Painting Wood
If your using less then desirable wood or you have an old piece of furniture that needs updating, you might want to consider using paint. Woods such as poplar, spruce, pine, and even some fir woods aren’t the best choices when it comes to staining. But a nice paint can sure spruce up your project. Even old intricate furniture that is out of date and starting to look your grandmas house is a great candidate for paint. The hard to sand intricate details can be a pain to refinish with a new stain.
So whether it is old or new wood, you must take the appropriate steps to ensure a quality paint job.
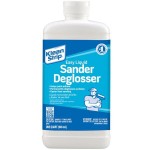
Step 1: With all projects preparation is key. Your paint job will  only be as good as the canvas you are working on. So for new wood, sand your surface to a nice smooth feel with a 150 grit sandpaper. For old wood, use a liquid sander/ sheen remover to remove the clear finish on the wood.
Step 2: For both old and new pieces or  wood, wipe down the surface and asses it. This is the time to fill any cracks, holes, or dents in the wood. Choose an appropriate wood filler to complete this task. Allow the filler to dry and sand your project once again with a 150 grit sandpaper.
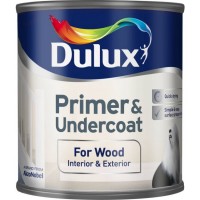
Step 3: Apply a coat of primer. Now whether you use oil based or water based, it all  depends whether you have to apply a grain filler after. Grain fillers can be oil based or water based, but they must be used with the same based primer. Since most of my projects are interior I would choose a water based primer for my first coat. Let it dry for at least 6 hours before applying the grain filler, consult the manufactures directions for exact dry times.
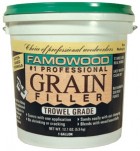
Step 4: This step is only required if you are using an open pore  wood. Once the primer has dried apply the wood grain filler over the entire surface of he project. Whether you use a brush or putty knife, make sure you spread it in a circular motion to get it all the way down the grain. Scrape off the excess filler with a plastic scraper or steel wool before it turns dull and begins to harden. The more you scrape off the less you have to sand after.
Step 5: Whether or not you performed step 4, it is ideal to sand the surface once again. When using a water based primer it can cause the grain to raise. So sanding will reduce the raised surface  and make a flat surface again. Once that is complete, clean the surface with a lint free rag and proceed to step six.
Step 6: Apply two more coats of primer. Make sure to lightly sand with a 150 grit sandpaper between coats. This removes any defects caused from brushing or rolling. It also levels out any brush marks.
Step 7: It is time to apply your top coat, with the color of your choice. Since most paints nowadays are latex, you might want to  consider adding a conditioner/ extender to the paint. This will give the paint a longer dry time and help the coat level itself and remove brush marks. Even if you choose to add the extender, you will want to lightly sand between coats. For paint I tend to choose a matte or flat finish. I choose this finish since I always put a clear coat over my painted projects. If you are not applying a clear coat after, I would choose a semi-gloss or gloss finish.
Apply 2 to 3 coats of paint to get proper coverage. Consult with the manufactures directions with dry times between coats.
Step 8: Proceed with this step only if you are wanting to apply a clear coat. Use a water-based clear coat to cover your project.
Sand your project with a 220 grit sand paper. Wipe it down with a lint free rag and apply a coat of clear coat. Once it is dry sand again with a 220 grit and apply 3 more coats, with sanding in between, to achieve the desired protection.
