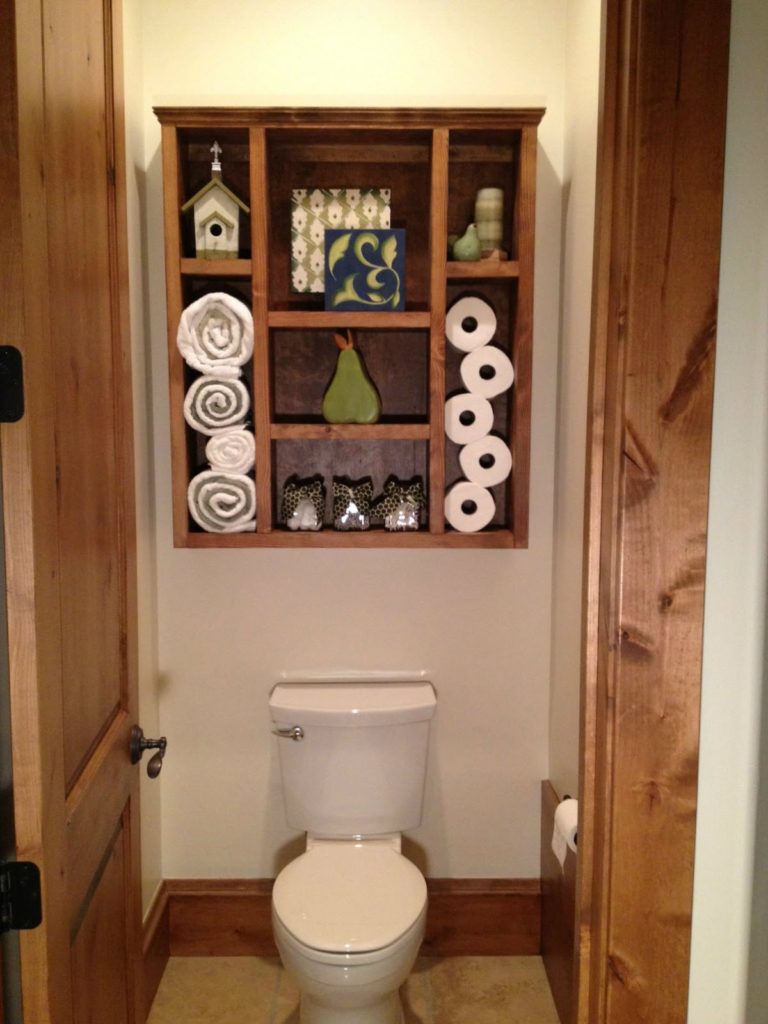
Bathroom Shelf
- 1 – 4×8 sheet of Luan
- 2 – 2×8 @ 8’ long
- 1 box of 3” screws
- 6’ trim board
- 1 – 1×2 @ 8’ long
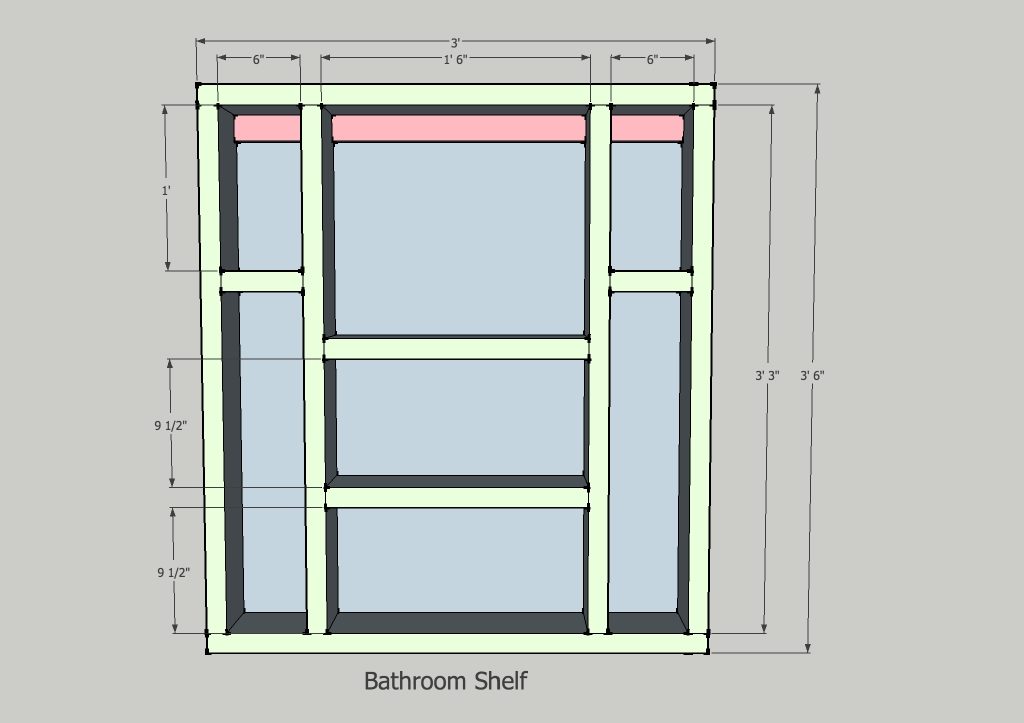
We cut the 2×6 boards according to the dimension on the plan below. Pre-drilling the holes is essential to being able to put the whole project together without and gaps. So line up all of the boards and mark where they should be drilled.
Tip: If you start with the center shelves first you will have plenty of room to tighten the screws. Then add the remaining boards to complete your shelf unit.
When all of the shelves are in place cut the piece of plywood for the back. Make sure the shelf is square, then nail the plywood to the back of the shelf.
At the very top of the shelf you will need to cut three pieces of the 1×2 material and secure it to the inside of the unit (salmon colored board in the drawing above). This is to give us something to secure it to the wall with when we are ready to put it in place. These 3 pieces can be secured with screws from the top down.
Finally we are ready to cut that trim board and place it around the top of the finished shelf. Paint or stain your masterpiece and let it dry. Locate the studs where you want to hang it and pre-drill holes in the 1×2’s at the appropriate locations. You can use those 3 inch screws to mount it in place.
The original plan can be found at http://dadbuiltthis.blogspot.ca/2012/11/bathroom-shelf.html

