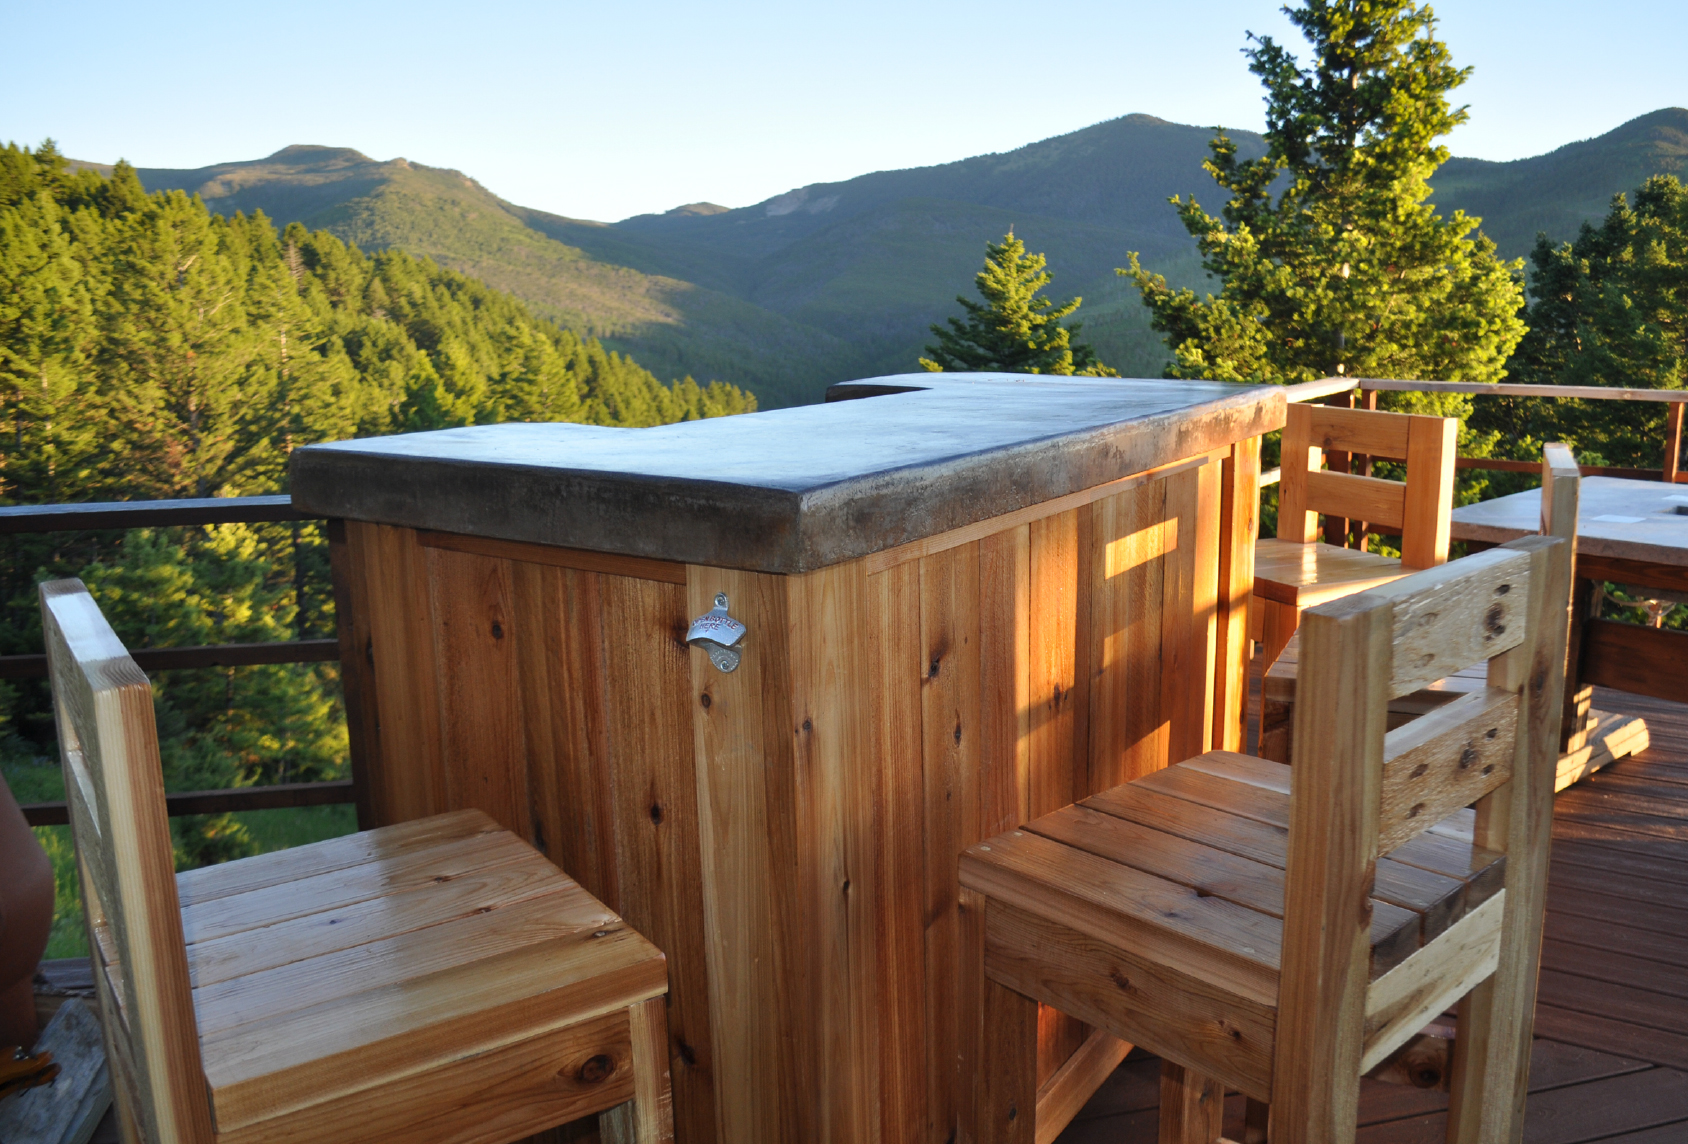
Patio Bar
Concrete Top
- (1) – 4×8 sheet of melamine
- (2) – 2×4 piece of 1 ½ inch thick foam
- (1) – 1 box of 1 ½ inch screws and drill bit
- (1) – 1 tube of silicon caulk
- (1) – 4×8 sheet of square wire re-enforcement
- Packing tape
- (4) – Bags of Quikrete Concrete Counter Mix or Quikrete 5000 Mix
- Permanent Marker
- Packing Tape
- Spray bottles and 5 gallon bucket or hose for rinsing
- Ammonia or baking soda
- Acid stain
- Concrete sealer
- 400 grit sandpaper and sanding block
- Knife to cut foam
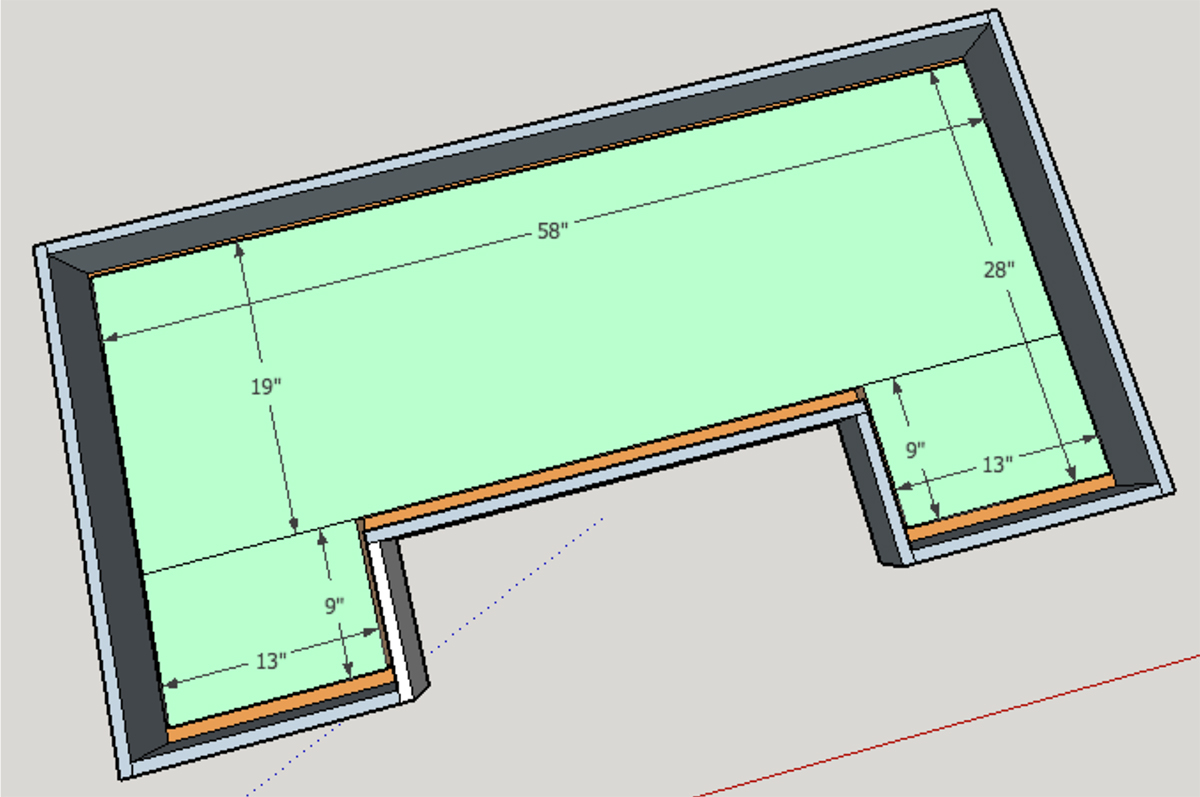
Build the mold for your concrete bar top. Cut ¾ inch thick melamine down to 60” wide by 30”. Then use a jigsaw to cut out the bartender area as seen in the diagram below.

Cut the strips for the sidewalls of your mold. The strips need to be 3 ¾ inches wide by the
dimensions shown in the drawing below. The strips will hold the concrete in and give you a
concrete top that is 3” thick around the outside perimeter of the piece.


Create the foam knockout using 1 ½ inch thick foam. Cut the foam using a sharp knife.
Foam is typically available in large 4 foot by 8 foot sheets or smaller 2 foot by 4 foot
sections. You can piece sheets together as needed to fit the space. Leave a 1 inch channel
around the perimeter of the foam. This will allow the concrete to form around the foam and make an apron. The concrete will look 3 inches thick around all sides. The rest of the
concrete will be 1 ½ inches thick which will reduce the overall weight of the finished bar
top.

Cut the steel re-enforcement to the same dimensions as the foam. The re-enforcement
should fit inside the mold with an inch of play on each side. Use a bolt cutter to cut the re-enforcement.
Fasten the foam to the base of the mold with silicon. Let dry and then mix up your concrete. I’d recommend Quikrete counter top mix or Quikrete 5000. Quikrete counter top mix will be much easier to get a nice smooth during the troweling process. The mix consists of smaller aggregate and additives that help increase the workability and strength of the concrete.
Allow the concrete to set-up. Once the concrete is firm, remove the sidewalls of the mold. If the concrete sags, quickly re-fasten the sidewalls and wait a little longer. When it is ready, fill in any voids with extra concrete and smooth it out using a small trowel. I’d recommend using a mixture with small aggregate for filling things in or making up your own mix of Portland cement, sand, and water
Hard trowel the top surface of the concrete. Use a 12” trowel. Please watch the video for
more tips and information about timing for the troweling process.
Allow the concrete to cure for at least 48 hours and then de-mold the entire piece. Sit the
concrete on wood blocks so the underside of the concrete will dry evenly. Let the concrete
cure for another 24 to 48 hours. Once cured, sand the entire piece by hand with 400 grit sandpaper.
Apply acid stain to the concrete using spray bottles or a pump sprayer. Read the directions
on your stain for more information. I typically recommend diluting the stain 1:1 with water. Allow the stain to sit for at least 8 hours. Then neutralize the acid by pouring a bucket of water on the surface that is mixed with baking soda or a very small amount of ammonia. Use a terry cloth to lightly clean the surface and remove extra residue. If this process is done too early you’ll remove some of the stain because it will not have had enough time to set in the concrete.
Allow the concrete to dry out for a few hours. Then use a water-based outdoor concrete
sealer to seal the concrete top. Apply 2 to 4 coats.
Install the concrete top on the base. First, run a bead of silicon caulk around the top of the
wood base to help prevent the concrete from ever sliding. It is very heavy so it won’t move once in place.
Install LED lighting if you’d like, fill up the cooler, and have your first barbecue! Then send
in a photo of your finished project. I’d love to see your new bar and share it with others to
help inspire more DIY’ers to build it!
Wood Base
- (3) – 2x6x8 boards (Cedar)
- (12) – (approximately) 2x4x8 (Cedar)
- (1) – 4x4x8 (Cedar or Redwood)
- (22) – 6ft long cedar pickets (siding, shelves, and trim)
- (6) – 2×6 x 40” long (Corners and back or bar)
- (4) – 2×4 x 40” long (Corners)
- (3) – 2×4 x 54” long (frames)
- (9) – 2×4 x 22” long (frames)
- (2) – 2×4 x 35” long (frame)
- (5) – 2×4 x 6 ½” long (frames)
- (5) – 2×4 x 13” long (frames)
- (1) – 2×4 x 11” long (frame)
- (2) – 4×4 x 20 ½ long (frame)
- (15) – 1×6 x 40” long pickets (siding) Approximate (Will need to rip at least 1 board)
- (9) – 1×6 x 16” long pickets (shelving) May need to rip a few pieces
- (6) – 1×6 x 23” long pickets (shelving) May need to rip a few pieces
- (2) – 1×6 x 46” long pickets (rip to 3” wide) – Front top and bottom trim
- (4) – 1×6 x 16 ½ inch long pickets (rip to 3” wide) – Side top and bottom trim
- 1 box 2 ½ inch Kreg Screws
- Outdoor grade wood glue
- 1 box of 3 inch wood screws (exterior grade)
- 1 box of 2 inch wood screws (exterior grade)
- 1 box 1 ½ inch trim nails for a nail gun (optional)
- 100 and 200 grit sandpaper for orbital sander
- Four 3 inch or 4 inch caster wheels (I used 3 inch)
- 16 2 ½ inch long leg bolts, washers, and nuts that are 7/16 in diameter
Assemble the top frame for the base. Make all your cuts and then assemble using 3 inch
screws. You could use a Kreg-Jig as well for some of the joints if you’d prefer. See the
diagrams below for measurements.


Assemble the lower frame. This is built out of 2×4’s and a 4×4 on each end. The 4×4
provides extra strength and surface area to mount the caster wheels to. Use 3 inch screws.

Create the front corners. Connect a 40 inch long 2×4 to a 40 inch long 2×6. A Kreg-Jig and 2 ½ inch screw work great for this process and eliminate screw holes around the outside of
the base. You could attach the boards using 3 inch screws at an angle if you do not have a
Kreg-Jig.

The rear corners consist of two 2×6 boards and one 2×4. All boards are 40 inches long. Use 2 ½ inch Kreg screws to connect the 2×6’s to each other.

Set the top frame on a flat surface and attach the corners/legs. Attach the corners to the frame using 2 ½ inch long wood screws. Use 3 or 4 screws in each board. Pre-drill pilot holes to minimize splitting.


Once the top frame and legs are attached you’ll want to flip the entire piece so it is right
side up. Them attach the lower frame to the corners/legs. Use a scrap ¾ inch thick scrap
boards to prop the lower frame up ¾ of an inch from the bottom of the legs. This will help
hide the wheels a bit and allow the siding to overlap the bottom 2×4.

Attach the 54 inch long middle support using 2 ½ inch long screws. Measure up 19 inches
from the top of the lower frame and make a mark. The top of the 54 inch long 2×4 should
line up with the mark

The middle shelves consist of 2x4s. Attach the 54” wide board first. Next attach the board
on the right, and finally the left side shelving.


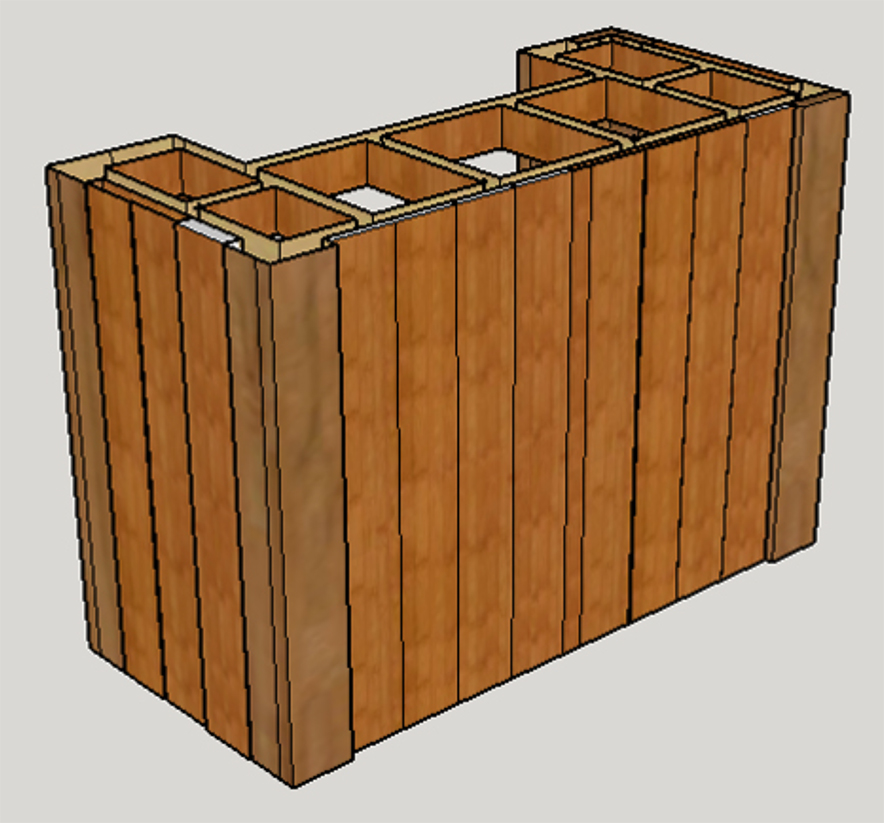
Cut all the siding for the bar out of the 6 foot long cedar pickets. Cut approximately 15
pickets down to 40 inches. Next, measure and attach pickets to the lower and middle
frames to create shelves. Use 1 1/2 inch brad nails if you have an air gun. Or use 2 inch
screws and pre-drill if you do not have an air gun. The boards will be either 16 inches long
or 23 inches long. You may need to rip the end boards using a circular saw/table saw to
ensure a perfect fit.


Attach the cedar picket siding using an air gun and 1 ½ inch long nails. All boards should
be cut to 40 inch lengths. Use 3 on each end and 8 full boards on the front. I worked from
the outside in on the front and ripped the center board to fill the center gap.
Turn the bar on its side and attach the caster wheels if you haven’t already. Pre-drill and
use 2 ½ inch long 7/16 diameter leg bolts, along with a washer. Use 4 bolts and 4 washers
for each caster wheel.

Add trim to the top and bottom of the front and sides of the bar. Rip a couple pickets down
to 3 inches wide. The front trim will be approximately 46 inches long. Use an air nailer,
nails, or screws to attach each trim piece. The side trim will be approximately 16 ½ inches
long.

Run a bead of silicon around the top the base. Then find a few friends to help lift the
concrete into place.

Add a bottle opener and bottle cap catcher if you’d like. LED strip lighting can be ran along
the underside of the concrete which look neat when dark.

The original plan can be found at https://www.diypete.com
![]() [email_link]
[email_link]