Bathroom Shelf
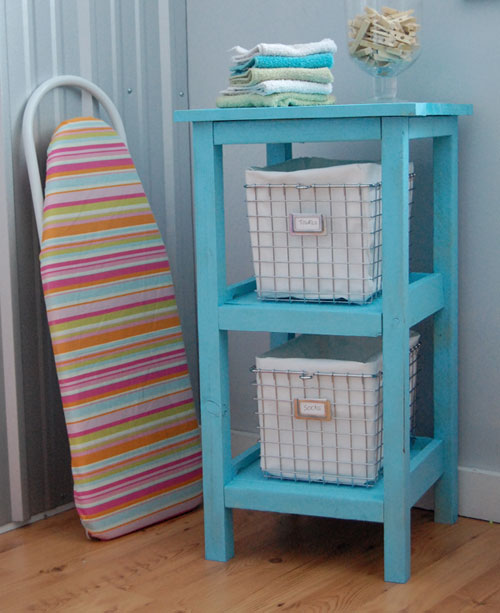
This simple storage tower can be used with or without wire baskets to add precious storage space and countertop space to even the tiniest of bathrooms. Use throughout the home for storage – think potatos and onions, socks and underwear, or even favorite books beside your bed.
Shown with a Spectrum small wire basket, available at most stores for about $10 and a homemade fabric liner. Also available is a medium sized basket that is slightly wider. Simply add a few inches to the width of you project to accommodate the larger baskets.
- 2 – Wire Baskets, measuring 9″ wide x 8″ tall x 12″ deep (as shown)
- 3 – 2×2 @ 8 feet long
- 1 – 1×12 @ 4 feet long
- 1 – 1×3 @ 8 feet long
- 1 – 1×2 @ 2 feet long
- 2 1/2″ Screws or finish nails
- 2″ Screws or finish nails
- 1 1/4″ Screws or finish nails
- wood glue, wood filler and finishing supplies

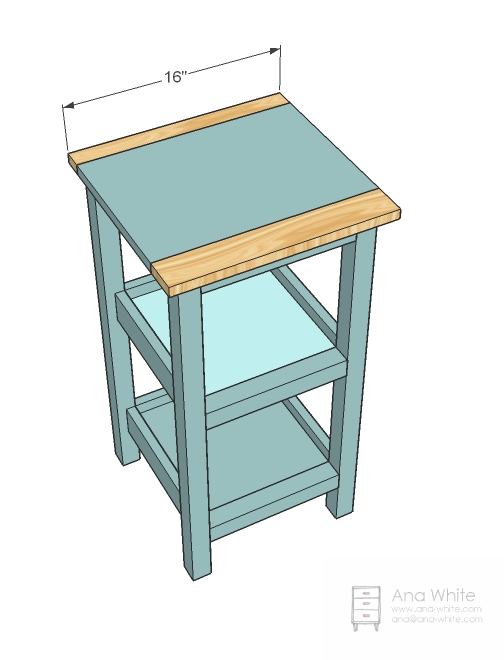
Dimensions: 16″ wide x 30″ tall x 15 1/2″ deep
- 4 – 2×2 @ 29 1/4″ (Legs)
- 4 – 1×3 @ 11 1/2″ (Side Trim for shelves – Measure to fit the width of your 1x12s)
- 2 – 1×12 @ 11″ (Shelves)
- 2 – 1×3 @ 11″ (Back Trim for Shelves)
- 4 – 2×2 @ 11″ (Width Trim)
- 3 – 2×2 @ 11 1/2″ (Top Trim – Measure to fit the width of your 1x12s)
- 1 – 1×12 @ 16″ (Top Shelf)
- 1 – 1×2 @ 16″ (Back, Top)
- 1 – 1×3 @ 16, (Front, Top)
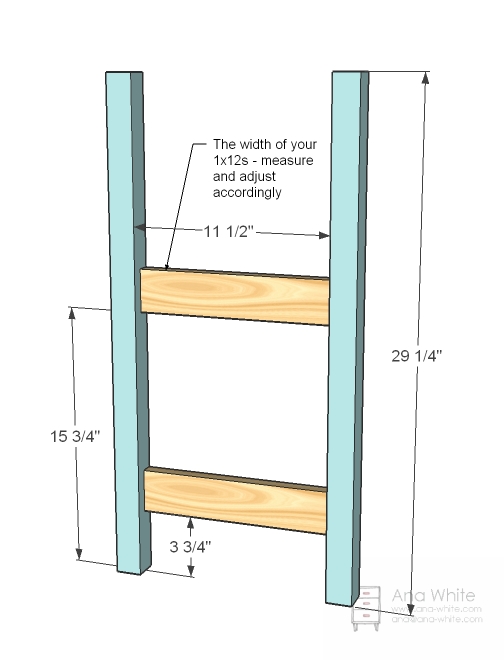
Measure and mark the location of the shelf side trim on the insides of the legs. Predrill holes and attach with 2 1/2″ screws or finish nails and glue. Build two. Shelf side trim is flush to the inside.

Measure and mark the shelf side trim 1″ from the top edge. This is the top edge of your shelves. Attach shelves with 2″ screws and glue or 1 1/4″ pocket hole screws and glue.

Attach the back trim flush with the sides as you did the side trim.
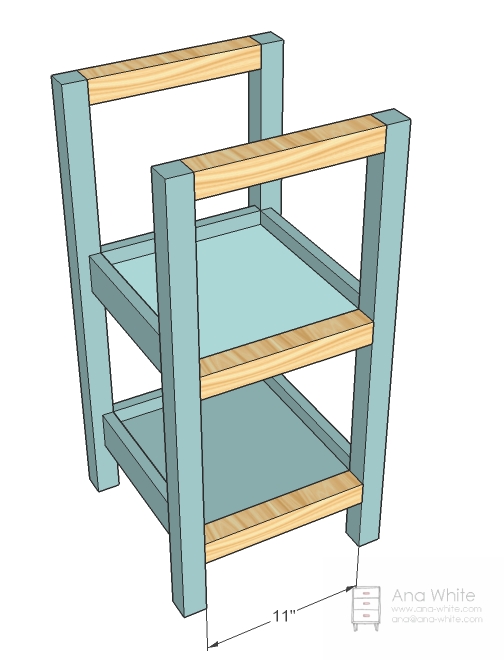
The shelf trim is flush to the top, the top trim flush to the top. Attach with 2 1/2″ screws or finish nails and glue.

Attach the top support/trim as shown above. Center the support. You will use these boards to screw the tops in place.
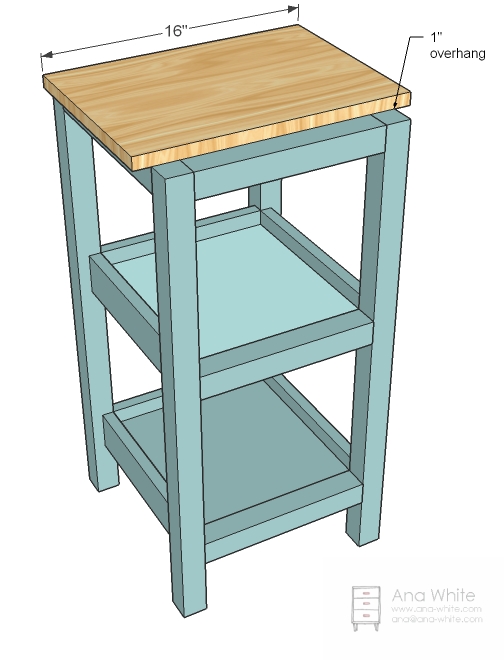
Screw through the supports/top trim with 2″ screws and glue to attach top shelf.
Finish the top shelf with the 1×2 and 1×3, 1×2 to the back so your piece will sit flush to the wall. Use 2″ screws and glue.
Preparation Instructions:
Fill all holes with wood filler and let dry. Apply a second coat if necessary. Sand with 120 grit sandpaper in the direction of the wood grain. Vacuum and wipe clean with a damp cloth. Prime and paint as desired.
The original plan can be found at http://www.ana-white.com/2011/02/wire-basket-bath-storage-tower.html
![]() [email_link]
[email_link]