Bathroom Vanity
- 4 vanity legs (Osborne Wood Part #5050)
- ¾” plywood (1 sheet)
- ¼” plywood (quarter sheet is plenty)
- (2) 2x2x8
- (2) 1x2x8
- Cove molding (optional)
- (2) 2x8x8 (for the top)
- 2 sets of hinges
- 16” drawer slide
- 4 brass ring pulls
Okay, first, let me explain something. Used to, standard height on vanities was 30” tall. It’s become standard now to do 36” tall (have you guys used both? 36” tall is SOOOOOO much nicer because you don’t have to bend over so far to wash your face, which is nice on the old back).
These vanity legs come 34 ½” long to accommodate a 1 ½” thick countertop to make it a total of 36” tall. HOWEVER, I purchased an above mount sink that is 5 ½” tall. So, in order for the top of my sink to be 36” off the ground, I had to make my vanity 30 ½” tall. Are we all on the same page? If you are using an undermount sink or a drop in, you don’t have to cut the legs. And your measurements will be a little different as far as the height goes.
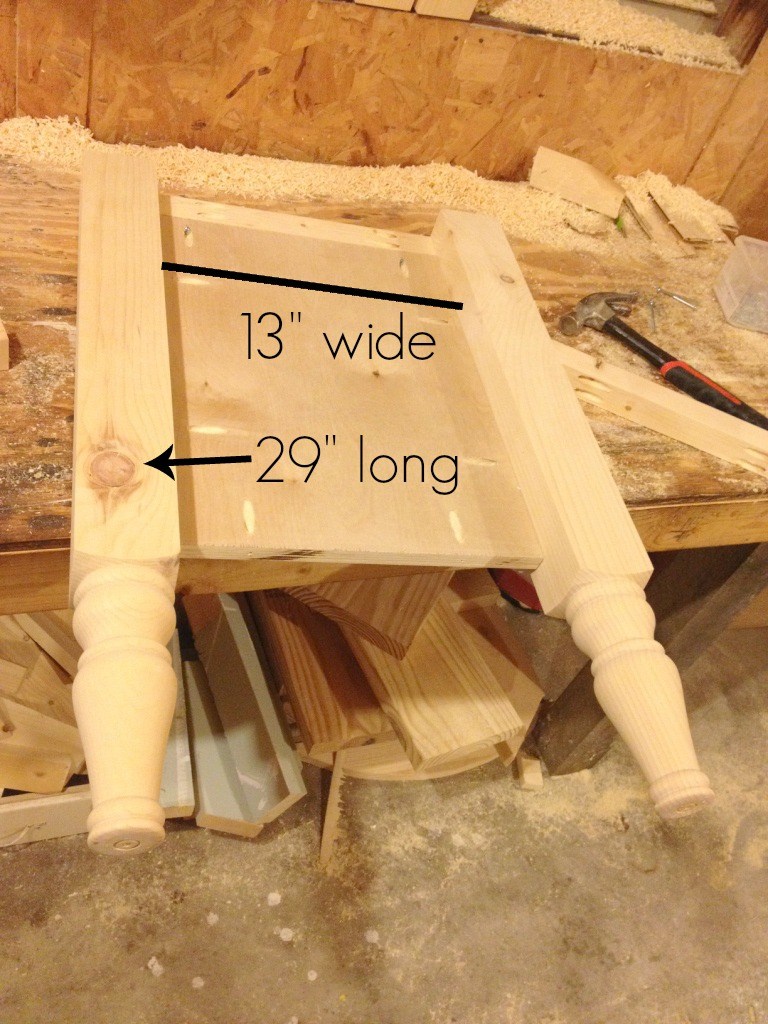
Okay, so now that I’ve explained that, first I cut my vanity legs to be 29” tall. I’m going to be honest. These legs are so smooth and pretty (unlike my own…HA!), it kind of hurt my soul a little to have to cut them. But, you gotta do what you gotta do.
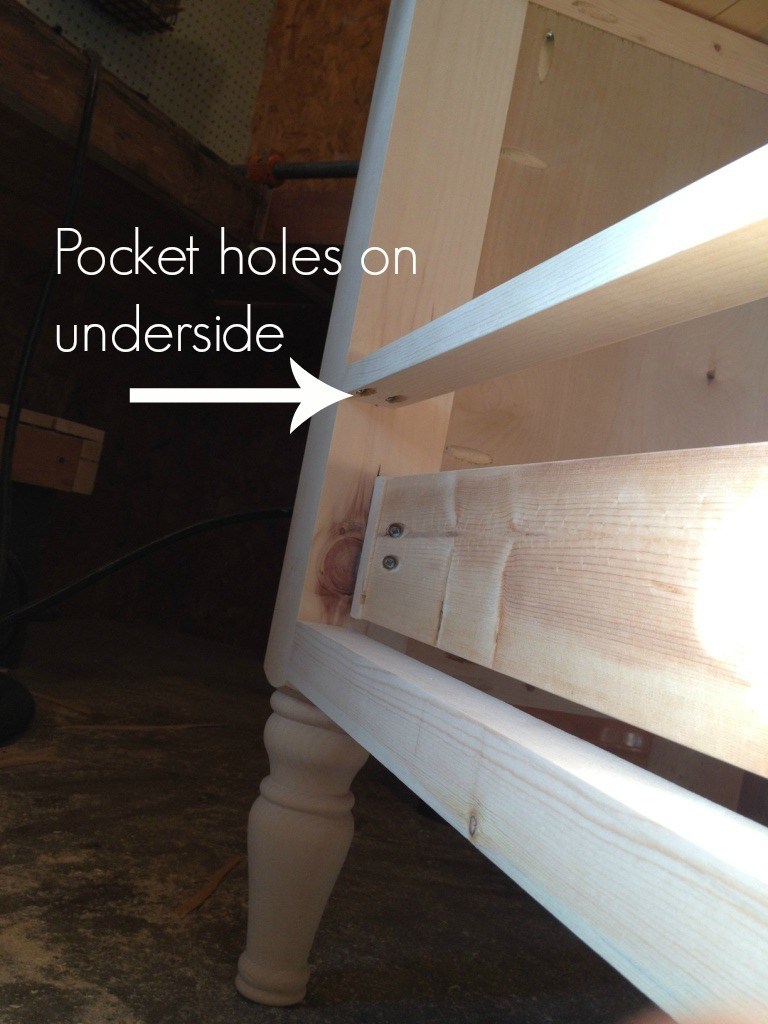
Then, I cut two pieces of 2×2 at 13” long and drilled 1 ½” pocket holes in both ends. I attached the 2x2s to the top between two legs using 2 ½” pocket hole screws making sure the outside of the 2×2 was flush with the outside of the legs. See image below. I used my Kreg Rip cut to cut my plywood down to a 13” wide strip. Once I had my 13” strip, I cut two pieces 18” long and drilled pocket holes along the sides with my Kreg Jig. I slid these pieces in between the vanity legs and attached to the 2×2 and the legs using 1 ¼” pocket hole screws. See image below. Make sure the inside of the plywood is flush with the inside of the 2×2.
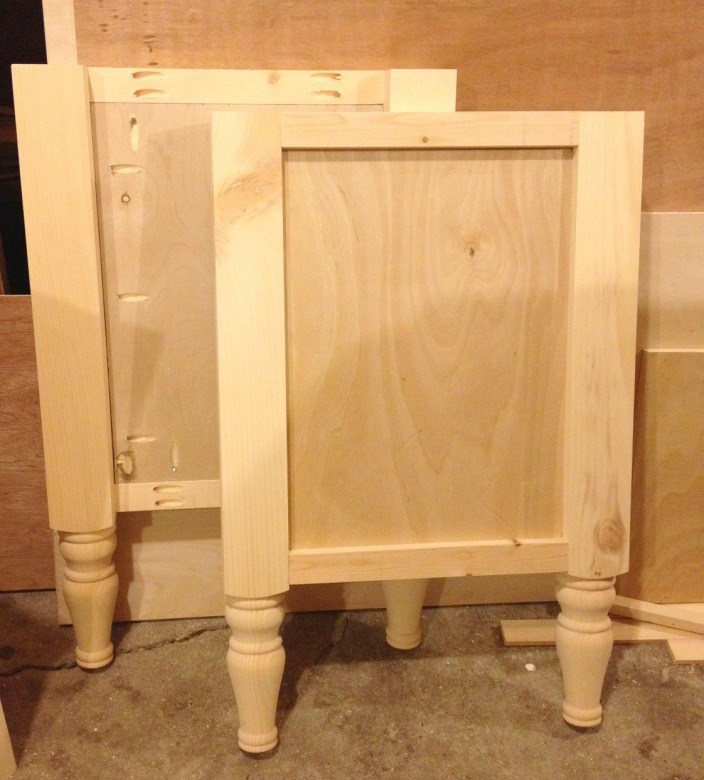
Then I attached another 2×2 to the bottom using 1 ½” pocket holes and 2 ½” pocket hole screws. I screwed the plywood into this at the bottom as well. That makes two panels that look like the image below.
I made my vanity 33” wide overall. Subtract 1” on each side for the top overhang and 6 inches (3” per leg) for the legs, and that gives 25”. If you want your vanity to be wider, just adjust this measurement.
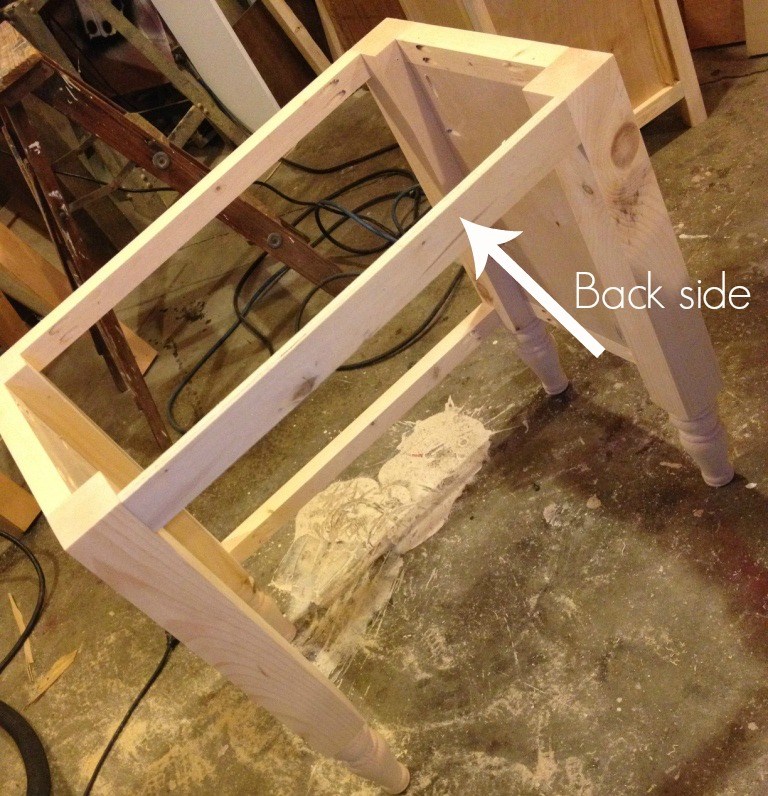
I cut two 2x2s at 25” long and drilled 1 ½” pocket hole screws in each end and used 2 ½” pocket hole screws to attach the side panels at the TOP OF THE FRONT SIDE as shown below and at the bottom as shown in the next picture.

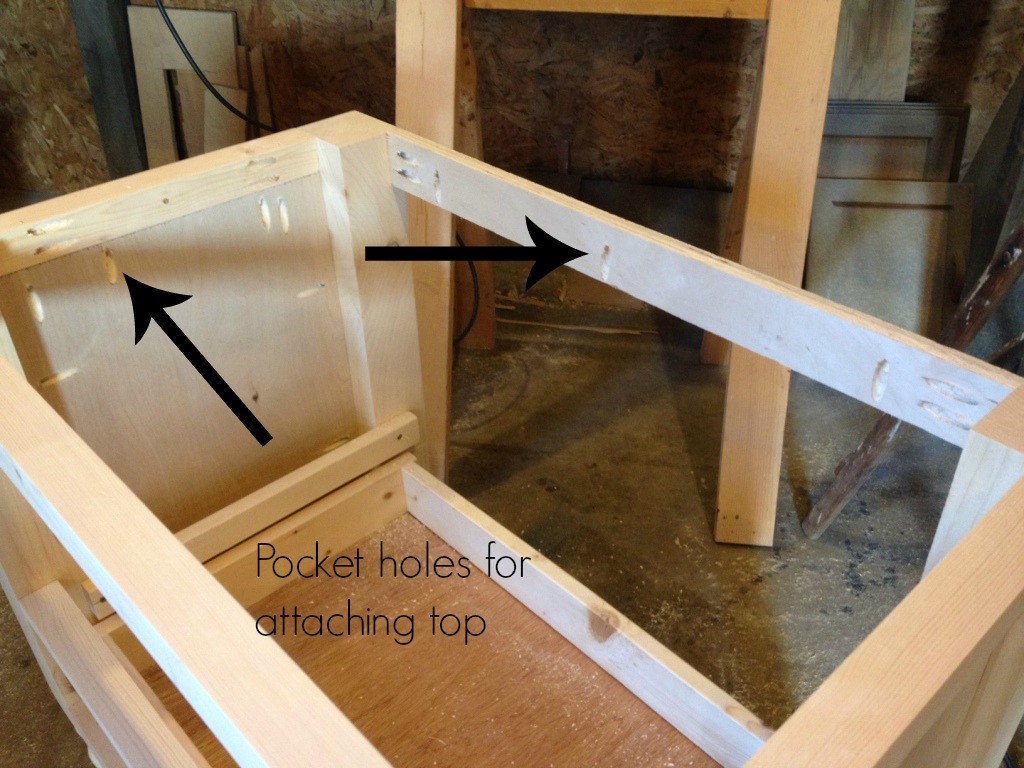
Then I used a piece of scrap plywood (but you can use a 1×2) to attach across the top of the back side using pocket holes and screws. (When installing the vanity, this will be the piece you screw to the wall.) Notice the bottom front side 2×2 in the image below.
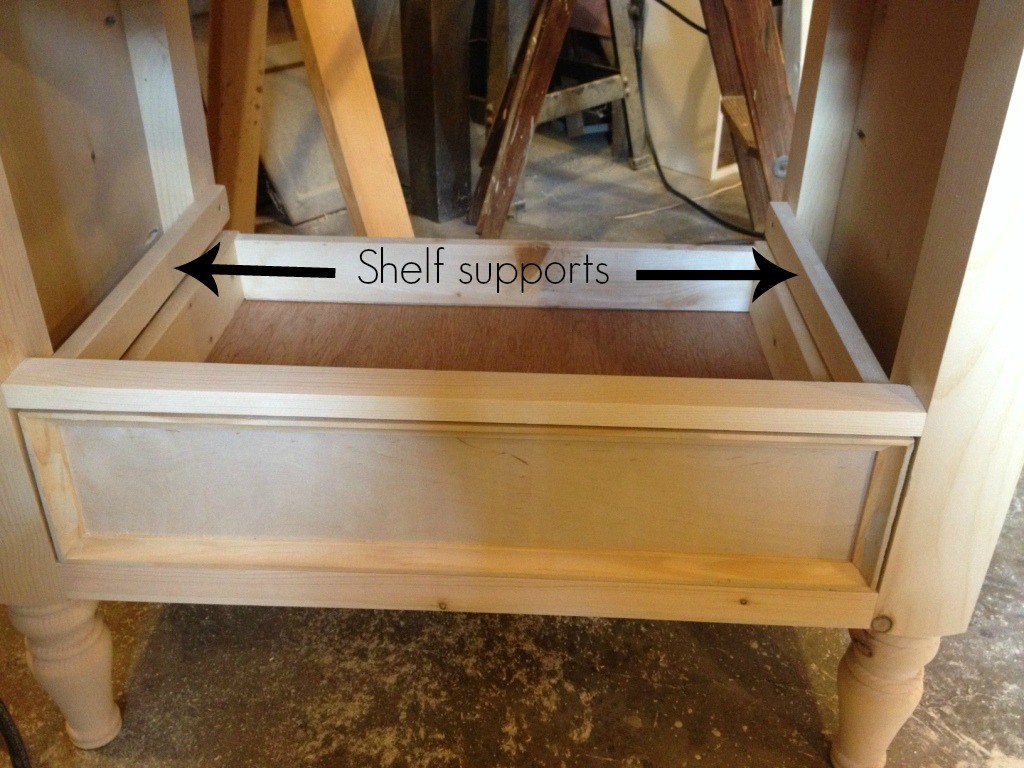
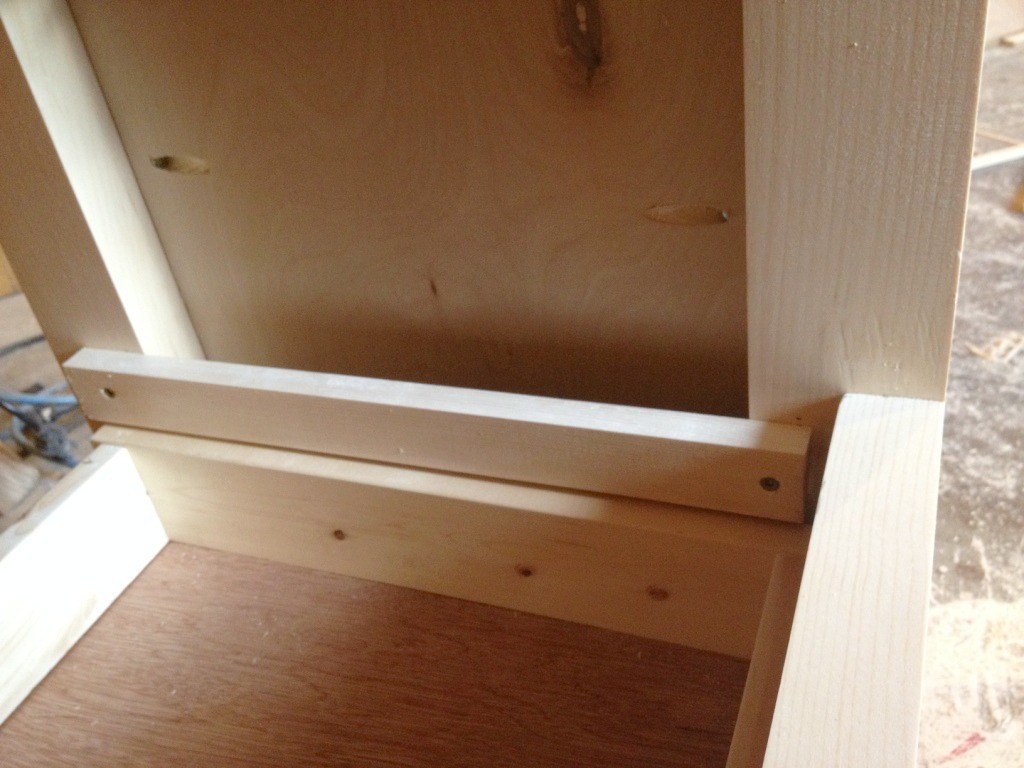
I forgot to take a picture of part of this, but you can see most of it on the image below. I cut two pieces of 1×2 at 13” and screwed them into each side panel between the vanity legs using pocket holes and screws.
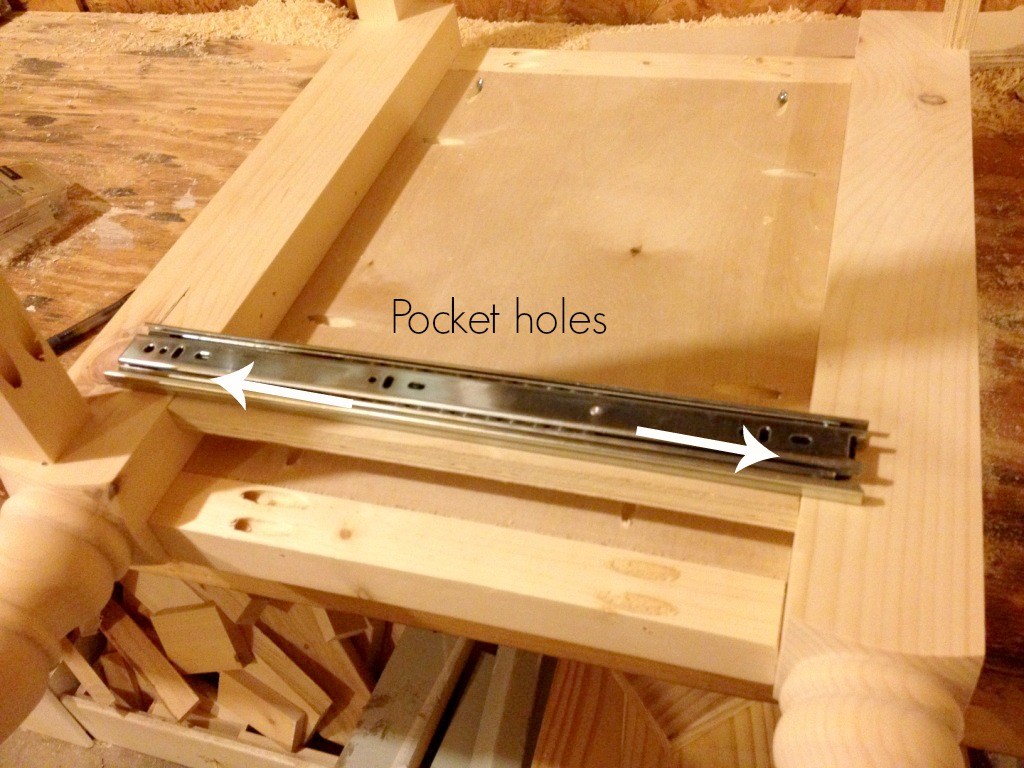
This is so you can attach the drawer slide as seen above. I attached the drawer slide to this 1×2 making sure to leave space in the front for the depth of the drawer front (which is about 1 ½”)
You can make them lots of different ways, but your overall size of the drawer (without the front) should be 16” deep and 24” wide. I used 1x4s for the sides of the drawer, but 3 ½” strips of plywood would work just fine, too. Once the drawer was made, I attached it to the slides.
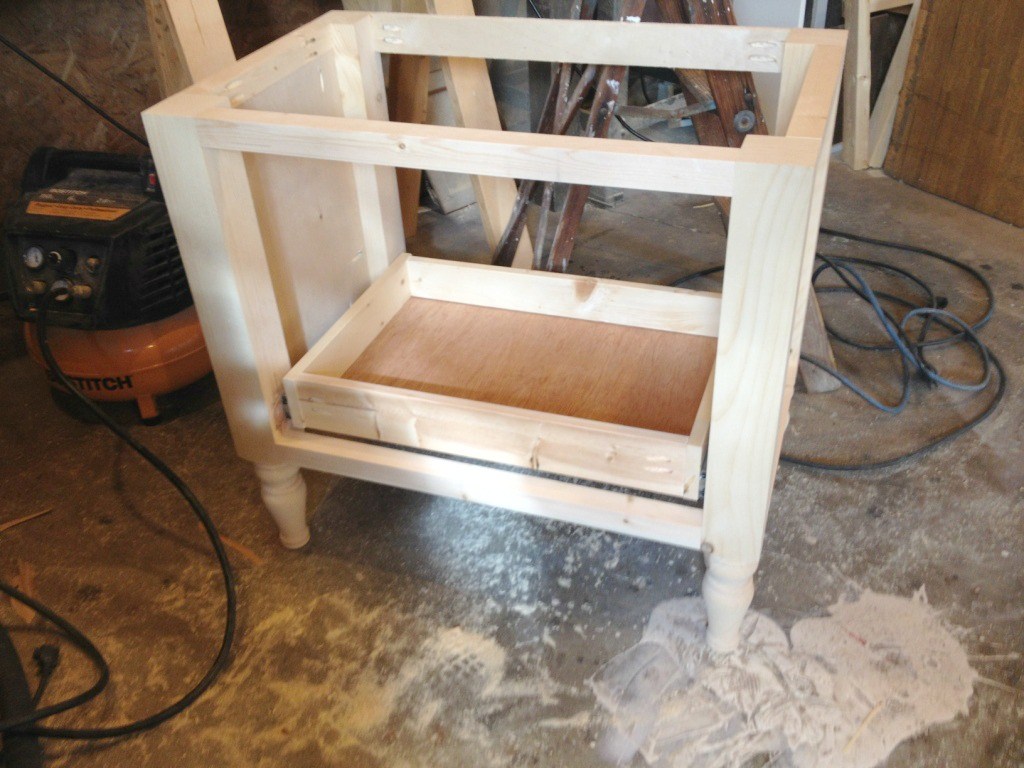
I made my drawer front 5 ¼” tall (more on that in a second). So, I cut a 1×2 at 25” and drilled pocket holes in each end and attached it into the legs as shown below. I measured and made sure the distance between the top of the 2×2 and the bottom of the 1×2 was 5 ½” to allow room for the drawer front. Sorry, I have the top gluing up in the picture…that’s actually step 6.
I cut two more 1x2s at about 16” and screwed them into the legs as shown below so that the top was flush with the bottom of the 1×2 on the front.
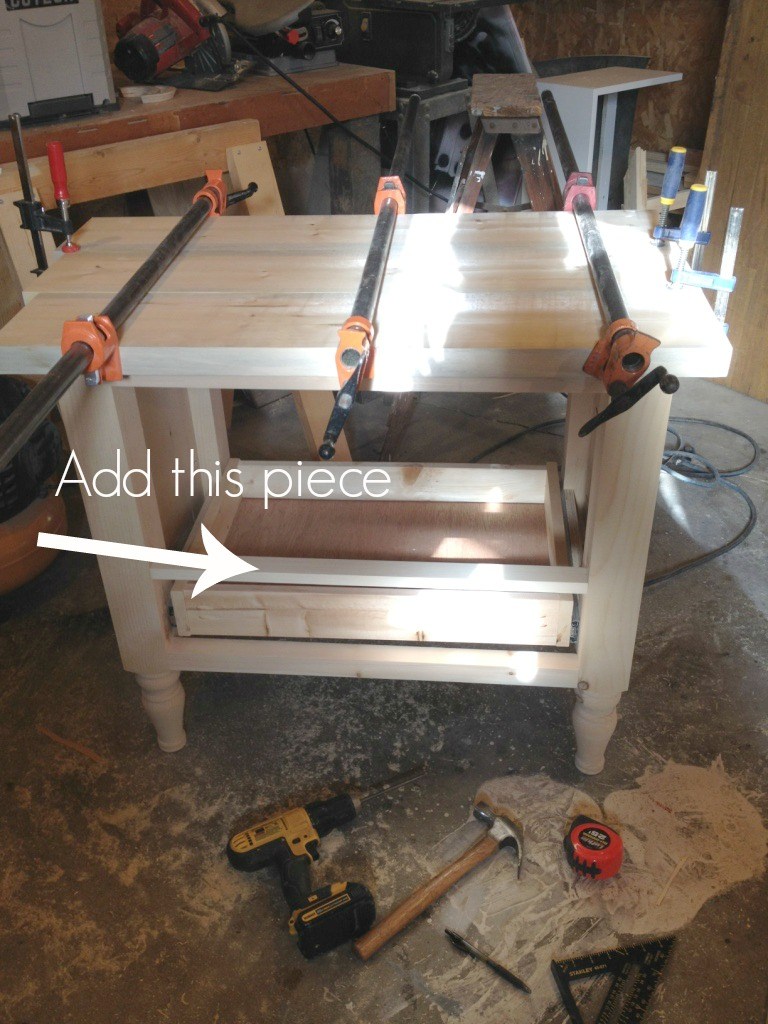
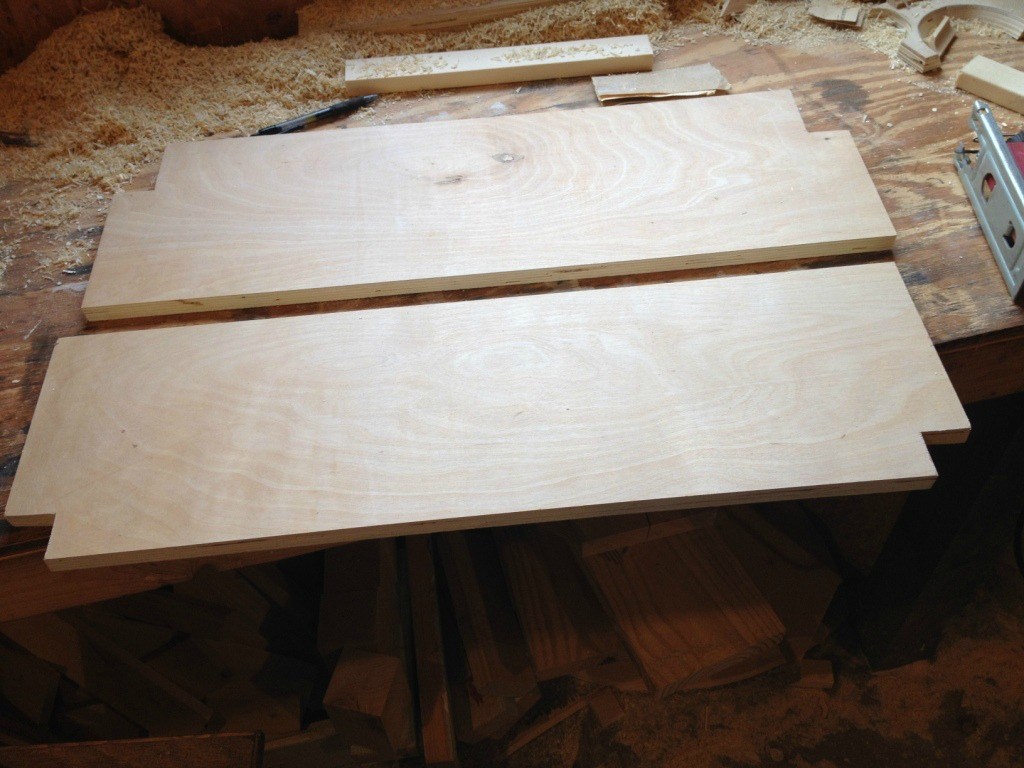
Then, I cut a piece of ¾” plywood at 17 ½” wide and 28” wide. I cut notches in each corner like the picture below.

Then I attempted to put the shelf in and there was NO WAY I could get it to go in as one piece. So I ripped it in half and put it in as two pieces.

Here’s why I did this: I have long hair. Long hair and P-traps don’t get along. Although I won’t be using this guest bathroom as my main bathroom, inevitably the P-trap will eventually get clogged and need to be cleaned (the fact I wash my paint brushes in the guest bathroom sinks probably won’t help the matter…). I want to be able to remove this shelf when cleaning the P-trap so that 1. It doesn’t get covered in nasty P-trap grime on accident and 2. So there’s more room to work on it in here when the time comes. If you are totally okay with not removing the shelf, you could do this step BEFORE adding the drawer and screw it all in as one piece that can’t be removed. Up to you.
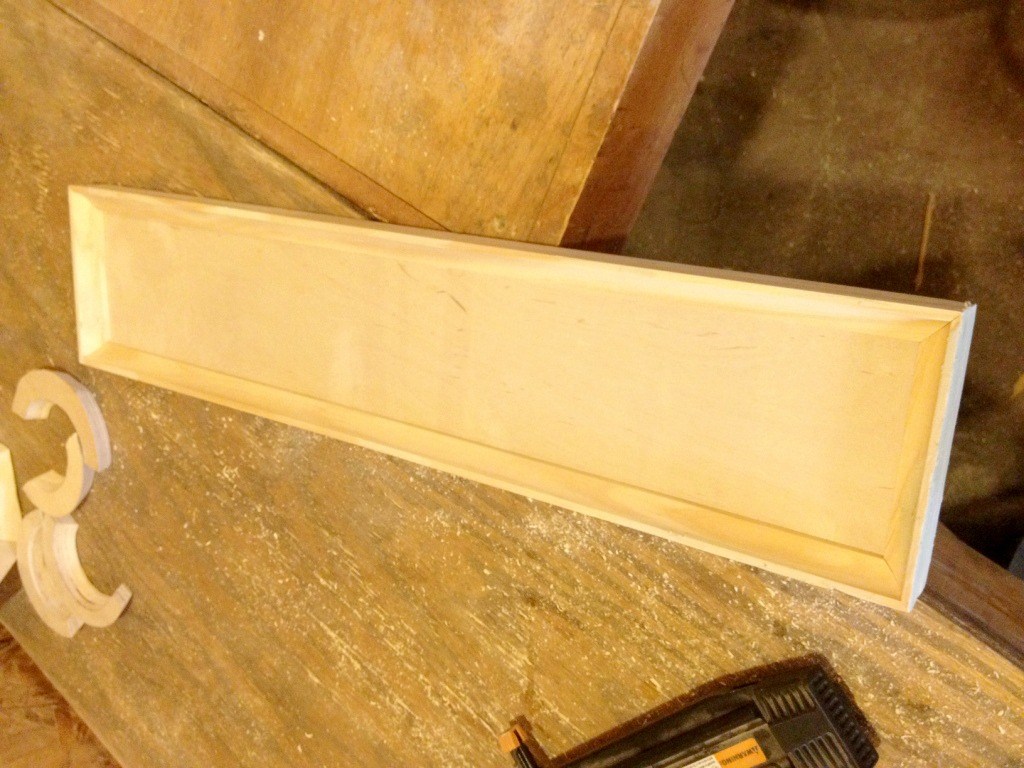
I already said that my drawer front was 5 ¼” tall. I cut it from the leftover 3/4″ plywood and made it ¼” shorter width wise than the drawer opening (24 ¾”) and added cove molding around the edges.
I also cut two doors from the 3/4″ plywood and nailed cove molding to them, too (my joints look bad below…they aren’t nailed in yet). The size of the doors will depend on the type of hinge you decide to use. My doors ended up about 11 ½” tall and 12 ¼” wide.

Then I nailed cove around the side panels for a little extra detail
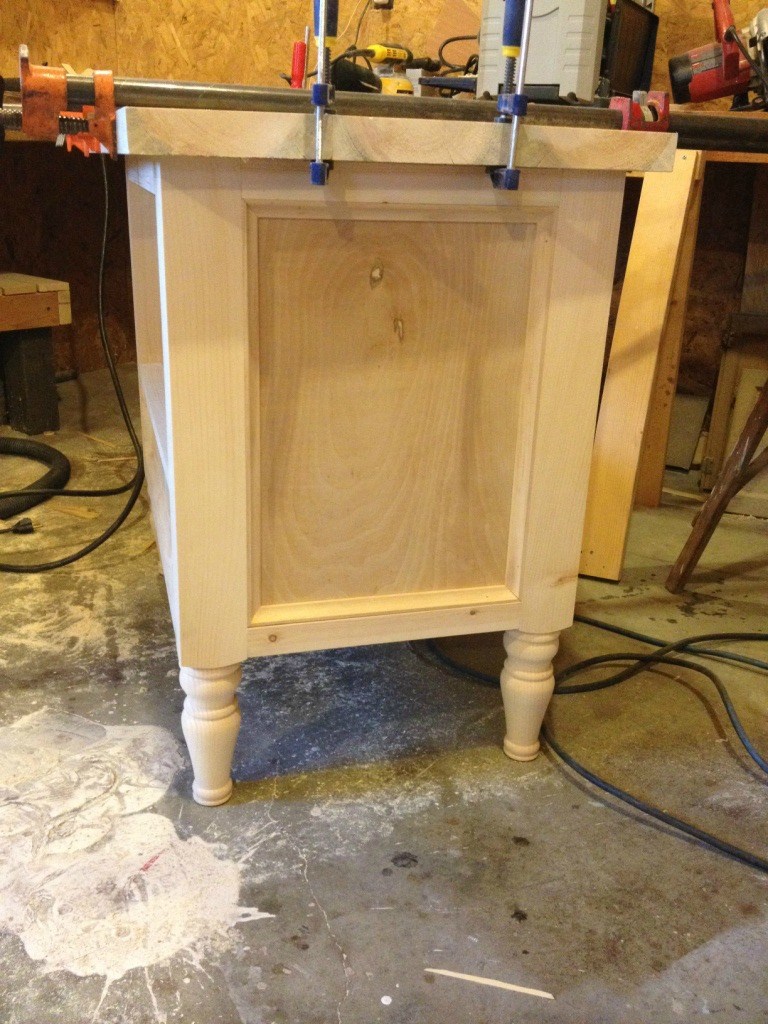
Putty the cracks and nail holes. Once the putty dries, sand everything well. Don’t attach the drawer front or doors yet…it’s easier to paint them first.
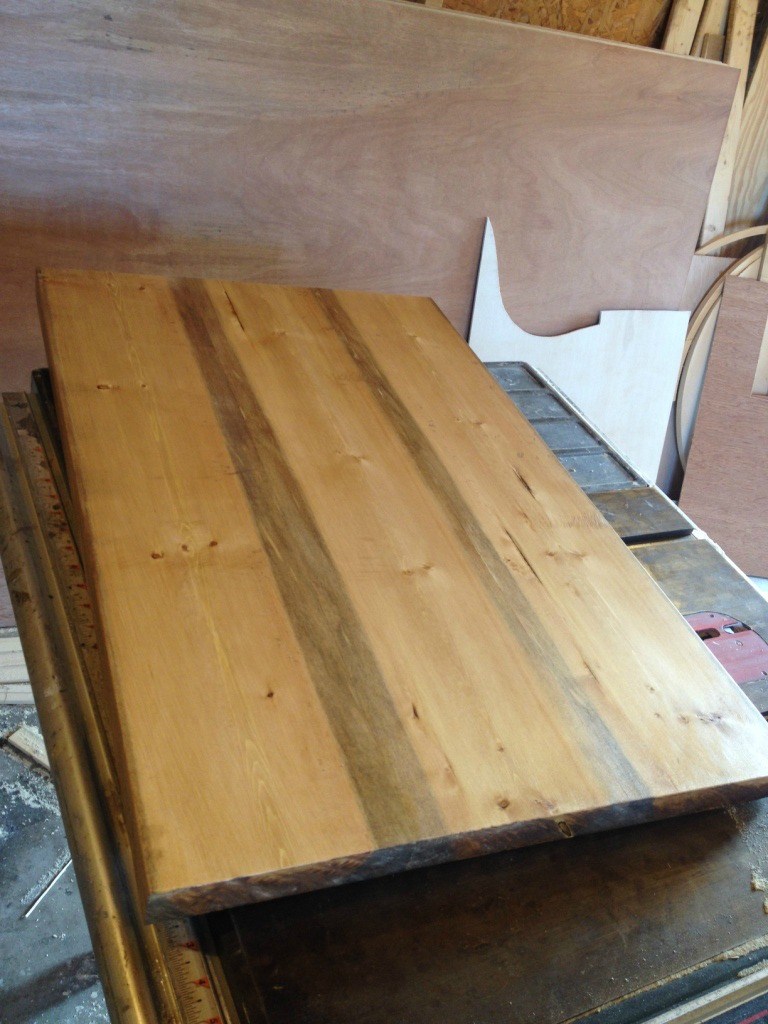
I made my table top 33” wide and about 22” deep. I will likely trim the top down to 20-21” once the vanity is installed. I’m not sure how far from the wall the top of the vanity will be when it’s installed (because of baseboards and the fact that walls are NEVER perfect), so I’m waiting to trim it down until I know how far off the back it will hang. I want only 1” overhang in the front. Sorry, that’s a lot of extra information. But, it’s free so there you go.

I drilled pocket holes along the sides and back to attach the top later.
I stained the top with Miniwax Puritan Pine and finished it with Miniwax Polycrylic. Since this will be in the bathroom, I plan to add SEVERAL coats before it’s actually installed.
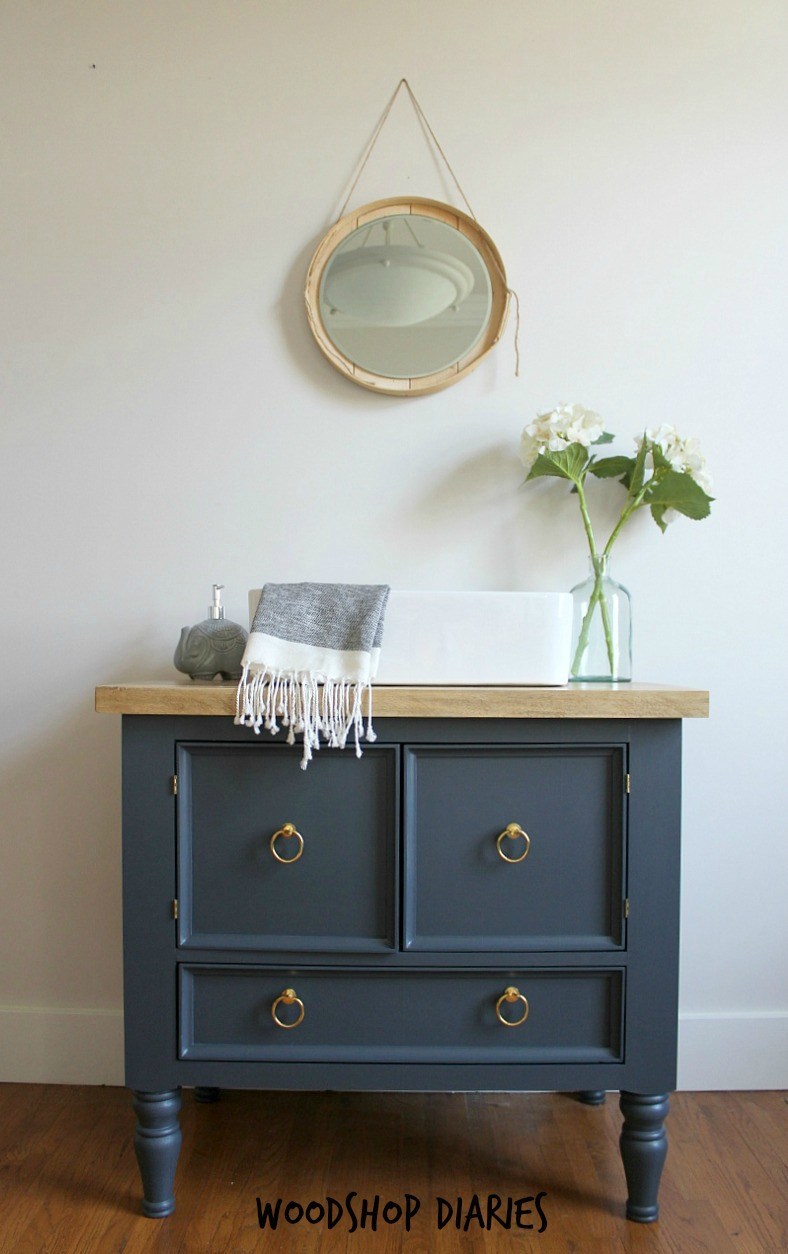
I primed and painted the vanity in SW Navy. Once the paint was dry, I attached the drawer front by screwing it in from the inside of the drawer and attached the doors using small brass hinges. The sink isn’t installed yet, but I set it on top to get the idea. Once it’s ready, we will drill the hole in the top for the drain.
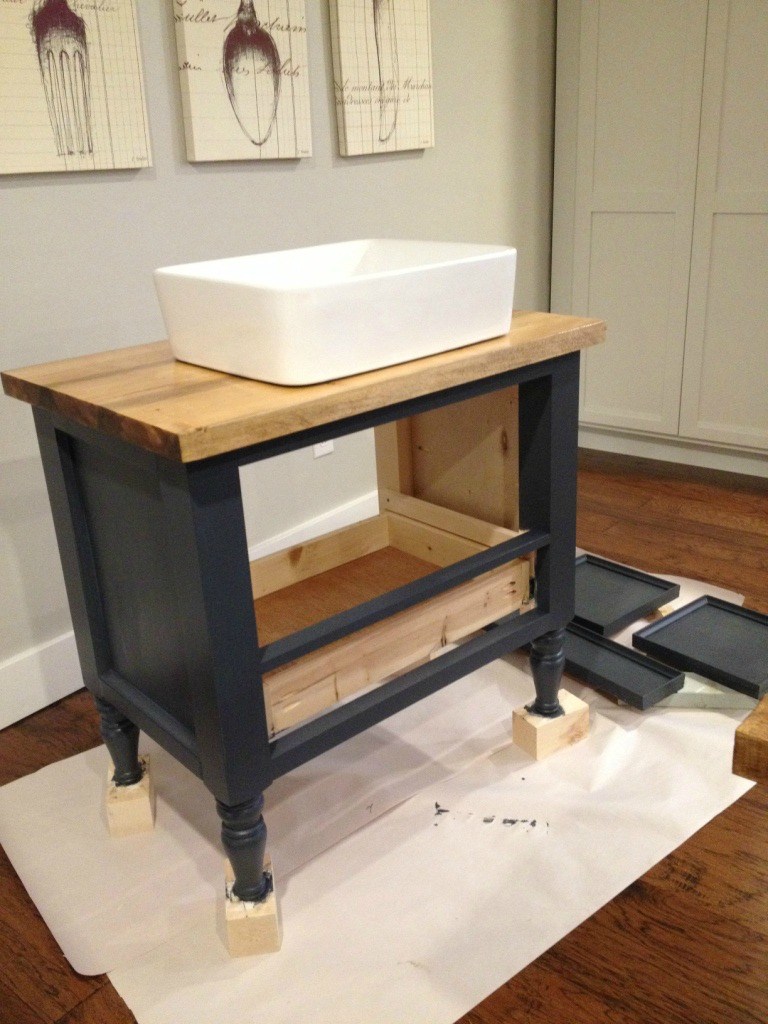
Then I added these brass ring pulls from D. Lawless Hardware. Aren’t they gorgeous?! I think they really add so much character to the vanity. Plus I’m a sucker for brass and navy.

The original plan can be found at https://www.woodshopdiaries.com/diy-bathroom-vanity/
![]() [email_link]
[email_link]