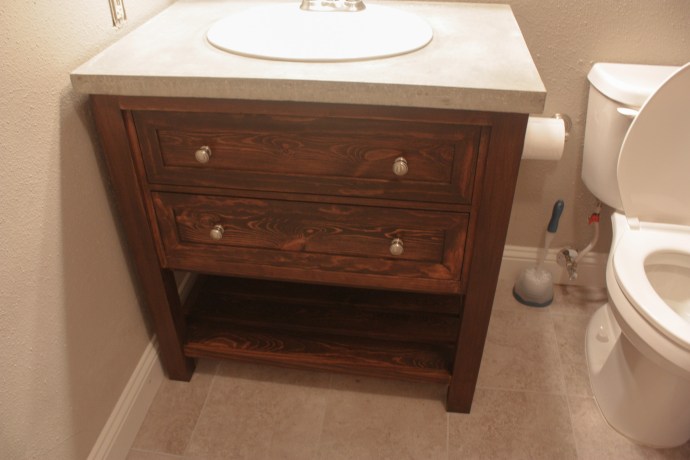
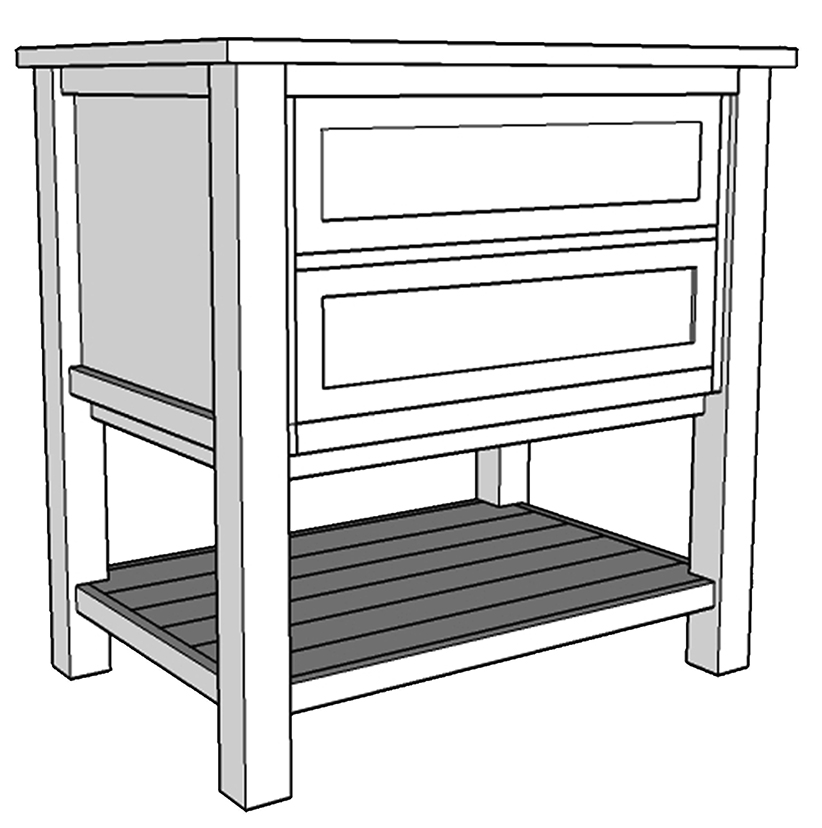
Bathroom Vanity
- (4) 3×3 x 36″ poplar legs
- (1) 3/4″ project panel 2′ x 4′
- (2) 2×2 x 8 Lumber
- (1) 2×6 x 8′ Lumber
- (1) 1×8 x 8′ Lumber
- (2) 1×4 x 8′ Lumber
- (3) 1×2 x 8′ Lumber
- (2) 1/4″ x 1 1/2″ x 8′ moulding
- 2 inset hinges
- 2 magnetic clasps
- 4 knobs
- (4) 3×3 @ 35″
- (2) 2×2 @ 29″
- (1) 2×2 @ 27 1/2″
- (1) 2×6 @ 29″
- (4) 2×2 @ 18″
- (1) 1×8 @ 27 1/2″
- (1) 1×8 @ 27 1/4″
- (2) 3/4″ x 15 1/2″ x 18″ plywood
- (2) 1×2 @ 17″
- (3) 1×2 @ 29″
- (1) 1×2 @ 27 1/2″
- (4) 1×2 @ 18″
- (2) 1/4″ x 1 1/2″ @ 7″ mitered at 45
- (4) 1/4″ x 1 1/2″ @ 27 1/4″ mitered at 45
- (2) 1/4″ x 1 1/2″ @ 7 1/4″ mitered at 45
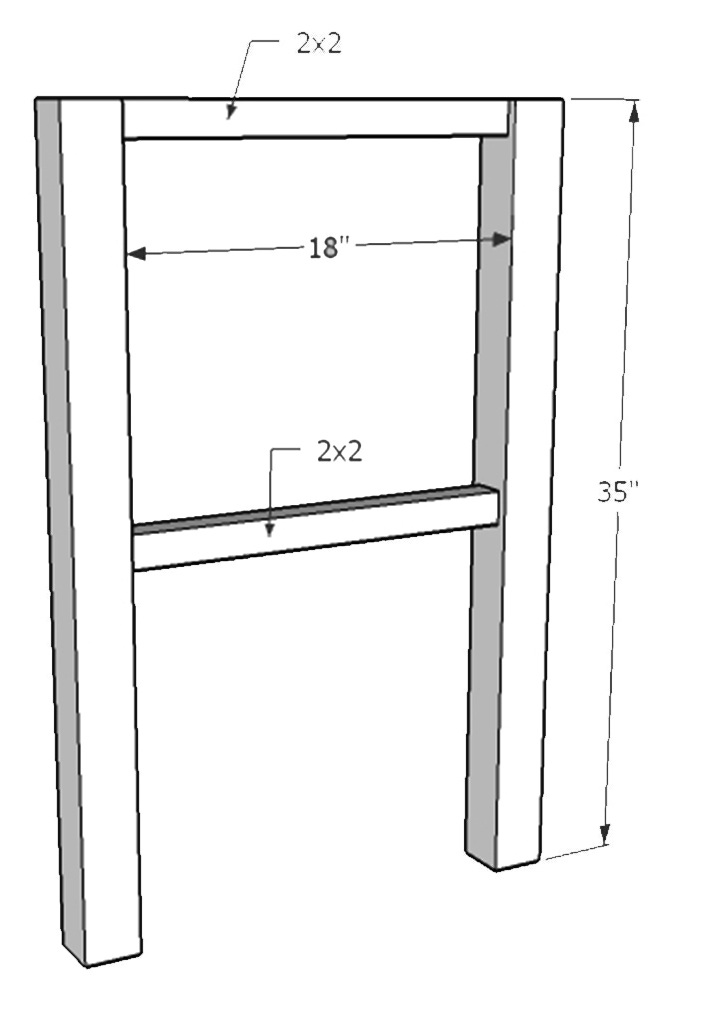
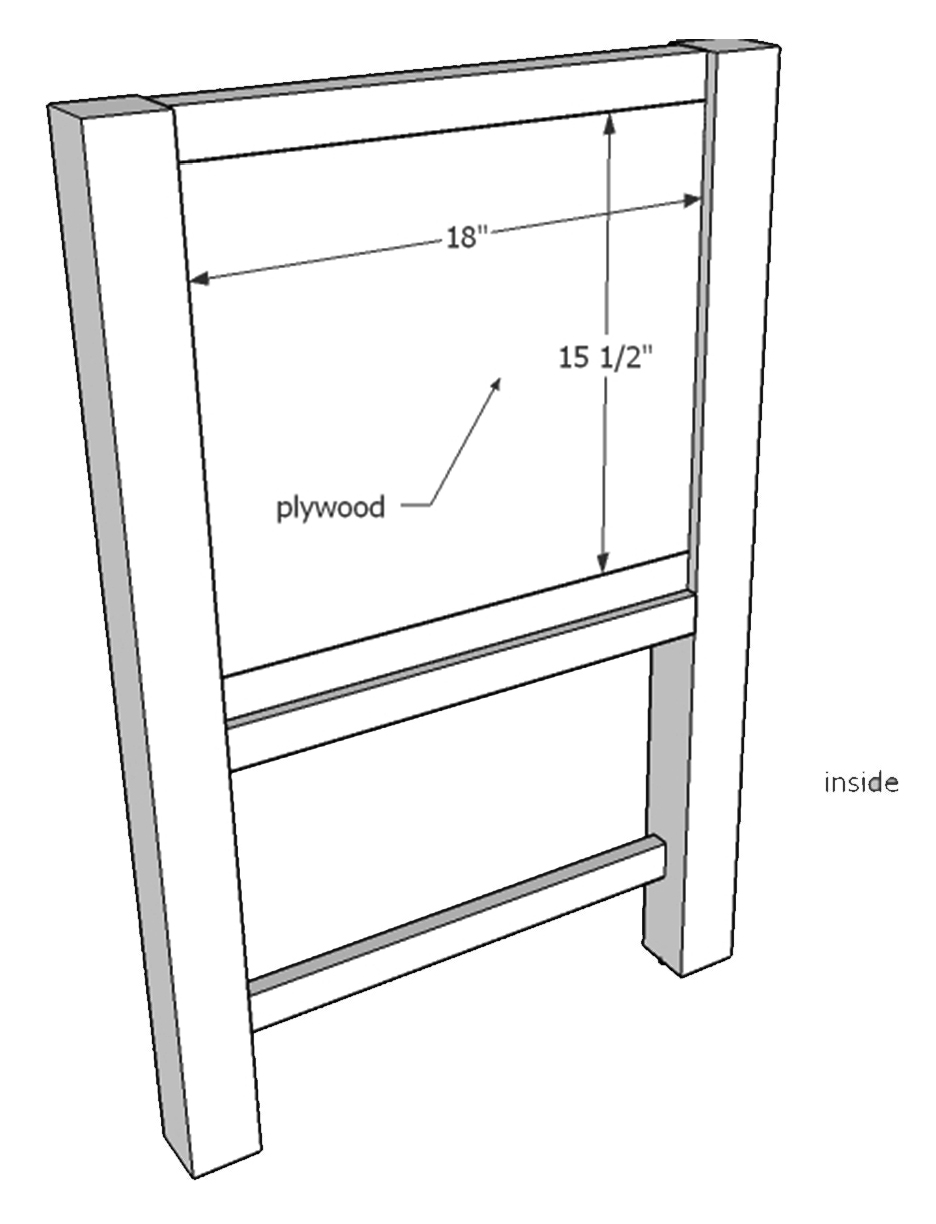
Build the side frame by attaching the 2×2 @ 18″ to the 3x3s with 1 1/2″ pocket holes and 2 1/2″ pocket hole screws and glue! Top 2×2 is flush with the tops of the 3x3s but set back 1/2″ and the second 2×2 is placed at 15 1/2″ from the bottom of the top 2×2 and set back 1/2″! Whichever way you place your pocket holes will determine the inside of the side!
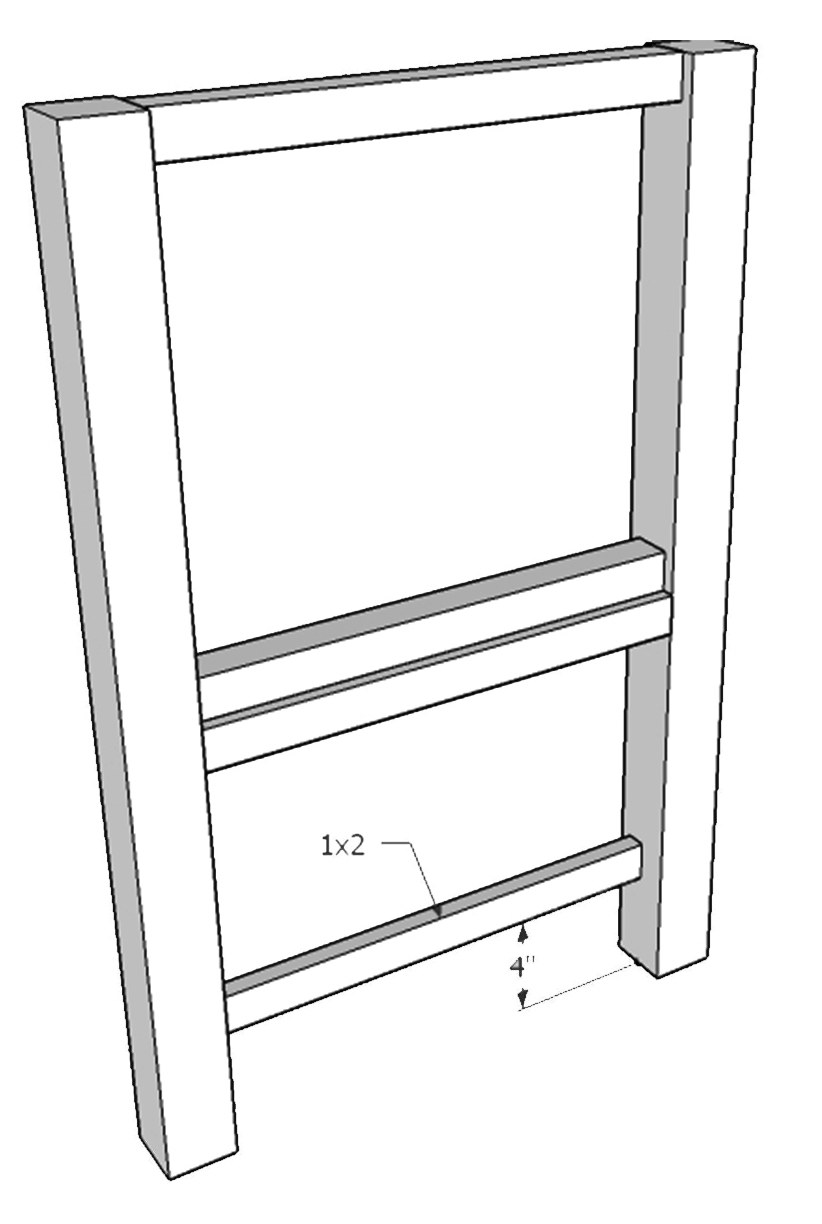
Attach the 1×2 @ 18″ flush with the 3x3s to the back. Attach with 3/4″ pocket holes and 1 1/4″ screws and glue. Make sure pocket holes are facing the “inside”.
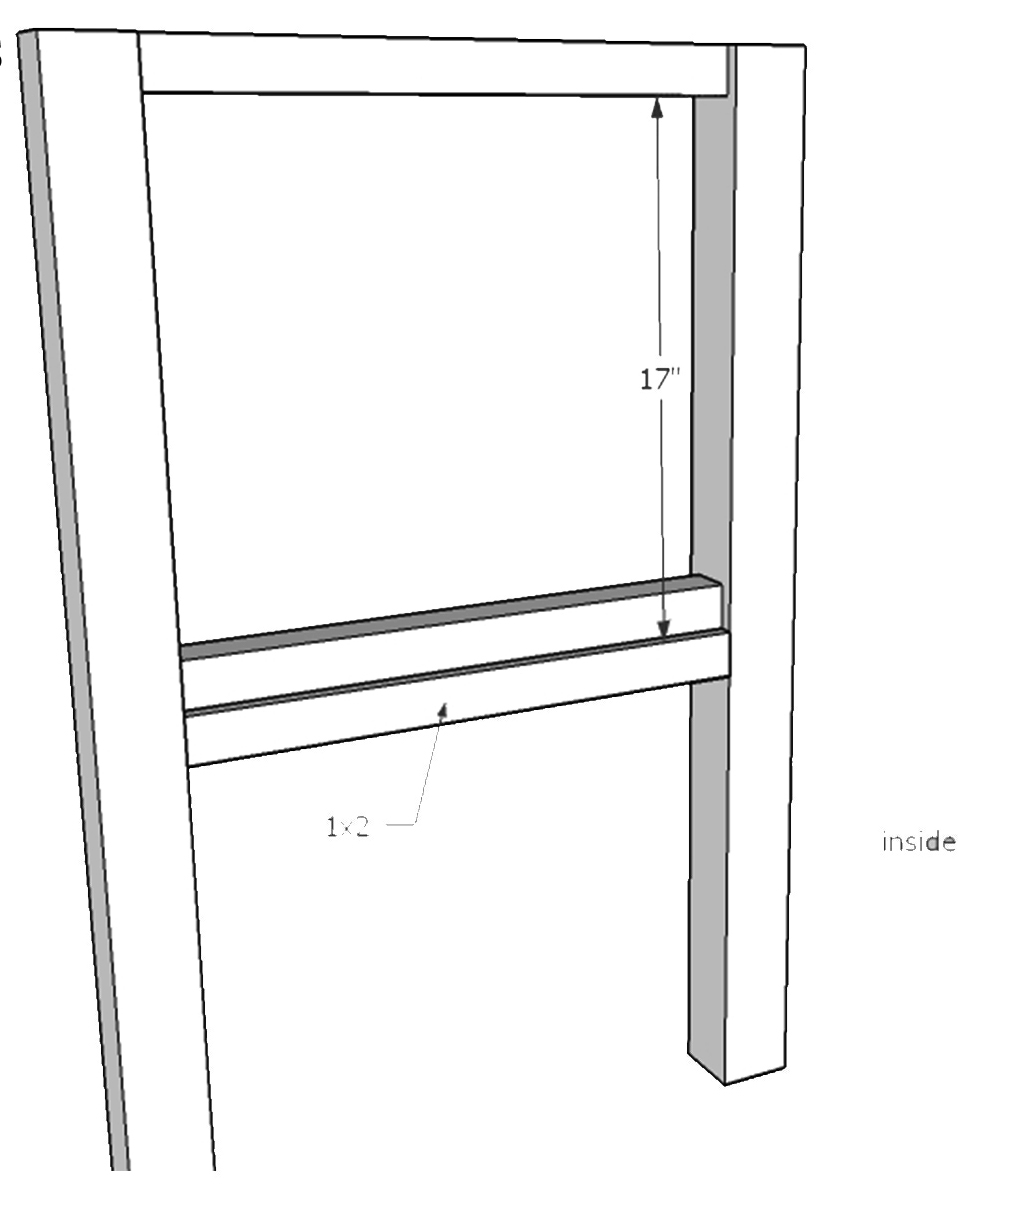
Place another 1×2 @ 18″ 4″ up from the bottom of the 3x3s and set back 1/2″ from the front. This will be attached with the same 3/4″ pocket holes and 1 1/4″ screws and glue!
Place your plywood piece cut at 18 x 15 1/2″ in the square space created by your frame! This is attached with 3/4″ pocket holes all around the edges and 1 1/4″ screws and glue! It should be flush with your 2x2s!
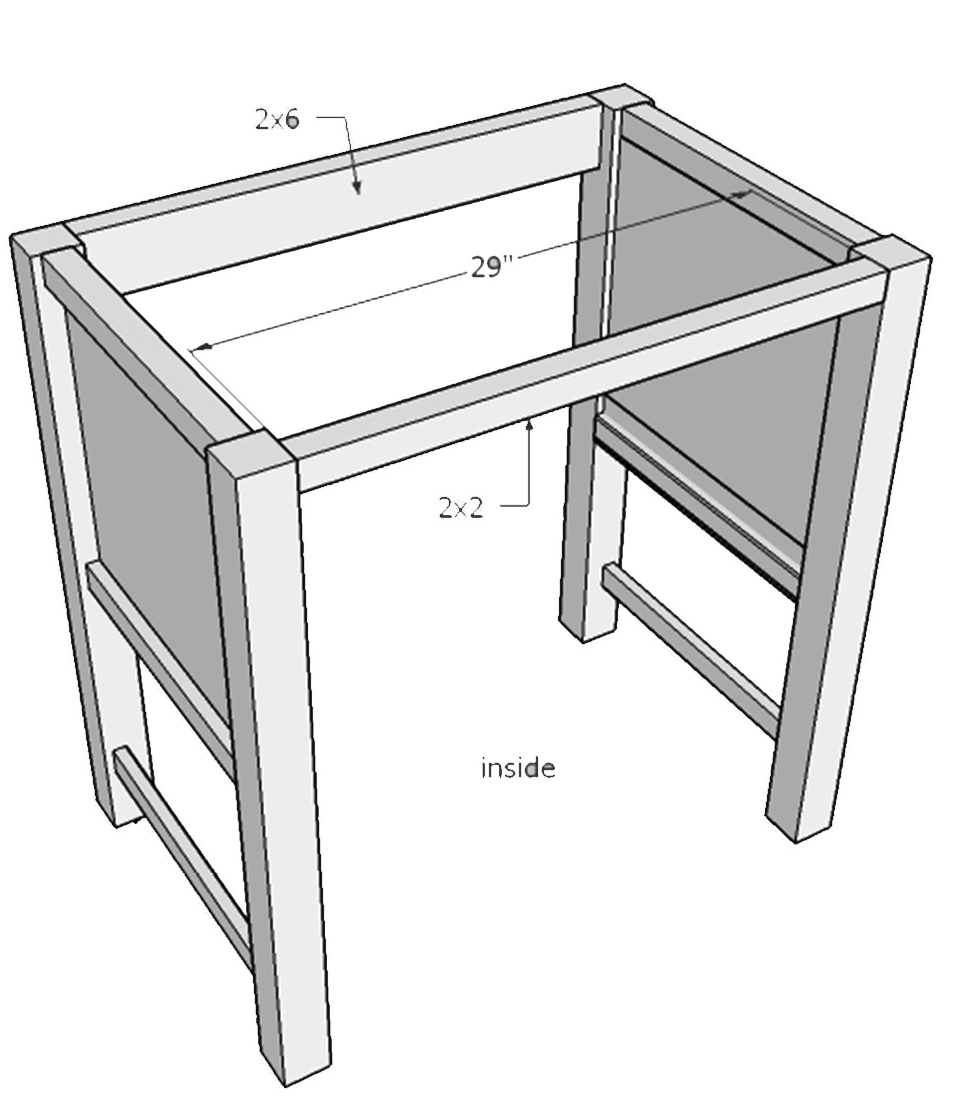
After building the sides, using the 2×6 @ 29″ and the 2×2@ 29″ attach both sides together! Using 1 1/2″ pocket holes on both and 2 1/2″ screws and glue on both! The 2×6 is going to be flush with the top and what will be the back and the 2×2 is flush with the top and what will be the front!
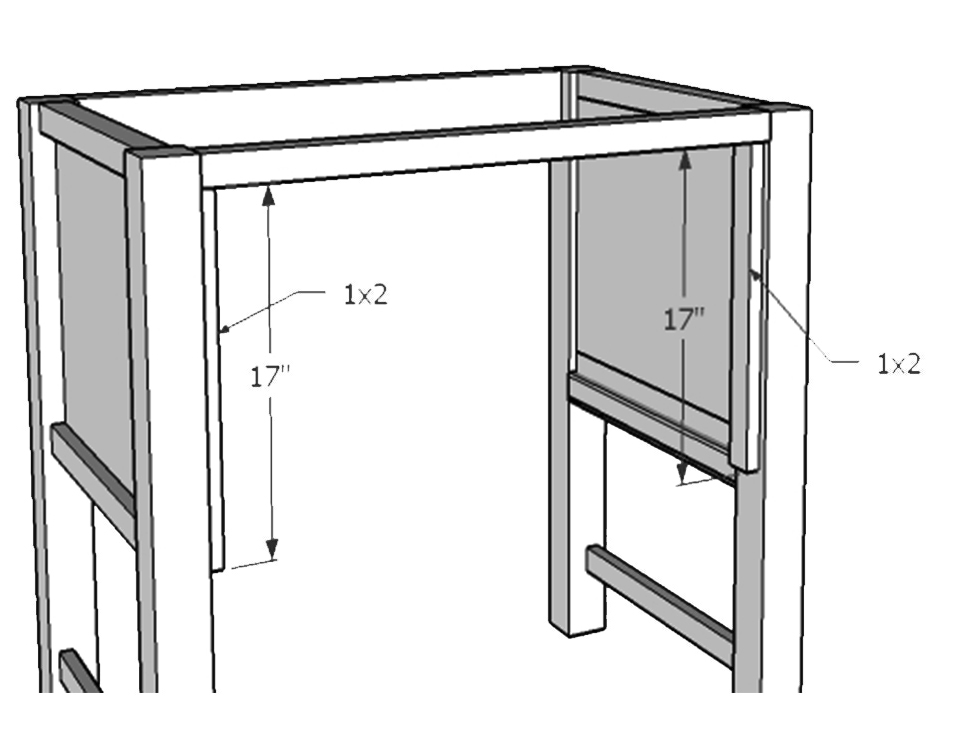
Attach the 2 – 1×2 @ 17″ to the 3x3s…they are glued and attached using countersunk screws! To do this you will need a 1/2″ countersink drill bit, drill the 1x2s in each place you would like to place a screw and then when you screw the screw in, it will sit down inside a little hole that you can then putty over and no one will ever know it was there! Three screws on each 1×2 should be fine. The 1x2s are set back 1/2″!
Attach the 1×2 @ 27 1/2″ using 3/4″ pocket holes and 1 1/4″ screws and glue. This should be 7 1/4″ down from the bottom of the 2×2 across the top. Attach the 2×2 @ 27 1/2″ flush with the bottom of the 1x2s that run along the 3x3s. Use 1 1/2″ pocket holes and 2 1/2″ screws and glue to attach.
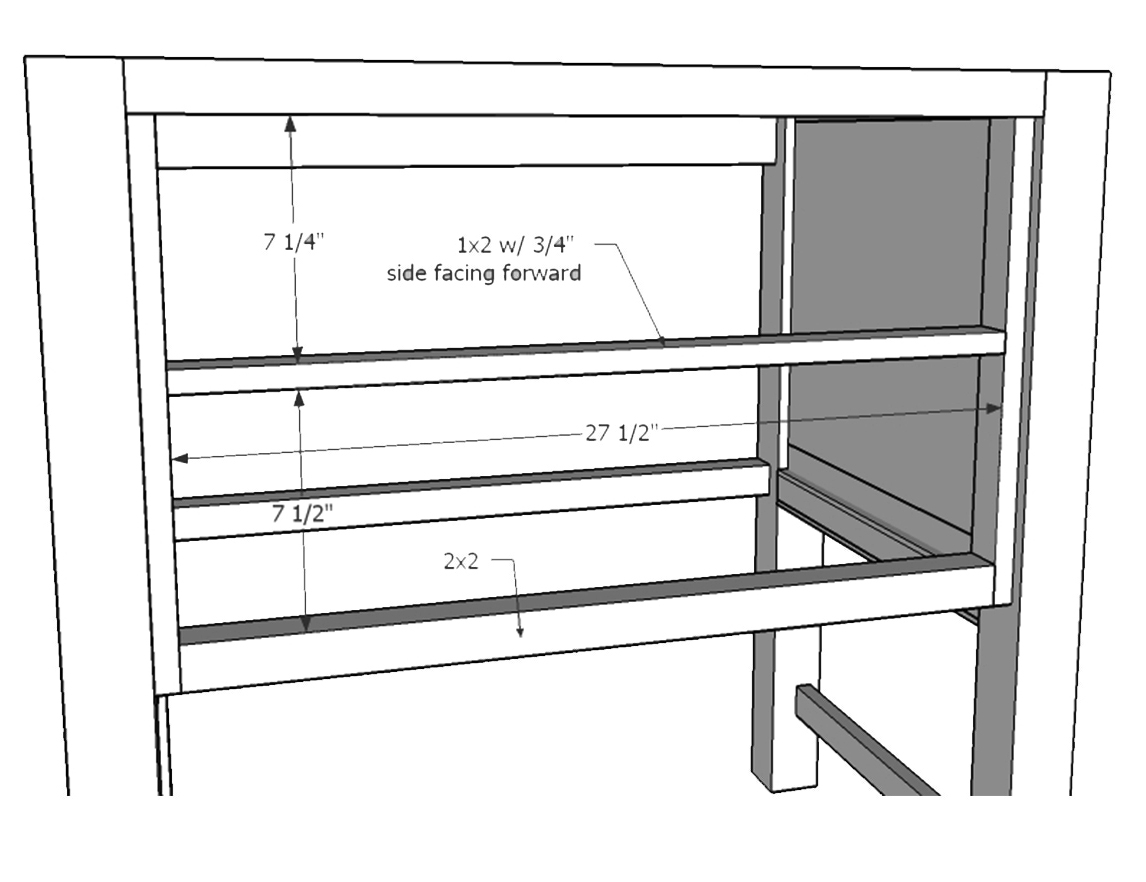
Attach the 1×2 @ 29″ below the 2×2 flush to the back of the 3x3s though. Using 3/4″ pocket holes and 1 1/4″ screws and glue to attach.

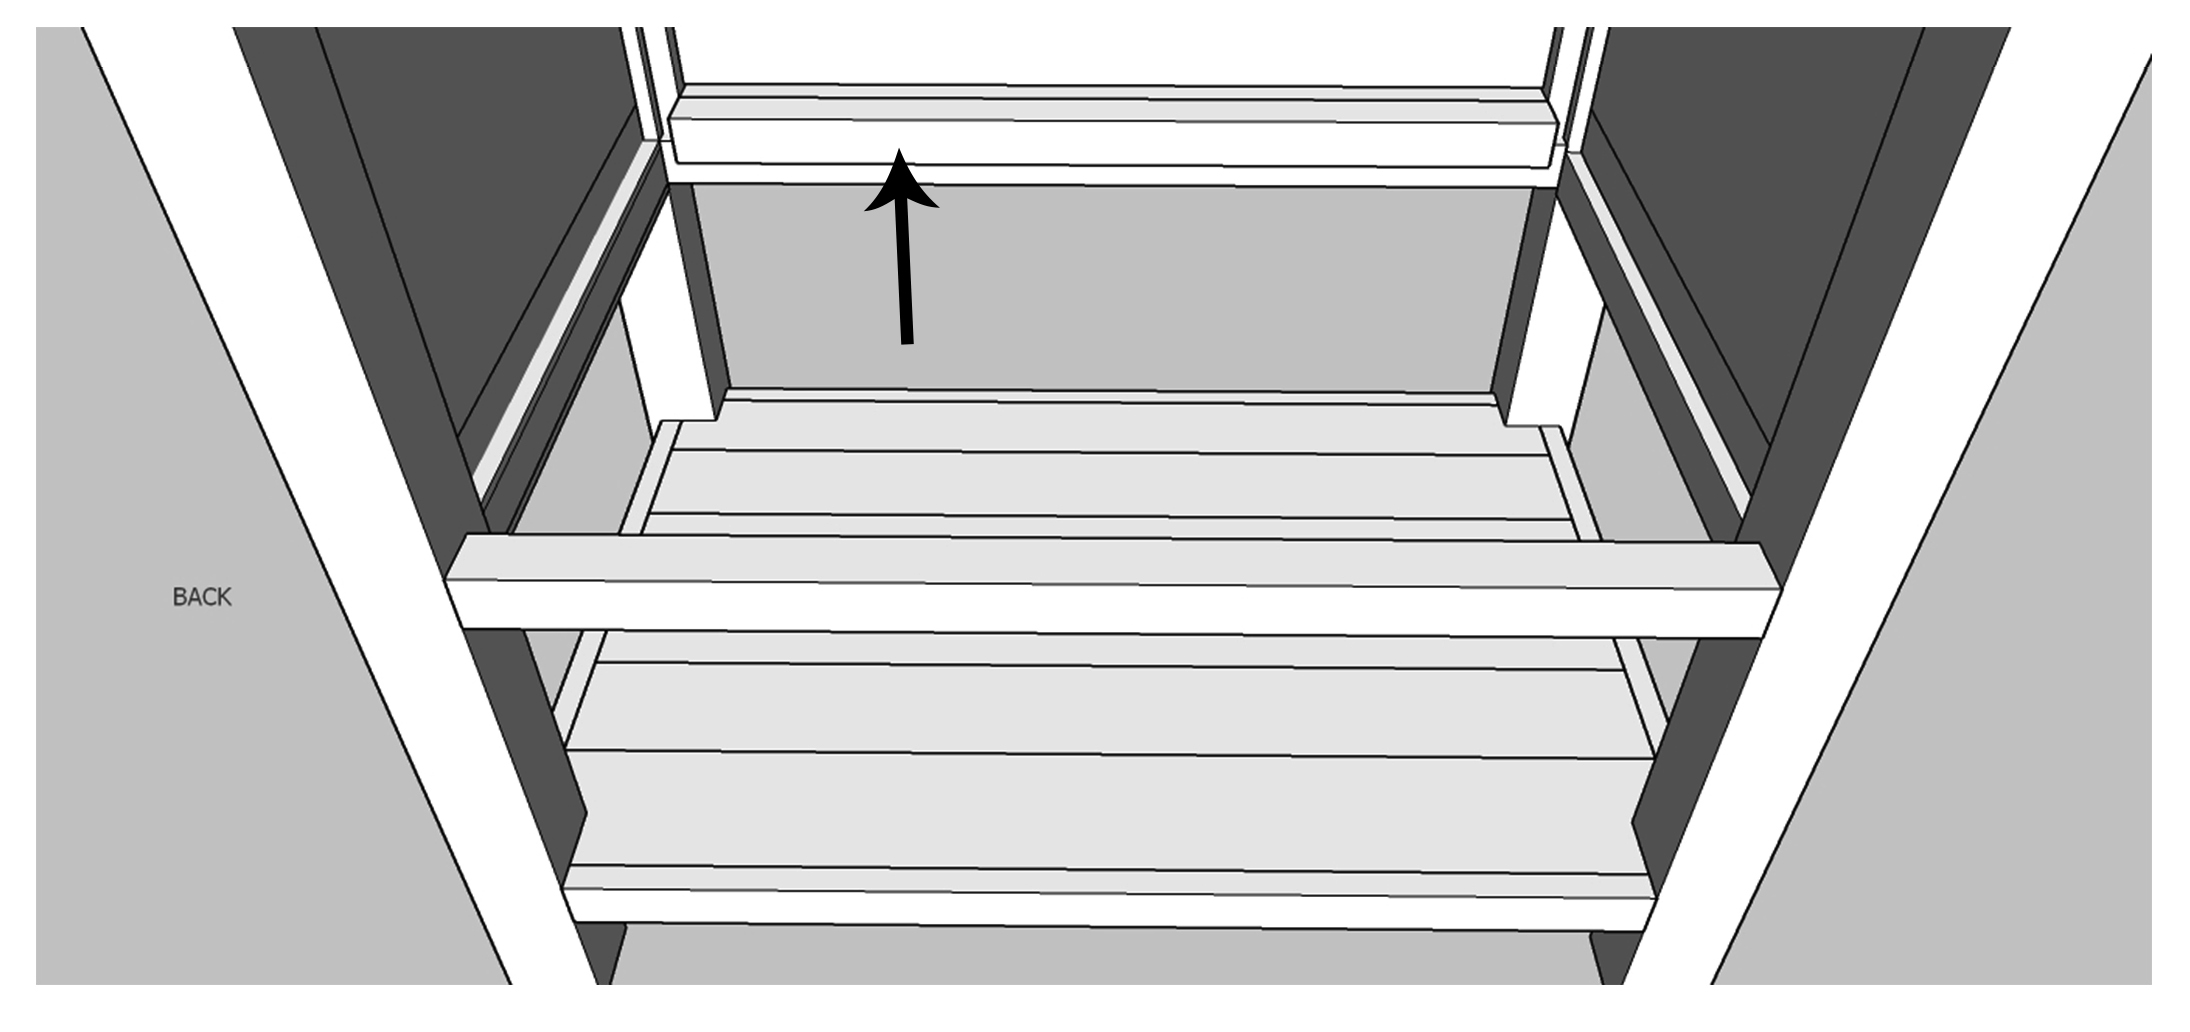
Take the 1×8 @ 27 1/2″ and cut your 1/4″ molding leaving a 1/8″ gap around all sides of Mitering the corners at 45 degrees off square, make sure and measure your board here. Glue and staple this to the front of the 1×8… on the back you will drill normal 3/4″ pocket holes and attach using 1 1/4″ screws and glue… if you do not want the bottom drawer to flip down, you can make two of this same size only bring the molding all the way to the top and bottom edges since room has already been left in this bottom space for it to move… if you want the flip down door continue to step 10.
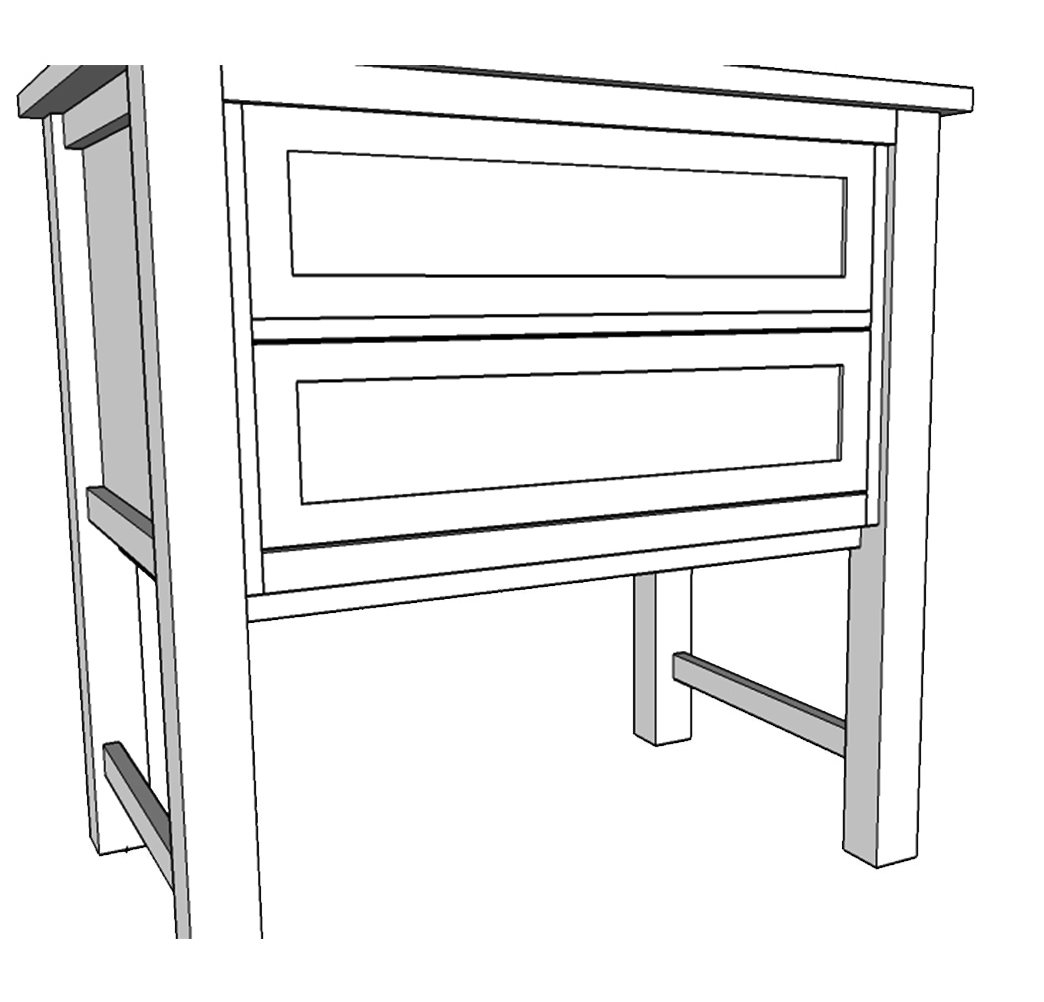
Take the 1×8 @ 27 1/4″ and place 1/4″ molding all the way to the edges of the board, mitered at 45 degrees off square. Make sure and measure your board. This board will be attached with hinges and magnetic claps… later on in the instructions. I sanded and stained it before attaching.
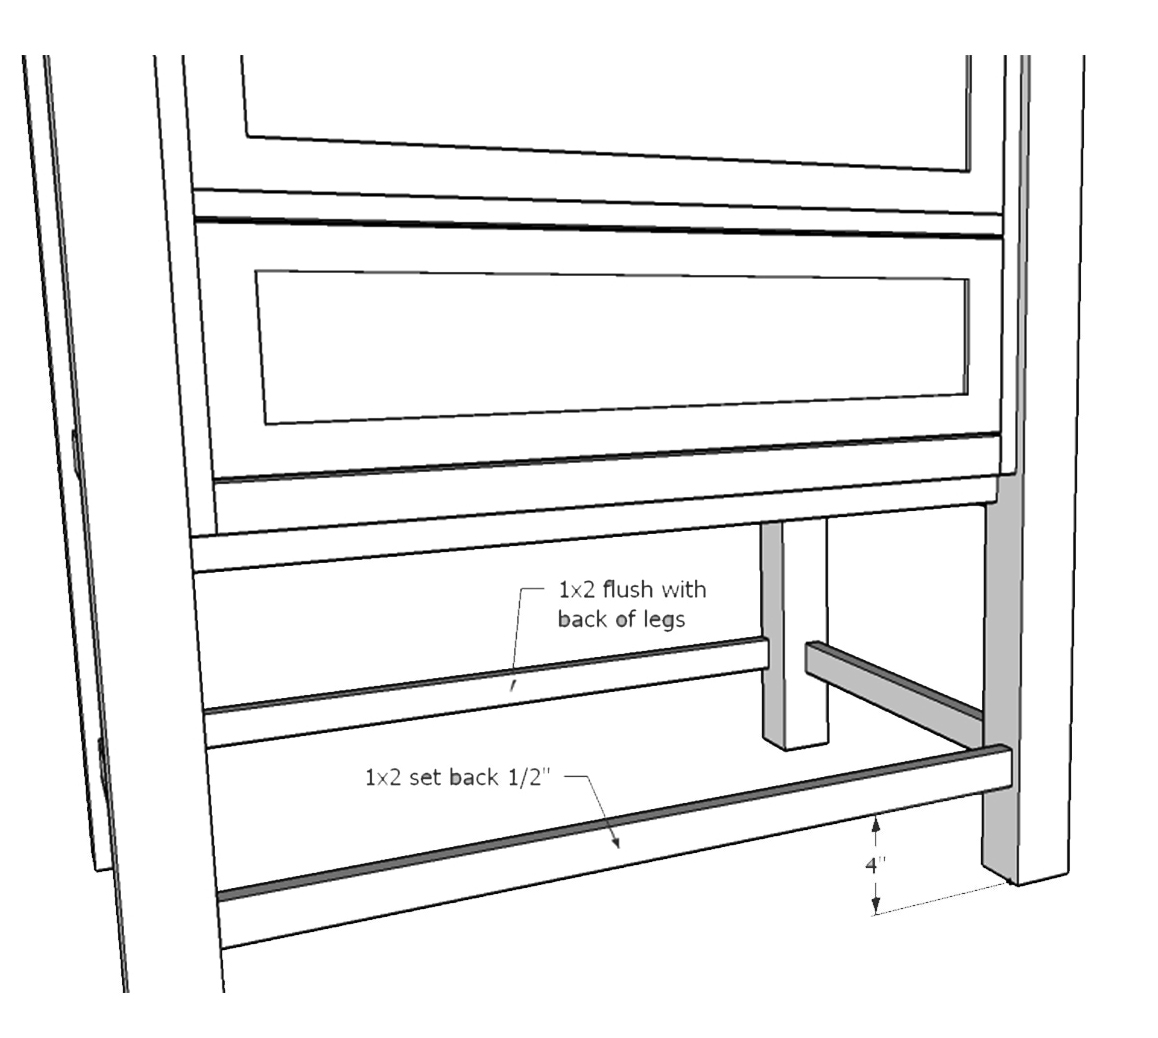
Attach the 2 – 1×2 @ 29″ up four inches from the bottom. Using 3/4″ pocket holes and 1 1/4″ screws and glue. The front 1×2 will be set back 1/2″ and the back 1×2 will be flush with the back.
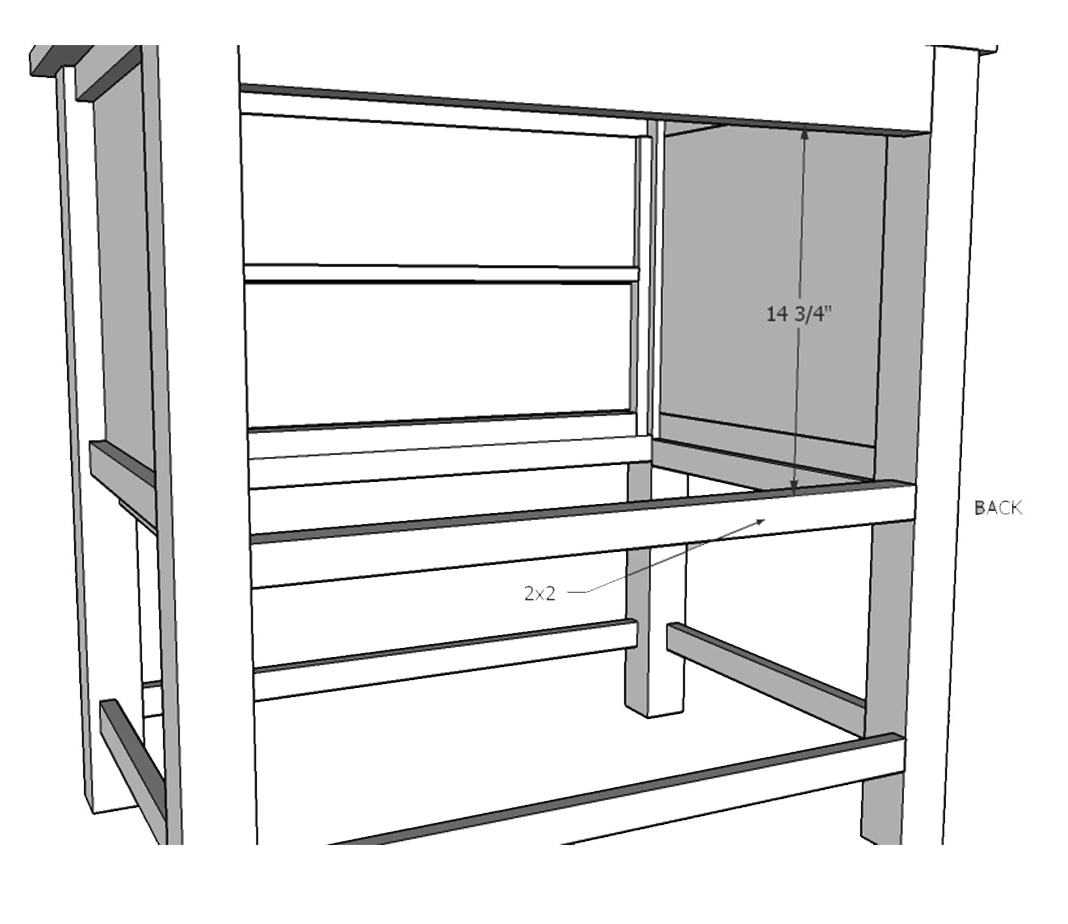
Attach the 2×2 @ 29″ across the back… you may want to measure your plumbing before placing this board as it can easily be moved up or down right now but not once it’s glued. It is flush with the back. Using 1 1/2″ pocket holes and 2 1/2″ screws and glue.
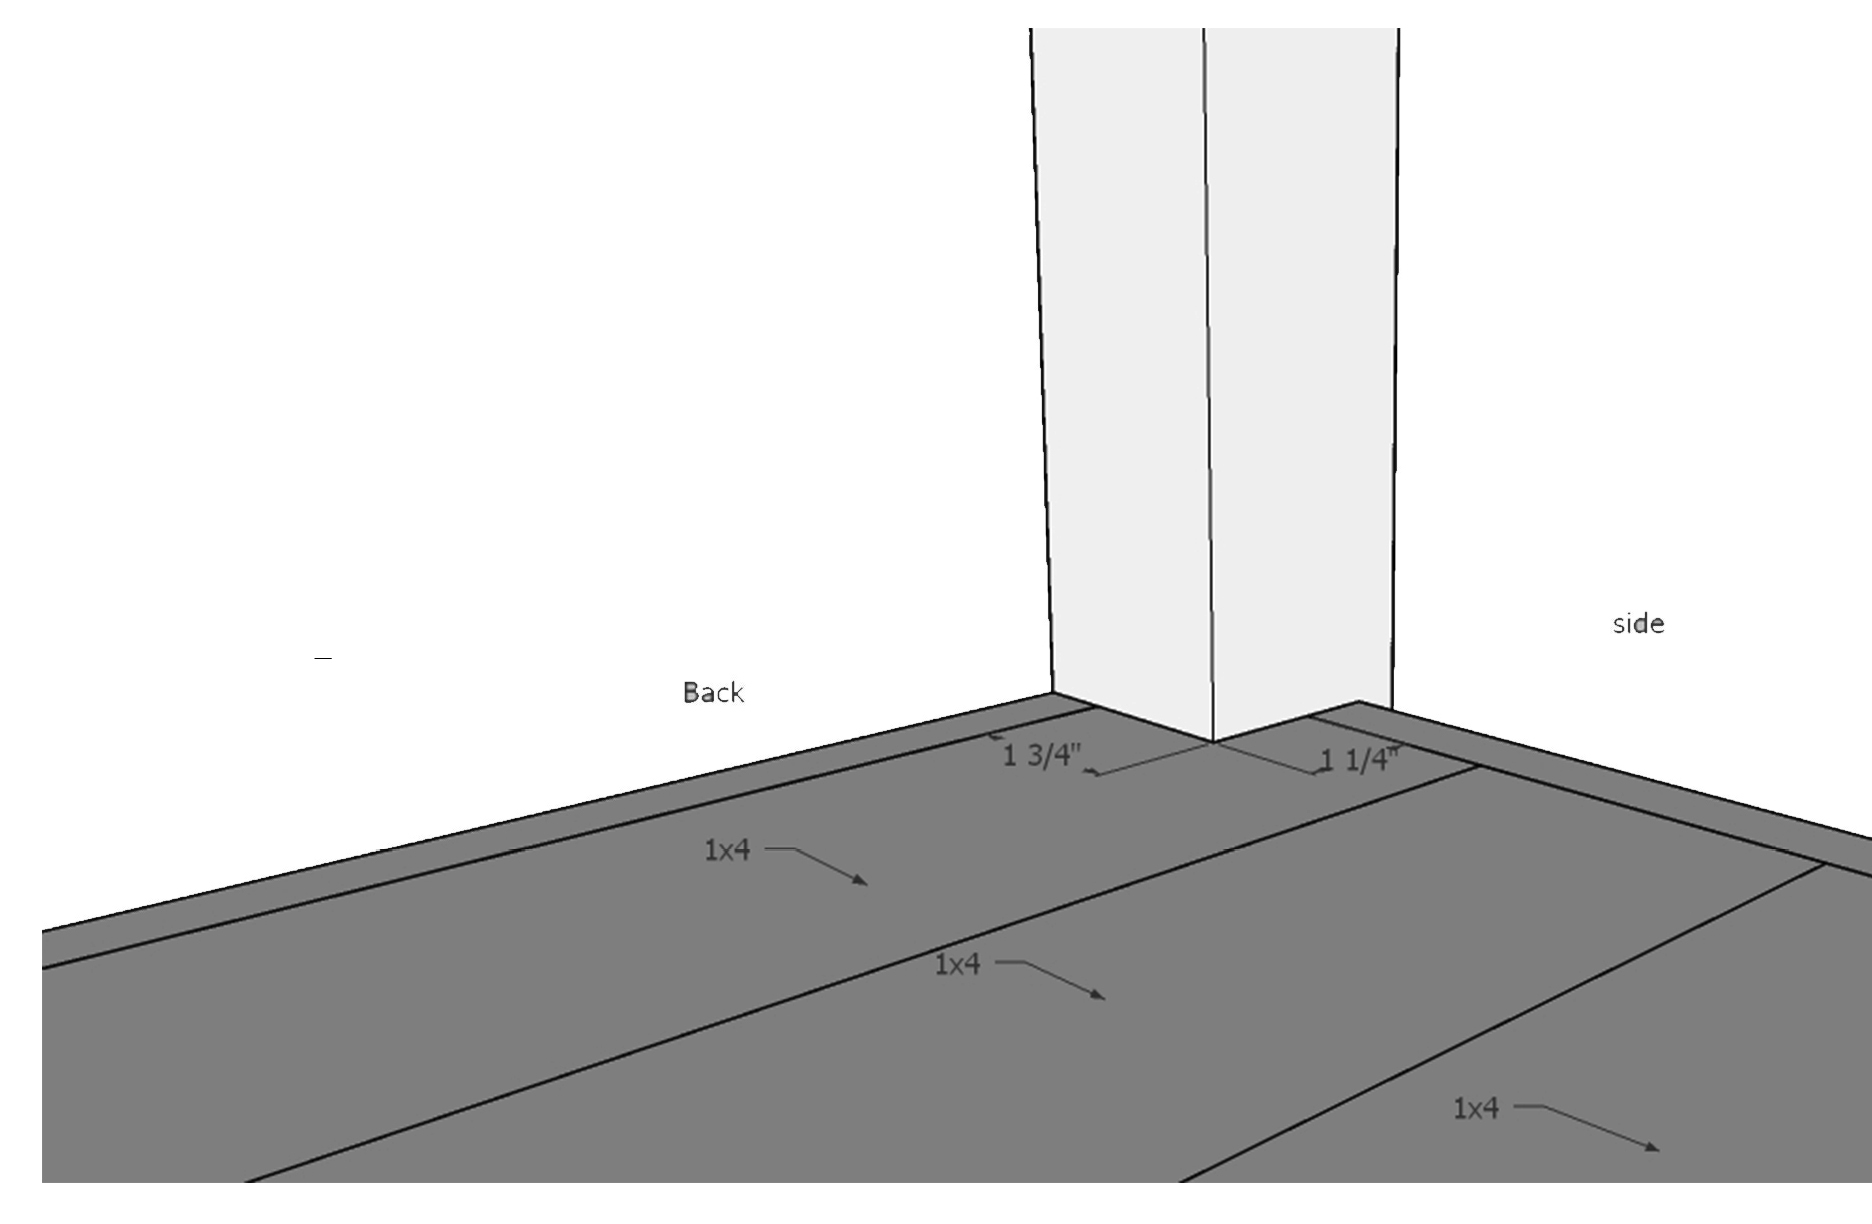
The front and back 1x4s @ 31 1/2″ along the bottom where they meet the 3x3s will need to be cut, taking a jigsaw you can quickly make these cuts. The measurements here are for the back 1x4s are all cut normal @ 31 1/2″. And the front 1x4s is cut at 1 1/4″ in and 1 1/4″ in. Attach using 3/4″ pocket holes and 1 1/4″ screws and glue.
Attach the 2×2 @ 27 1/2″ to the other 2×2 that is along the bottom of the ‘drawers’… just using 1 1/2″ pocket holes drilled toward the other 2×2 (not on the ends but along the whole 2×2 as if you were planking them together) and connecting it to the other 2×2 with 2 1/2″ screws and glue. Now using the hinges and magnetic clasps you can finish the vanity. After sanding and staining you’re done.
The original plan can be found at http://builditcraftitloveit.com
![]() [email_link]
[email_link]