Bathroom Vanity
- (1) 1x2x6
- (1) 1x3x8
- (1) 5/4x2x6
- (2) 5/4x3x8
- Molding 8′
- 1/2” pin nails
- 1/4” plywood 24”x24”
- 1/2” plywood 24”x24” (optional)
- 3/4” plywood 24”x48”
- 1-1/4” wood screws
- 1-1/4″ pocket screws
- 1-1/2″ pocket screws
- (2) Cabinet hinges
- Elmer’s Wood Glue Max
- Rust-Oleum Ultimate Wood Stain – Dark Walnut
- Semi-Gloss Polyurethane
Cut the Legs. Cut 4 pieces of 5/4×3 to 27-1/4″. On one end, measure up 2″ and in 2″. Connect the marks with a line. Cut the angle using a circular saw and crosscut jig. Repeat for the other legs.

Cut the Side Rails. Cut 4 pieces of 5/4×3 to 10-3/4″ and drill pocket holes in each end.

Cut the Bottom Side Rails. Cut 2 pieces of 5/4×2 to 10-3/4″ and drill a pocket hole in each end.

Cut the Side Panels. Cut 2 pieces of 3/4″ plywood to 10-3/4″ x 9″ and drill pocket holes around the edges.

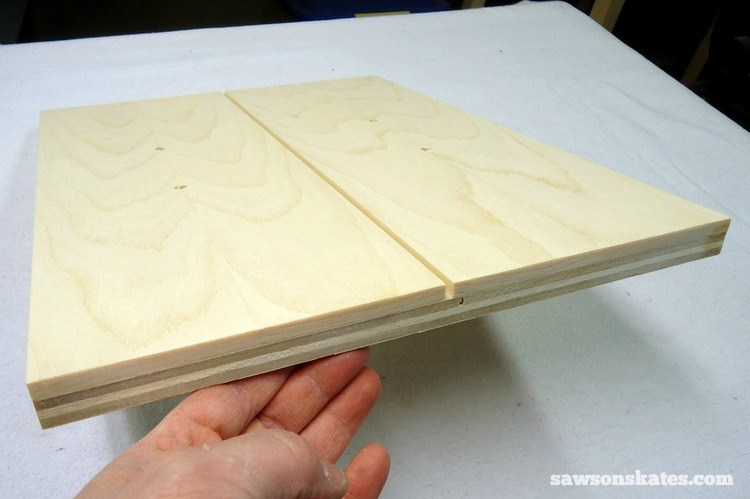
Note: I made my panels a little differently. I made 1/4″ book-matched panels and glued those panels to a pieces of 1/2″ plywood for a total of 3/4″.
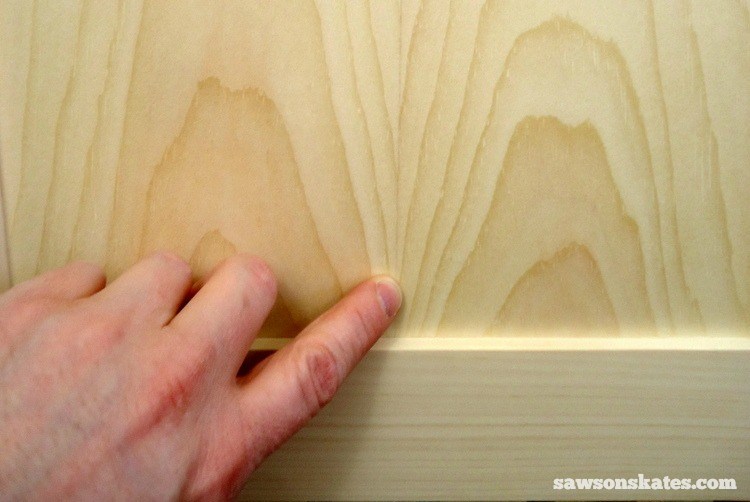
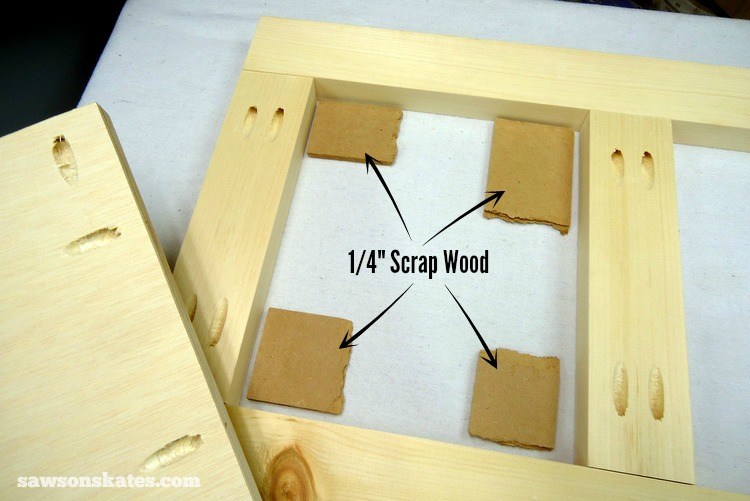
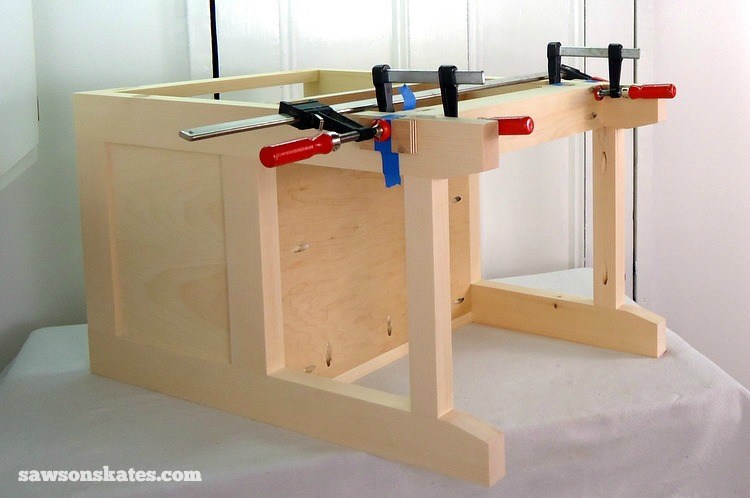
Assemble the Side. Layout 2 legs (make sure the angles face inward), the top rail, middle rail and bottom rail. The side panel sets in 1/4″ from the face of the legs. To help position the panel, I placed some scrap pieces of 1/4″ MDF on my workbench, then placed the panel on top. My book-matched panels had cathedral grain and I made sure this was pointing towards the top of the vanity. (Cathedral grain refers to the grain pattern of the wood. Think of the grain pattern like a mountain. You want the point of the mountain facing towards the top of the piece and the wide part of the mountain facing towards the bottom of the piece.)
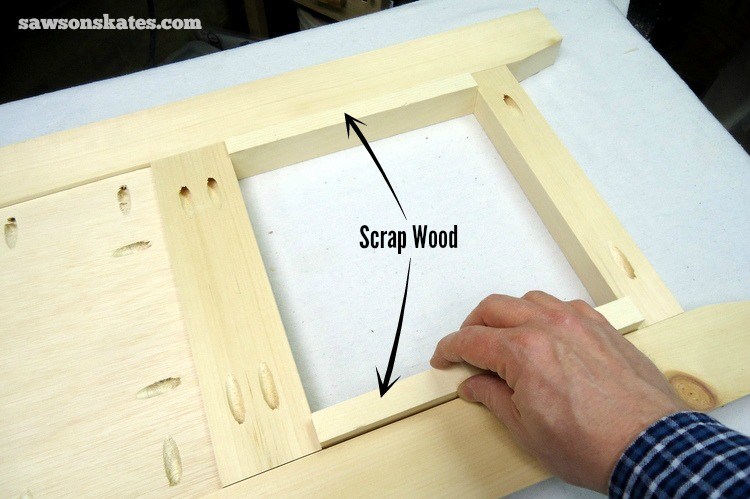
To keep the proper spacing of the bottom rail I cut two pieces of scrap wood to 9″ and placed between the bottom and middle rail.
Once everything is laid out, apply glue to the ends of the rails, clamp the assembly and attach using 1-1/2″ pocket screws. Do not attach the panel at this point.

Flip the assembly over and be sure the panel sets in 1/4″ from the face of the legs. Adjust if necessary. Clamp the panel in position, flip the assembly over and attach the panel with 1″ pocket screws. Repeat for the other side.
Cut 5 pieces of 1×2 to 15-1/2″ and drill a pocket hole in each end.

Cut 5 pieces of 1×3 to 15-1/2″ and drill a pocket holes in each end.

Cut the Bottom. Cut 1 piece of 3/4″ plywood to 15-1/2″ x 15″ and drill pocket holes around the edges.

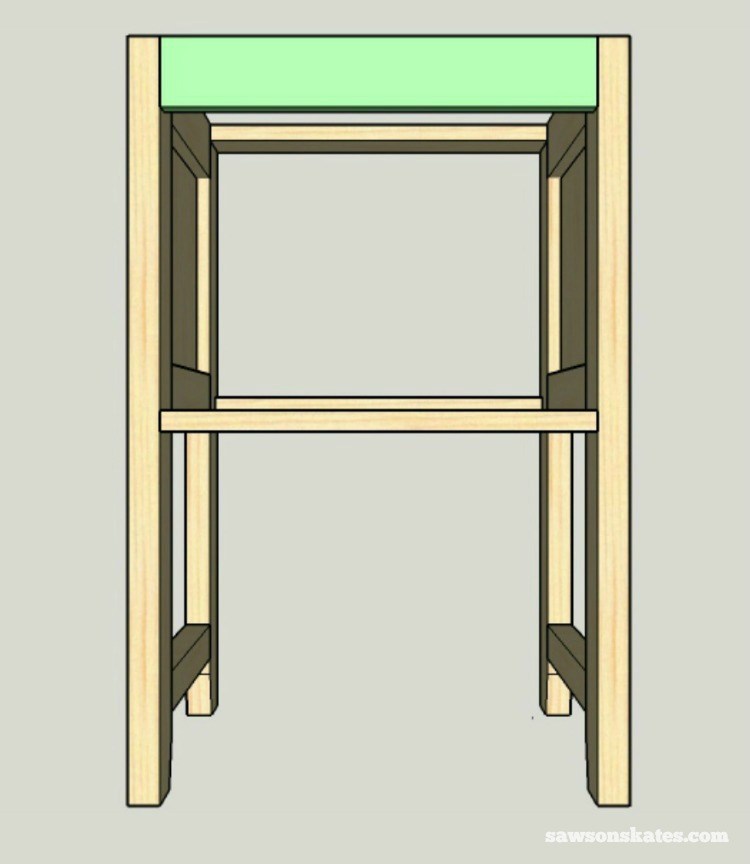
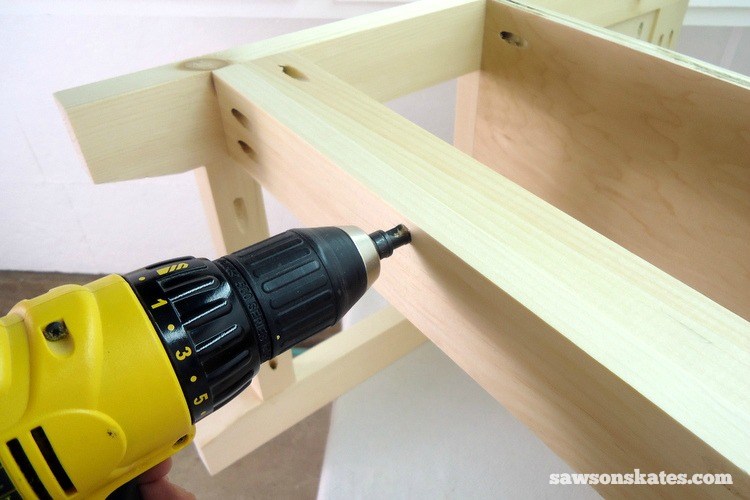
Assemble the Carcass. Apply glue to a 1×3 (from Step 7) and place at the top of the front legs. Attach using 1-1/4″ pocket screws.

Apply glue to a 1×2 (from Step 6) and place 11-3/4″ below the top brace. I cut a few pieces of scrap wood to 11-3/4″ to help position this piece. Attach using 1-1/4″ pocket screws.

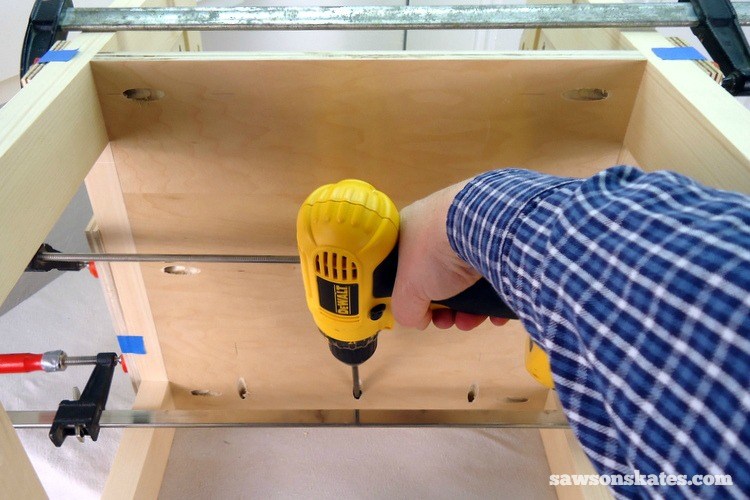
Slide the bottom in position. Make sure the bottom is flush with the bottom of the side rails and front rail. Clamp and attach using 1-1/4″ pocket screws.
Apply glue to a 1×2 (from Step 6), place at the top of the back legs and attach using 1-1/4″ pocket screws.
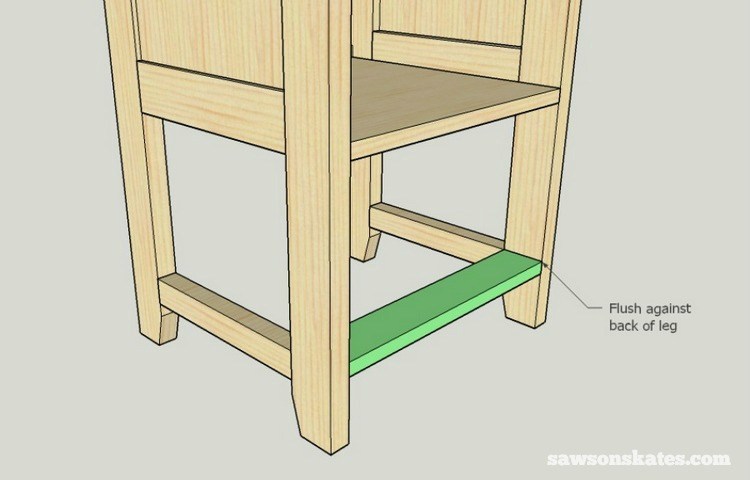
To help install the back slat, I cut a few pieces of scrap to 9″ and placed below the bottom. The back of the slat (from Step 7) is placed flush against the back legs. Attach using 1-1/4″ pocket screws.
Place a 1×2 (from Step 6) on top of the back slat. Attach using 1-1/4″ pocket screws.
From the bottom, drill a countersink hole and attach using a 1-1/4″ wood screw.
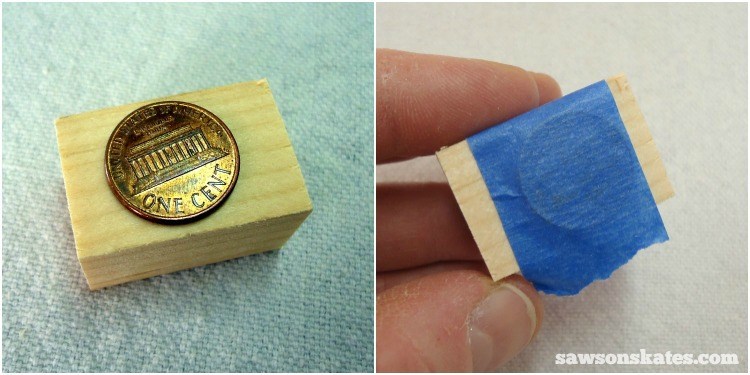
The remaining 3 slats (1×3’s from Step 7) are placed so that the tops of the slats are flush with the top of the bottom rails and spaced 13/16″ apart. To help with the spacing I cut a few pieces of 3/4″ scrap wood and attached pennies to the scrap wood with painter’s tape. The thickness of the wood plus the penny equals about 13/16″.
Attach the slats using 1-1/4″ pocket screws.
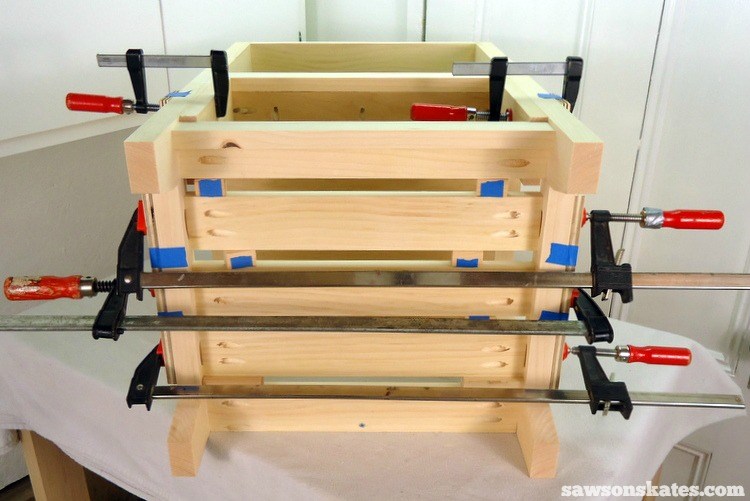
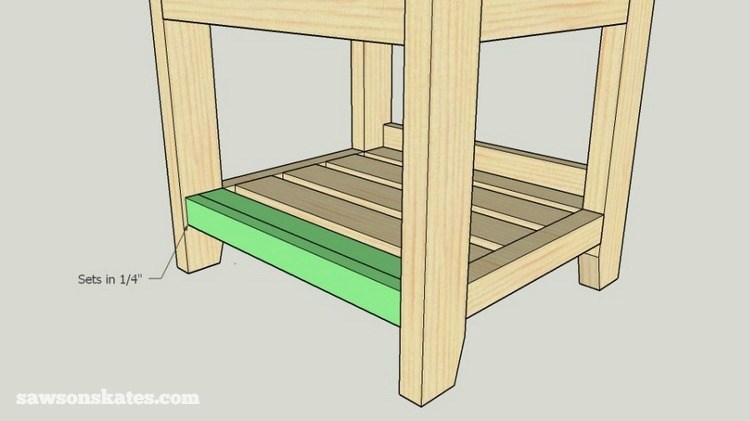
Make the Front Slat Assembly. Apply glue to the edge of a 1×2 (from Step 6) and attach to a 1×2 (from Step 6). To help position the front slat assembly, I cut a few pieces of scrap to 9″ and placed below the bottom. Place at the front slat assembly below the scrap wood and set in 1/4″. Attach using 1-1/4″ pocket screws.
Cut 2 pieces of 1/2″ plywood to 1-1/2″ x 3/4″. Apply glue and place under the front slat assembly. This piece will keep the front assembly from rocking.

Make the Faux Drawers. Cut a piece of 1/4″ plywood to 15-1/4″ x 11-1/2″.

Make the “drawer fronts” from 2 pieces of 1/4″ plywood to 15-1/4″ x 5-11/16″.

Note: I used leftover pieces of the book-matched side panels to make my drawer fronts. Apply glue to the drawer fronts, place on the door panel (leaving a gap between the drawer fronts) and clamp until dry.
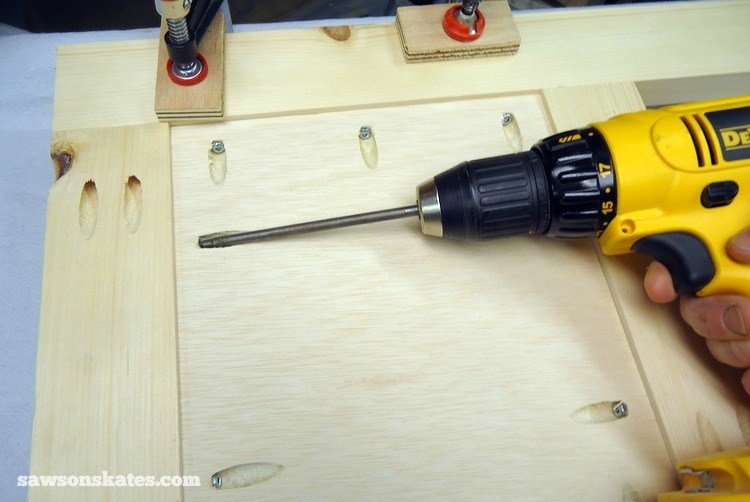
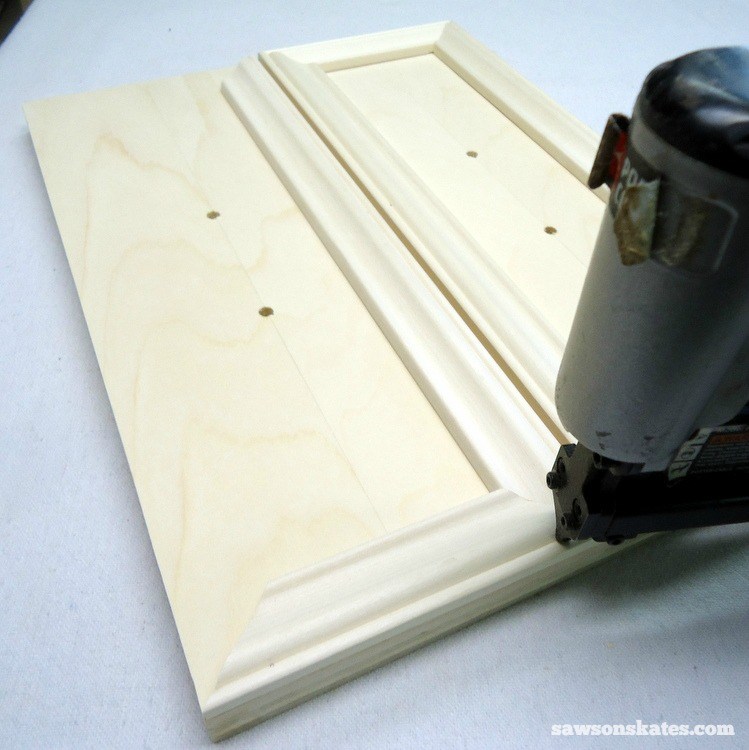
Wrap the drawer fronts with molding. Miter the molding, apply glue and tack in place with 1/2″ pin nails.
Install the Hinges. Follow the manufacturer instructions for installing the hinges.
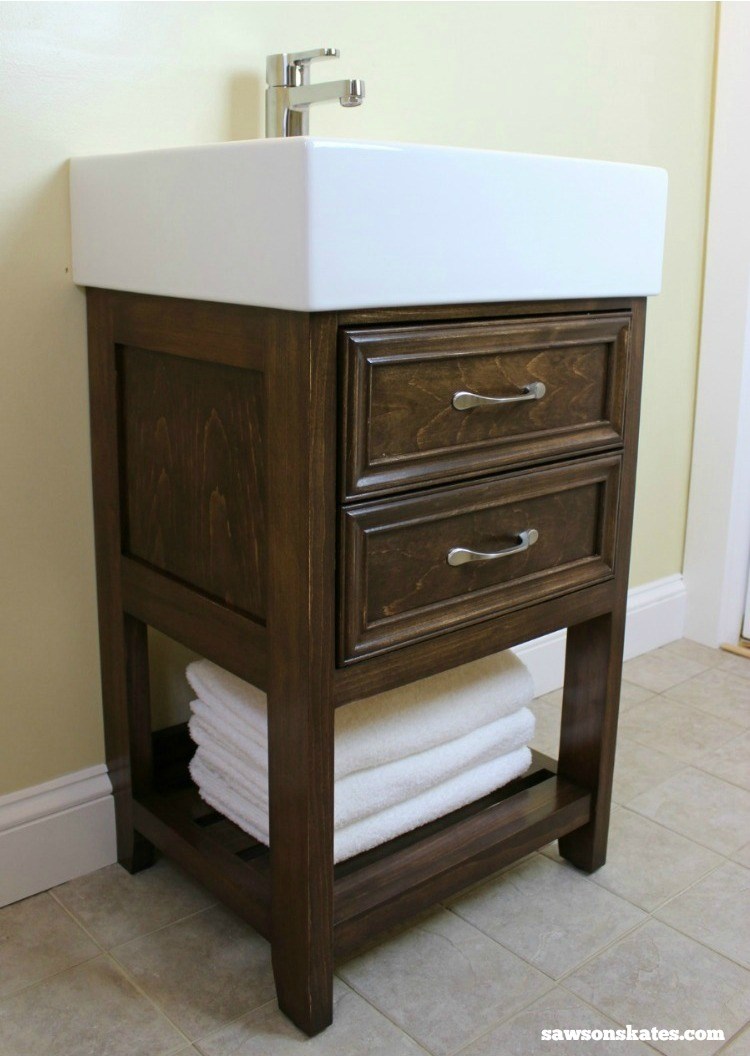
Finish the Vanity. Sand, fill any holes or gaps with wood filler, apply a tea stain, apply a dark walnut stain and then three coats of polyurethane.
The original plan can be found at https://sawsonskates.com
![]() [email_link]
[email_link]