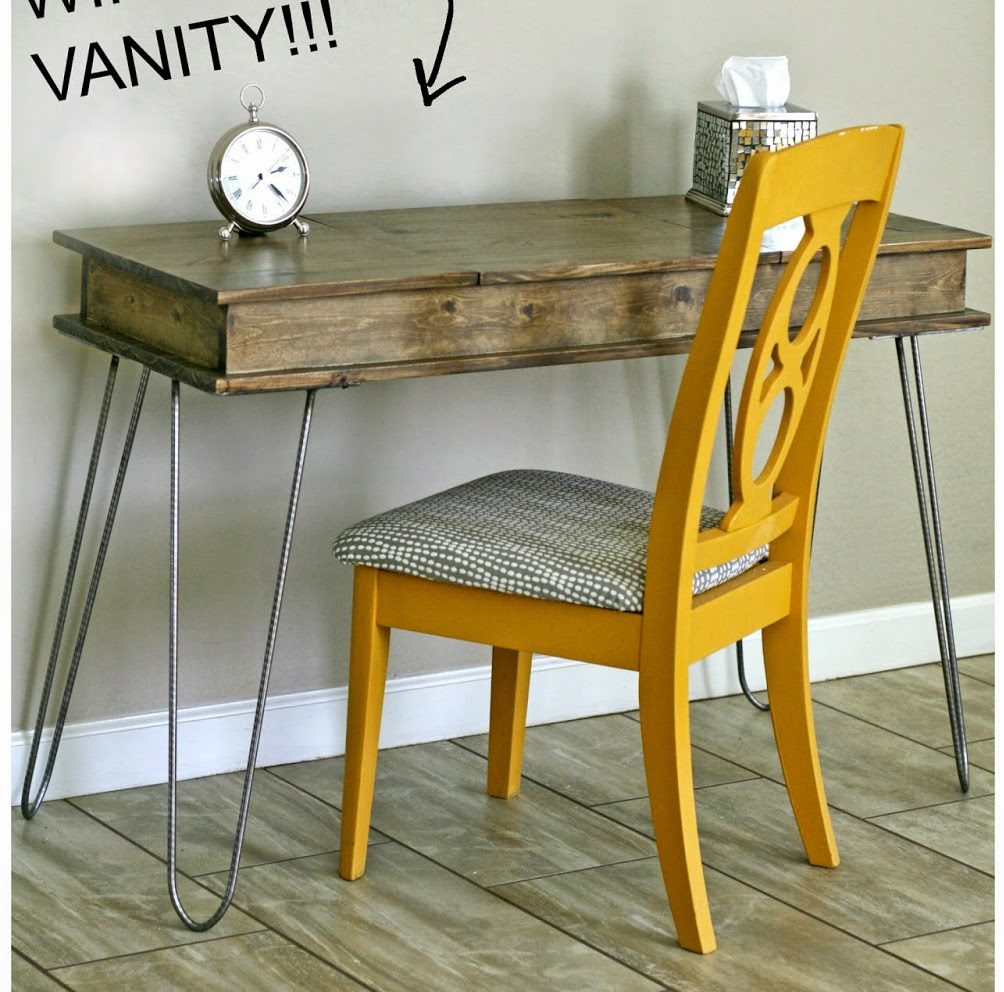
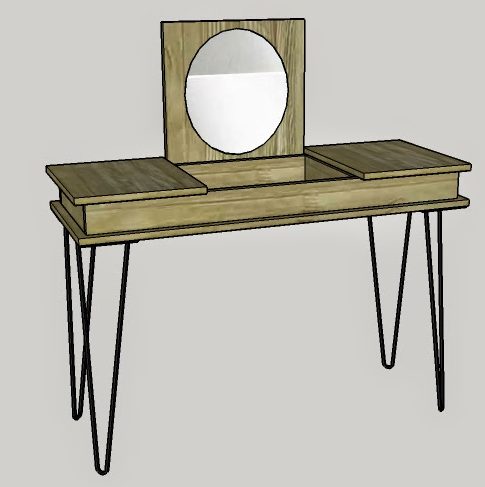
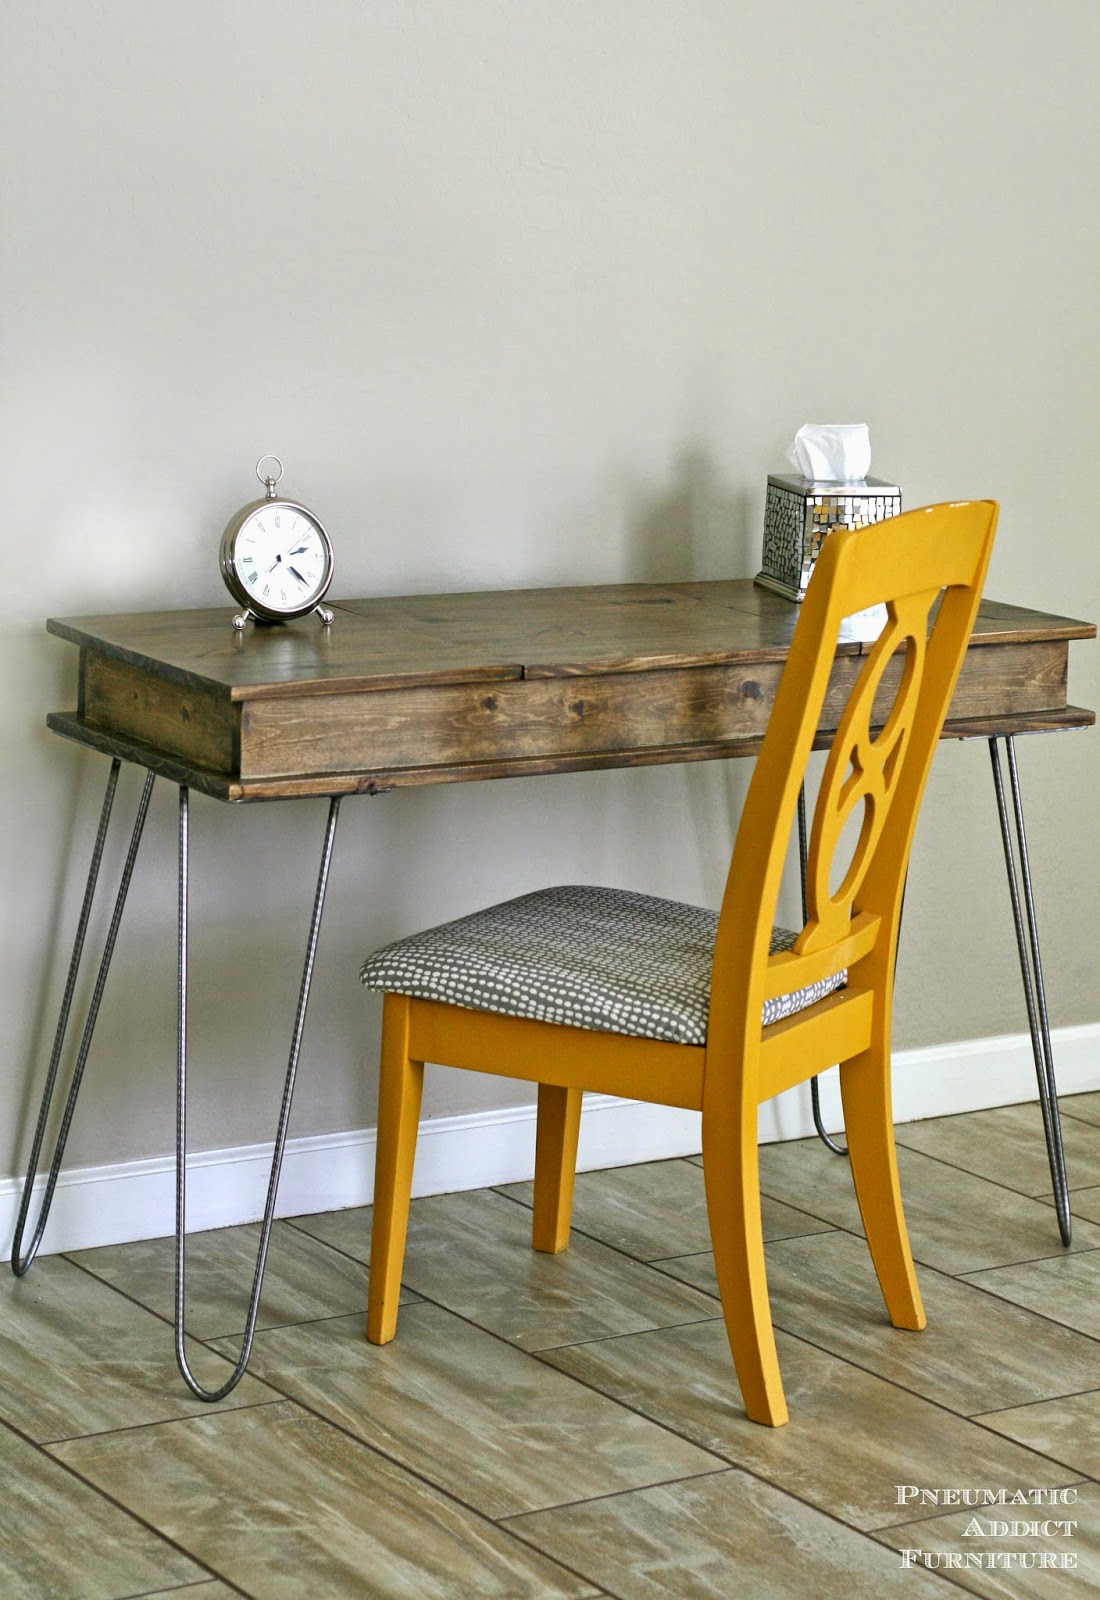
Hairpin Make-up Vanity
Materials List:
- (2) 1 x 18 x 48″
- (2) 1 x 4 x 96″
- (6) *full overlay cup hinges
- (4) 26″ steel hairpin legs OR (2) 10′ pieces of 3/8″ steel rod and (4) 3/16 thick steel plates
Cut List:
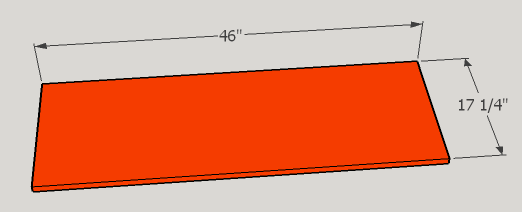
- (2) 1 x 18 @ 46″
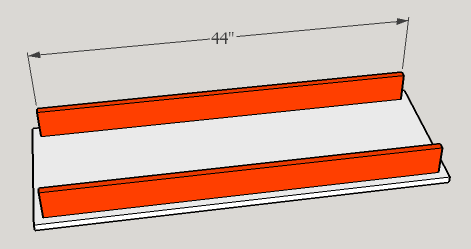
- (2) 1 x 4 @ 44″
- (4) 1 x 4 @ 13 3/4″
Instructions:
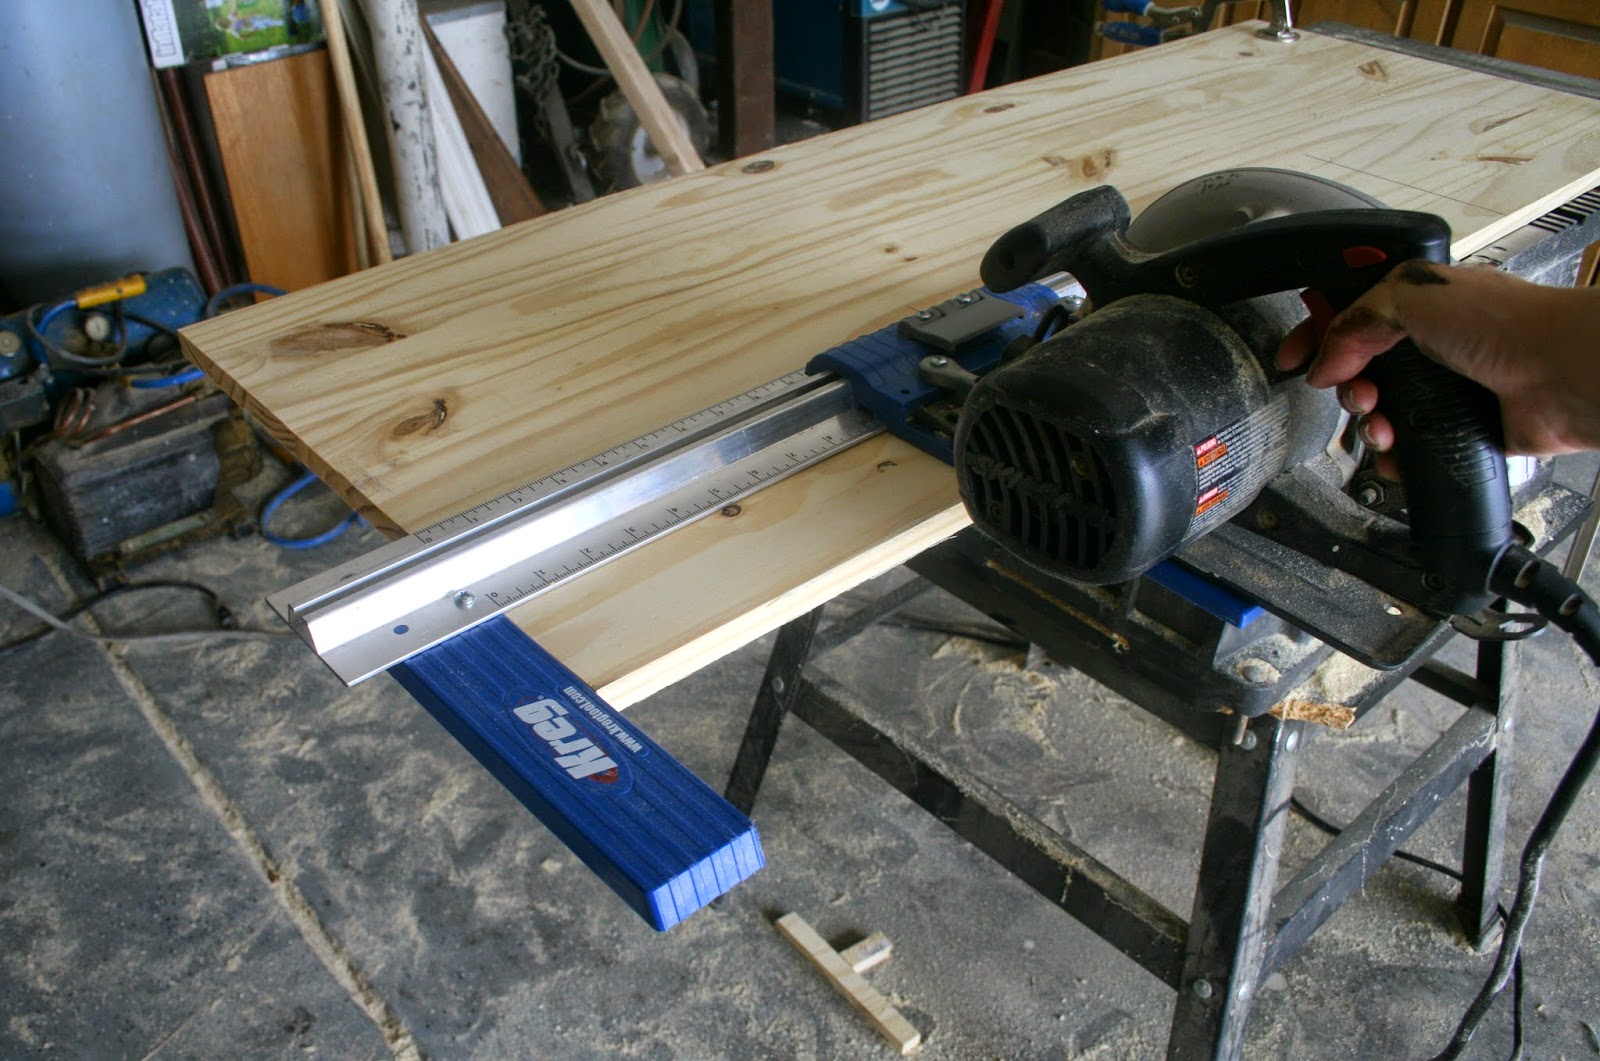
Start with your 1 x 18 boards. Of course 18″ is the “nominal” width; they should actually measure 17 1/4″ wide. Cut both boards down to 46″ in length using a either a table saw or a circular saw attached to a cutting guide, like the Kreg Rip-Cut™.
Next, cut the 1 x 4’s to length. On each 13 3/4″ piece, drill 3, evenly spaced pocket holes on the same side on each end.

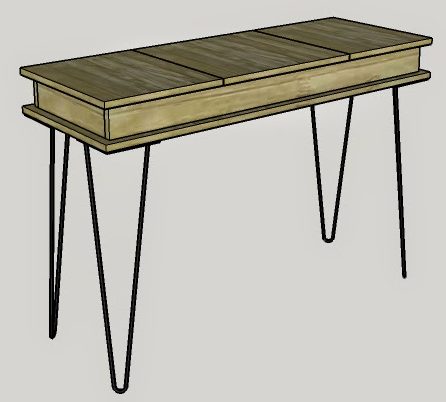
Take your first 1 x 18, and draw a line 1″ from all 4 sides. Line up the 44″ 1 x 4’s along the line and attach them via 2 1/2″ wood screws from the bottom, making sure to pre-drill and countersink.
Now, attach one of the shorter 1 x 4’s, parallel and flush with the ends of the longer boards, using 1 1/4″ pocket hole screws.

Measure 11 7/8″ from the inside of each end board and make a mark. Line up the outer edge of another 13 3/4″ 1 x 4, check for square, and connect with 1 1/4″ pocket hole screws. Repeat the process, measuring from the inside of the other end board. When you are done, you should have two, 11 1/8″ wide sections and one, 17 1/4″ section.

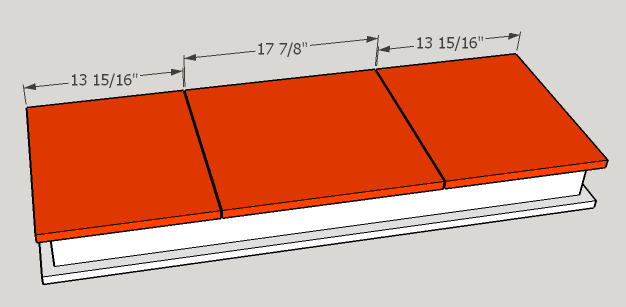
Now, you need to cut the doors. Take the second 1 x 18 board, and measure 14″ from either end and draw a line. Those lines are where you need to make your cuts. You can do it with a table saw.
The saw blade will remove 1/8″ of material, so when you have made both cuts, you will be left with two 13 15/16″ sections of board and one 17 7/8″ section of board. Don’t panic if your doors aren’t the exact same measurement as mine. As long as you’re close and the two outside doors are the same, you’ll be fine.
At this point, I recommend applying the finish to the vanity box, and both sides of the doors. It will much harder to paint or stain with the doors attached. I gave my wood a cool, medium stain with a couple coats of a dark toner, and sealed everything with 3 coats of lacquer.
To attach the doors, you will need a pair of full overlay cup hinges for each door. I know they sound scary, but they really aren’t too bad! I’m always scared to drill two huge holes into the underside of my door, but the little guide that comes with the drill bit kit makes it easy to line everything up.

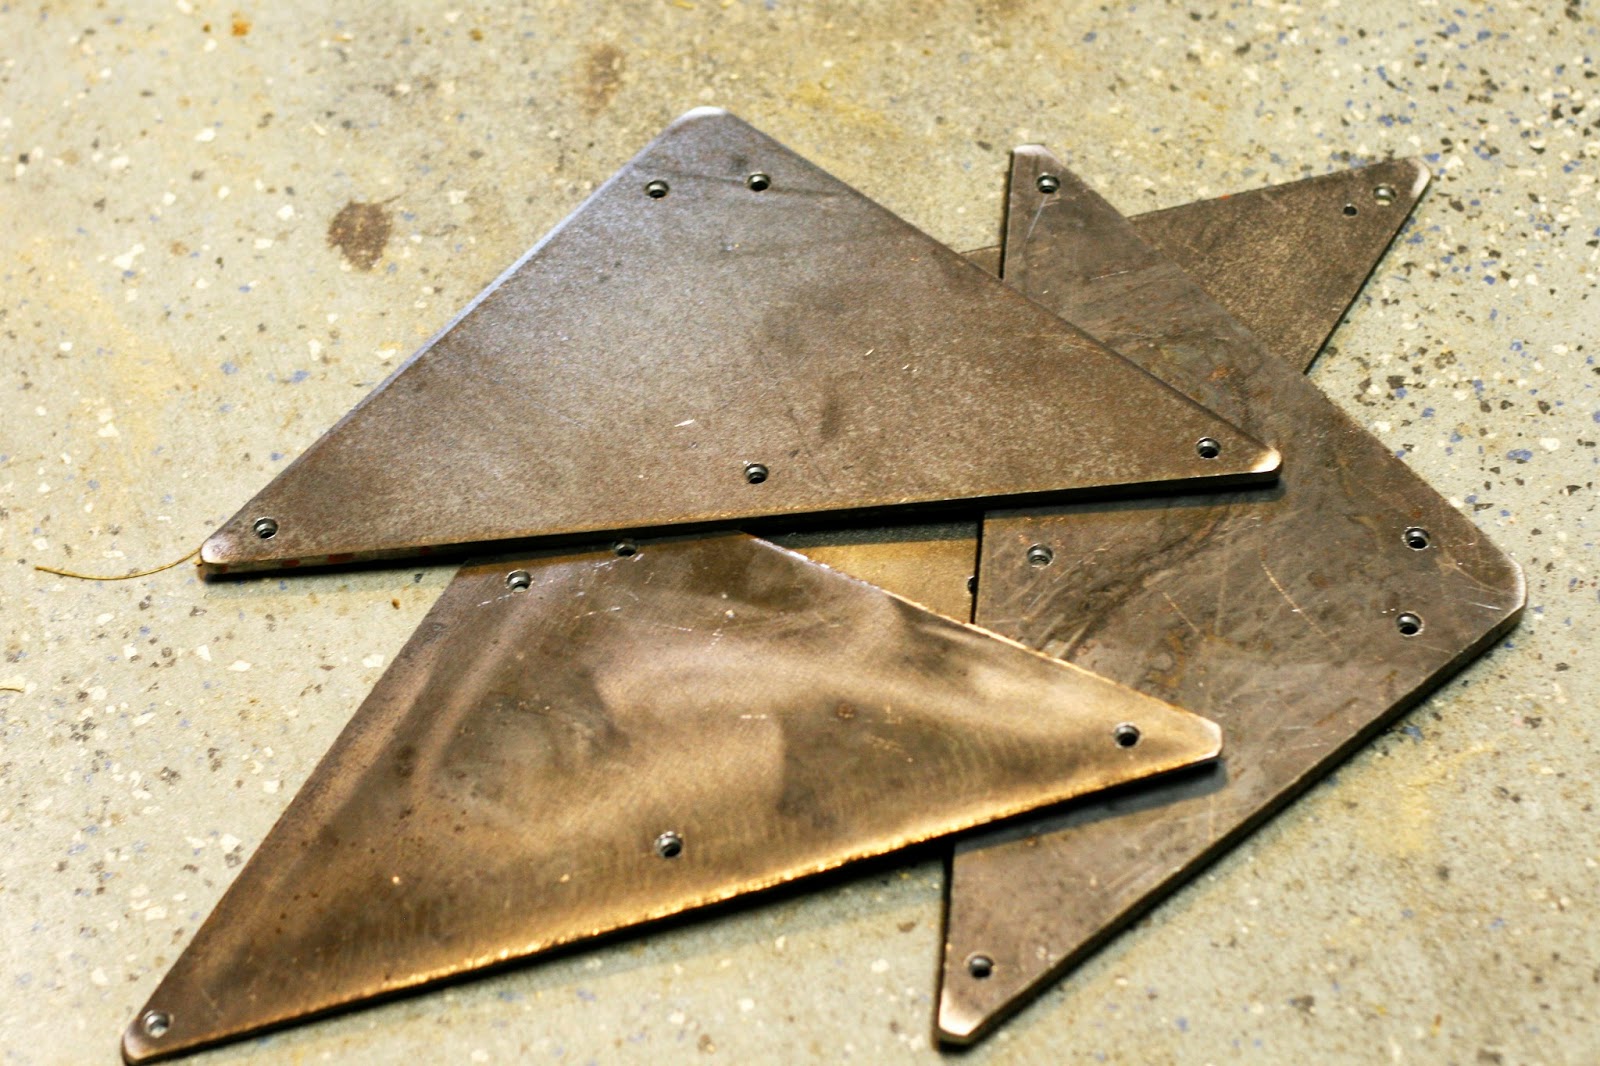
Time to address the legs. I made four, 26″ DIY hairpin legs out of pre-cut 3/16″, 8″ steel triangles. I picked up the steel from a local metal supplier and the materials for all four legs only cost me around $24. Google “metal supply” in your area and I guarantee you’ll find a local distributor who is open to the public.
If you’re not feeling like creating DIY hairpin legs, you can definitely buy them. I found a website that sells 26″ height legs with pretty quick turnaround (here).
To attach the legs, flip the vanity over. Line up each leg, 1/8″ from the edge of the wood, and attach with 5/8″ #8 wood screws.

Now you can flip it right side up. Open the middle door and attach a mirror to the underside. I actually used an inexpensive, dollar store mirror left over from another project.
And, you’re done!
I’m really happy with how it turned out!


The original plan can be found at http://www.pneumaticaddict.com
![]() [email_link]
[email_link]