Aquarium Cabinet

A sturdy cabinet that could be used for just about anything… A TV Stand, console, or in this case an aquarium.

Materials needed:

  • 3/4″ plywood (1/2 Sheet)
  • 1/4″ plywood (1/4 Sheet)
  • 1 – 2x10x8 Spruce
  • 3 – 2x4x8 Spruce
  • 2 – 2x2x8 Spruce
  • 2 – 1x3x8 Spruce
  • Cove moulding
  • Crown moulding
  • Base moulding
  • 2 – sets of hinges
  • 2 – knobs/ or pulls
  • 2 1/2″ pocket hole screws
  • 1 1/4″ pocket hole screws
  • Brad nails
  • Wood Glue
  • Wood Putty

Step 1: Build the sides of the Cabinet

What makes this cabinet sturdy, is its frame made mostly of 2×4’s. This cabinet ended up being 32″ tall x 36″ wide x 16 1/2″ deep overall. If you wanted a deeper or taller, change these dimensions as you wish.

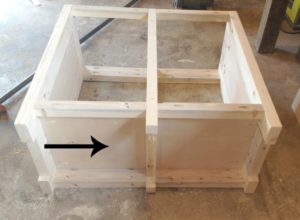
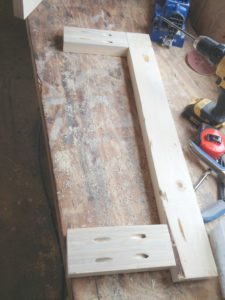
First step is to cut four 2×4’s at 30 1/2″ long and four pieces at 7″ long. Then, I assembled two sides like shown using pocket holes and screws. I attached the bottom 2×4 an inch from the bottom

Before attaching the other 2×4 in the frame, I added a piece of 3/4″ plywood to fit in the opening. It’s best to measure and cut exactly to fit, but it should be 7” wide x 22 ½” long.

Lastly, I attached the last 2×4 to complete the two side panels attached using pocket holes and screws.

Step 2: Build Middle Support

To help hold the weight in the middle, I built another frame piece from 2x2s. The two legs should be 30 1/2” long and the two “stretchers” should be 11” long. I attached the bottom stretcher 2 1/4” from the bottom. Assemble this using pocket holes and screws.

Step 3: Assemble the Cabinet

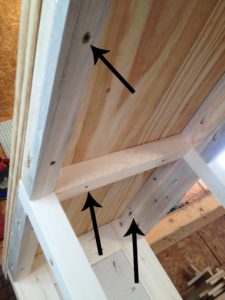
Now, it was time to attach all three of these pieces together. I cut 4 pieces of 2×4 and 4 pieces of 2×2 all at 13” long and drilled pocket holes in both ends of each piece. . I used 2×2’s in the back and 2×4’s in the front and assembled as shown.

First I attached one side panel to the middle support, then attached the other side panel to that using pocket hole screws. I attached the bottom 2×4’s in the front 1” from the bottom and the back bottom 2×2’s 3” from the bottom. (Note: this view is looking from the back.)

Step 4: Add the bottom

I cut a piece of 3/4″ plywood to fit in the bottom of the cabinet. This should be about 11” x 27 1/2”. I drilled pocket holes in both ends and screwed it in place into the two side panels. It should sit right on the bottom piece of the middle support.

Step 5: Attach top

I used a 2×10 to build a top for the cabinet. I made it 36” long and 16 ½” wide. You can use a circular saw or table saw to trim it down to size. Once the top was together, I screwed it in (making sure it was centered side to side) using 2 ½” screws through the back top supports, the middle top support and “toe-nailed” (drove in at an angle) through the front top 2×4.

Step 6: Add the Doors

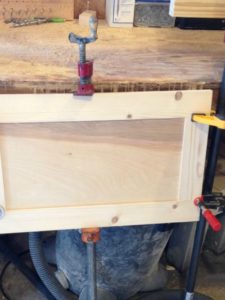
I made the doors 14” wide and 23 ½” tall. You can see my post here.

Step 7: Add trim and mouldings

Finally, I added crown molding around the top, base around the bottom, and cove to the insides of the side panels. (Note: I added the cove and base before the top…it doesn’t matter whether you do it before or after except for the crown molding.)

Step 8: The finish

I puttied and sanded where needed then, I stained the cabinet in Minwax Golden Oak and polyed with Minwax Polycrylic. I attached the doors with simple overlay hinges and added these pulls from D Lawless Hardware to the doors to match the black hinges I used.

I didn’t add a back, because I wanted to hide the extension cord and power strip in the cabinet, but if you wanted a back, just staple or nail some 1/4” plywood on the back side.

This plan can be originally found at https://www.woodshopdiaries.com/diy-aquarium-cabinet-stand/
[email_link]

Aquarium Stand

Materials:

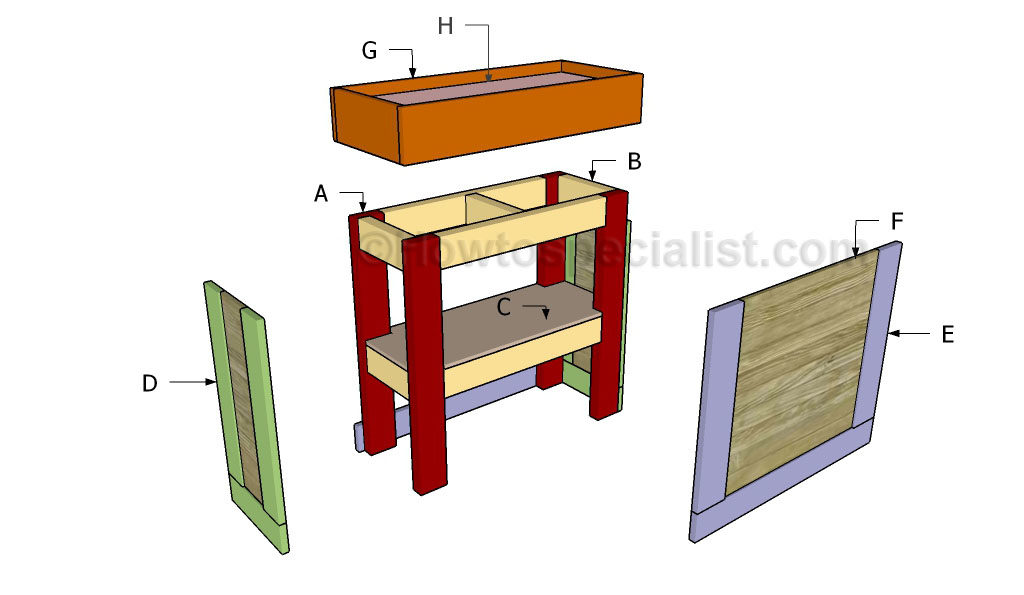
  • A – Legs – 4 pieces of 2×4 Lumber – 29 1/2″ long
  • B – Frame – 4 pieces of 2×4 Lumber – 23 1/2″ long
  • C – Shelf – 1 piece of 3/4″ plywood – 30 1/2″ x 11 3/4″
  • D – Trims – 2 pieces of 1×4 Lumber – 1 @ 22 1/4″, 1 @ 12 1/4″
  • E – Trims – 2 pieces of 1×4 Lumber – 1 @ 22 1/4″, 1 @ 32″
  • F – Panels – 2 pieces of 1/2″ plywood – 1 @ 5 1/4″ x 22 1/4″, 1 @ 22 1/4″ x 23 1/2″
  • G – Top Trims – 4 pieces of 1×6 Lumber –  2 @ 22 1/4″, 2 @32″
  • H – Tabletop – 1 piece of 3/4″ plywood – 12 1/4″ x 30 1/2″


Directions:

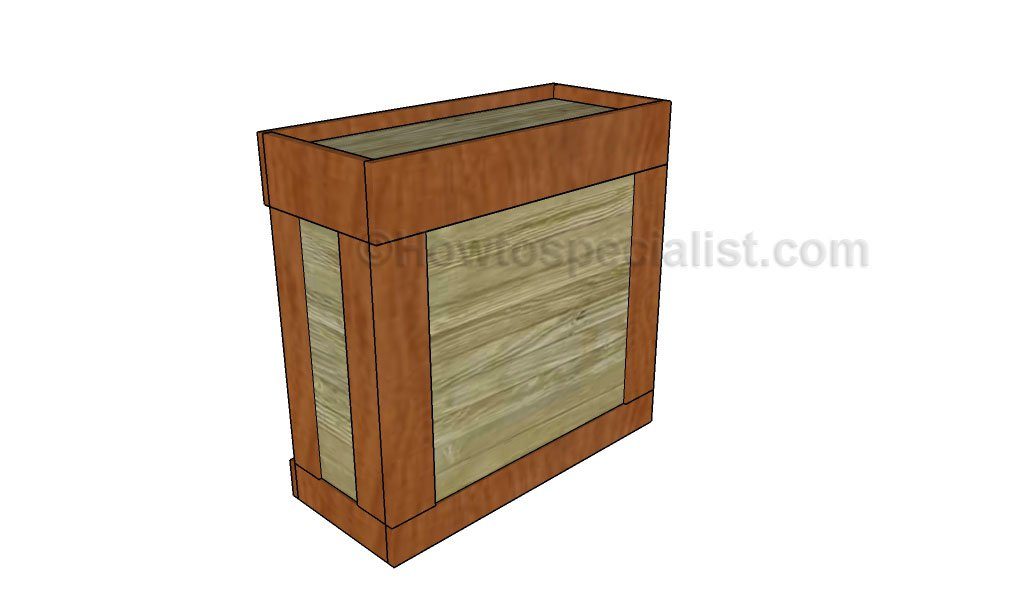
The first step of the woodworking project is to build the faces for the aquarium stand. As you can easily notice in the diagram, we recommend you to build the components out of 2×4 lumber. Take accurate measurements and drill pilot holes at both ends of the horizontal components. Insert 2 1/2″ screws after making sure the edges are flush and the corners are square. Add glue for a proper bond.

Next, you have to lock the faces of the stand together, as in the diagram. Cut the components out of 2×4 lumber and drill pocket holes at both ends. Fit the components between the faces and lock them together using 2 1/2″ screws. Make sure the corners are square and the edges flush.

Build the bottom shelf out of 3/4″ plywood. Mark the cut lines on the sheet of plywood and get the job done with a circular saw. Smooth the edges and check if the notches are cut out properly.

Fit the shelf to the structure and lock it into position by using a few brad nails. You could add glue to enhance the bond of the components. In addition, we recommend you to make sure the edges are perfectly flush one with another.

Building the front wall for the aquarium stand is a straight forward process. Therefore, use lumber for the  frame and 1/2″ plywood for the main panel. Drill pocket holes at both ends of the vertical supports and secure them to the top and bottom trims by using 1 1/4″ screws. Drill pocket holes along the edges of the plywood panel and secure it to the frame by using galvanized screws and glue.

Build the side walls in the same manner described above. Just make sure you adjust the size of the components as in the diagram. Check if the corners are square and make sure there are no gaps between the components.

Continue the project by attaching the exterior walls to the frame. Align the components with great care and secure the panels to the frame studs by using finishing nails. The edges should be perfectly flush for a professional result.

In order to enhance the look of the aquarium stand, you have to attach the trims to the back of the structure, as shown in the diagram. Secure the trims to the structure using brad nails and glue.

One of the last steps of the project is to attach the top component to the stand, as described in the diagram. Cut the piece of plywood at the right dimensions and secure it to the cleats using brad nails and waterproof glue.

Last but not least, we recommend you to take care of the finishing touches. Fill the holes with wood filler and let it to dry out for several hours. Afterwards, smooth the wooden surface with fine-grit sandpaper and vacuum the residues.

This plan can be originally found at http://howtospecialist.com/finishes/furniture/how-to-build-an-aquarium-stand/

[email_link]

Aquarium Stand


Materials:

  • A – Frame – 5 pieces of 2×4 lumber – 2 @ 30 1/2″ long, 3 @ 9 1/4″ long
  • B – Legs – 4 pieces of 2×2 lumber – 26″ long
  • C – Sides – 4 pieces of 1×2 lumber – 9 1/4″ long, 2 pieces of 3/4″ plywood 9 1/4″ x 26″ long
  • D – Front Face – 2 pieces of 1×2 lumber – 27 1/2″ long, 1 piece of 3/4″ plywood 26″ x 27 1/2″ long
  • E – Supports – 2 pieces of 2×2 lumber – 27 1/2″ long
  • F – Bottom – 1 piece of 3/4″ plywood – 9 1/4″ x 27 1/2″ long
  • G – Top – 1 piece of 3/4″ plywood 12 1/4″ x 30 1/2″ long
  • H – Trims – 4 pieces of 1×6 lumber – 2 @ 12 1/4″ long, 2 @ 32″ long

Directions:

The first step of the project is to build the frame for the tabletop. As you can easily can notice in the diagram, use 2×4 lumber for the components. Cut the components at the right dimensions and drill pocket holes at both ends of the short components. Make sure the corners are square and insert 2 1/2″ screws to lock them together tightly.

Build the side panels out of 3/4″ plywood. Attach the 1×2 cleats to the top and bottom of the panel, as described in the diagram. Add glue to the joints and insert 1 1/4″ finishing nails to get the job done in a professional manner.

Drill pocket holes along the sides and top edges of the plywood panels and secure them to the 2×2 legs using 1 1/4″ screws. Add glue to the joints and leave no gaps between the components.

Build the front panel out of 3/4″ plywood and the supports out of 1×2 lumber. Use glue and 1 1/4″ brad nails to lock the supports to the panel. Drill pocket holes along the sides and top edges. Fit the front panel to the side panels and insert 1 1/4″ screws to lock them together tightly. Make sure the corners are square before inserting the screws.

Continue the project by fitting the 2×2 supports to the face of the fish tank stand. Drill pocket holes at both ends of the supports and secure them to the sides using 2 1/2″ screws. Make sure the corners are right-angled.

Continue the woodworking project by attaching the frame to the top of the structure. Align the edges with attention, making sure they are perfectly flush. Insert 2 1/2″ screws through the top of the stand into the 2×4 frame. Leave no gaps between the components and add glue to enhance the rigidity of the structure.

Use 3/4″ plywood to build the top of the aquarium stand. Smooth the edges with sandpaper and attach it to the frame using glue and 1 1/4″ brad nails.

Use 1×6 lumber to build the trims for the top of the stand. Attach the trims to the frame of the stand using 1 1/4″ brad nails and glue. Make sure the corners are square and leave no gaps between the components.

Build the cleats out of 1×2 lumber. Drill pocket holes at both ends of the components and secure them to the structure using 1 1/4″ screws. Check if the corners are right-angled before inserting the screws.

Build the bottom of the stand out of 3/4″ plywood. Smooth the edges with 120-grit sandpaper and fit the sheet to the bottom cleats. Insert a few 1 1/4″ brad nails to lock the sheet to the cleats.

Build the doors panels out of 3/4″ plywood and the frames out of 1×2 lumber. Cut the components at the right dimensions and secure them to the plywood panels using 1 1/4″ brad nails and glue. Leave no gaps between the components and make sure the edges are perfectly flush.

Fit the doors to the opening and secure them to the side using hinges. Leave 1/8″ around the doors and install a magnet door stop. Fit nice handles and then take care of the finishing details.

One of the last steps of the woodworking project is to take care of the finishing touches. Therefore, fill the pilot holes with wood putty and smooth the surface with 120-grit sandpaper.

This plan was originally found at http://myoutdoorplans.com/furniture/fish-tank-stand-plans/

[email_link]