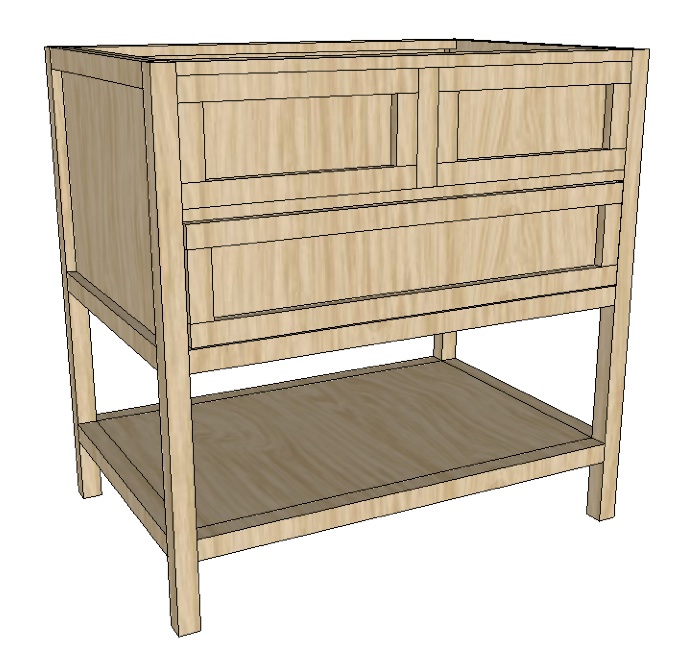
Simple Sink Console

Shopping List:

Wood:

  • 4 – 1×2 @ 8 feet long
  • 1 – 1×3 @ 6 feet long
  • 1 – 1×6 @ 6 feet long
  • 1 – 1×8 @ 10 feet long (NOTE: It is very important that your 1×8 is 7 1/4″ wide.  If it is not, purchase a 1×10 and rip it down to 7 3/4″.)
  • 2 – 2×2 @ 8 feet long
  • 1 – 2×2 @ 10 feet long
  • 1 – scrap of 1/4″ plywood at least 32″ x 12″
  • 1 – 1/2 sheet of 3/4″ plywood

Hardware and Supplies:

  • 3 – Knobs or Drawer Pulls
  • 1 – set of 12″ Bottom Mount Drawer Slides
  • 1 1/4″ Pocket Hole Screws
  • 2 1/2″ Pocket Hole Screws
  • 1 1/4″ Regular Wood Screws
  • 1 1/4″ Finishing Nails
  • Wood Glue
  • Wood Filler
  • Medium Grit Sandpaper
  • Primer or Wood Conditioner
  • Paint or Stain

Cut List:

Boards:

  • 6 – 1×2 @ 4 1/2″ – Drawer Trim (short)
  • 1 – 1×2 @ 7 1/2″ – False Drawer Trim (center)
  • 4 – 1×2 @ 15 3/4″ – False Drawer Trim (long)
  • 2 – 1×2 @ 32 3/4″ – Drawer Trim (long)
  • 1 – 1×2 @ 33″ – Front Trim
  • 4 – 1×2 @ 21 1/2″ – Side Trim
  • 2 – 1×3 @ 33″ – Vanity Top Trim
  • 1 – 1×6 @ 32″ – Drawer Back
  • 2 – 1×6 @ 11 1/4″ – Drawer Sides
  • 1 – 1×8 @ 32 3/4″ – Drawer Front
  • 1 – 1×8 @ 33″ – False Drawer Front
  • 1 – 1×8 @ 33″ – Back Support
  • 2 – 2×2 @ 33″ – Bottom Shelf Trim (long)
  • 2 – 2×2 @ 21 1/2″ – Bottom Shelf Trim (short)
  • 4 – 2×2 @ 35 3/4″ – Legs
  • 1 – 2×2 @ 33″ – Bottom Drawer Divider

Plywood:

  • 1 – 1/4″ Plywood scrap @ 32″ x 12″ – Drawer Bottom
  • 1 – 3/4″ Plywood @ 33″ x 21 1/2″ – Bottom Shelf
  • 2 – 3/4″ Plywood @ 21 1/2″ x 18 1/4″ – Sides

General Instructions:

Make sure to re-measure and check for square after every step.  Sometimes when building your measurements can be off very slightly, and it’s important that your numbers are exact.  (Especially when working with doors and drawers!)  Measure your available space before building this plan to make sure that it will fit.  Please read through the entire plan before getting started.

Plywood Cuts:

Here is a basic cutting diagram for your 3/4″ plywood.  When you purchase your plywood, have them cut the piece lengthwise at 21 1/2″.  That way, when you get it home, you only have to make one cut per piece.  (Plus, if you’re like me with our Matrix hatchback, this way it will actually fit in your car!)

Step 1:

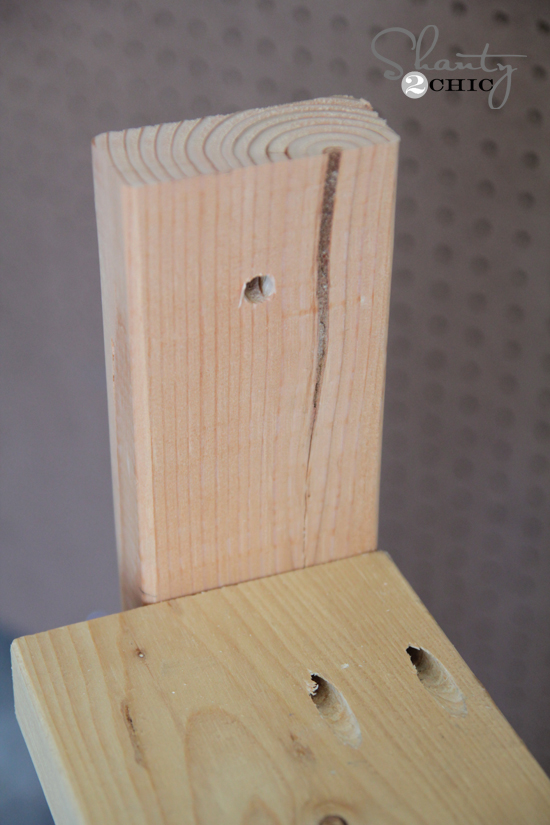
Assemble the side of the vanity as shown above.  Make sure that there is a 3/4″ gap between the front of your plywood and the edge of the 2×2.  Also, make sure that your pocket holes go on the inside of what will be the cabinet, I just marked them on the outside so that you could better see where they go.

Step 2:

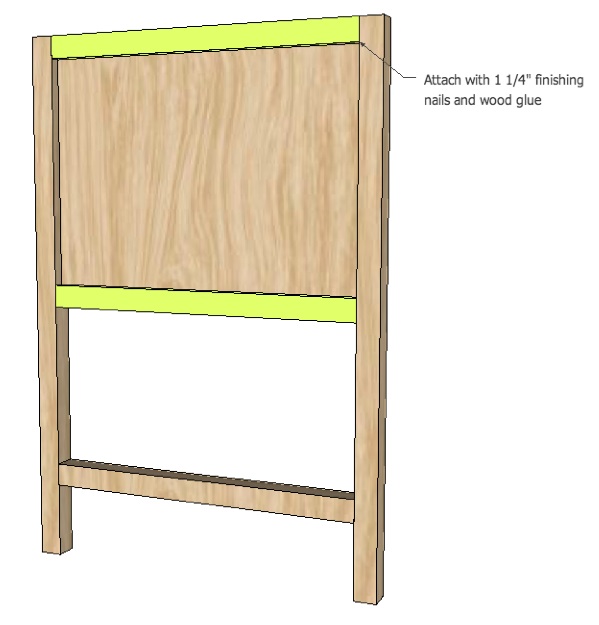
Add trim to the top and bottom edge.  Repeat steps 1 and 2 for the second side.

Step 3:

Here’s the fun part where it starts to look like something.  Attach the shelf, back support, and one of the pieces of the vanity top trim as shown above.

Step 4:

Add 2×2 bottom shelf trim using the pocket holes that you pre-drilled in the previous step.  (It will be easier if you flip the whole piece over while completing this step.)  The top of the 2×2 should be flush with the top of your plywood.

Step 5:

Flip your sink console so that you are now working on the front side.  Make sure to drill your pocket hole screws on the INSIDE to hide them.  Leave a 3/4″ gap on the front of your false drawer front to allow for trim in the later steps.

Step 6:

Add your second piece of top trim above your false drawer front.  The front of the 1×3 should be flush with the edges of your 2×2 legs.

Step 7:

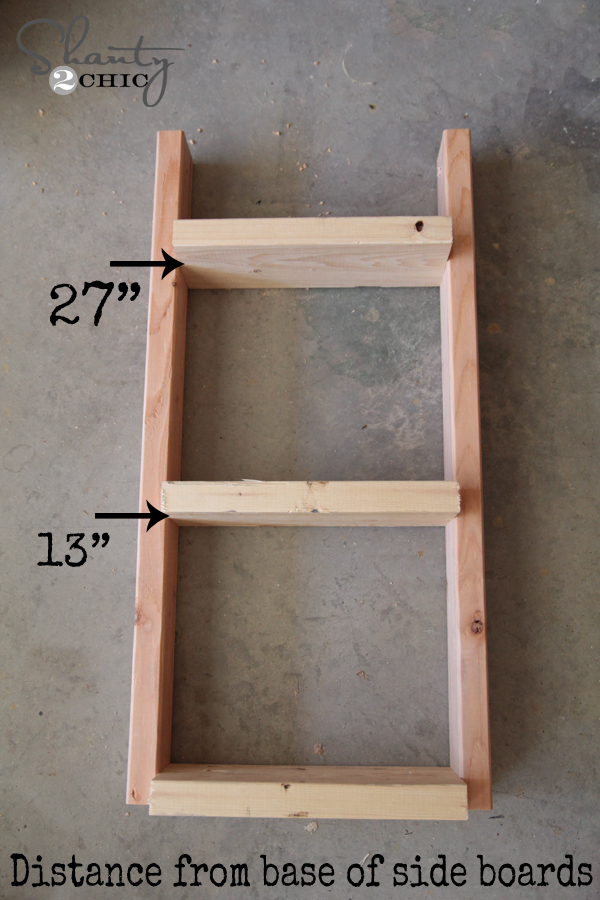
When adding the bottom drawer divider, it is important that your measurements are exact.  Before adding this piece, double check the width of your 1×8 drawer front to once again confirm it is 7 1/2″ wide.  Some of them come as 7 1/4″, which is why I notated in the shopping list to make sure your board is wide enough.

A trick to making sure your board is exactly 7 3/4″ from the bottom of your 1×2 is to cut a scrap piece of wood to 7 3/4″ and use it as a “spacer” while screwing in your bottom drawer divider.

Step 8:

Build your drawer interior as shown above.

Step 9:

Install your drawer slides and insert your drawer.  When installing your slides the interior of the drawer should sit right behind your 2×2 bottom drawer divider, leaving room for your drawer front and trim. To install your drawer front, center it into the space, leaving a 1/8″ gap all the way around it, and secure it with finishing nails.  Once it’s tight enough to pull out, remove the drawer and further secure it using the pocket hole screws that you pre-drilled in the previous step.

Step 10:

Add all of your drawer trim. Once you have finished your piece, add your knobs/drawer pulls.

Finishing:

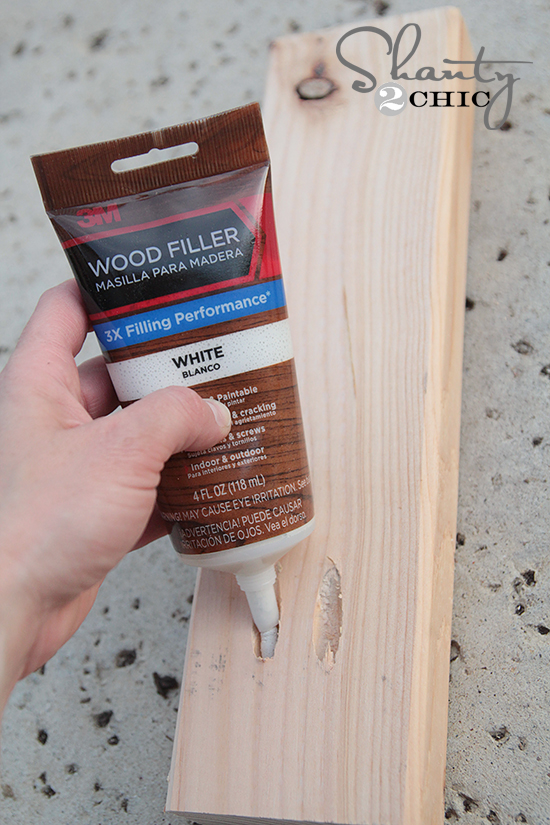
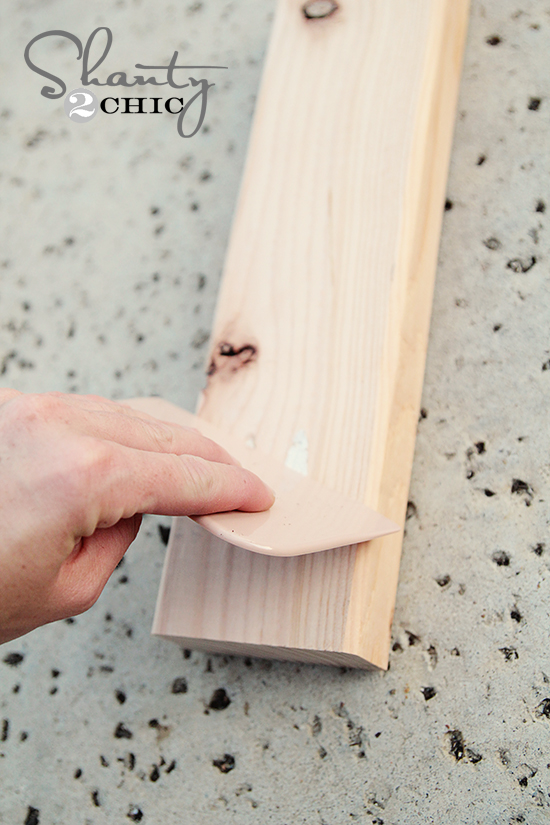
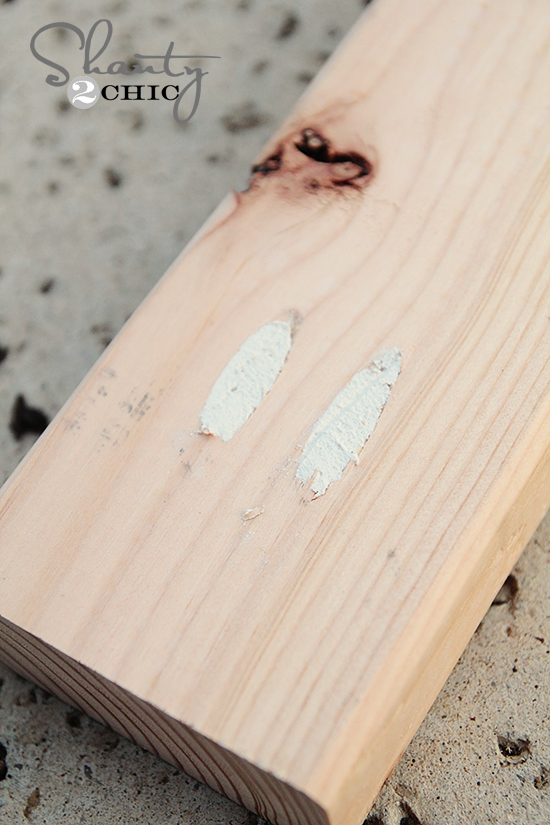
Finish your project as desired.  Make sure to sand it down with medium grit sand paper and fill in all your holes with wood filler before tackling that paint or stain.

The original plan can be found at http://www.oldpaintdesign.com/2012/05/28/simple-sink-console/

 
[email_link]
 

Hanging Bathroom Shelf

Supply List:

  • 1 – 2x4x8 whitewood or pine board
  • 1 – 2x6x8 whitewood or pine board
  • Rope

Cut List:

  • (2) – 2 x 4 @ 40” long
  • (3) – 2×6 @ 21” long

I used my Kreg Jig to attach my shelf.  This is super easy to do. If you don’t own a Kreg Jig (yet) you can also attach the boards by using 2.5″ wood screws through the outside boards and into the 2×6 shelf boards.  If you do this, make sure to pre-drill first, and cover the head of the wood screw with wood putty before staining.

You can see here I have set my measurements to 1.5″ pocket holes because I am joining 2×4 wood and the thickness of the wood is 1 1/2″. I put my pocket holes in my 2×6 boards.  This is what they looked like all finished and ready to attach.

Next I used 2.5″ pocket hole screws to attach the pieces all together.  Here are the shelves attached. One is at the base, one is 13″ from the bottom and the other is placed at 27″ from the bottom.

I have found a great way to fill pocket holes and other holes is using 3M Wood Filler! Just squeeze some out into each hole.

Use a scraper to even it out.

Next I used my drill to place a 3/8″ hole in the top of each side piece.

To finish this shelf, I used one of my very favorite stains. Rust-Oleum Ultimate Wood Stain in Dark Walnut. You just brush it on with a foam brush and use an old rag to wipe it off… Easy!  You can find this stain at Lowe’s or Walmart.

Finally, I used a piece of sisal rope which I also found at Lowe’s to hang it on the wall.  I just ran the ends of the rope through the holes at the top of the shelf and tied knots on each end.  I used good anchors in my wall since I wasn’t attaching this to a stud.  I found my hook at Lowe’s

The original plan can be found at https://www.shanty-2-chic.com/2013/08/bathroom-shelf.html

 
[email_link]
 

Bathroom Shelf

My boys’ bathroom is a disaster, so my #OrganizeBuildChallenge submission is a shelf/ towel bar hybrid, combining wood, paint, and clear acrylic sheets. Although the idea of a new material, like acrylic, may seem intimidating but I promise you, it went together so easily! The whole project took me a single afternoon.

Materials List:

  • (2) 5-1/2″ x 18″ x 3/8″ acrylic sheet
  • (1) 1 x 6 x 72″ – wood board
  • (1) 1-3/8″ x 48″ – wood closet rod
  • (1) 3/8″ x 12″ – wood dowel
  • (8) *2″ wood screws
  • (8) *screw head covers
  • (4) *3/4″ L-brackets


Cut List:

  • (2) 1 x 6 @ 36″
  • (1) 1-3/8″ closet rod @ 38-3/4″
  • (2) 3/8″ wood dowel @ 2-1/8″

Step 1:

Cut and finish your pieces and allow to fully dry. You can cut the acrylic sheets yourself, or request them to be cut from your supplier. I found a company on Ebay which was inexpensive and didn’t charge for cutting.

Step 2:

Start by drilling and prepping your acrylic side panels. Leave the protective film on the acrylic as long as you can. Measure 2″ from the bottom edge, and center between the sides and make a mark. Using a 1-3/8″ forstner drill bit, make a hole.

Step 3:

3/8″ from the top edge, pre-drill two holes though the acrylic and into the ends of the first wood board. Counter-bore the holes and attach the pieces with 2″ wood screws.  Measure 10″ down from the bottom side of the first shelf and align your second board. Pre-drill, counter-bore and attach with screws.

Step 4:

A cool and simple way to address the exposed screw heads is to cover them with screw head caps. I found a set of matte black covers for $0.29 at local True Value.

You just simply tap them into place and the screws instantly look much better.

Step 5:

Insert the finished closet rod through the holes, leaving 1″ overhang on each end. Drill a 3/8″ hole, vertically through the rod, just outside the acrylic.

Step 6:

Use a mallet to tap wood dowel pins till centered through holes.

Step 7:

The shelf is built and ready to hang on the wall. To mount my shelf, I attached four, 3/4″ L-brackets to the wall, then placed and attached the shelf.

And here’s the final look!

The original plan can be found at http://www.pneumaticaddict.com/2016/01/wood-and-acrylic-bathroom-shelf.html

 
[email_link]

Bathroom Shelf

Material List:

  • 1 – 4×8 sheet of Luan
  • 2 – 2×8 @ 8’ long
  • 1 box of 3” screws
  • 6’ trim board
  • 1 – 1×2 @ 8’ long

We cut the 2×6 boards according to the dimension on the plan below.  Pre-drilling the holes is essential to being able to put the whole project together without and gaps.  So line up all of the boards and mark where they should be drilled.

Tip: If you start with the center shelves first you will have plenty of room to tighten the screws.  Then add the remaining boards to complete your shelf unit.

When all of the shelves are in place cut the piece of plywood for the back.  Make sure the shelf is square, then nail the plywood to the back of the shelf.

At the very top of the shelf you will need to cut three pieces of the 1×2 material and secure it to the inside of the unit (salmon colored board in the drawing above).  This is to give us something to secure it to the wall with when we are ready to put it in place.  These 3 pieces can be secured with screws from the top down.

Finally we are ready to cut that trim board and place it around the top of the finished shelf.  Paint or stain your masterpiece and let it dry.  Locate the studs where you want to hang it and pre-drill holes in the 1×2’s at the appropriate locations.  You can use those 3 inch screws to mount it in place.


The original plan can be found at http://dadbuiltthis.blogspot.ca/2012/11/bathroom-shelf.html

 
[email_link]

Bathroom Storage Cabinet

Its a perfect mix of open shelving and hidden storage for the ugly stuff you don’t want to display, plus it’s super easy to build.

Cut List

Step 1:

Drill for 1-1/4” pocket screws along the ends and top edges of both the top front and top back rails as shown. Attach the top front and the top back brace rails to the vertical side boards with screws and wood glue. The pocket holes along the top edge will be used to
attach the top later on. Attach the rails with the pocket screws facing out. You will cover up the front pocket holes with a face frame and you want the back to have the clean face facing inwards.

Step 2:

Drill for 1-1/4” pocket screws in the bottom shelf and the bottom rail brace as shown. First attach the bottom shelf with wood glue and screws so that the top of the shelf is 1-1/2” (or the thickness of your 1” x 2” board for the bottom of the face frame) from the bottom as shown. Then attach your bottom brace rail with the pocket screws facing outward as shown.

Step 3:

Cut the side face frame pieces and the top and bottom face frame pieces to fit the box you made in steps 1 and 2. Create your face-frame as shown, drilling for 1-1/4” pocket screws and attaching with wood glue and screws. Make sure the faces and edges of the boards are all flush.

Step 4:

Attach the face frame with wood glue and 1-1/4” brad nails. Make sure the outside, top and bottom side edges are flush with the face frame.

Step 5:

Drill for 1-1/4” pocket screws along the sides and front edges on the bottom of the remaining two shelves. Attach with wood glue and screws; making sure the top of the shelves are flush with the shelf face frame rails.

Step 6:

Cut your plywood back panel to fit so that it will be flush top and bottom and 1/8” shorter on both sides of the box you’ve created. Attach with staples so that the orientation of the staples run vertical. With the back panel cut narrower you should still have about 1/2” of the side panel edges to staple into. See detail.

Step 7:

Hold your 1” x 12” board on top of your cabinet, flush with the back. Measure how far forward the board hangs over the front and cut the length so that the over hang is equal on all sides. Attach with wood glue and pocket screws through the holes you drilled earlier in step 1.

Step 8:

Attach your cove molding by first cutting a 45 degree miter cut at one end. Then hold the piece up to the front with the mitered end at one end. Mark the other for length and cut the opposite mitered 45 degree cut. Now cut a mitered cut into a piece slightly longer than
the side. Hold that piece and the front piece in place and mark the length of the side piece where it touches the back end of the side board, NOT THE BACK OF THE PLYWOOD PANEL. Make a straight cut on the other end of the side molding. Now repeat with the other side and dry fit the three pieces. Once you are happy with the corner mitered cuts attach with wood glue and 3/4” brad nails. Repeat adding the molding on the bottom but fl ip the molding so that the fl at end is on the bottom.

Step 9:

Attach the plate for the sliding door according to the instructions that came with the hardware. Basically, the instructions will give you measurements for screw and plate placement. The kit should have a spacer and screws and be attached similarly as shown.

Step 10:

Taking into account the length of the door sliding hardware and how it sits on the plate will determine the length of your door slats. Take some time and take careful measurements. You basically want the door to be about 3/4” shorter than your cabinet when it is hung. If for some reason it comes out a bit too long you can always run the finished door across your table saw, or use a radial hand saw, and trim it to the proper length. To attach the door slats together you will drill for 1-1/4” pocket screws as shown. When laying out the boards take notice of the circular motion of the end grain on the edge of your board. You want to alternate the end grain as shown in the detail above. This will help the door not to cup and warp over time. Attach with wood glue and screws.

Step 11:

Attach the door hanging hardware according to the instructions that came with the hardware. As an added, decorative element we attached a metal strapping across the bottom as shown. You could instead use a door pull or simply nothing at all.


The original plan can be found at https://www.shanty-2-chic.com/2016/01/diy-sliding-barn-door-bathroom-cabinet.html

 
[email_link]

Bathroom Cabinet

We have a small master bathroom and needed some more storage space. The logical place ended up being above the toilet. Rather then just bolting a cabinet to the wall I wanted a little more style and this standing cabinet seemed to fit the bill just perfectly.
This project has been a long time coming. I started it earlier this year but other things kept getting in the way. Now that it’s done I’m very pleased with the way it turned out. From my original design this cabinet has had numerous changes and not all of them well documented. The difficult part now is remembering how I built it so I can share it with you. Like most of my projects I started with a 3D CAD drawing that I generate in Rhinoceros, this helps me get dimensions and see how things are going to fit together.
While it looks like a difficult project it’s really pretty easy. It’s made up of four parts the stand, the cabinet and two doors. I’ll give you some options as we go through this that may change the way you build your cabinet so let’s get started.

We’ll start with the legs for the stand. They are made from 5/4″ straight grain fir. I glued two 6″ X 96″ X 5/4″ pieces together, first rolling the glue on both pieces of wood.

I like Titebond glue but you have to work quickly if you use Type II. Next I clamped the dickens out of it and let it dry overnight.

I like Titebond glue but you have to work quickly if you use Type II. Note: You could cut the boards in half before you glue, it works either way. Next I cut the boards in half and then cut them down to 2” x 2”.

I used my Freud Glue Line Rip blade because it produces nice clean edges that require little sanding. I also use it because I don’t have a jointer.

Now cut the legs to length. Mine are 38” long because we are going to put in a “comfort height” toilet. If you are making this for a standard toilet you’ll probably want to make them a little shorter

To cut them to the exact length I clamped a board to my tablesaw 38” away from the blade and it stops just before the wood enters the blade, this prevents any possible binding and kick back. Using the taper jig I made, I tapered the last 8 ¾” of each leg down to 1 ½” square

Round the edges of the legs using a 3/8” roundover bit in your router. Next I cut the cross pieces and end pieces out of clear ¾” pine. The top front, top back and leg spreader are all 22 ¼” x 2 ½”. The four end pieces are 6 ½” x 2 ½”

Now we’ll cut the mortise and tenon’s. I start with the cross pieces and then the legs, this allows me to precisely align the location of the mortise.

It is important to make good clean tenon’s so measure them carefully. I set my tablesaw blade to 3/16” verifying it with a piece of scrap wood.

Set the fence ¾” from the blade and cut all four sides of all seven pieces.

I used the same technique for cutting these as I did for the length of the legs. Set a stop just short of the saw blade and use your miter for the wood. To cut the cheeks I used my handy dandy heavy duty Tenoning Jig.

Carefully lay out the marks for the mortise. I offset the cross pieces to within 1/8” of the leg faces, this makes for a nice reveal at the joint. I aligned the top cross pieces flush to the top. The lower side pieces are 7” up from the bottom and the back piece is 10 ¾” up from the bottom. Using a ½” forstner bit, drill ¾” deep holes following the guidelines.

I used the drill press table I made to make each mortise exactly the same

Set the stop block to register the top end

Using a sharp chisel clean out the mortise and square the ends. Cut a curved detail in the front cross support. I used a French curve to lay out the lines.

Cut out the detail using a scroll saw or band saw. Round over the edges of the detail, the bottoms of the top cross pieces and the top and bottom of the lower cross pieces using a ¼” roundover bit. Now its time to glue it all together. Apply glue to the tenon’s and inside of the mortise’s. Clamp the stand using cauls under each clamp.

Next we will build the cabinet that mounts to the stand. I made the cabinet out of clear pine and ¼” plywood. We’ll begin by cutting the sides 9” x 38” x ¾”. There will be one shelf that is dadoed into the sides. Set up a ¾” dado blade in your table saw to cut a dado 3/8” deep.

The shelf will be 5 ¾” from the bottom. Set a stop on the miter fence and cut the dado’s all the way through.

I cut them all the way through because I’m going to paint my cabinet and they won’t show. If you are going to use a stain finish you may want to stop short of the front and chisel out the dado. The sides are held to the top and bottom by biscuit joints. Lay out for three biscuits on each end marking both sides at the same time.

Cut in the biscuits on the top and bottom of both sides.

The back of the cabinet will be ¼” plywood so we need to dado in the backs of the side to recess the back. I attache a piece of scrap wood to the tablesaw fence and set the dado blade to ¼” deep x 3/8” wide. Mark the beginning and end of the dado blade on the fence. Use this to align your start and stop points on the side.

Use a chisel to complete the dado cut, squaring the ends.

I used my shelving jig to drill the holes for the shelf holes.

Cut the shelf that fits in the dado’s 8 7/8” x 24 ¼”. Cut the top and bottom 10” x 26 ½”. Round over the front and side edges of the bottom with a ¾” Roundover bit.

Add a crown molding around the top front and sides. There is a large selection of different styles available at most home supply stores. Dado the backs of the top and bottom the same as the sides to fit the ¼” plywood back. Align the backs of the top and bottom with backs of the shelves and mark the centers for the biscuits. The cabinet is now ready to glue up. Glue the biscuits, their pockets, the shelf ends and the dado that goes in. Work quickly before the glue starts to set up or use a slow drying glue

Use pipe clamps with cauls. Measure from corner to corner to make sure that it is square, then let dry overnight.

I cut the back out of ¼” plywood to fit inside the dado’s I’d cut. Apply glue to the edges and nail it in place. I did sand the inside face first to make finishing easier later on.

Now it’s time to make the doors. I decided to use lap joints for the corners. I was after an old fashion look and square corner joints seemed to fit the ticket. Each door will be 30” x 12 ½” and made from ¾” clear pine and plywood. Start out by cutting the rails and stiles 30” x 1 ½” and 12 ½” x 1 ½”. Using a dado cut a 1 ½” lap joint ¾” deep on each end.

I used a stop on my miter fence to make repeatability easy. I cut a ¼” dado down the middle of each rail and stile to hold the ½” plywood.

Notice that I stopped just short of the end of each piece. This saved me from having to chisel out each corner. Cut ¼” plywood to fit inside the frame. Glue only the corners, not inside the dado for the plywood. You want the plywood to be able to float with weather changes.

Work quickly so the glue does not dry and clamp each corner.

Be sure to check the squareness of each door by measuring from corner to corner. The dimension should be the same. For hinges I decided on non-mortise hinges. Even though they are non-mortise hinges I decided to inset them a little. I used my plunge router and clamped a piece of wood on each side for stability and routed a mortise on the cabinet side.

While I didn’t get any good photos of the next few steps, they are pretty straight forward.

I cut a ¼” piece of plywood to fit eactly between the rails of the doors approximately 7” high. Glue and clamp this piece in place. Cut the fake drawer fronts from ½” clear pine 4 ½” x 10 ½”. Round over all four sides with a ½” roundover bit. Glue these centered and flush to the top of the bottom stile. Now add the trim strips. I made them from ¼” x ½” clear pine and rounded over the edges with a 1/8” roundover bit.

Cut four of them to fit the width of the door plus ¼” to allow for the miter on one end. Miter one end 45 degrees. Cut the tiny end pieces to fit the edge of the door plus ¼”. Miter both ends 45 degrees but in the opposite directions as shown.

Glue and nail the trim strips with finishing nails. Apply your finish of choice to the cabinet and it’s ready to mount to the base. Drill holes for the pulls that go on the cabinet doors and fake drawer front. A little trick I like to use is a sticky note to lay out the lines for drilling.

I used figure eight fasteners to hole the cabinet to the base

Drill countersink holes with a forstner bit so the figure eight fastener is flush to the top.

Screw in the figure eight fasteners with flat head screws.

Set the cabinet on the top of the base and screw up through the figure eight fasteners. Cut and paint some shelves to fit inside the cabinet and you are good to go.

Since this cabinet has a small base it should be attached to the wall for stability.


The original plan can be found at http://www.runnerduck.com/bathroom_cabinet/bathroom_cabinet.htm

 
[email_link]

Bathroom Cabinet

Materials:

Laminated Pine

  • Sides – 2 – 3/4″ x 15 1/4″ x 36″
  • Shelves/base – 3 – 3/4″ x 14″ x 13 1/8″
  • Top – 1 – 3/4″ x 16″ x 16″
  • Legs – 4 – 2 1/4″ x 2 1/4″ x 8″
  • Skirts – 4 – 3/4″ x 2″ x 10″
  • Door Stiles – 2 – 3/4″ x 1 7/8″ x 30 1/2″
  • Door Rails – 2 – 3/4″ x 2 1/2″ x 9 1/8″
  • Drawer Face – 1 – 3/4″ x 5 1/2″ x 13″

Plywood

  • Back – 1 – 1/4″ x 14″ x 36″
  • Drawer sides – 2 – 1/2″ x 4 1/2″ x 14 1/2″
  • Drawer back/front – 2 – 1/2″ x 4 1/2″ x 11 1/8″
  • Drawer Bottom – 1 – 3/16″ x 11 5/8″ x 13 5/8″

Misc

  • Door glass – 1 – 1/8″ x 9 5/8″ x 26″
  • Drawer slides – 1 set – 14″ long – 3/4 Extension
  • European cup hinges – 120 degree inset

Frame:

Begin by cutting the main parts to size. Next, prepare a 1/4″-thick x 1/4″-wide, two-sided groove along the rear edge of each cabinet side. These grooves, called “rabbets,” are made to accept the plywood back panel that comes later. For now, sand all parts to 120-grit, and then begin assembly with the bottom, the two shelves and the two sides. As you can see in the plans, I spaced the shelves evenly, but choose whatever spacing suits you best. You could use biscuits to secure the shelves, but I used glue and #8 x 1 1/2″-long wood screws driven in through the sides. If you use screws, create counterbored holes for the screw heads so you can cover them later with tapered wooden plugs. Complete this first part of the assembly by fastening the top to the upper ends of the sides with more counterbored screws or biscuits.

Drawer and Door

While this cabinet has a glass door that makes it easy to find things, there’s also an enclosed drawer that can stow items out of sight. Since this drawer is small and won’t hold much weight, simple butt joints are more than strong enough. I used 1/2″-thick, cabinet-grade plywood for the sides, front and back of the drawer. A 3/16″-thick plywood bottom panel fits into 3/16″-wide x 1/4″-deep grooves in the sides, front and back. Cut these grooves at the tablesaw or router table. Then, assemble the drawer with the bottom panel in place. I used glue and 18-gauge brads, but #6 x 1 1/4″-long wood screws work well too. Either way, attach the drawer glides and test the drawer in its opening with the drawer face left off. You’ll add the face later, during the final assembly.

Now, build the frame that forms the door. The vertical members are called “stiles,” and the horizontal ones are “rails.” I joined these parts with 3/8″-diameter x 1 1/2″-long dowels set in holes created with a dowelling jig. The stiles are narrow enough that the biscuits would protrude beyond the edges of the door, but that’s OK. Trim them flush after the door is assembled and the glue is dry.

To create, the rabbet to house the glass, set up a table-mounted router with a straight bit or bearing-equipped rabbeting bit and cut the 1⁄8″-deep x 1/4″-wide profile on the rear-facing, inside edges of the rails and stiles. The corners of the rabbets will be rounded, so square them off with a chisel so the glass can fit in. Bore holes in one stile for European cup hinges, and then install the door and make sure it swings properly.

For the leg assemblies, glue three pieces of the pine shelving together to make four 2 1/4″ x 2 1/4″ blocks each 8″ long. Taper the ends of the legs on their inside edges. A simple tapering jig for the tablesaw can be used, but a bandsaw also works well. Sand the legs using 80- then 120-grit abrasives, and then cut the skirt pieces and drill two counterbored holes for the #6 x 1 1/4″-long wood screws that fasten each skirt to the underside of the cabinet. Attach the legs to the skirts with more 3/8″-diameter x 1 1/2″-long dowels. Finally, screw the skirt-and-leg assembly to the base of the cabinet.


Finale:

Double-check the action of the door and drawer, then cut and attach a drawer face to fit over the drawer box before giving everything a final hand-sanding with 120-grit sandpaper. If you built your cabinet from a knotty softwood, as I did, paint the project with a resin-blocking primer to prevent resin from bleeding through the final finish. I applied two coats of coloured stain, followed by a protective topcoat of semi-gloss urethane. Once everything is dry, set the glass in place and secure it to the back of the door with mirror clips. Since the glass sits flush with the back face of the door frame, use the flat side of each clip against the glass. Finally, find and install cool-looking pulls for the drawer and door, and your job is done. Your cabinet is now ready to fill up with all the lotions and potions one could need in any bathroom.


The original plan can be found at http://canadianhomeworkshop.com/7246/project-plans/space-saving-bathroom-cabinet#instruction2
 
[email_link]

Bathroom Wall Storage

Simple woodworking plans to help you build a Bath Storage Shelf with robe hooks designed to store towels and other bathroom supplies. Featuring two cubbies, top shelf storage with protective ledge and two hooks, these beginning woodworking plans will help any do it yourself newbie build a Pottery Barn Matilda Wall Storage inspired bath storage.

Materials:

  • 1 – 1×6 @ 2’ long
  • 1 – 1×8 @ 8’ long
  • 1 – 1×2 @ 4’ long
  • 1 – ¾” x ¾” cove base moulding
  • 2” screws
  • 1 ¼” finish nails
  • 2” finish nails
  • 1 ¼” pocket screws

Dimensions:

Cut List:

  • 2 – 1×8 @ 17″ (Sides)
  • 2 – 1×8 @ 21″ (Shelves)
  • 1 – 1×8 @ 10″ (Center Divider – Optional)
  • 1 – 1×6 @ 21″ (Base)
  • 1 – 1×2 @ 24″ (Crown)
  • 2 – 1×2 @ 6 3/4″ (Cut to fit – Side Crown)
  • 1 – 1/4″ Plywood @ 22 1/2″ x 12 1/4″ (Back)
  • Cove Moulding to fit

Step 1:

From the ends cut a scroll pattern as shown above with a jigsaw. Make sure both ends match and sand any rough areas. Your 1x8s may vary slightly in width, adjust accordingly.

Step 2:

If you use a Kreg Jig, attach shelves as shown above. Otherwise, use 2″ finish nails and wood glue to attach – or you could use 2″ screws.  Leave a 10″ space between the shelves for the shelf partition – see next step.

Step 3:

We choose not to add the center partition, but if you want, fasten in place. Use 2″ finish nails and glue. You won’t be able to do pocket holes because of the clearance here.

Step 4:

Attach base as shown above. Make sure you also attach to the bottom shelf too.

Step 5:

Tack the back on with 1 1/4″ finish nails and wood glue.

Step 6:

Now the front crown. 1 1/4″ finish nails and glue as directed in the diagram.


Step 7:

And the ends. Cut to fit, as your 1x8s can vary in width.

Step 8:

Cove moulding should be no more than 3/4″ wide x 3/4″ tall, like this. Miter the corners at 45 degrees and glue and tack on with 1 1/4″ finish nails.

Step 9:

The best way to hang is through the 1×6 into a stud in the wall behind.

Fill all holes with wood filler and let dry. Apply additional coats of wood filler as needed. When wood filler is completely dry, sand the project in the direction of the wood grain with 120 grit sandpaper. Vacuum sanded project to remove sanding residue. Remove all sanding residue on work surfaces as well. Wipe project clean with damp cloth. It is always recommended to apply a test coat on a hidden area or scrap piece to ensure color evenness and adhesion. Use primer or wood conditioner as needed.

The original plan can be found at http://www.ana-white.com/2011/07/martina-bath-wall-storage-shelf-hooks

 
[email_link]

Bathroom Cabinet

We sized this project to accommodate a reclaimed shutter as the door. You will need to make sure to resize the parts of this project to allow for the size of the door. The finished dimensions are 47-1/2″ tall x 23-1/4″ wide x 24-3/4″ deep.

Materials:

  • 4 – 1x2x8’ Lumber
  • 6 – 1x3x8’ Lumber
  • 1 – 1x4x8’ Lumber
  • 1 – sheet of ¼” plywood
  • 1 – sheet of ¾” plywood
  • Doorknob hardware
  • #18 x 1 ¼” wire brads
  • #18 x 5/8” wire brads
  • 1 ¼” pocket hole screws
  • #17 x 1 ½” wire brads
  • European inset hinges

Click to enlargen

Cut List:

  • 4 – 1×4 Lumber @ 15 ¼” long
  • 7 – 1×3 Lumber @ 15 ¼” long
  • 2 – 1×3 Lumber @ 33 ¾” long
  • 8 – 1×3 Lumber @ 46” long
  • 3 – 1×2 Lumber @ 16 ½” long
  • 6 – 1×2 Lumber @ 17 3/8” long
  • 3 – 1×2 Lumber @ 18 1/8” long
  • 8 – 1×2 Lumber @ 21 ¾” long
  • 2 – 20 1/8” x 39 ¼” – ¼” plywood
  • 1 – 18” x 39 ¼” – ¼” plywood
  • 3 – 18 1/8” x 17 3/8” – ¾” plywood
  • 1 – 21 ¾” x 23 ¼” – ¾” plywood
  • 1 – 21 ¾” x 20 ¼” – ¾” plywood

Step 1: Make the side and back assemblies

Fig.1

Drill two pocket holes on both ends of the bottom rails, middle rails and top rails. Use Fig. 1 as a guide for cutting to shape the bottom ends of the legs.

Position the bottom rails, middle rails, and top rails as shown in Fig. 2 and attach to the legs using glue and 1-1/4-inch pocket-hole screws. Create three assemblies.

Fig. 2

Position the back panel centered and flush with the top of one of the assemblies (be sure to place the panel on the pocket-hole side) and attach using glue and #18 x 5/8-inch wire brads (Fig. 3). Label this the back assembly.

Fig. 3

Position the back shelf supports as shown in Fig. 4 and attach using glue and #18 x 1 1/4-inch wire brads. For the back shelf support in the middle, only drive the brads through the last 5/8-inch at the end of the supports.

Position a side panel flush with the top and one end of one assembly (be sure to place the panel on the pocket hole side) and attach using glue and 5/8-inch brads. Attach the remaining side panel to the remaining assembly, making sure it is a mirror image of the previous assembly with the side panel.

Fig. 4

Position the side panel assemblies flush with the back panel assembly as shown in Fig. 5 and scribe the position of the shelf supports onto the side panel assemblies.

Position the side shelf supports spaced apart the same distance as the back shelf supports and attach using glue and 1-1/4-inch wire brads. For the side shelf support in the middle, only drive the brads through the last 5/8-inch at the end of the supports

Fig. 5

Step 2: Create front Assembly

Fig. 6

Drill two pocket holes on each end of the front stiles, and one pocket hole centered and horizontal along the length of the stiles. Position the front stiles flush with the ends of the remaining bottom rail and top rail with the horizontal pocket holes pointing out and attach using glue and 1-1/4-inch pocket-hole screws. Position this assembly flush with the top end of the two remaining legs (make sure the angle cut on the bottom of the legs are facing inward) and attach to the legs using glue and pocket hole screws. Be sure to also drive screws through the horizontal pocket holes on the stiles as shown above.

Step 3: Assemble the base and attach the shelves

Fig. 7

Position the back assembly flush with the top and back edge of the side assemblies and attach using glue and #17 x 1-1/2-inch wire brads. 
Position the shelf nosing flush with the edge and 18-1/8-inch wide end of the shelves and attach using glue and 1-1/2-inch brads. Build three shelf assemblies.Position the shelves on the shelf supports, beginning with the bottom shelf, with the shelf nosing flush against the front edge of the shelf supports, and attach to the supports (sides and back) using glue and 1-1/2-inch brads as shown in Fig. 7.

Fig. 8

Position the front assembly flush with the top and front edge of the side assemblies and attach using glue and #17 x 1-1/2-inch wire brads as shown in above image. Check the assembly for square by measuring it diagonally and clamp in place if needed to attain square until the glue sets.

Step 4: Build and attach top

Fig. 9

Position the sub top on the top end of the assembly, flush with all edges, and attach using glue and 1-1/2-inch brads. Position a sub top trim part on the front of the assembly, flush with the top edge and sides of the sub top and attach using glue and 1-1/2-inch brads. Position a second sub top trim part on the back of the assembly, flush with the top edge and sides of the sub top and attach using glue and 1-1/2-inch brads. Position the two remaining sub top trim parts flush with the top edge of the sub top and the ends of the first two sub top trim parts, and attach using glue and 1-1/2-inch brads as shown in Fig. 9.

Fig. 10

Position the top on the sub top, flush with all edges, and attach using glue and 1-1/2-inch brads. Position a top trim part on the front of the assembly, flush with the top edge and sides of the top and attach using glue and 1-1/2-inch brads. Position a second top trim part on the back of the assembly, flush with the top edge and sides of the top and attach using glue and 1-1/2-inch brads. Position the two remaining top trim parts flush with the top edge of the top and the ends of the first two top trim parts, and attach using glue and 1-1/2-inch brads as shown in Fig. 10.

Step 5: Attach the shutterdoor


Attach two hinges, spaced equidistantly apart, on the edge of the shutter. Position the shutter centered from in the opening from top to bottom, with a spacer (a paint stirrer works nicely) between the shutter and the front of the assembly. Attach the hinges to the front stile.

Attach a door pull at the desired position on the shutter.
As an option, you can attach a magnetic catch to the shutter and inside of the bath pantry assembly or a latch on the outside of the shutter and bath pantry assembly to keep the door closed.

Step 6: Finishing Touches


Fill nail holes and apply paint or stain and polyurethane as desired on the project. Depending on the condition of the reclaimed shutter, you may want to apply a coat of polyurethane to seal the shutter.

This original plan can be found at http://www.diynetwork.com/how-to/skills-and-know-how/carpentry-and-woodworking/how-to-build-an-armoire-storage-cabinet

 
[email_link]

1 2 3 4