Broadway Bar
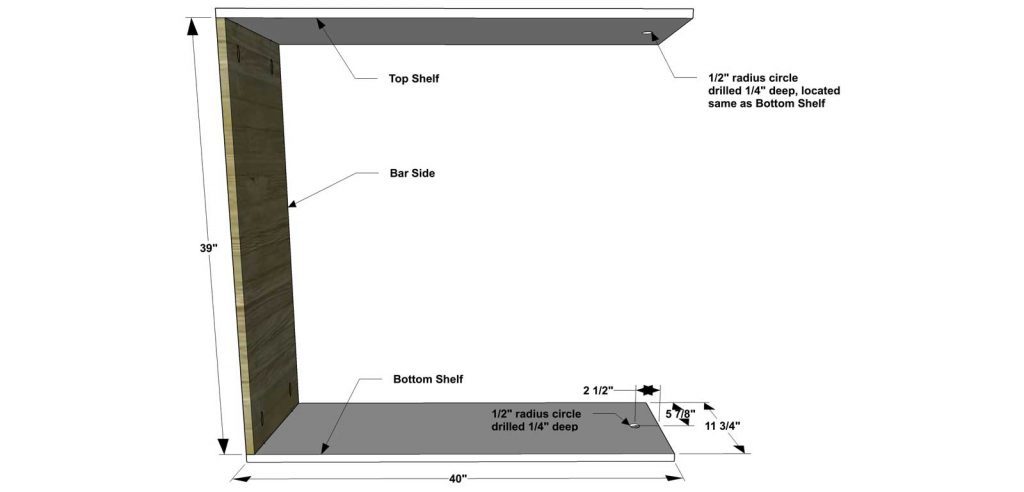
This open bar concept works out to be 40″ long x 40 1/2″ tall x 11 3/4″ deep
- 1 – 3/4” plywood at 4’x8’
- 2 – 1×2 at 8’
- 1 – 7/8” diameter dowel at 8’
- 1 3/8″ Brad Nails
- 1 ¼” Pocket Hole Screws
- 2 – 3/4” plywood at 11-3/4”x40”– Top and Bottom Shelves
- 1 – 3/4” plywood at 11-3/4”x39”– Bar Side
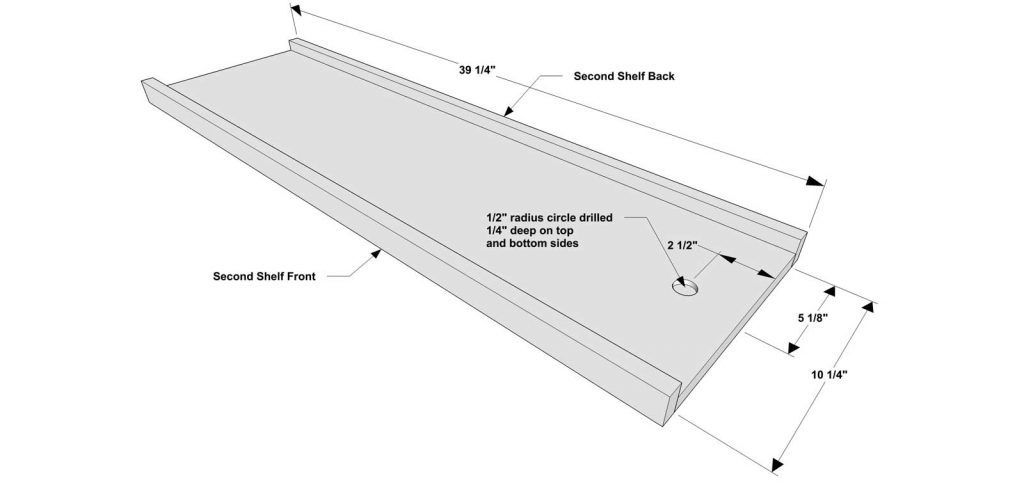
- 1 – 3/4” plywood at 10-1/4”x39-1/4” – Second Shelf
- 2 – 1×2 at 39-1/4” – Second Shelf Front and Back
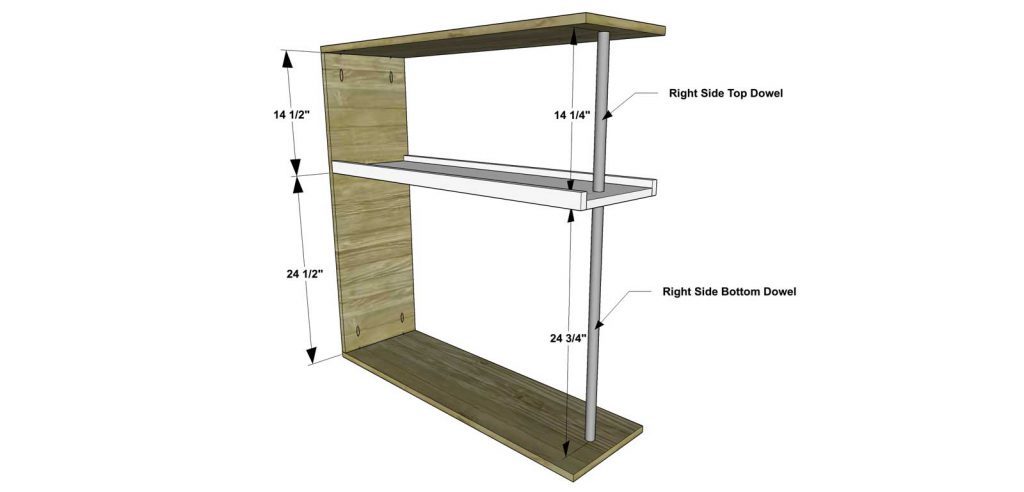
- 1 – 1” diameter dowel at 14-1/4” – Right Side Top Dowel
- 1 – 1” diameter dowel at 24-3/4” – Right Side Bottom Dowel
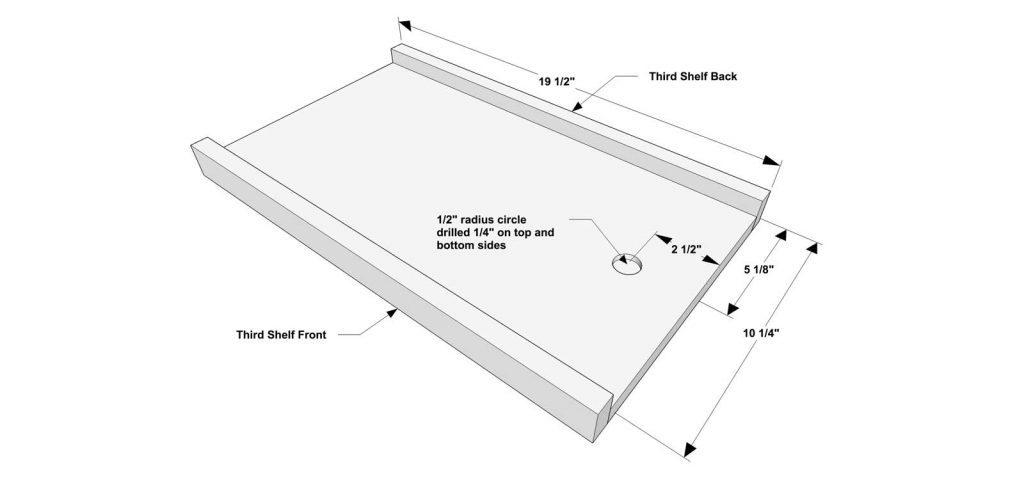
- 1 – 3/4” plywood at 10-1/4”x19-1/2” – Third Shelf
- 2 – 1×2 at 19-1/2” – Third Shelf Front and Back
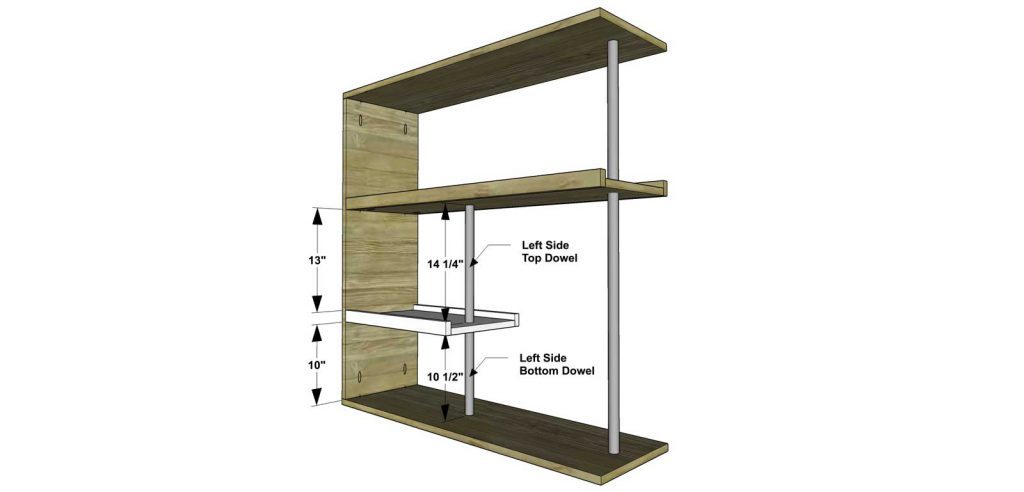
- 1 – 1” diameter dowel at 14-1/4” – Left Side Top Dowel
- 1 – 1” diameter dowel at 10-1/2” – Left Side Bottom Dowel
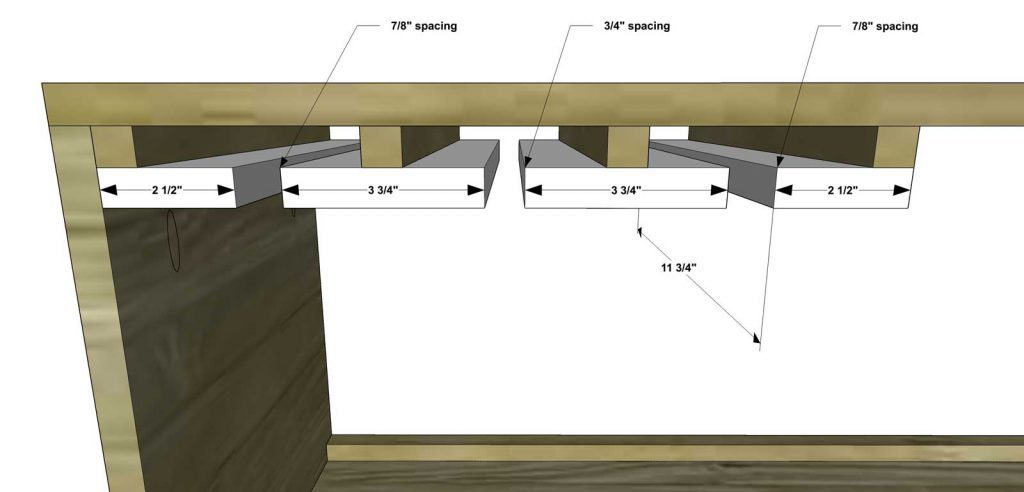
- 4 – 3/4” plywood at 3/4”x11-3/4” – Spacers
- 2 – 3/4” plywood at 2-1/2”x11-3/4” – End Slides
- 2 – 3/4” plywood at 3-3/4”x11-3/4” – Inside Slides
Cut the pieces for the Top and Bottom Shelves and Bar Side. Set the Kreg jig for 3/4” material and drill pocket holes in each end of the Bar Side. Drill a 1” diameter hole 2-1/2” from each end, centered, on the Top and Bottom Shelves. Assemble as shown with the 1” drilled holes facing the inside and with glue and 1-1/4” pocket screws.
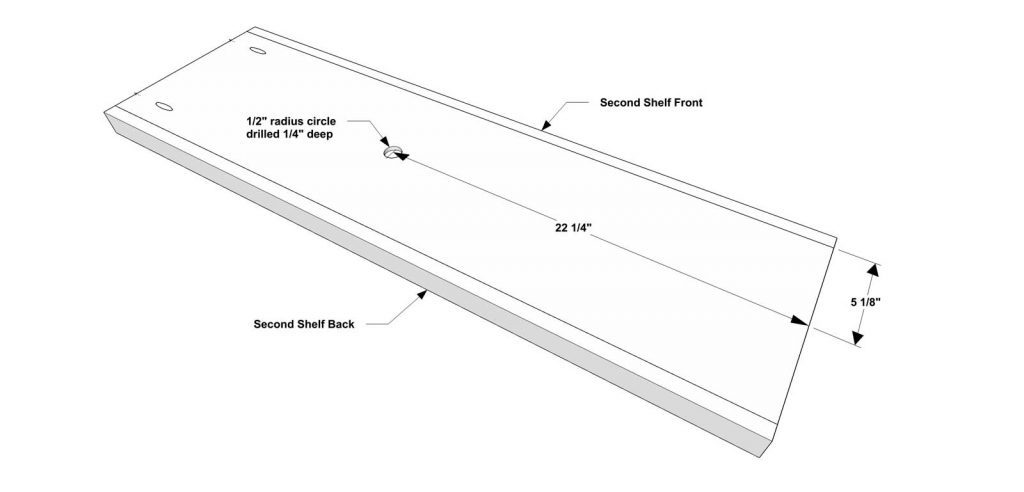
Cut the pieces for the Second Shelf and Second Shelf Front and Back. Set the Kreg jig for 3/4” material and drill pocket holes in one bottom end of the Second Shelf. Drill a 1” diameter hole 2-1/2” from the opposite end of the pocket holes, on the top side and centered. Drill a second 1” diameter hole 22-1/4” from the same end, centered, but on the bottom side. Attach the Second Shelf Front and Back to the Second Shelf as shown with glue and 1-1/4” brad nails. Position Right Side Top Dowel and Right Side Bottom Dowel with glue and attach the Second Shelf (with Front and Back pieces) to the Bar Side as shown with glue and 1-1/4” pocket screws. Note: you can paint the dowels with metallic paint before assembly to make them look like metal rods.
Cut the pieces for the Third Shelf and Third Shelf Front and Back. Set the Kreg jig for 3/4” material and drill pocket holes in one bottom end of the Third Shelf. Drill a 1” diameter hole 2-1/2” from the opposite end of the pocket holes, on the both the top side and bottom side, centered. Attach the Third Shelf Front and Back to the Third Shelf as shown with glue and 1-1/4” brad nails. Position the Left Side Top Dowel and Left Side Bottom Dowel with glue and attach the Third Shelf (with Front and Back pieces) to Bar Side as shown with glue and 1-1/4” pocket screws. Note: you can paint the dowels with metallic paint before assembly to make them look like metal rods.
Cut the pieces for the Spacers. Assemble as shown with glue and 1-1/4” brad nails.
Cut the pieces for the Slides. The End Slides will be located flush with the end Spacers and the Inside Slides will be centered on the Spacers. Assemble as shown with glue and 1-1/4” brad nails.
Fill any Screw, Nail or Pocket Holes, Sand and Finish as Desired.
The original plan can be found at http://www.thedesignconfidential.com

