Rustic Headboard
Creating a weathered and distressed look starts with lumber selection. It may be counterintuitive, but when picking lumber for this project you’ll want to look for imperfections such as knots, gouges and nicks. However, do select boards that are straight and true.
This project uses pocket-hole joinery. If you’re not familiar with it, take a look at the basics.
Use the dimensions listed as a guide, but be sure to double check measurements as you build and make adjustments before you cut the parts.
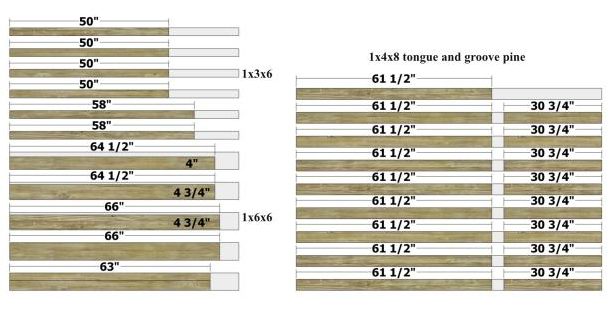
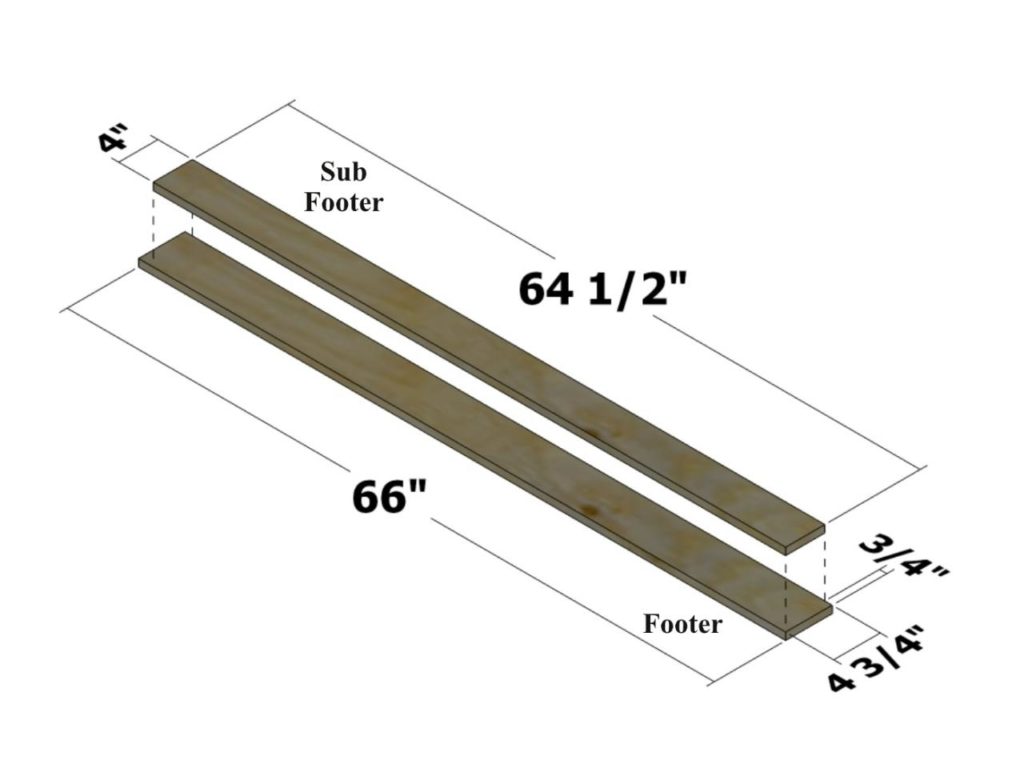
- sub footer (1) – 3/4 x 4 x 64-1/2
- footer (1) – 3/4 x 4-3/4 x 66
- sub header (1) – 3/4 x 4-3/4 x 64-1/2
- header (1) – 3/4 x 5-1/2 x 66
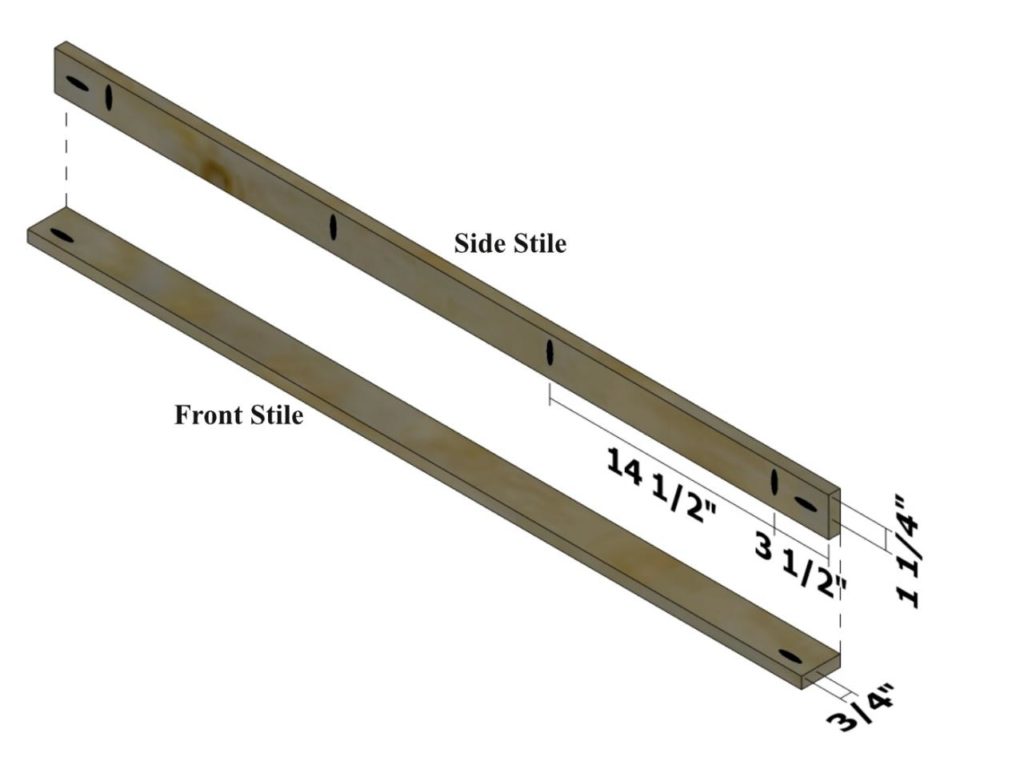
- front stiles (2) – 3/4 x 2-1/2 x 50
- side stiles (2) – 3/4 x 2-1/2 x 50
- rails (2) – 3/4 x 2-1/2 x 58
- long slats (9) – 3/4 x 3-1/4 x 61-1/2
- short slats (8) – 3/4 x 3-1/4 x 30-3/4
- headboard cleat (1) – 3/4 x 3-1/16* x 63
- wall cleat (1) – 3/4 x 3-1/16* x 63
*at the widest point
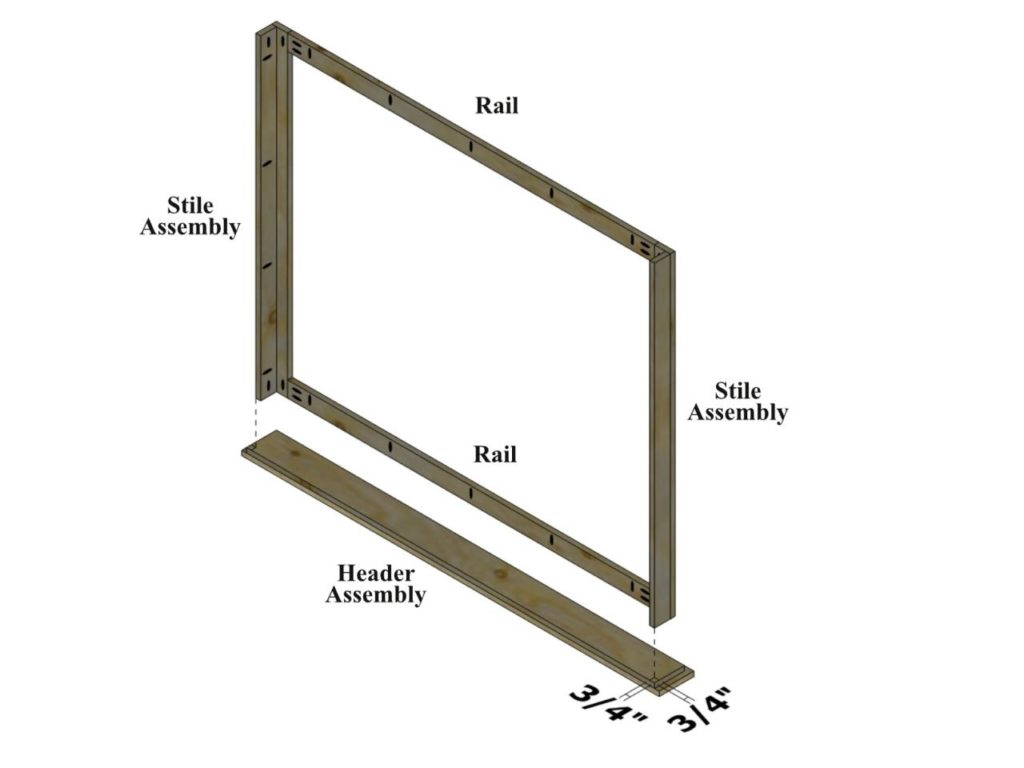
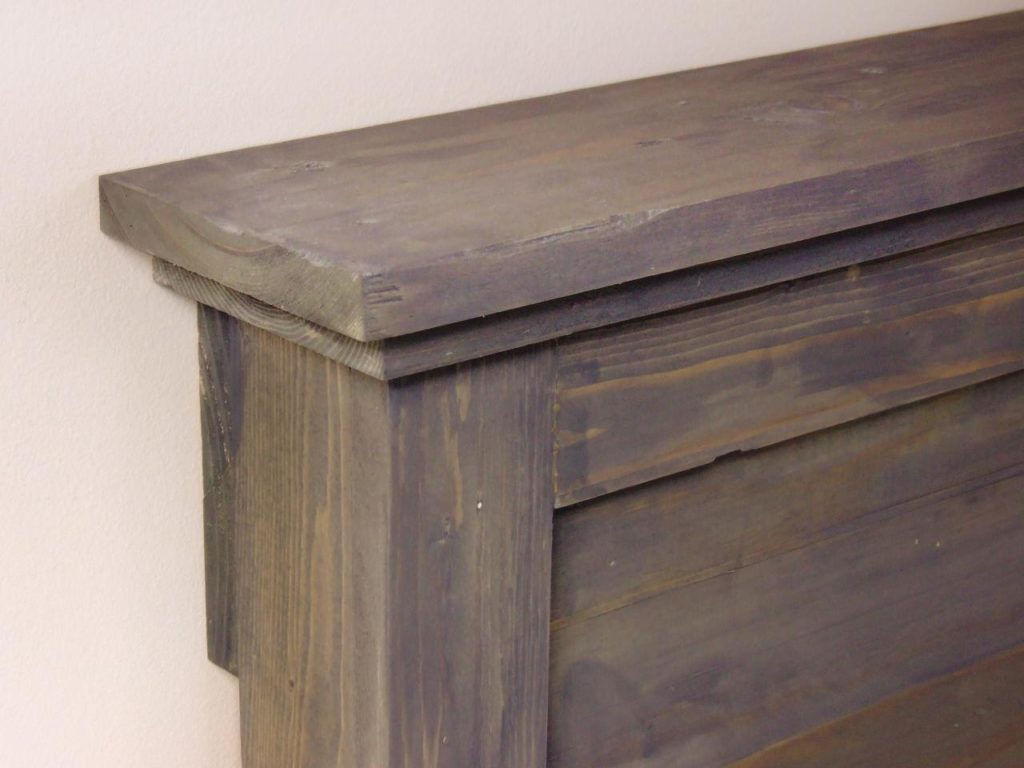
The finished dimensions (as shown in Image 2) are 53″ high x 66″ wide x 5-1/2″ deep.
Position the sub footer flush against one edge and centered (3/4 inch from the ends) on the footer as shown in Image 1.
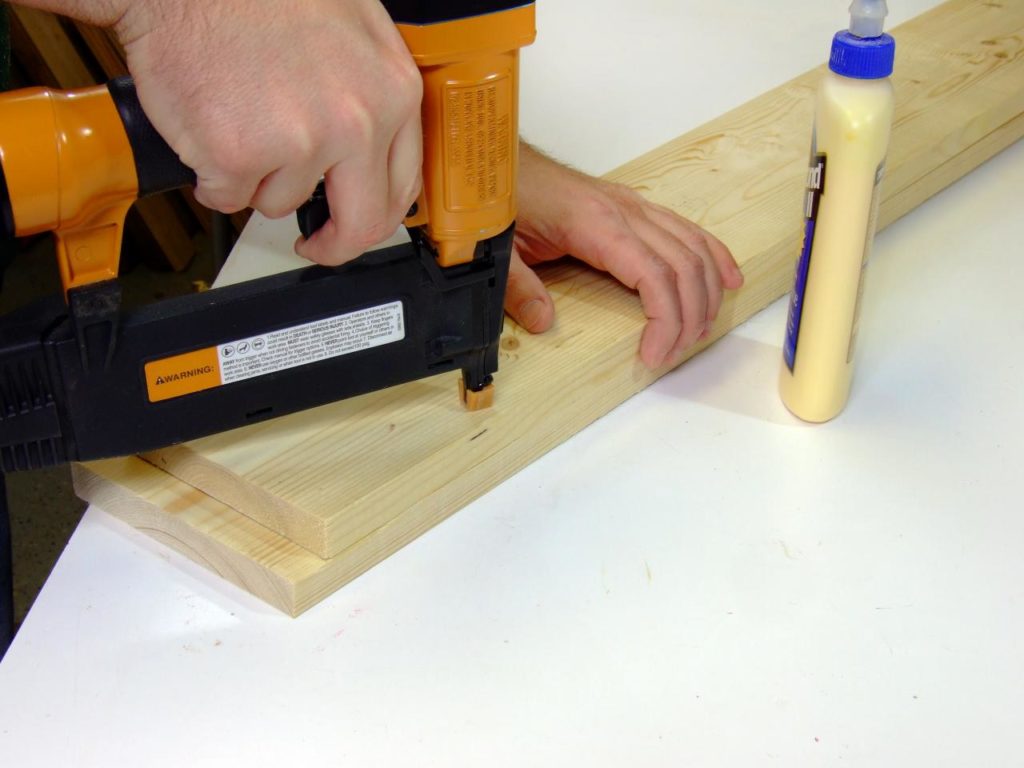
Attach the sub footer to the footer using glue and #17 x 1-1/4-inch wire brads as shown in Image 2.
Position the sub header as shown in Image 3 (3/4 inch from the edge and end). Attach using glue and wire brads.
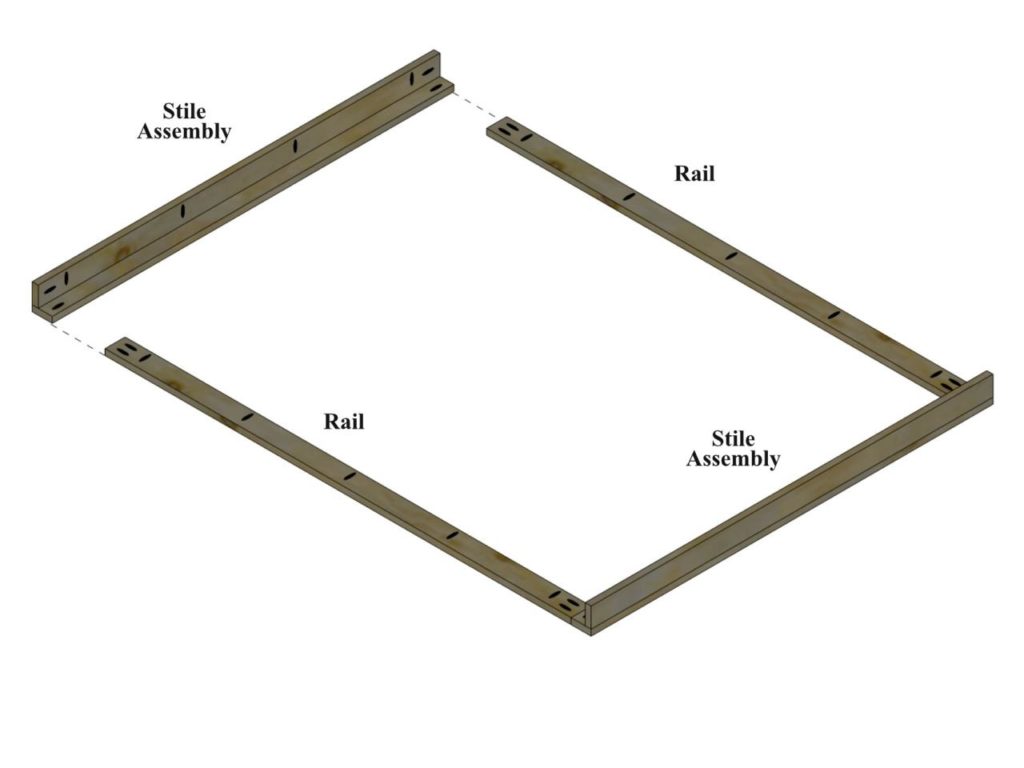
Use above image as a guide for drilling pocket holes in the front stiles and side stiles.
Position the side stiles flush with the inside edge of the front stiles as shown in above image and attach using glue and 1-1/4-inch pocket-hole screws as shown below.
Use the top image as a guide for drilling pocket holes in the rails.
Position the rails flush with the ends of the front stiles as shown above and attach using glue and 1-1/4-inch pocket-hole screws as shown below. This assembly is the frame.
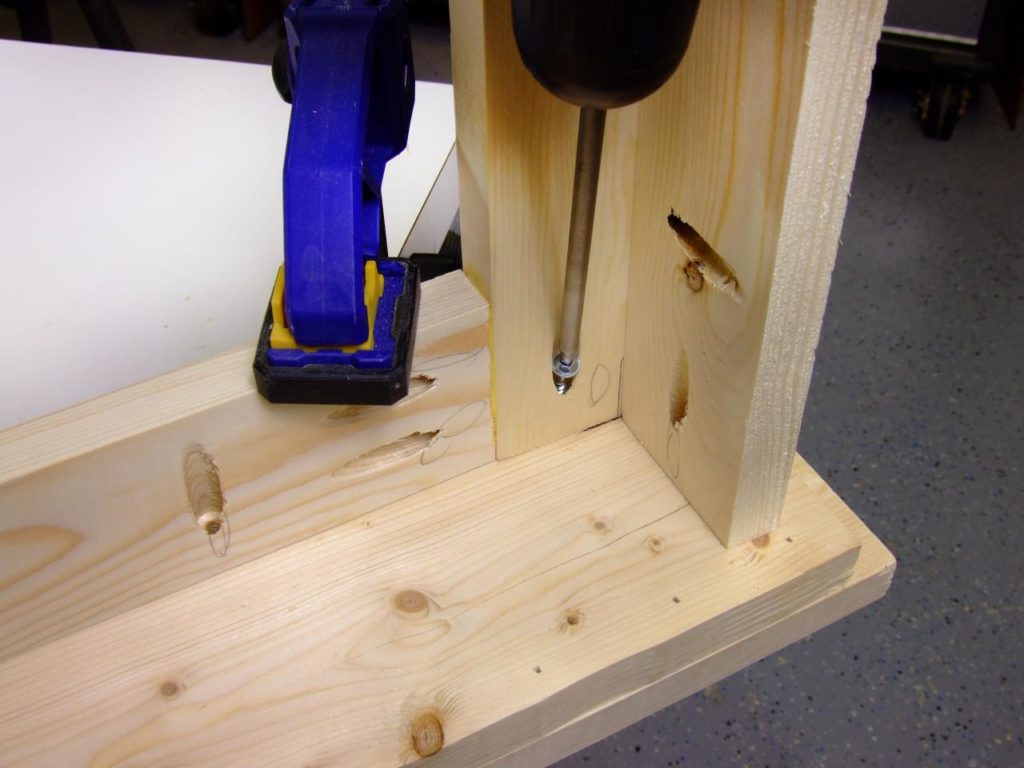
Position one end of the frame with the back edge of the side stiles placed 3/4 inch from the end and back of the sub header as shown above and attach using glue and 1-1/4-inch pocket-hole screws as shown below. Be sure to clamp the assemblies in place before joining them.
Position the other end of the frame with the back edge of the side stiles placed 3/4 inch from the end of the sub foot and attach using glue and 1-1/4-inch pocket-hole screws. Be sure to clamp the assemblies in place before joining them.
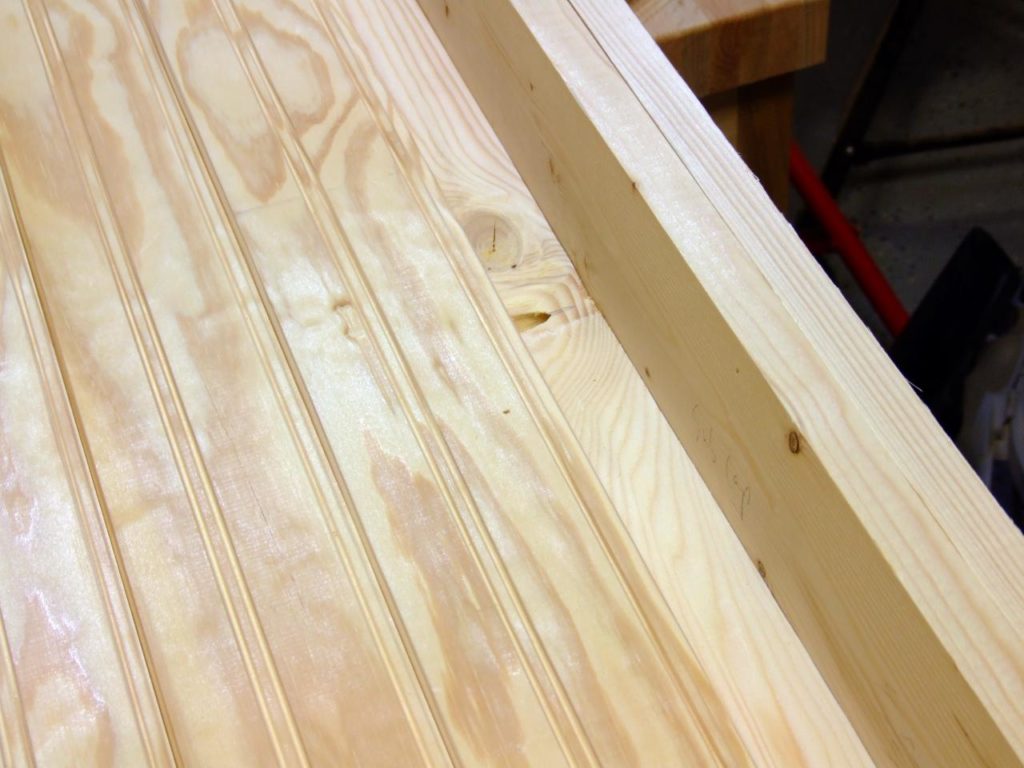
Starting at the footer assembly end, begin alternating placing the long slats and short slats (cut from tongue-and-groove pine) as shown in above images. Attach the slats to the front rails using glue and 1-1/4-inch wire brads as shown below.
If you have trouble placing the grooves on the tongues of mating parts, try using a cutoff of the tongue-and-groove pine to use as a guide, as shown in the first image below. Note that the last long slat placed will leave a gap a couple of inches wide near the sub header, as shown in the very bottom image.
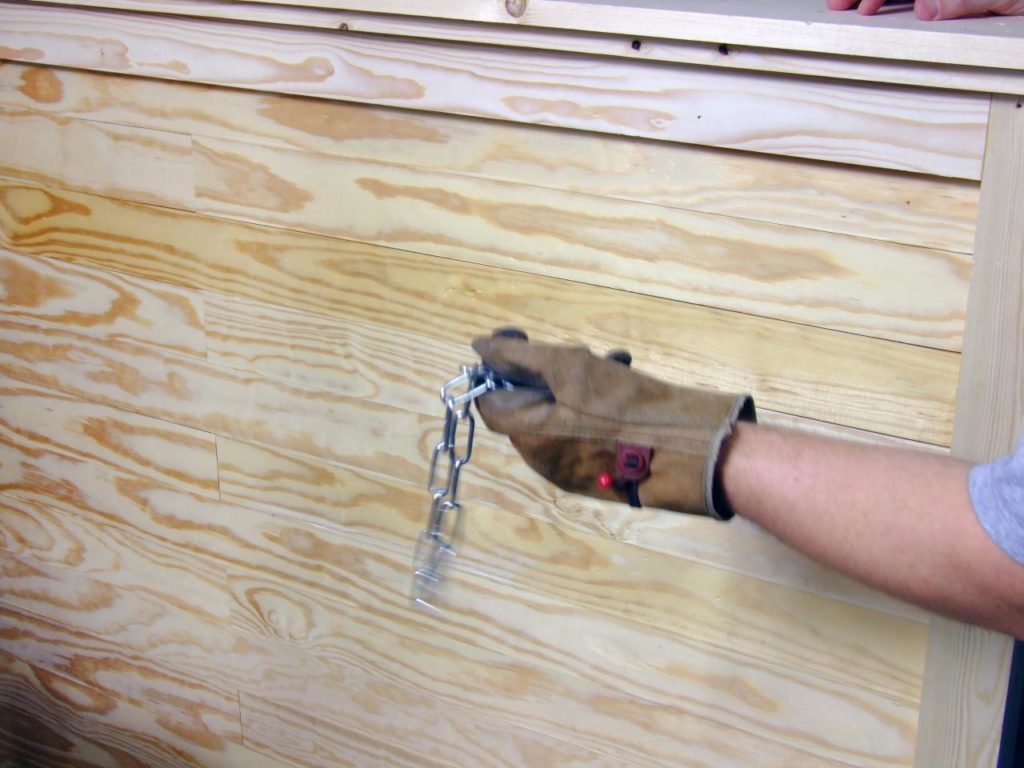
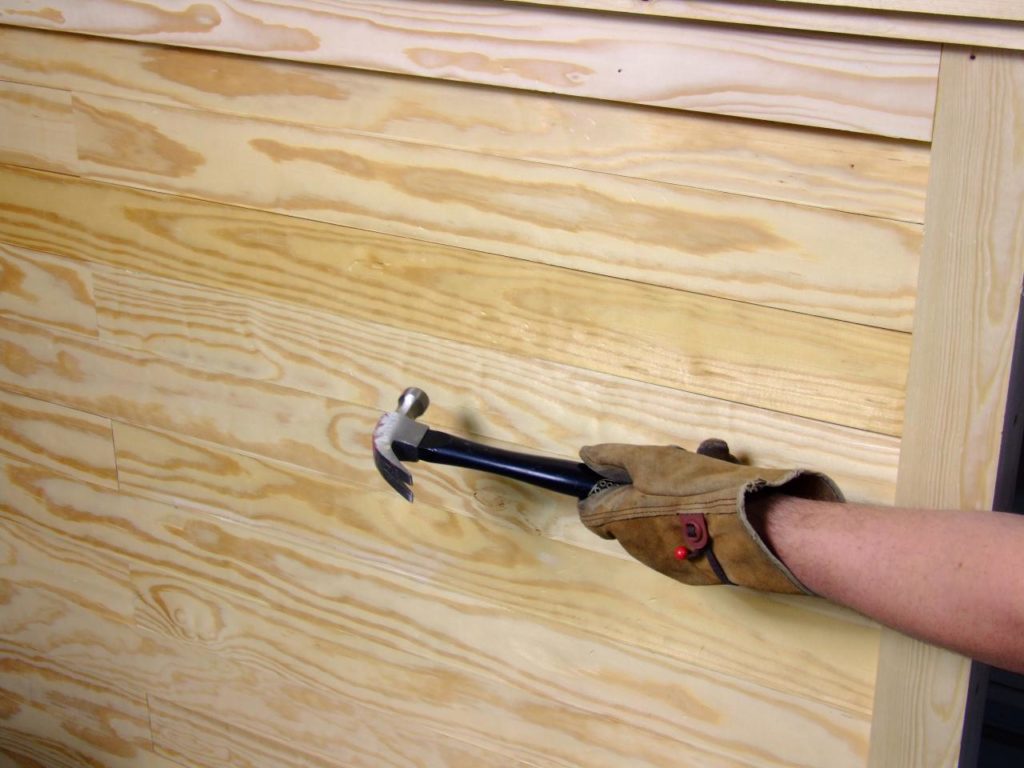
There are many methods for distressing lumber to give it an aged and “well-loved” appearance. Beyond the step mentioned in the beginning of selecting boards with imperfections, you can essentially “beat up” a project. Use a scrap length of chain to add dents and nicks. For deeper dents, use a hammer (Above images).
To create the look of wormholes, use an awl or ice pick as shown in top image. Try creating holes in different angles as well. Create worn or chipped edges by cutting notches using a pocket knife or utility knife as shown above.
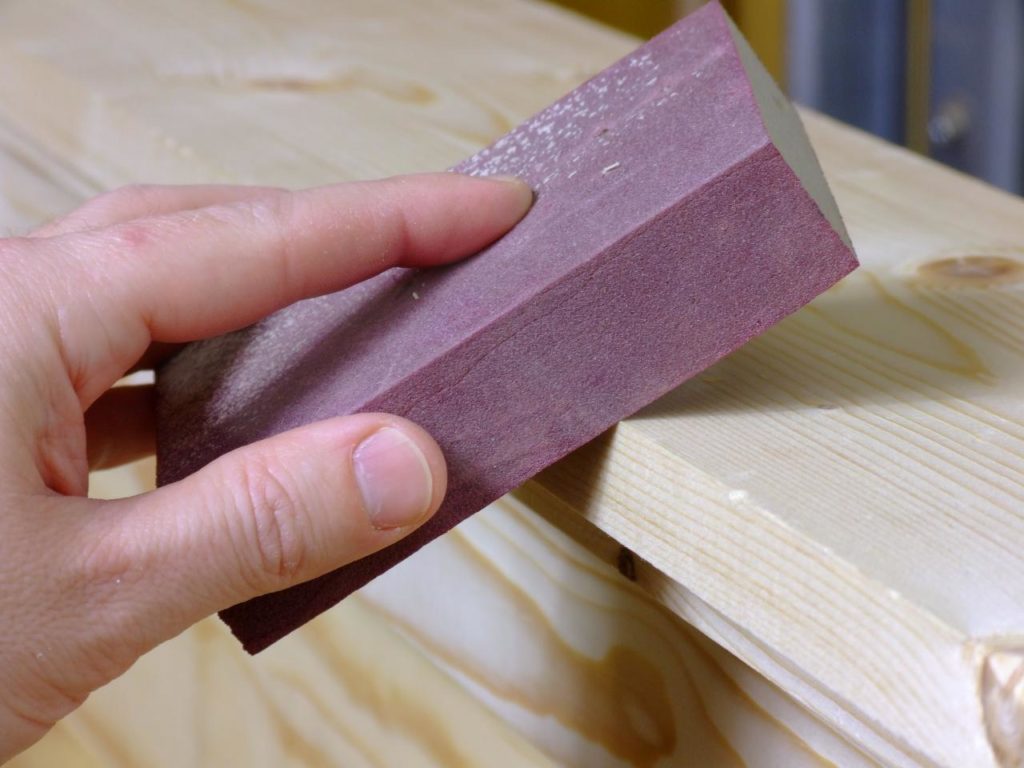
Wear down random spots using a sander as shown above. It’s hard to give a weathered appearance to new boards, such as the lumber we use here, but you can cheat that gray patina by diluting dark gray paint and applying it as you would a stain. Add water and the paint to a quart-size container and test the finish on pieces of scrap cut from this project until you get the look you desire. Apply a coat of polyurethane when finished.
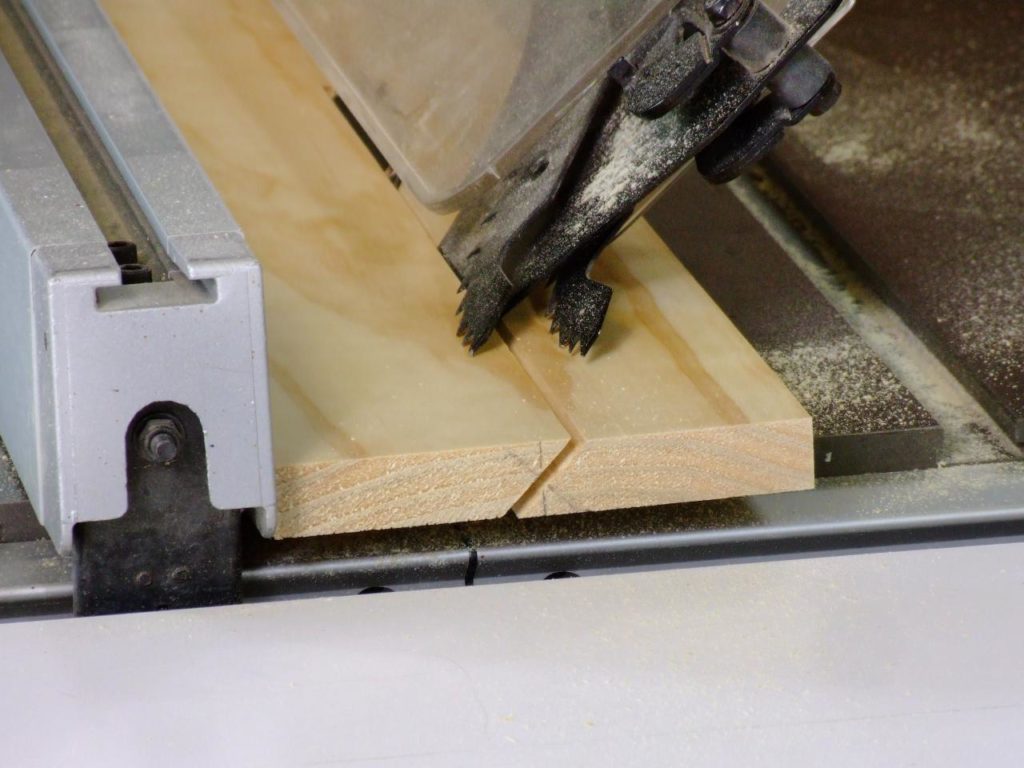
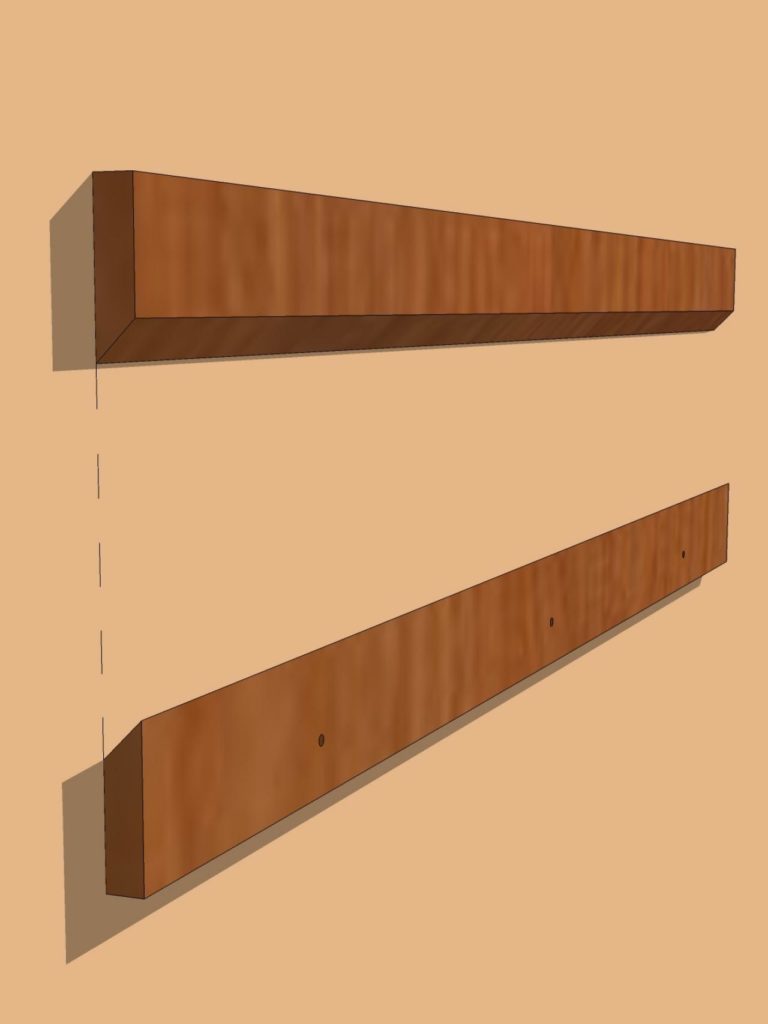
Mark a centerline across the end of a 1×6. Mark the center point of this line and draw a 45-degree angle that bisects this center point. Set the saw blade on your table saw at 45 degrees, then set the fence on your table saw so that the 45-degree mark lines up with the saw blade. Rip the 1×6 to create the headboard cleat and wall cleat, as in top image.
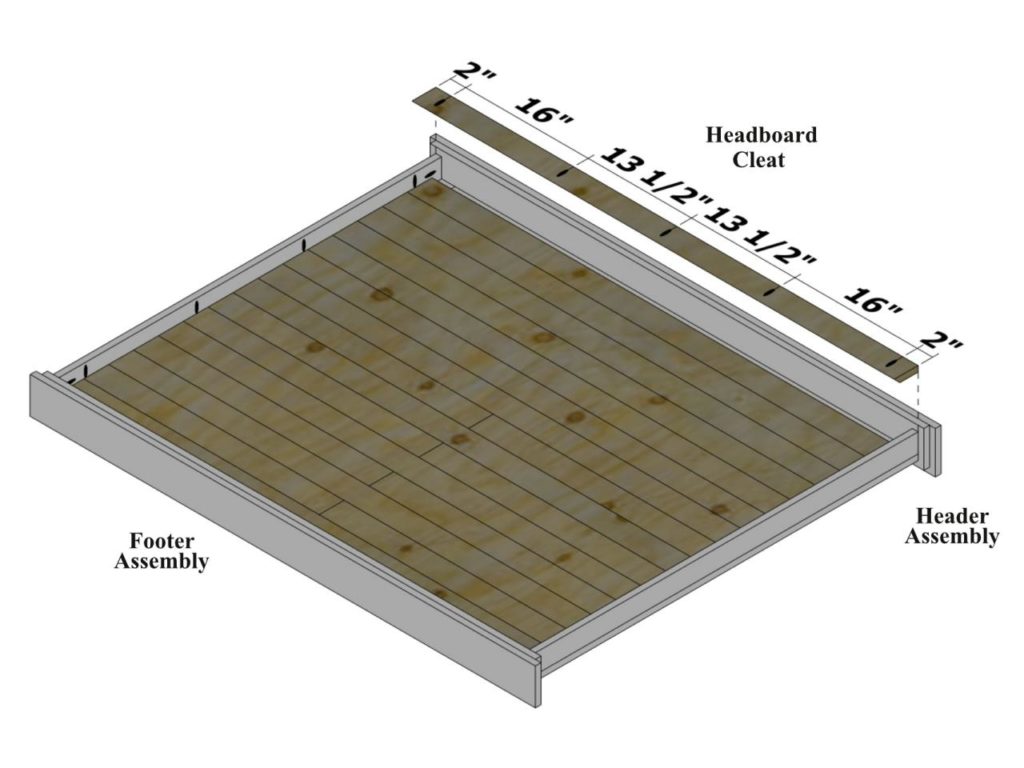
Use above image as a guide for drilling vertical pocket holes on the widest face of the headboard cleat at 2 inches from each end, 18 inches from each end and centered.
Position the headboard cleat flush against the sub head and the outside edges of the side stiles and clamp in place. Attach the headboard cleat to the sub header using glue and 1-1/4-inch pocket-hole screws as shown in Image 3. Attach the headboard cleat to the side rails using glue and the side stiles using glue and 1-1/4-inch brads. Apply a finish to the ends of the headboard cleat and wall cleat.
Position the headboard assembly in the desired location, flush against the wall to which you plan to install it.
Place the wall cleat flush underneath and against the headboard cleat as shown above. Mark the position of the wall cleat.
Use a level to square the cleat and attach it to the studs in your wall using 3-1/2-inch screws, as shown above. (The drywall is transparent to illustrate the position of the studs.)
Image below indicates how the headboard cleat (shown here unattached for clarity) will fit on the wall cleat.
The original plan can be found at http://www.diynetwork.com/how-to/skills-and-know-how/carpentry-and-woodworking/how-to-make-a-rustic-style-headboard

