Bathroom Medicine Cabinet

Make full use of your bathroom space by building a sleek storage cabinet that also doubles as a full-length mirror. This bathroom mirror storage cabinet is 5 ½” deep on the inside, 24” wide and 60” tall, with adjustable shelving to easily fit products of any height. You can tackle this project in one afternoon.
- (4) 1 x 6 Pine Boards, 8’ Long
- (3) 1 x 4 Pine Boards, 8’ Long
- 1/4 x 24 x 96” Fir Plywood
- (28) 1 1/2” Bugle-Head Screws
- (32) 1” Bugle-Head Screws
- (8) 3” Bugle-Head Screws
- (8) 1 1/2” Pocket-Hole Screws
- (80) 5/8” Hinge Screws (typically included with packaged hinge)
- 1 1/2 x 60” Brass Piano Hinge
- (20) 3/8” Shelf Pegs
- 120-Grit Sandpaper
- 180-Grit Sandpaper
- 3/8” Drill Bit
- 1/8” Drill Bit
- Pocket Hole Jig + Piloting Bit
- Single-Strength Mirror (approx. 17 x 53”)
- Mirror Adhesive
- Masking Tape
- Wood Glue
- Clamps
1×6 Boards:
- (2) pieces, 60” long for the sides
- (2) pieces, 22 1/2” long for the top and bottom
- (5) pieces, 22 3/8” long for the shelves
1×4 Boards:
- (2) pieces, 60” long for the sides of the door
- (2) pieces, 17” long for the top and bottom of the door
- (2) pieces, 22 1/2” long for the top and bottom back rails
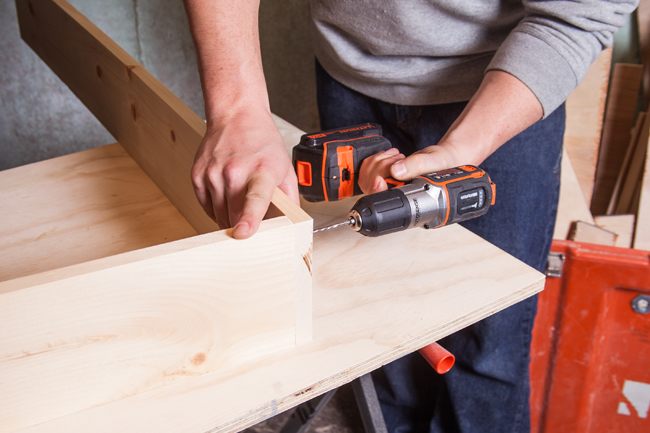
Place the two 60” 1 x 6 side pieces on-edge, parallel to each other. Apply wood glue to the ends of the two 22 1/2” 1 x 6 pieces, and place them flush between the sides at the top and bottom to form a rectangular frame. Use a drill and a 1/8” drill bit to drill three evenly spaced, 3/8” pilot holes from each end of the side pieces. Drive 1 1/2” screws through the sides and into the end pieces to assemble the cabinet box.
TIP: Depending on what type of screw you’re using, pilot holes should be just slightly smaller than the screw. The idea is to allow the hole to be big enough for the screw to pass through without splitting the wood, but at the same time, small enough so that the threads grip firmly.

Apply wood glue to the back of the 22 1/2” 1 x 4 back rail, and place it inside the cabinet box frame, flush at the back and the top of the frame. Drill pilot holes through the sides and top of the box to penetrate into the back rail. Attach the back rail using eight 1 1/2” screws. Install the second back rail in the same position on the bottom of the box.

Use a 3/8” drill bit to drill two vertical rows of holes on the inside faces of the box sides, 1” from the front and back edges. Space each pair of holes 2” apart vertically, and drill the holes 1/2” deep.
TIP: Place a piece of masking tape ½” above the drill bit. This will help indicate the depth of the holes.

Build the door facedown. Use a pocket-hole jig, piloting bit and drill two pocket holes in both ends of the two 17” pieces of 1 x 4. Apply wood glue to the ends of the 17” pieces, and place them flush between the two 60” pieces of 1 x 4. Add clamps to the joint and then screw the door frame together with 1 1/2” pocket hole screws, using the screwdriver. Measure the overall width and length of the door frame. Cut a piece of 1/4” fir plywood to the frame’s dimensions. Apply glue and screw the plywood to the back of the door, with 1” screws spaced 6” apart.
TIPS:
- Pocket holes are angular holes that allow you to join two flat pieces of wood together at 90°. Pocket holes are made with a small jig that positions the bit to penetrate through the end of one piece into the side of a corresponding piece.
- It’s helpful to clamp the joints of the door together while joining them with screws. Add additional clamps to keep the door flat.

Measure the recess inside the door frame and subtract 3/16” from the width and length. Order a single-strength mirror to the measured dimensions.

Use 120-grit sandpaper to sand the cabinet box, shelves and door. Round over all the corners and edges. Apply the stain or paint and allow it to dry as directed. Seal the stained wood with two coats of aerosol lacquer, hand-sanding in between coats with 180-grit sandpaper.
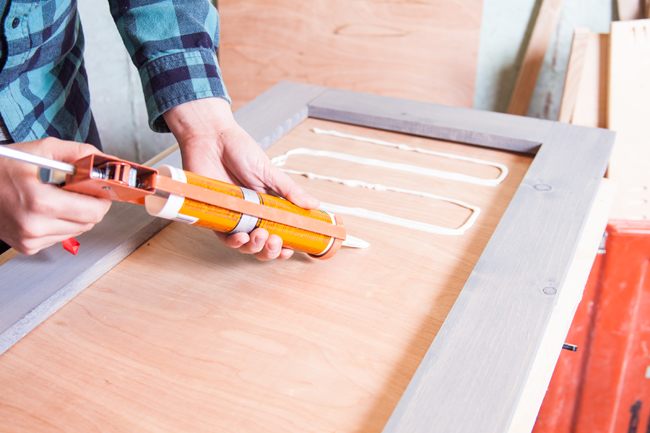
Place the door face up on a flat surface. Apply mirror adhesive liberally to the plywood. Set the mirror into the opening. Place books or other similar items on the mirror to aid adhesion. Allow the adhesive to dry as directed.
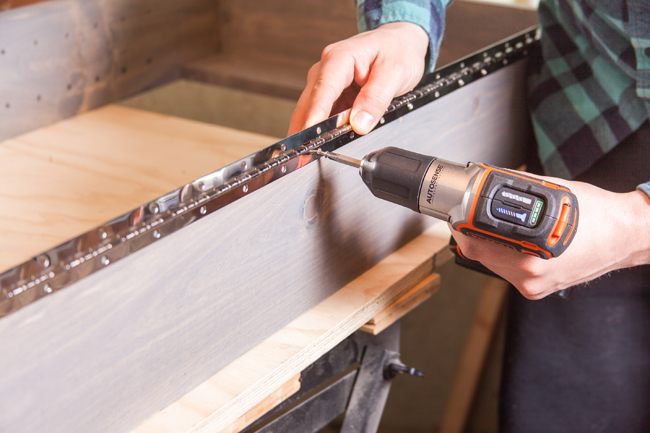
Use a 1 ½” x 60” piano hinge to the side of the cabinet box, using 5/8” screws. Place the door on the cabinet and screw the other half of the hinge to the side of the door.
Locate at least two wall studs in the desired location for the cabinet. Fit the cabinet on the wall. Make sure the cabinet is level. Anchor the cabinet to the wall through the top and bottom back rails with 3” screws driven into the wall studs.

Place 3/8” shelf pegs in corresponding shelf-peg holes. Insert the shelves in the cabinet, resting them on top of the pegs. You can store toiletries, beauty products, folded towels and other small bathroom items on the shelves.
The original plan can be found at https://www.blackanddecker.com
![]() [email_link]
[email_link]