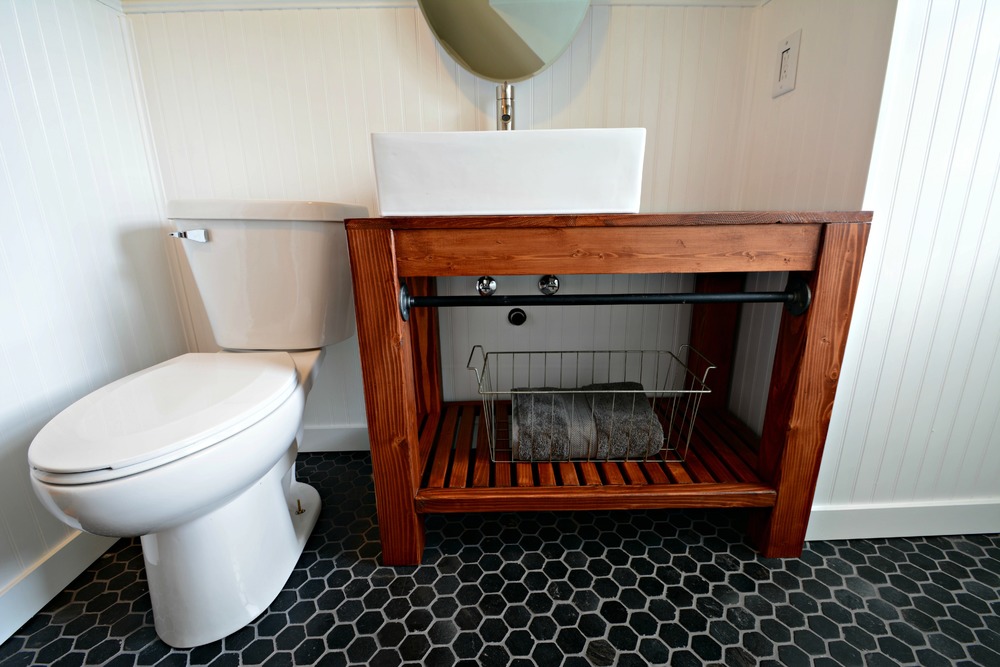
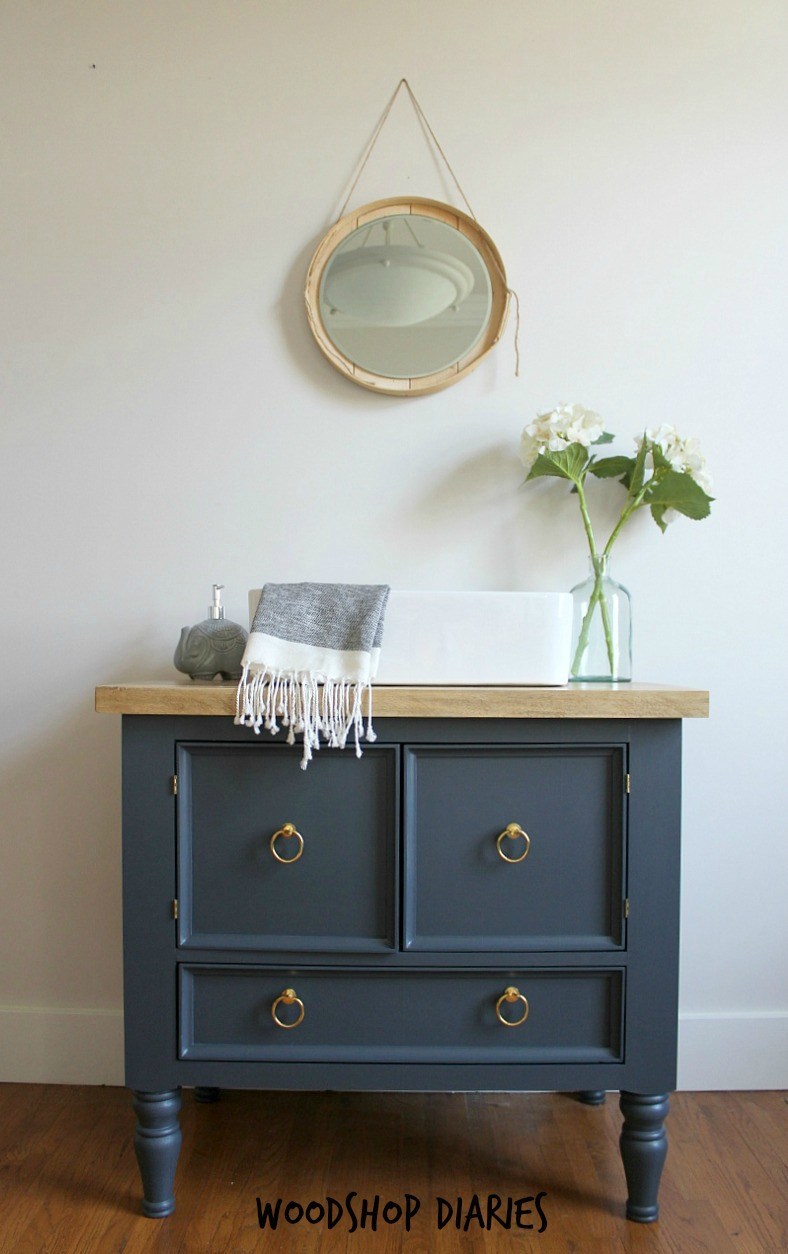
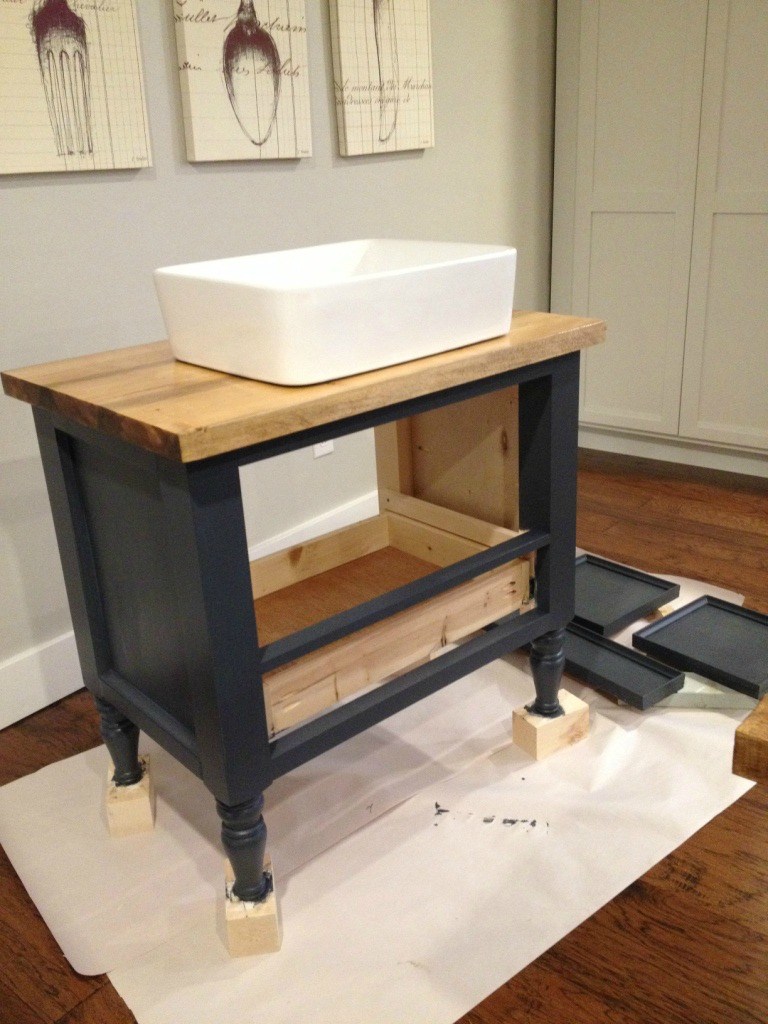
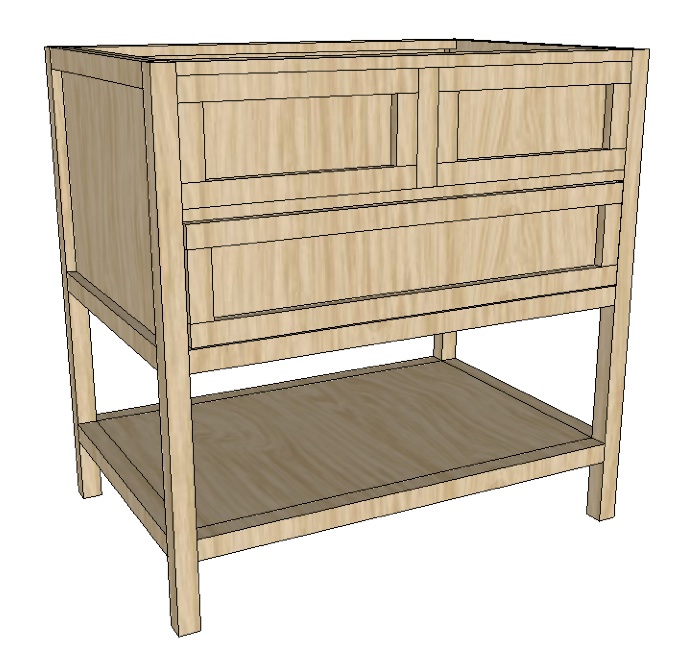
Bathroom Vanity


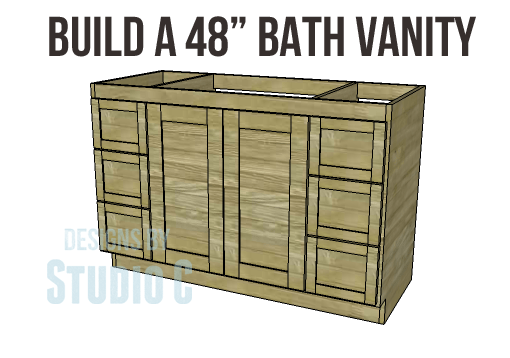
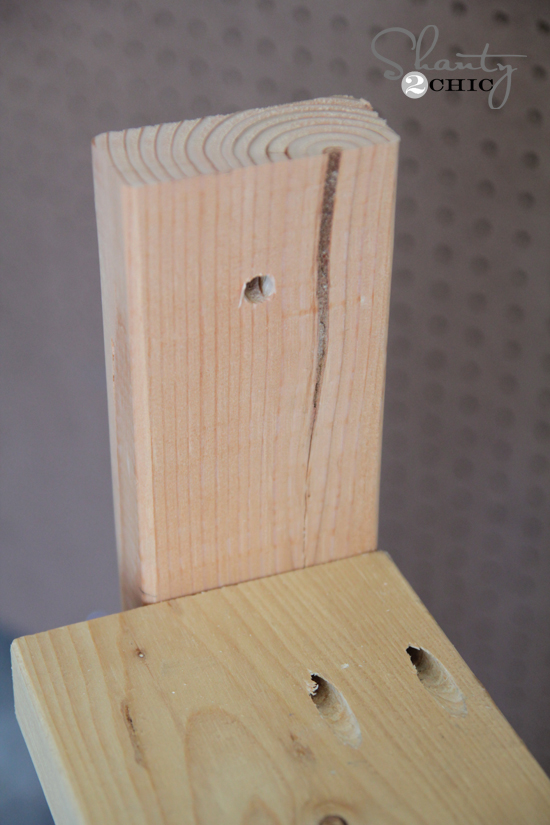
Note: Before constructing this vanity, make sure it will fit around the plumbing lines and pipe without interference! We had to cut a notch in the divider to allow for the cold water line which therefore shortened the upper drawer. It wasn’t that big of a deal to make such alterations but had I paid attention to the location of the plumbing beforehand, this could have been avoided! The same will apply to the adjustable shelf!

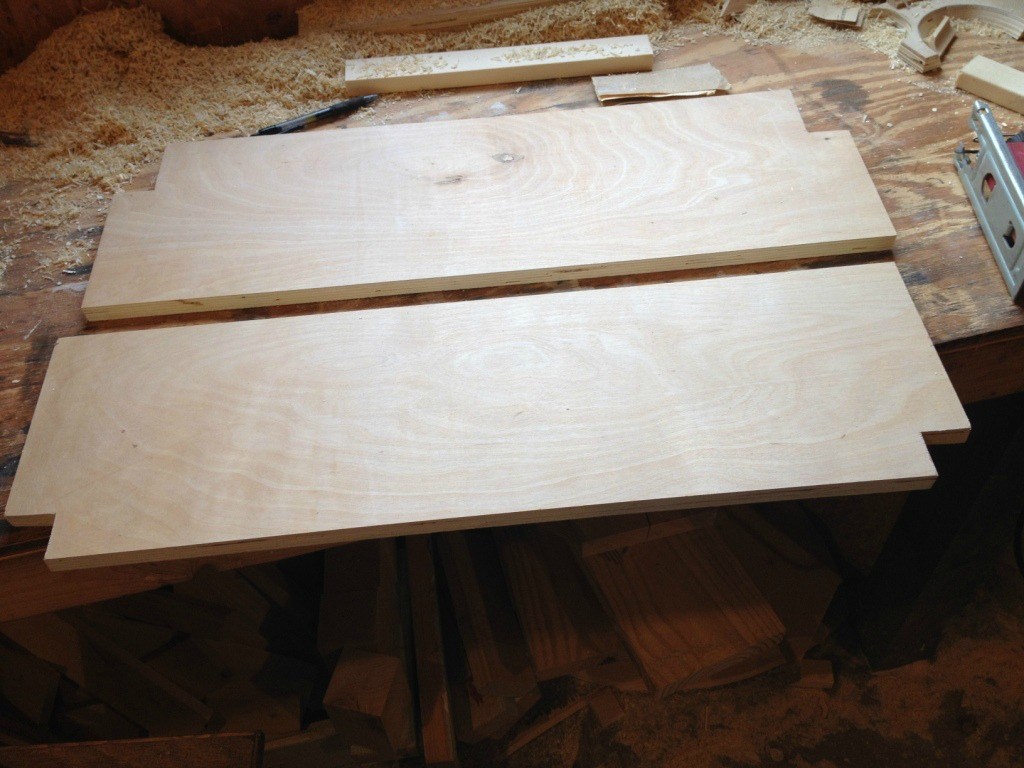
Also, to maintain the consistency of the wood species, we cut all of the pieces out of plywood and used edge banding on the exposed edges. The drawers can be cut out of cabinet grade plywood, which is a little cheaper than oak or birch. This makes the project very economical and reduces the amount of waste.
Materials:

  • 1″ pocket hole screws
  • 1-1/4″ pocket hole screws
  • 6 sets of 18″ drawer slides
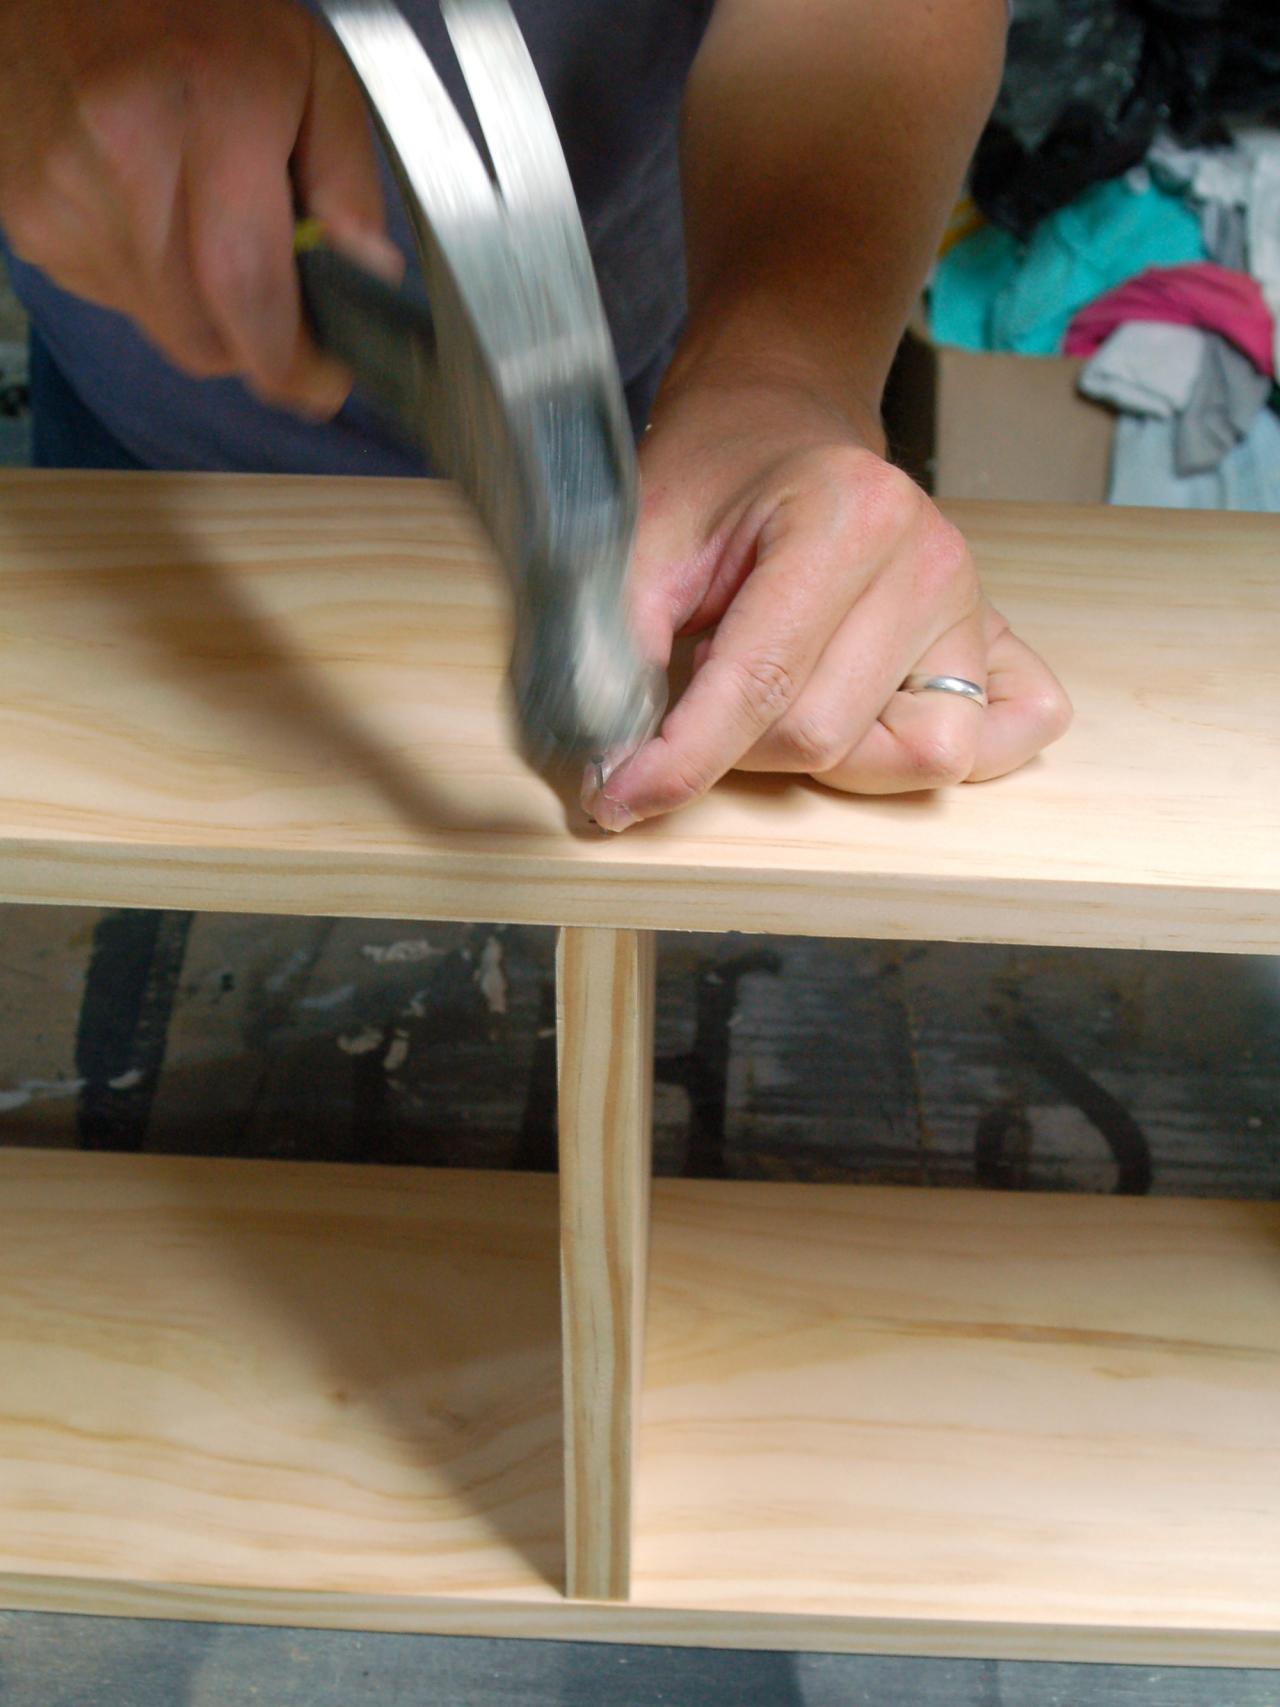
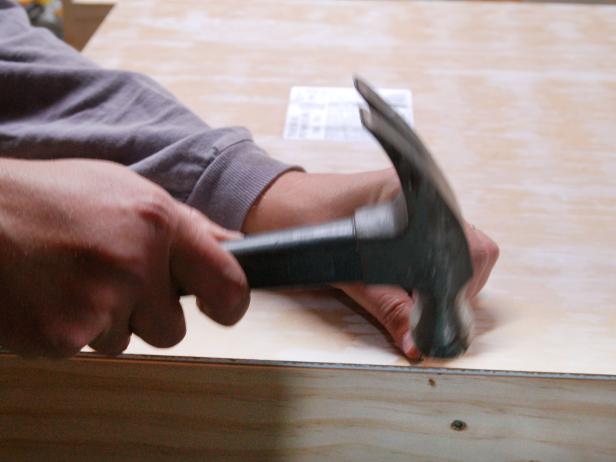
  • Edge banding, if desired
  • 8 cabinet pulls
  • 2 sets of hinges
  • Finishing supplies

Lumber:

  • Half sheet of 1/2″ plywood
  • 1 sheet of 3/4″ cabinet grade plywood
  • 2 sheets of 3/4″ plywood

Cut List:

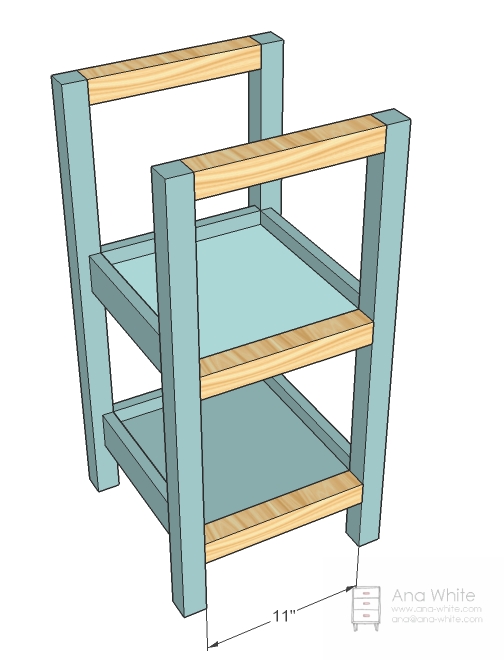
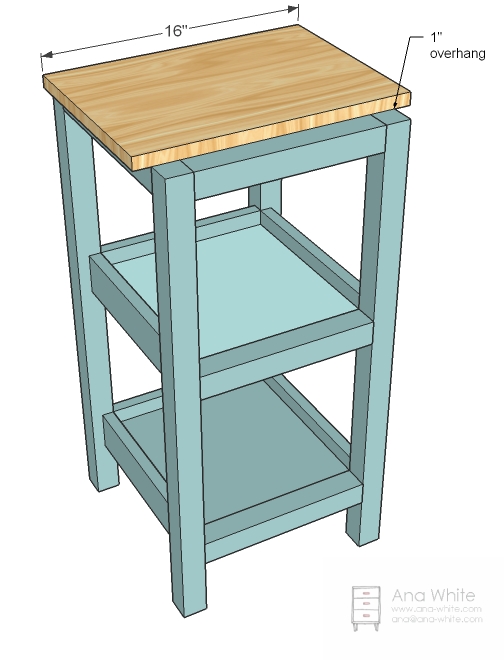
  • 2 – 3/4″ plywood at 20-1/2″ x 32-1/4″ – Sides
  • 1 – 3/4″ plywood at 20-1/2″ x 46-1/2″ – Bottom
  • 1 – 3/4″ plywood at 4″ x 46-1/2″ – Kickplate
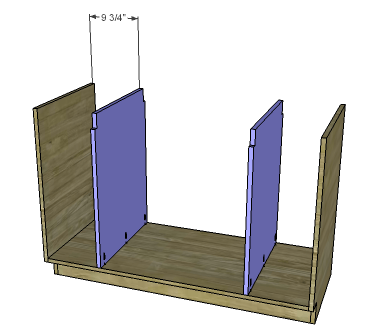
  • 2 – 3/4″ plywood at 20-1/2″ x 27-1/2″ – Dividers
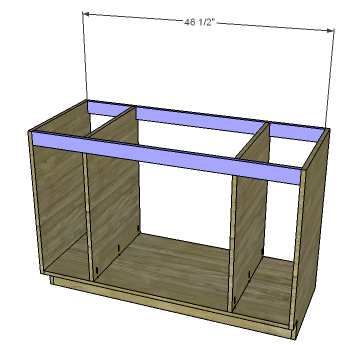
  • 2 – 3/4″ plywood at 2-1/2″ x 46-1/2″ – Upper Stretchers
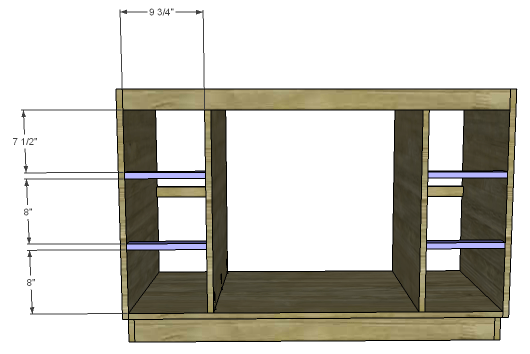
  • 6 – 3/4″ plywood at 1-1/2″ x 9-3/4″ – Drawer Stretchers
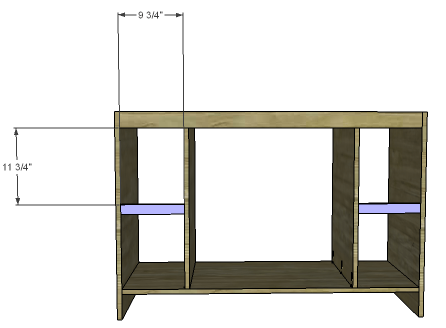
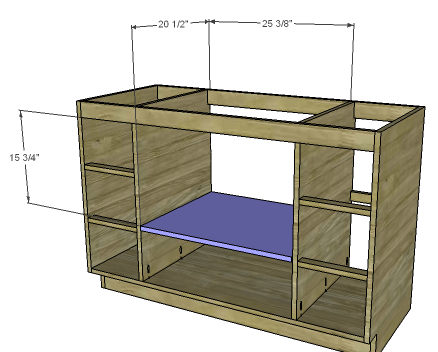
  • 1 – 3/4″ plywood at 20-1/2″ x 25-3/8″ – Shelf
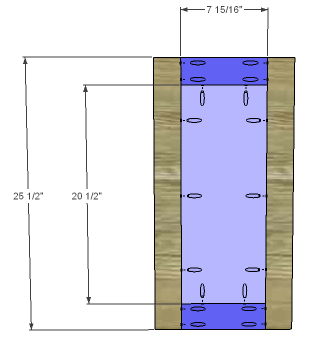
  • 4 – 3/4″ plywood at 2-1/2″ x 7-15/16″ – Door Rails
  • 4 – 3/4″ plywood at 7 15/16″ x 25-1/2″ – Door Stiles
  • 2 – 1/2″ plywood at 7-15/16″ x 20-1/2″ – Door Panels
  • 6 – 3/4″ plywood at 7-1/4″ x 16-1/2″ – Drawer Bottoms
  • 12 – 3/4″ plywood at 5-1/2″ x 16-1/2″ – Drawer Sides
  • 12 – 3/4″ plywood at 5-1/2″ x 8-3/4″ – Drawer Front & Back
  • 12 – 3/4″ plywood at 1-1/2″ x 7-1/4″ – Drawer Front Rails
  • 4 – 3/4″ plywood at 1-1/2″ x 8″ – Upper Drawer Front Stiles
  • 8 – 3/4″ plywood at 1-1/2″ x 8-1/2″ – Drawer Front Stiles
  • 2 – 1/2″ plywood at 5″ x 7-1/4″ – Upper Drawer Front Panel
  • 4 – 1/2″ plywood at 5-1/2″ x 7-1/4″ – Drawer Front Panels

Step 1:

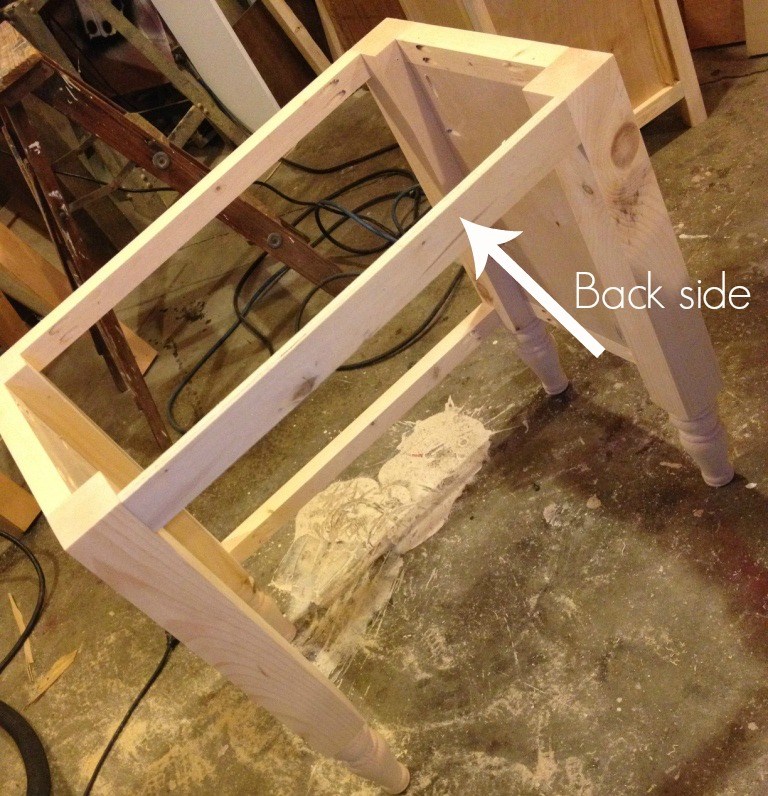
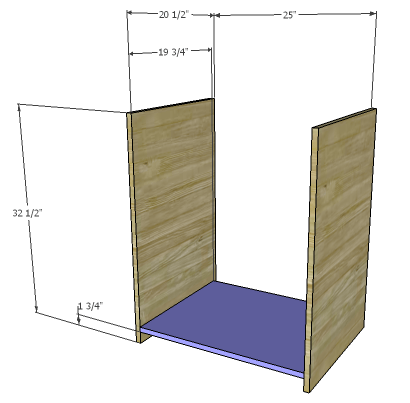
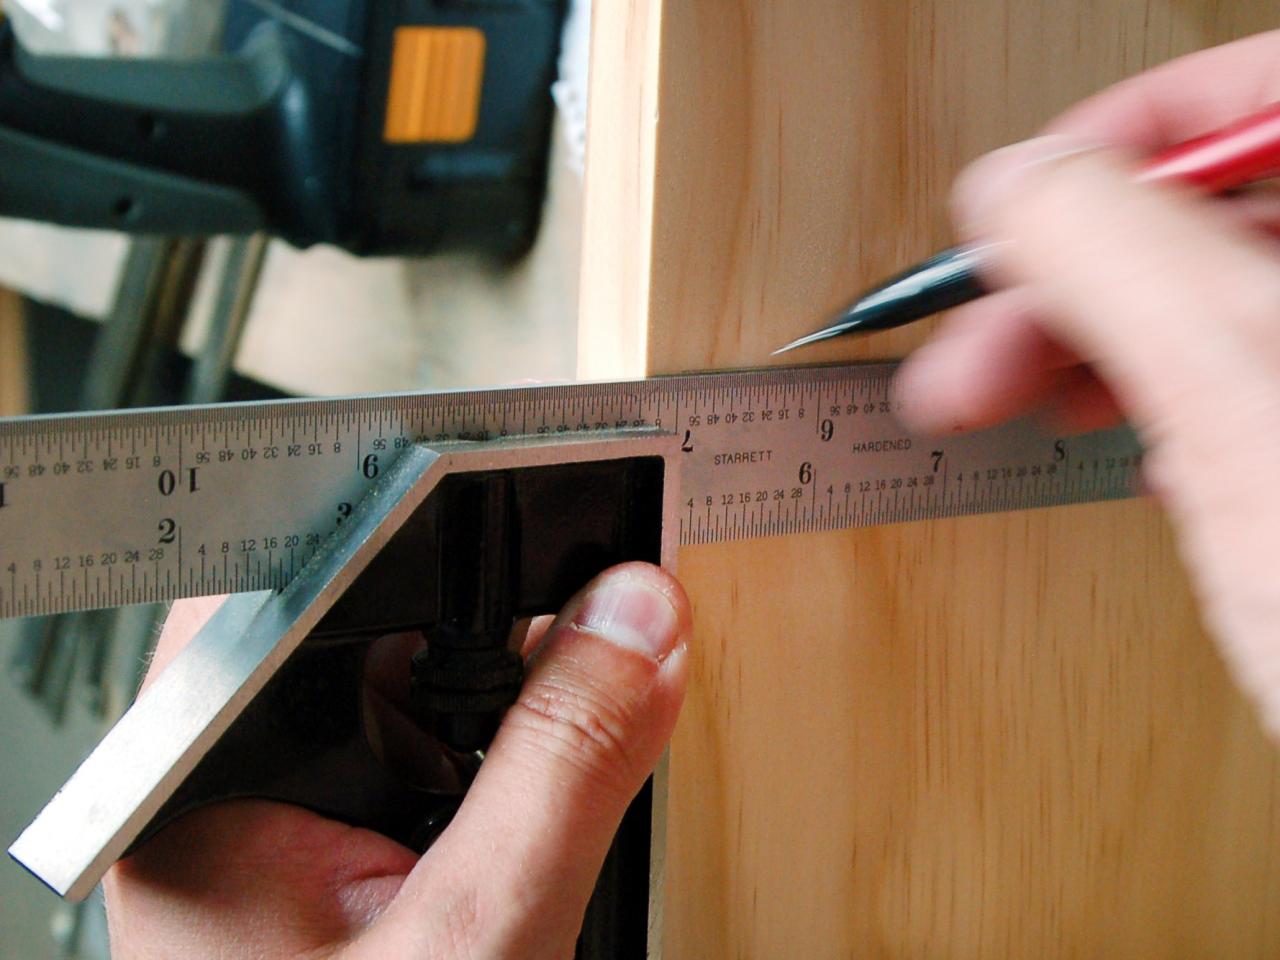
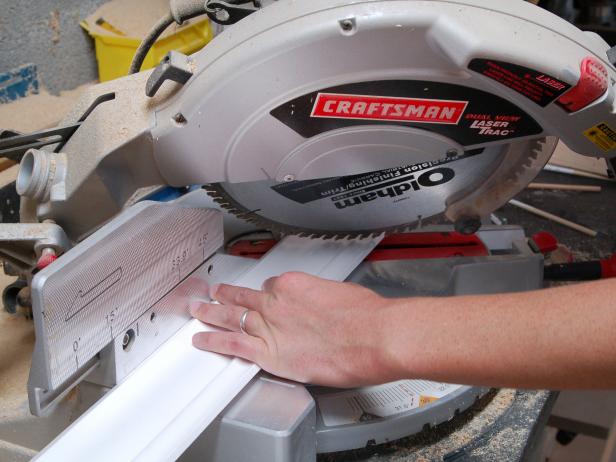
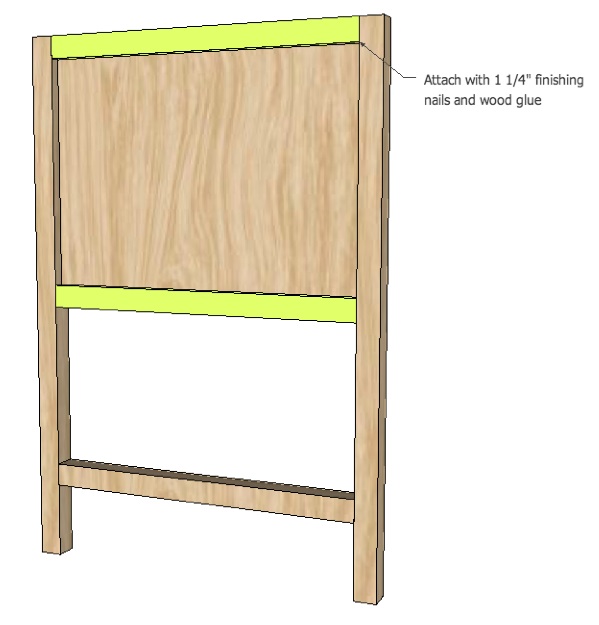
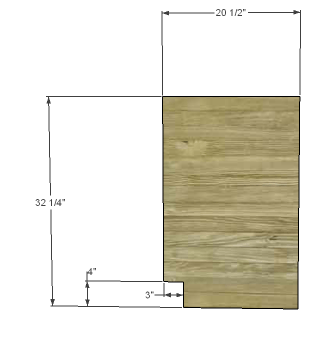
Edge banding will be applied to the exposed edges of the plywood prior to assembly! Cut the pieces for the sides. Cut the notch for the kickplate using a jigsaw

Step 2:

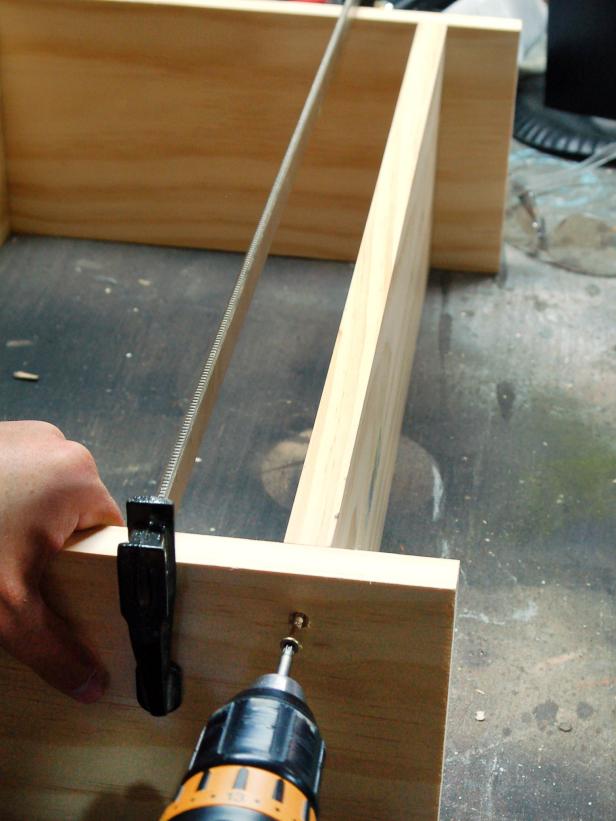
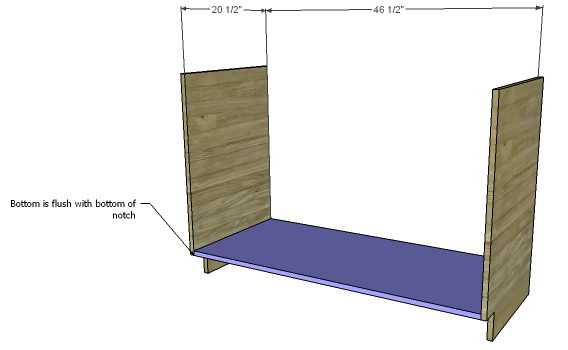
Cut the piece for the bottom and drill pocket holes at each end. Attach to the sides just above the horizontal line for the kickplate using glue and 1-1/4″ pocket hole screws.

Step 3:

Step 4:

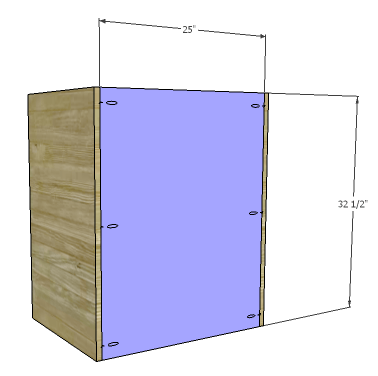
Cut the piece for the divider. Cut the notches as shown using a jigsaw. Drill pocket holes in the lower edge.  Secure the divider to the bottom as shown using glue and 1-1/4″ pocket hole screws.

Step 5:

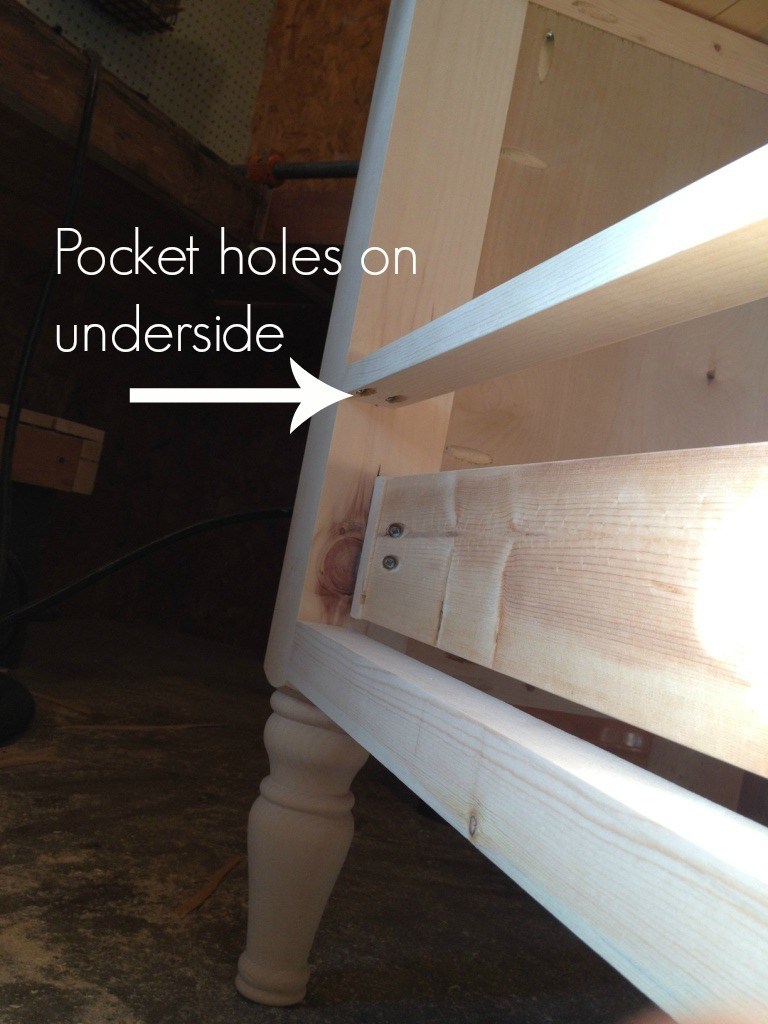
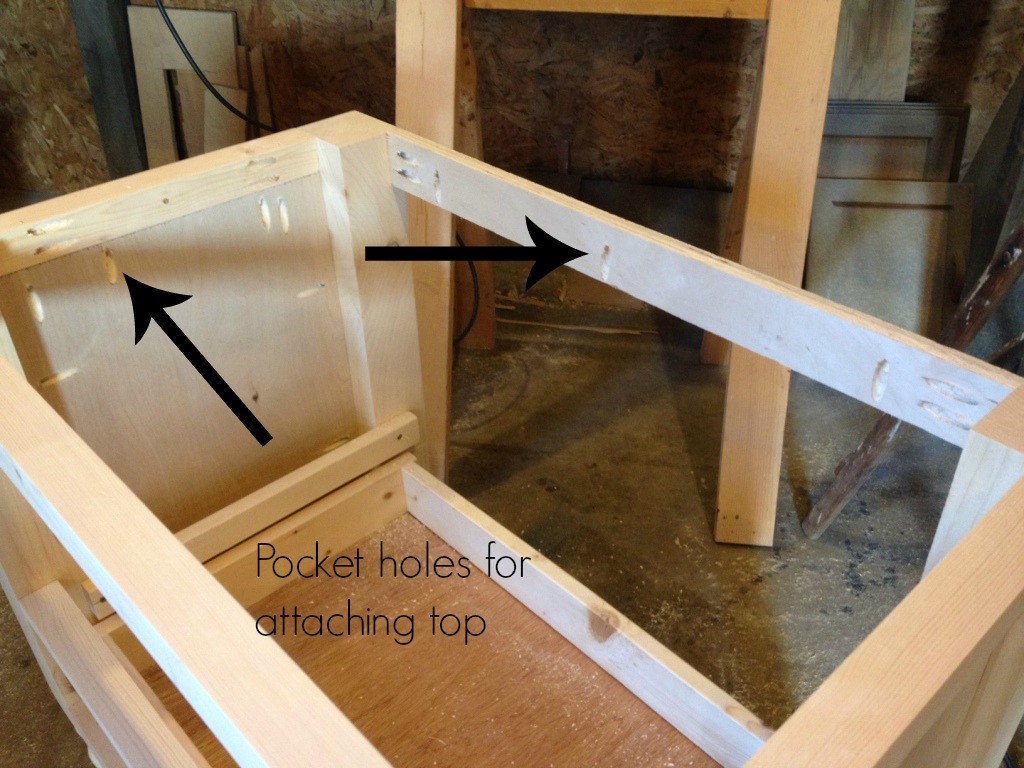
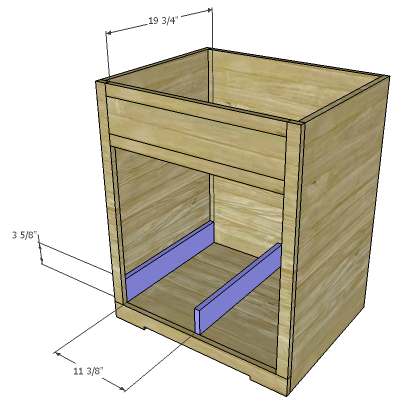
Cut the pieces for the upper stretchers. Drill pocket holes in each end as well as one pocket hole as shown to secure the divider. Position as shown, then secure to the sides and the divider using glue and 1-1/4″ pocket hole screws.

Step 6:

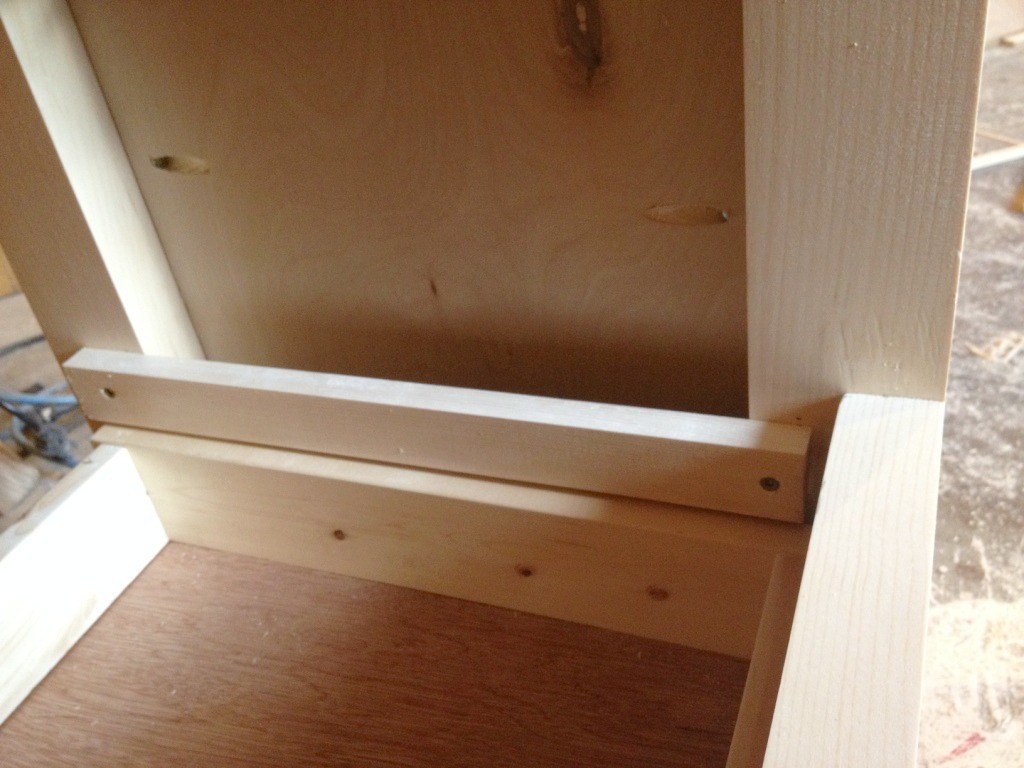
Cut the pieces for the stretchers and drill pocket holes in each end. Position at the center of the dividers and attach using glue and 1-1/4″ pocket hole screws.

Step 7:

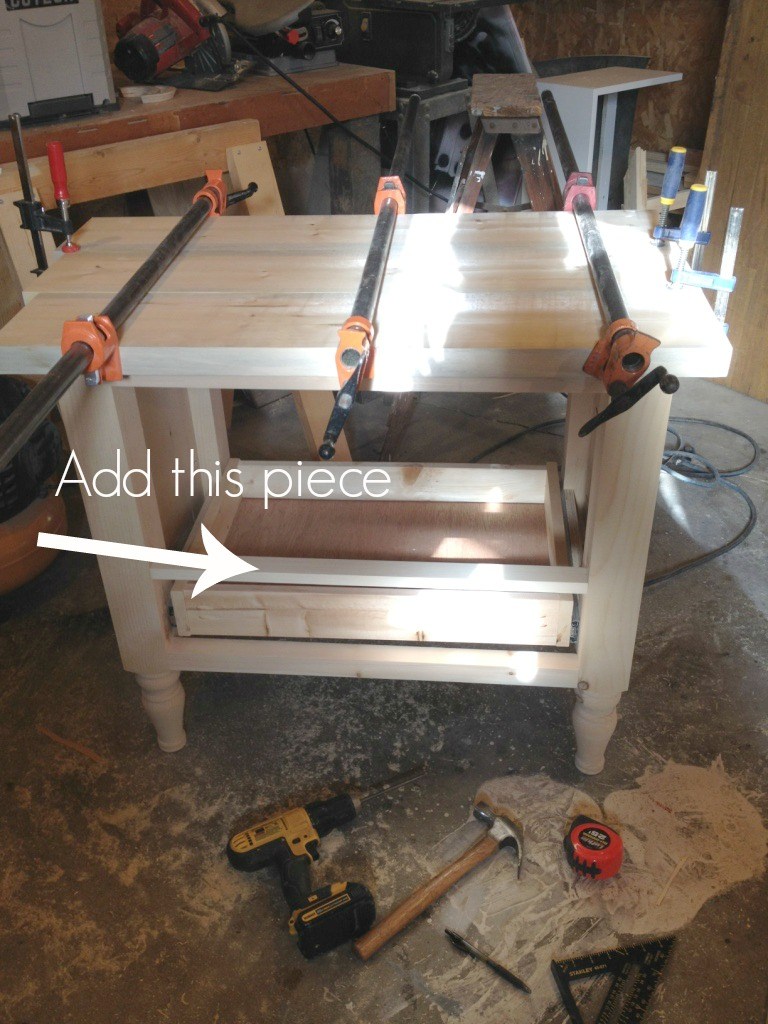
Position the front stretchers as shown then secure using glue and 1-1/4″ pocket hole screws.

Step 8:

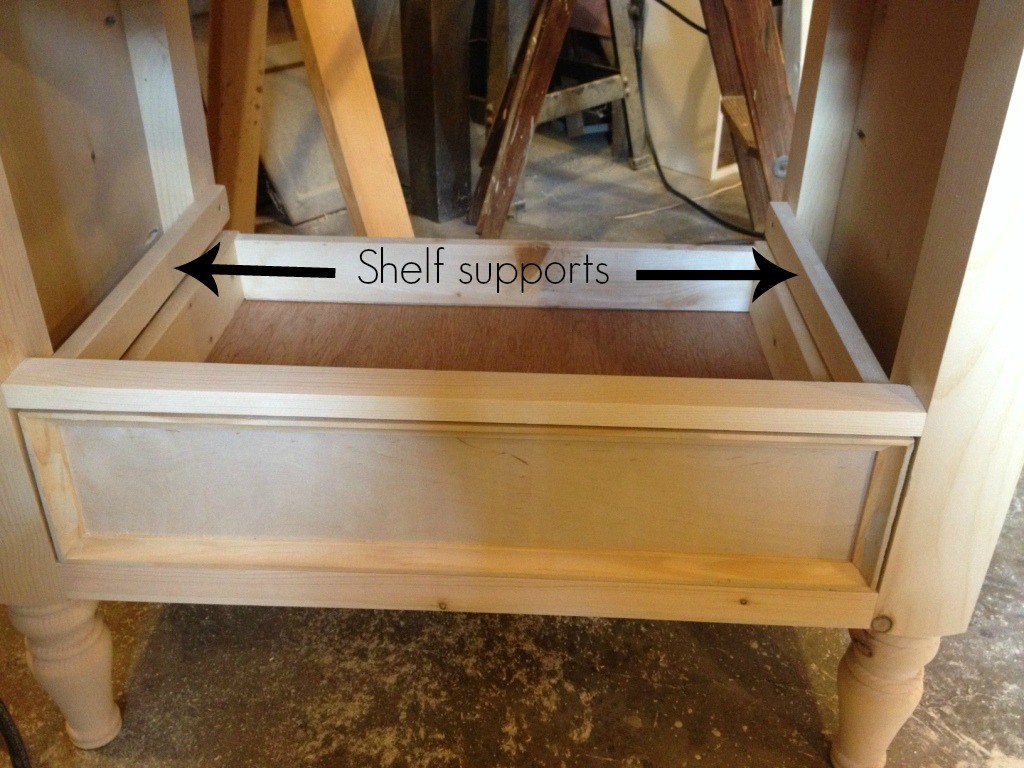
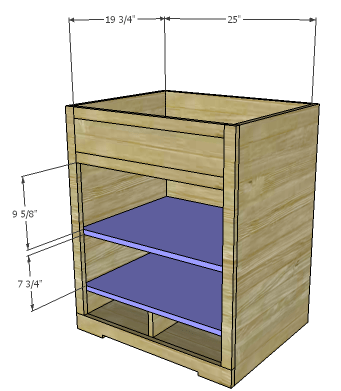
Cut the piece for the shelf and drill pocket holes in each side edge. Attach to the dividers using glue and 1-1/4″ pocket hole screws.

Step 9:

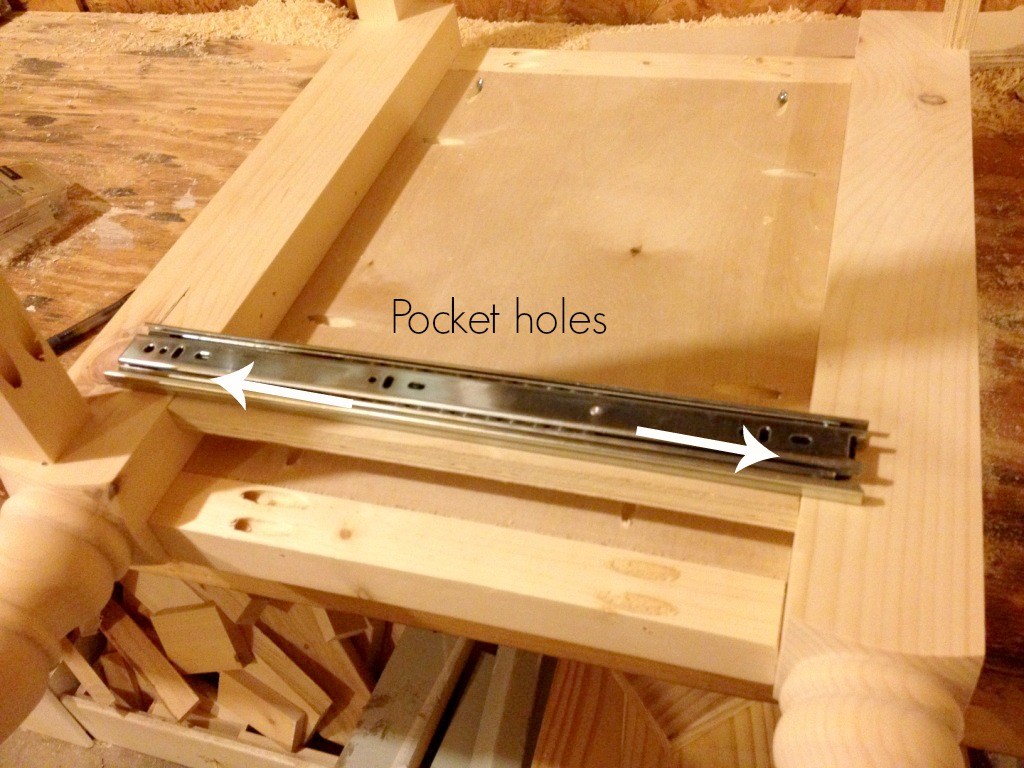
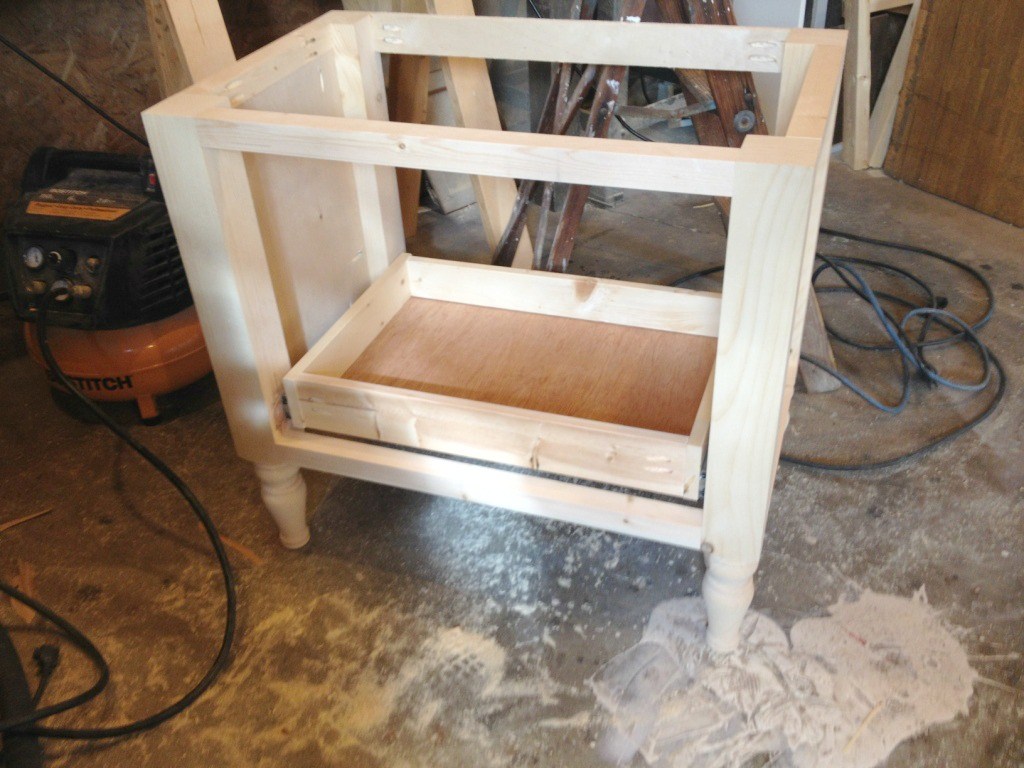
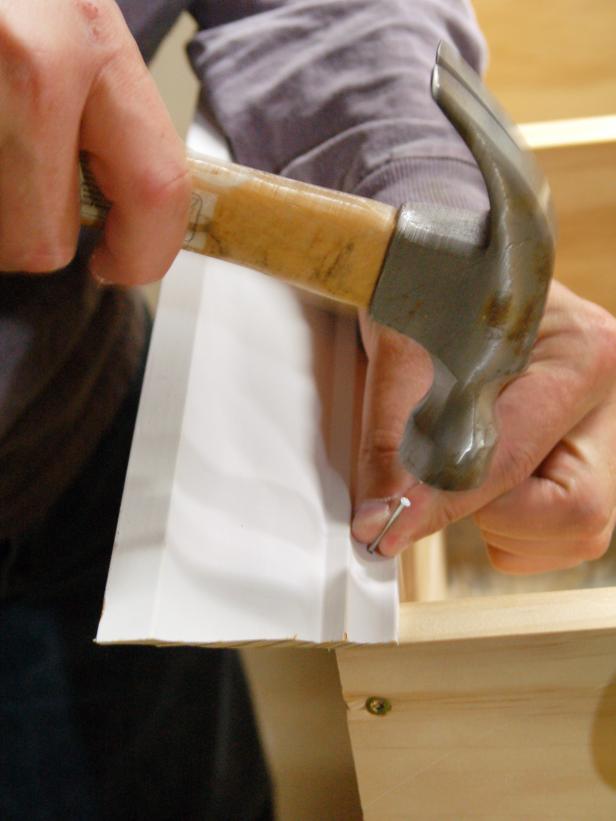
Cut the pieces for the drawers. Drill pocket holes in each end of the side pieces as well as all four edges of the bottom. Assemble as shown using glue and 1-1/4″ pocket hole screws. Install the drawer slides according to the manufacturer’s instructions. Make any necessary adjustments, then install the drawer boxes.

Step 10:

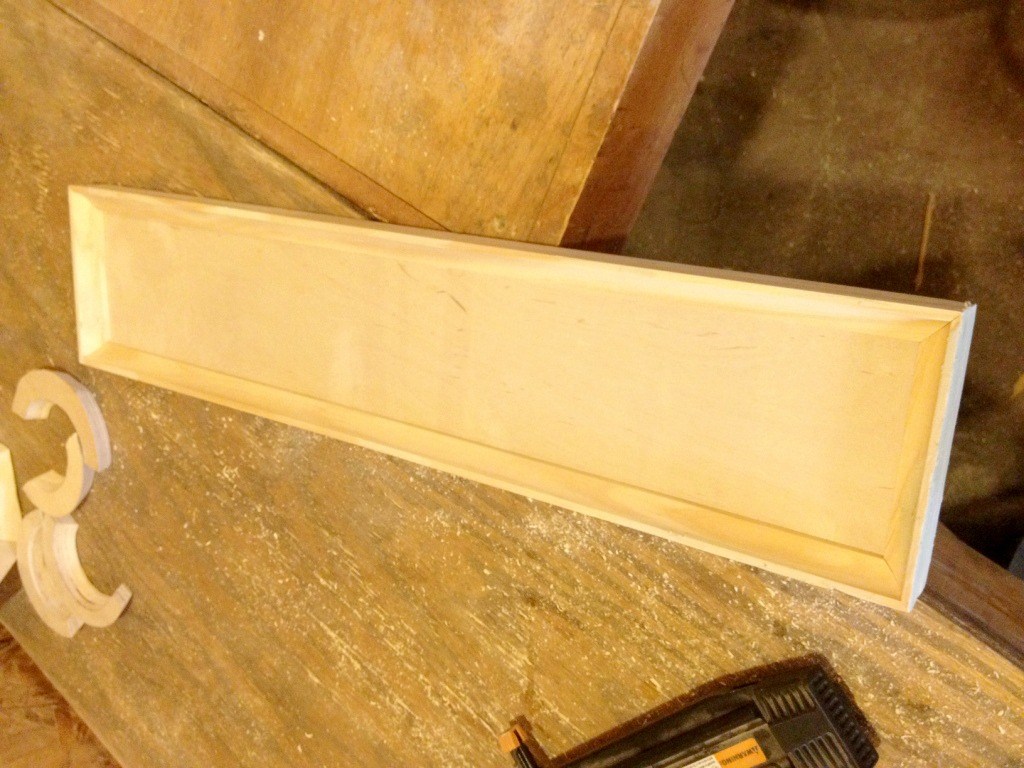
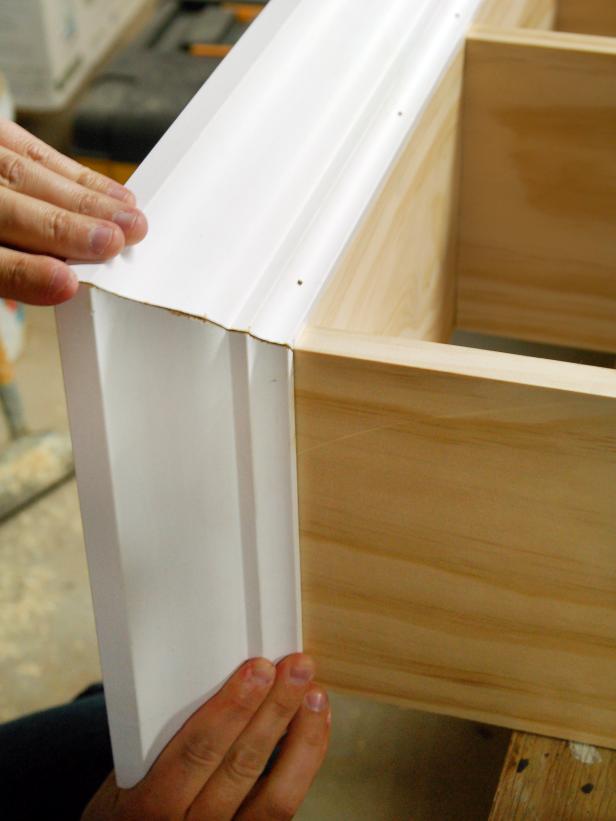
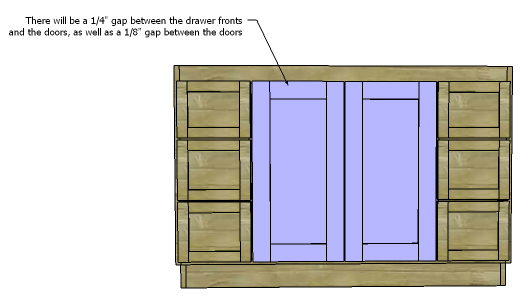
Cut the pieces for the drawer fronts. Drill pocket holes as shown. Attach the rails to the center panels using glue and 1″ pocket hole screws. The back face of the panel will be flush with the back face of the rails. Attach the stiles to the assembly using glue and 1-1/4″ pocket hole screws through the rails and 1″ pocket hole screws through the panel. Locate and drill holes for the cabinet pull. The drawer fronts will overlap the opening by 1/4″ on all sides. Drive screws through the holes drilled for the cabinet pull into the drawer box. Open the drawer, then secure the front from the inside of the box.

Step 11:

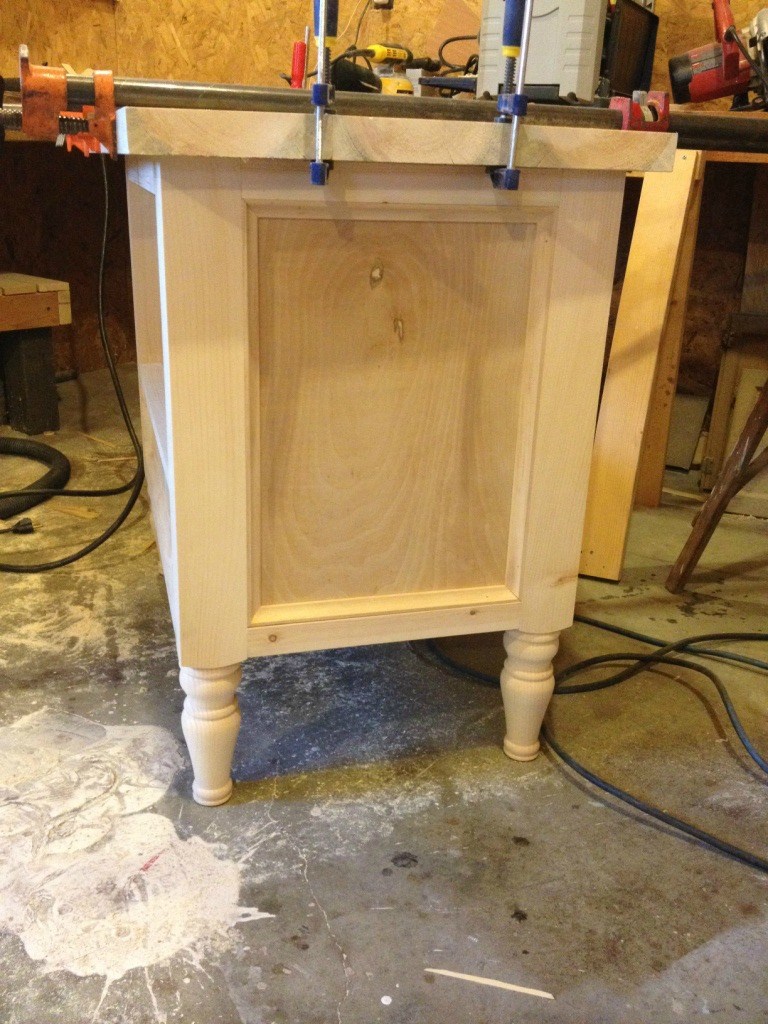
Cut the pieces for the door and assemble in the same manner as the drawer fronts. Attach the hinges according to the manufacturer’s instructions.
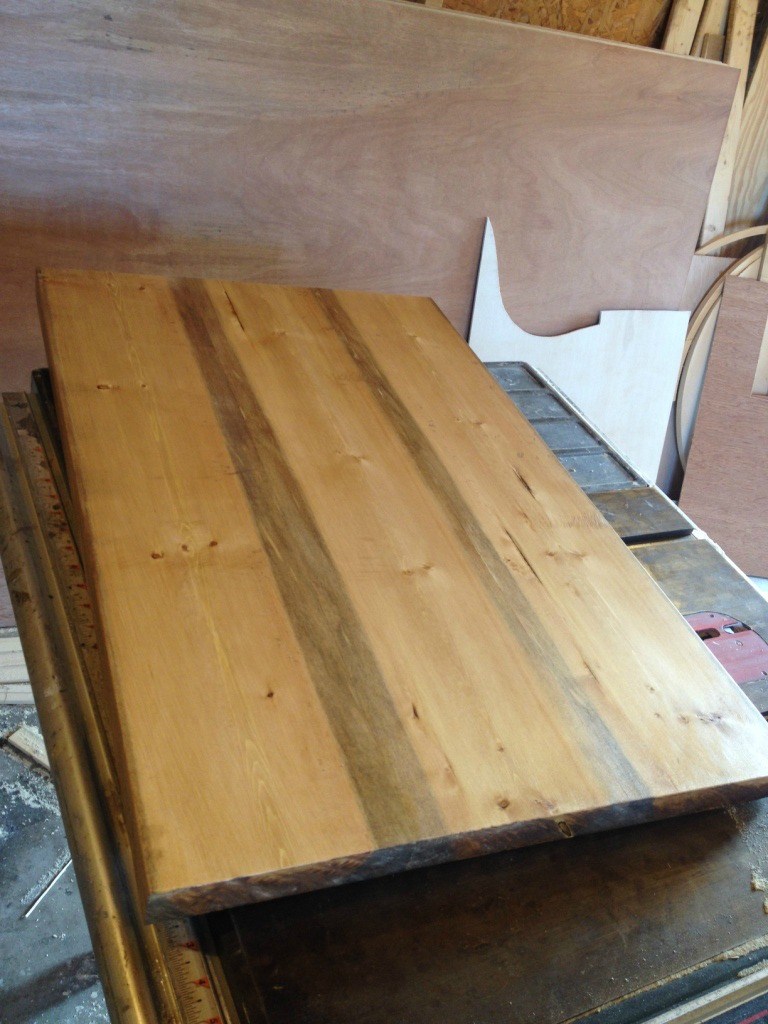
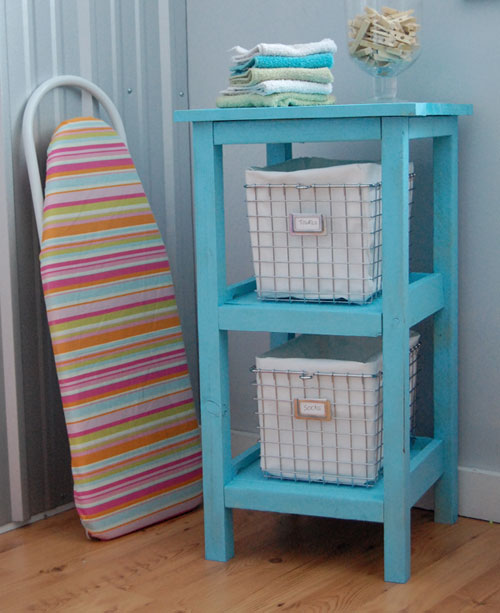
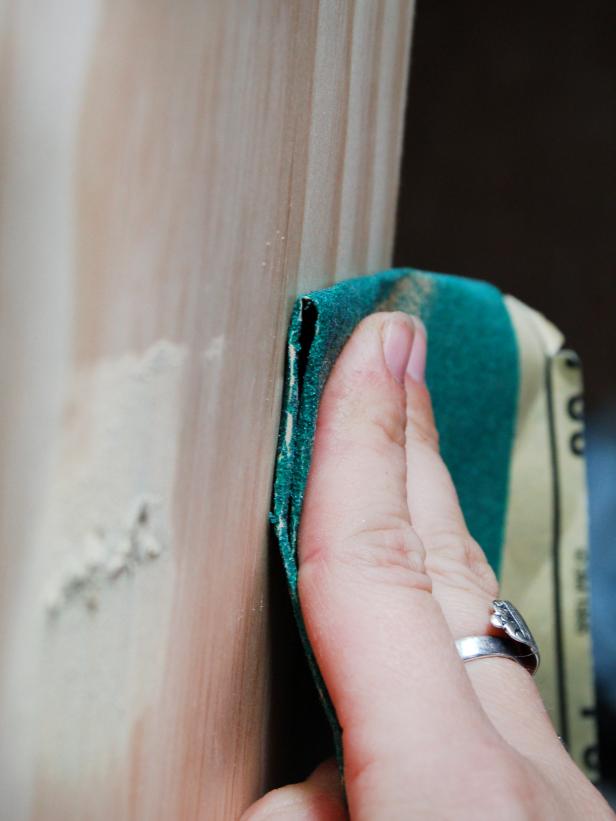
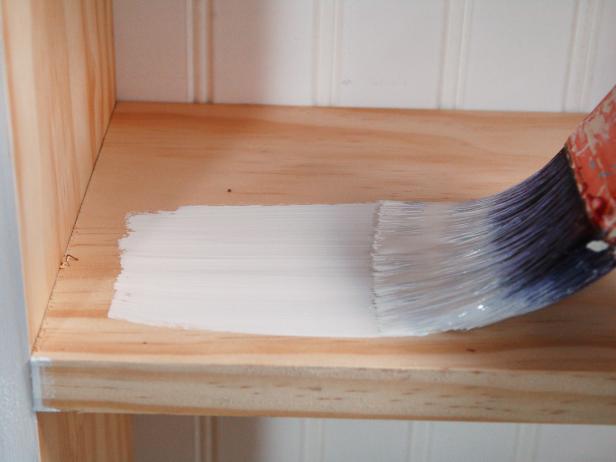
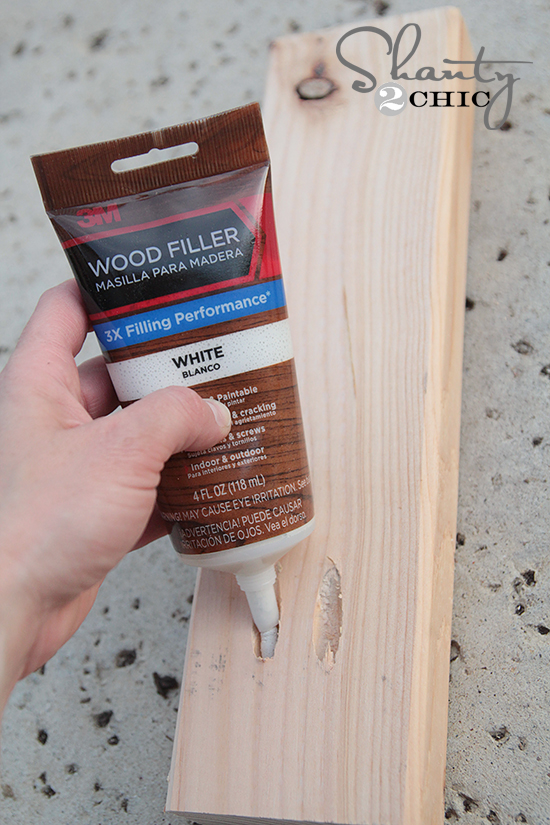
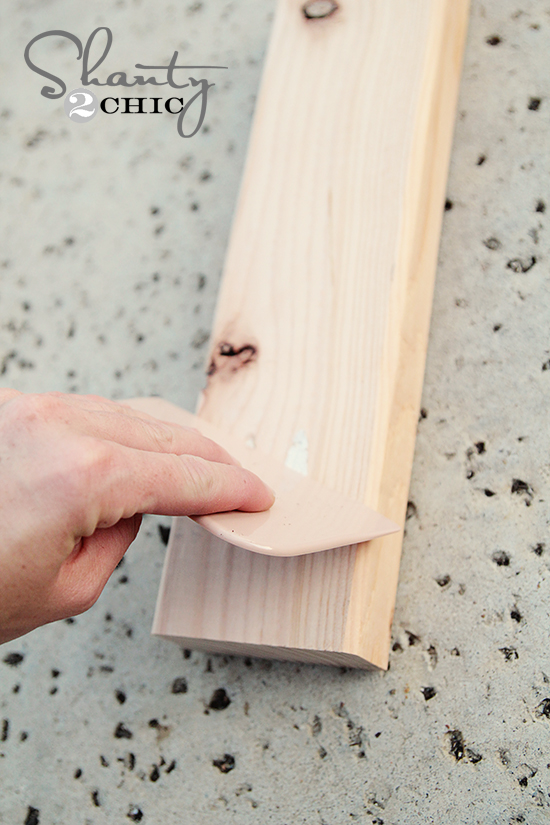
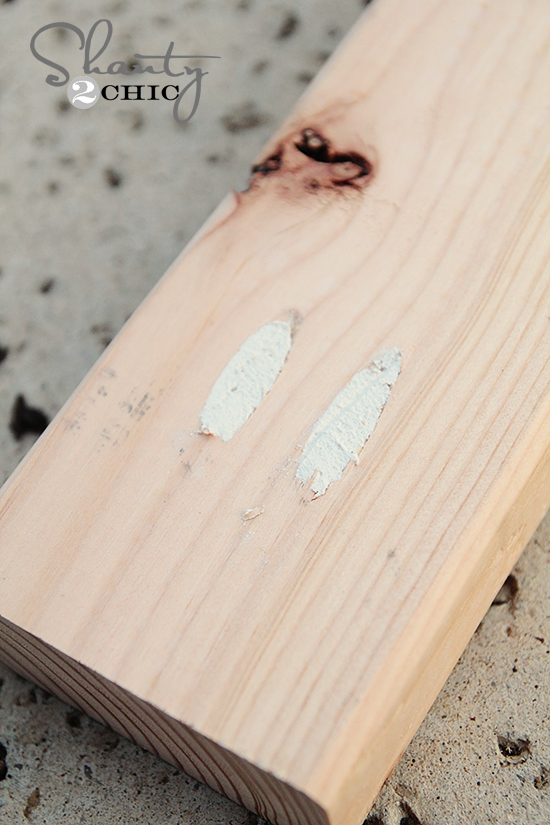
Finish as desired!

The original plan can be found at http://designsbystudioc.com

 
[email_link]


Farmhouse Bathroom Vanity


Material List:

  • 2 – 4″x4″x8′ (only need 29.25″ out of the second one)
  • 1 – 1″x20″x48″
  • 6 – 2″x2″x8′ (or I used 3 2″x4″ and ripped to width on a table saw)
  • 1 – 1″x4″x8′
  • 1 – 36″ 1/2″ black iron pipe
  • 2 – 1/2″ Black iron flanges
  • 2″ pocket hole screws
  • 1 1/4″ pocket hole screws
  • Franklin International Titebond Original Wood Glue
  • 1 1/4″ black screws (attaching flanges to legs)
  • Vessel sink and faucet
  • Plumbing connections in the same finish as the faucet
  • Stain/paint
  • Poly/Acrylic sealer
  • Bath Adhesive Caulk

Cut List:

  • (4) – 4×4 @ 29 ¼” long (legs)
  • (1) – 1×20 @ 38” long (top)
  • (2) – 2×2 @ 31” long (front/back of lower slats)
  • (4) – 2×2 @ 13” long (slats between 4×4’s)
  • (15) – 2×2 @ 17” long (slats between 31” 2×2’s)
  • (2) – 1×4 @ 31” long (front/back apron)
  • (2) – 1×4 @ 13” long (side aprons)

Instructions:

Put pocket holes into the back of both sides of all apron pieces.  Use wood glue and attach to 4×4’s, offsetting back 1/4″ from the outside edge using 2″ pocket hole screws.

Put pocket holes at the inside of the top of the 4×4’s and along the top of the aprons.  These will secure the top to the bottom.  Using wood glue, place bottom upside down onto the top piece. Attach with 1 1/4″ pocket hole screws.

At this point in time we stained/poly’d all pieces, including the ends of the slats. When they are attached, the small amount of the natural rounded edges of the 2×2’s could be exposed so it is best to have it stained ahead of time.

It is best to do the next part with the vanity upside down.  Measure down 7″ from the bottom of the inside of all legs.  Attach the 4 outside 2×2’s using pocket holes placed on the bottom and wood glue.  Put the other 13″ 2×2’s so they are lined up with the inside of the 2×2’s. They should be approximately 1/2″ apart.

Mark the following lines on the 31″ 2×2’s (see photo below), both sides, these will be the starting points for the 17″ slats in between.  Attach all with 1 1/4″ pocket hole screws and wood glue.

For the front metal bar, we used a black iron pipe.  We used flanges that the pipe could screw into. I cut the pipe around 29 3/4″ as there was a 1/2″ on each flange between where the threading stopped and the leg, then a little room to get the pipe between, then screw it out so it out so it was tight.  We purchased a pipe threader kit threads pipes up to 1″.  After cutting and threading the pipe, we held it up and marked the holes for each flange (doesn’t have to be exact, just whatever looks good).  They were probably 2″ on center from the bottom of the apron.  Attach with the black screws.

Place the sink/faucet on top of the vanity to determine the best placement.  For this sink, we determined that placing the sink about 2″ from each edge looked best.  Mark holes for the drain and faucet.

Drill holes according to instructions provided with your sink.  Our sink required a 1 1/4″ hole for the sink and 1 3/4″ for the drain.  Attach sink/faucet according to the directions provided with the sink/faucet.  Our sink required us to chisel out a small area around the drilled hole to accommodate a gasket for the bottom of the sink.  A router or wood chisel may be needed. Attach sink to vanity top using bath adhesive caulk.  Hook up plumbing, etc.


Enjoy that new bathroom vanity!

The original plan can be found at https://decorandthedog.net

 
[email_link]

Bathroom Vanity

Materials needed:

  • 4 vanity legs (Osborne Wood Part #5050)
  • ¾” plywood (1 sheet)
  • ¼” plywood (quarter sheet is plenty)
  • (2) 2x2x8
  • (2) 1x2x8
  • Cove molding (optional)
  • (2) 2x8x8 (for the top)
  • 2 sets of hinges
  • 16” drawer slide
  • 4 brass ring pulls

Step 1: Build the vanity side panels

Okay, first, let me explain something. Used to, standard height on vanities was 30” tall. It’s become standard now to do 36” tall (have you guys used both?  36” tall is SOOOOOO much nicer because you don’t have to bend over so far to wash your face, which is nice on the old back).

These vanity legs come 34 ½” long to accommodate a 1 ½” thick countertop to make it a total of 36” tall. HOWEVER, I purchased an above mount sink that is 5 ½” tall.  So, in order for the top of my sink to be 36” off the ground, I had to make my vanity 30 ½” tall.  Are we all on the same page?  If you are using an undermount sink or a drop in, you don’t have to cut the legs.  And your measurements will be a little different as far as the height goes.

Okay, so now that I’ve explained that, first I cut my vanity legs to be 29” tall. I’m going to be honest.  These legs are so smooth and pretty (unlike my own…HA!), it kind of hurt my soul a little to have to cut them.  But, you gotta do what you gotta do.

Then, I cut two pieces of 2×2 at 13” long and drilled 1 ½” pocket holes in both ends. I attached the 2x2s to the top between two legs using 2 ½” pocket hole screws making sure the outside of the 2×2 was flush with the outside of the legs.  See image below. I used my Kreg Rip cut to cut my plywood down to a 13” wide strip. Once I had my 13” strip, I cut two pieces 18” long and drilled pocket holes along the sides with my Kreg Jig.  I slid these pieces in between the vanity legs and attached to the 2×2 and the legs using 1 ¼” pocket hole screws.  See image below.  Make sure the inside of the plywood is flush with the inside of the 2×2.

Then I attached another 2×2 to the bottom using 1 ½” pocket holes and 2 ½” pocket hole screws. I screwed the plywood into this at the bottom as well.  That makes two panels that look like the image below.

Step 2: Attach the vanity sides together

I made my vanity 33” wide overall. Subtract 1” on each side for the top overhang and 6 inches (3” per leg) for the legs, and that gives 25”.  If you want your vanity to be wider, just adjust this measurement.

I cut two 2x2s at 25” long and drilled 1 ½” pocket hole screws in each end and used 2 ½” pocket hole screws to attach the side panels at the TOP OF THE FRONT SIDE as shown below and at the bottom as shown in the next picture.

Then I used a piece of scrap plywood (but you can use a 1×2) to attach across the top of the back side using pocket holes and screws. (When installing the vanity, this will be the piece you screw to the wall.)  Notice the bottom front side 2×2 in the image below.

Step 3: Add the drawer

I forgot to take a picture of part of this, but you can see most of it on the image below. I cut two pieces of 1×2 at 13” and screwed them into each side panel between the vanity legs using pocket holes and screws.

This is so you can attach the drawer slide as seen above. I attached the drawer slide to this 1×2 making sure to leave space in the front for the depth of the drawer front (which is about 1 ½”)

You can make them lots of different ways, but your overall size of the drawer (without the front) should be 16” deep and 24” wide.  I used 1x4s for the sides of the drawer, but 3 ½” strips of plywood would work just fine, too. Once the drawer was made, I attached it to the slides.

Step 4: Add the shelf

I made my drawer front 5 ¼” tall (more on that in a second). So, I cut a 1×2 at 25” and drilled pocket holes in each end and attached it into the legs as shown below.  I measured and made sure the distance between the top of the 2×2 and the bottom of the 1×2 was 5 ½” to allow room for the drawer front.  Sorry, I have the top gluing up in the picture…that’s actually step 6.

I cut two more 1x2s at about 16” and screwed them into the legs as shown below so that the top was flush with the bottom of the 1×2 on the front.

Then, I cut a piece of ¾” plywood at 17 ½” wide and 28” wide. I cut notches in each corner like the picture below.

Then I attempted to put the shelf in and there was NO WAY I could get it to go in as one piece. So I ripped it in half and put it in as two pieces.

Here’s why I did this: I have long hair.  Long hair and P-traps don’t get along.  Although I won’t be using this guest bathroom as my main bathroom, inevitably the P-trap will eventually get clogged and need to be cleaned (the fact I wash my paint brushes in the guest bathroom sinks probably won’t help the matter…).  I want to be able to remove this shelf when cleaning the P-trap so that 1. It doesn’t get covered in nasty P-trap grime on accident and 2. So there’s more room to work on it in here when the time comes. If you are totally okay with not removing the shelf, you could do this step BEFORE adding the drawer and screw it all in as one piece that can’t be removed. Up to you.

Step 5: Add drawer front and doors and trim

I already said that my drawer front was 5 ¼” tall. I cut it from the leftover 3/4″ plywood and made it ¼” shorter width wise than the drawer opening (24 ¾”) and added cove molding around the edges.

I also cut two doors from the 3/4″ plywood and nailed cove molding to them, too (my joints look bad below…they aren’t nailed in yet). The size of the doors will depend on the type of hinge you decide to use.  My doors ended up about 11 ½” tall and 12 ¼” wide.

Then I nailed cove around the side panels for a little extra detail

Putty the cracks and nail holes. Once the putty dries, sand everything well.  Don’t attach the drawer front or doors yet…it’s easier to paint them first.

Step 6: Make the top

I made my table top 33” wide and about 22” deep. I will likely trim the top down to 20-21” once the vanity is installed.  I’m not sure how far from the wall the top of the vanity will be when it’s installed (because of baseboards and the fact that walls are NEVER perfect), so I’m waiting to trim it down until I know how far off the back it will hang.  I want only 1” overhang in the front.  Sorry, that’s a lot of extra information.  But, it’s free so there you go.

I drilled pocket holes along the sides and back to attach the top later.

Step 7: Finish

I stained the top with Miniwax Puritan Pine and finished it with Miniwax Polycrylic. Since this will be in the bathroom, I plan to add SEVERAL coats before it’s actually installed.

I primed and painted the vanity in SW Navy. Once the paint was dry, I attached the drawer front by screwing it in from the inside of the drawer and attached the doors using small brass hinges.  The sink isn’t installed yet, but I set it on top to get the idea.  Once it’s ready, we will drill the hole in the top for the drain.

Then I added these brass ring pulls from D. Lawless Hardware. Aren’t they gorgeous?!  I think they really add so much character to the vanity.  Plus I’m a sucker for brass and navy.


The original plan can be found at https://www.woodshopdiaries.com/diy-bathroom-vanity/

 
[email_link]

Bathroom Vanity

Materials:

  • 1-1/4″ pocket hole screws
  • 1-1/4″ brad nails
  • Edge banding, optional
  • 6 – 1″ wide metal angles
  • Cabinet pulls
  • Wood glue
  • Sandpaper (100, 150, 220 grits)
  • Finishing supplies (primer & paint, or stain, sealer)

Lumber:

  • 2 – 4′ x 8′ sheets of 3/4″ plywood

Cut List:

  • 2 – 3/4″ plywood at 20-1/2″ x 32-1/2″ – Sides
  • 1 – 3/4″ plywood at 19-3/4″ x 25″ – Bottom
  • 1 – 3/4″ plywood at 25″ x 32-1/2″ – Back
  • 2 – 3/4″ plywood at 1-1/2″ x 30″ – Face Frame Sides
  • 1 – 3/4″ plywood at 2-1/2″ x 26-1/2″ – Face Frame Bottom
  • 1 – 3/4″ plywood at 4-1/2″ x 23-1/2″ – False Drawer Front
  • 2 – 3/4″ plywood at 1-1/2″ x 23-1/2″ – False Drawer Front
  • 3 – 3/4″ plywood at 3-5/8″ x 19-3/4″ – Drawer Spacers & Divider
  • 2 – 3/4″ plywood at 19-3/4″ x 25″ – Shelves
  • 2 – 3/4″ plywood at 9-3/4″ x 18-1/4″ – Drawer Box Bottom
  • 4 – 3/4″ plywood at 3-1/2″ x 18-1/4″ – Drawer Box Sides
  • 2 – 3/4″ plywood at 3-1/2″ x 11-1/4″ – Drawer Box Fronts
  • 2 – 3/4″ plywood at 3-1/2″ x 11-1/4″ – Drawer Box Back
  • 2 – 3/4″ plywood at 11-9/16″ x 22-1/4″ – Doors

Step 1:
Edge banding will be applied to the exposed edges of the plywood prior to assembly.
Cut the pieces for the sides and the bottom. With the pocket hole jig set for 3/4″ material, drill pocket hole sin each side edge of the bottom piece. Secure the bottom to the sides using glue and 1-1/4″ pocket hole screws. The front edge of the bottom will be flush with the front edge of the sides. The bottom will be 3/4″ short at the back to allow for the back piece.

Step 2:
Cut the piece for the back and drill pocket holes in the side edges. Secure the back to the sides using glue and 1-1/4″ pocket hole screws. Add a few brad nails through the back into the back edge of the bottom.

Step 3:
Cut the pieces for the face frame. Cut the notch in the lower piece using a jigsaw or a bandsaw. Secure the frame using glue and 1-1/4″ brad nails. The pieces can be assembled as a frame first, then applied to the front of the cabinet, or they can be secure individually. The side edges of the side pieces will be flush with the outside of the cabinet. The top edge of the bottom piece will be flush with the top face of the bottom.

Step 4:
Cut the pieces for the false drawer front. Drill pocket holes as shown, then assemble the false front using glue and 1-1/4″ pocket hole screws. Secure the false front to the sides of the the face frame using glue and 1-1/4″ pocket hole screws.

Step 5:

Cut the pieces for the drawer spacers and the drawer divider. Secure the spacers behind the face frame securing in place with glue and 1-1/4″ brad nails. Secure the divider to the bottom using glue and 1-1/4″ brad nails through the bottom. The back edge of the divider will be flush with the back of the cabinet to allow for the doors at the front.

Step 6:

Cut the pieces for the shelves. Drill pocket holes in the sides and back edge of one shelf only. Secure the shelf without the pocket holes to the drawer spacers and the divider using glue and 1-1/4″ brad nails through the top of the shelf. Secure the second shelf as shown using glue and 1-1/4″ pocket hole screws.

Step 7:

Cut the pieces for the drawer boxes. Drill pocket holes in each end of the side pieces as well as all four edges of the bottom. Secure the sides to the bottom using glue and 1-1/4″ pocket hole screws. Cut the pieces for the drawer fronts and cut the notch using a jigsaw or a bandsaw. Secure the drawer fronts and back pieces to the sides and bottom using glue and 1-1/4″ pocket hole screws.

Step 8:

Cut the pieces for the doors. There will be a 1/8″ gap around all sides of the doors in the openings as well as in between them.


Finish the cabinet and doors as desired. Install the hinges on the doors, then install the doors in the openings. Install the metal angles, spray painting if desired. Apply a coat of paste wax to the bottom of the drawers to allow them to slide smoothly in the openings.

A plain plywood top can also be added to the cabinet (instead of a vanity top and sink), and the cabinet can be used as a media cabinet or extra storage in any room of the home.

The original plan can be found at http://designsbystudioc.com/diy-plans-build-trunk-style-bath-vanity/

 
[email_link]

Bathroom Shelf

This simple storage tower can be used with or without wire baskets to add precious storage space and countertop space to even the tiniest of bathrooms. Use throughout the home for storage – think potatos and onions, socks and underwear, or even favorite books beside your bed.


Shown with a Spectrum small wire basket, available at most stores for about $10 and a homemade fabric liner. Also available is a medium sized basket that is slightly wider. Simply add a few inches to the width of you project to accommodate the larger baskets.

Shopping List: 

  • 2 – Wire Baskets, measuring 9″ wide x 8″ tall x 12″ deep (as shown)
  • 3 – 2×2 @ 8 feet long
  • 1 – 1×12 @ 4 feet long
  • 1 – 1×3 @ 8 feet long
  • 1 – 1×2 @ 2 feet long
  • 2 1/2″ Screws or finish nails
  • 2″ Screws or finish nails
  • 1 1/4″ Screws or finish nails
  • wood glue, wood filler and finishing supplies

Dimensions: 16″ wide x 30″ tall x 15 1/2″ deep

Cut List: 

  • 4 – 2×2 @ 29 1/4″ (Legs)
  • 4 – 1×3 @ 11 1/2″ (Side Trim for shelves – Measure to fit the width of your 1x12s)
  • 2 – 1×12 @ 11″ (Shelves)
  • 2 – 1×3 @ 11″ (Back Trim for Shelves)
  • 4 – 2×2 @ 11″ (Width Trim)
  • 3 – 2×2 @ 11 1/2″ (Top Trim – Measure to fit the width of your 1x12s)
  • 1 – 1×12 @ 16″ (Top Shelf)
  • 1 – 1×2 @ 16″ (Back, Top)
  • 1 – 1×3 @ 16, (Front, Top)

Step 1: Attach Shelf Side Trim to Legs

Measure and mark the location of the shelf side trim on the insides of the legs. Predrill holes and attach with 2 1/2″ screws or finish nails and glue. Build two. Shelf side trim is flush to the inside.


Step 2: Shelves

Measure and mark the shelf side trim 1″ from the top edge. This is the top edge of your shelves. Attach shelves with 2″ screws and glue or 1 1/4″ pocket hole screws and glue.

Step 3: Back Trim

Attach the back trim flush with the sides as you did the side trim.

Step 4: Width Trim

The shelf trim is flush to the top, the top trim flush to the top. Attach with 2 1/2″ screws or finish nails and glue.

Step 5: Top Support/Trim

Attach the top support/trim as shown above. Center the support. You will use these boards to screw the tops in place.

Step 6: Top Shelf

Screw through the supports/top trim with 2″ screws and glue to attach top shelf.

Step 7: Front and Back of Top Shelf

Finish the top shelf with the 1×2 and 1×3, 1×2 to the back so your piece will sit flush to the wall. Use 2″ screws and glue.

Preparation Instructions: 

Fill all holes with wood filler and let dry. Apply a second coat if necessary. Sand with 120 grit sandpaper in the direction of the wood grain. Vacuum and wipe clean with a damp cloth. Prime and paint as desired.

The original plan can be found at http://www.ana-white.com/2011/02/wire-basket-bath-storage-tower.html

 
[email_link]
 

Bathroom Shelf


These wooden shelf units are ideal for a bathroom and you can make them using pine that you will find at your local Builders Warehouse. Leave them natural or stain in your choice of wood tint and finish off with varnish. If you have all the pieces cut to size all that you have to do is assemble.

The size of the bathroom storage unit is 464mm square (18 1/4″) and 1800mm high (70 13/16″), but you can easily modify the design if you want a lower shelf unit.

Materials:

  • (4) 32mm (1 1/4″) x 32mm (1 1/4″) x 1800mm (70 13/16″ pine – uprights
  • (20) 32mm  (1 1/4″) x 32mm (1 1/4″) x 400mm (15 3/4″) pine – cross pieces
  • (35) 10mm (3/8″) x 44mm (1 3/4″) x 464mm (18 1/4″) pine – slats
  • Pattex No More Nails adhesive
  • Plastic screw caps (to hide screws)
  • 5 x 50mm (2″) smooth shank cut screws
  • 180-grit sandpaper

Step 1: Assemble the side frames

Working on a flat, level surface, measure and mark for placing the shelves. The first shelf is 200mm from the floor. Mark as follows for the remaining shelves: 592mm (23 5/16″) – 984mm (38 3/4″) – 1376mm (54 3/16″) – 1768mm (69 9/16″).

Step 2:

To attach the cross pieces, use the mark for the shelves and add 16mm to drill and countersink a 4mm pilot hole. Place the individual cross pieces above the marked positions and drill through the pilot hole into the end of each cross piece.

GOOD TO KNOW
It’s important to drill a pilot hole in the uprights and cross pieces to prevent the wood from splitting when you join together.

Step 3:

Apply a bead of adhesive to the end of each cross piece before securing in place with 5 x 50mm (2″) smooth shank cut screws.

Step 4:

The cross pieces on the front and back are mounted 10mm (3/8″) lower than those on the front. This is the allow space for mounting the slats, which will then sit flush with the height of the side cross pieces. It also ensure that there is room for the screws.

Step 5:

There are 7 slats in total and these need to be spaced equally on top of the front and back cross pieces. Attach with adhesive and then hammer in a panel pin (or use a pneumatic nail gun) to secure in place. The slats also provide additional stability to the unit.

Step 6: Finishing
To cover up the countersunk holes you can use plastic screw caps. These are available in a selection of colours from white to dark brown, so choose a colour that will match the finish of your bathroom shelf unit.

The original plan can be found at http://www.home-dzine.co.za/diy/diy-bathroom-storage.htm

 
[email_link]

Bathroom Shelf

Materials Needed:

  • (2) – 1″ x 8″ board, 36″ long
  • (4) – 1″ x 8″ board, 24″ long
  • (1) – 1″ x 8″ board, 9-3/4″ long
  • (1) – crown molding, 25-1/2″ long
  • (2) – crown molding, 7-1/4″ long
  • (1) – base molding, 25-1/2″ long
  • (2) – base molding, 7-1/4″ long
  • (1) – sheet of beadboard, 25-1/2″ x 36″
  • (1) – 1″ x 2″ board, 23″ wide

Step 1: Mark Shelf Layout

Lay both side pieces flat on a table with insides facing up. Using the diagram as guide, make pencil marks on both pieces of wood where shelves will be attached. Tip: If a power saw is unavailable, bring the lumber list to a local hardware store and have shelves cut there.

Step 2: Attach sides to shelves

Use diagram as a guide and loosely assemble the cabinet on a flat surface. Working top to bottom, line up shelf edges perfectly with pencil marks. The bottom shelf should be positioned two inches from the bottom of length pieces to leave room for the installation cleat. This 2-inch gap will be covered by base molding. Holding shelf firmly in one hand, drill pilot holes. Drive screws through pilot holes until shelf is tight against side. Repeat on opposite side and until all four shelf-length pieces are securely fastened to sides. If vertical piece is desired on the top shelf, center a piece of wood and attach with nails. Tip: Use woodworking clamp to hold sides and shelf snugly together.

Step 3: Attach beadboard backing

Position shelving unit face down on flat surface. With the lines on the beadboard running top to bottom, lay the beadboard face down on the shelving unit. Align the edges of the beadboard with the edges of shelving unit, and tack in place with nails.

Step 4: Attach the crown molding

Making sure the inside miter is lined up perfectly with edges, hold the bottom of the front piece of crown molding flush to the top front edge of the shelving unit. Tack on with nails. Line up mitered edges perfectly and hold the bottom of the side piece of crown molding flush to the top side edge of shelving unit. Tack on with nails. Repeat process on opposite side. Tip: Consulting a crown molding “cheat sheet,” which offers detailed instructions and settings, use a compound miter saw or miter box to make cuts.

Step 5: Attach the base molding

Making sure that the top of the base molding is flush with the top of the bottom shelf, repeat above process on the bottom of the shelving unit. Base molding will extend a bit beyond bottom edge of side piece. Tack with nails.

Step 6: Putty and sand

Use a putty knife and wood filler to fill screw and nail holes. Allow filler to dry and sand flush with surface.

Step 7: Prime and Paint

Apply all-purpose primer to shelf with a 2-1/2″ sash brush. Make sure to paint underside of shelf, since it may be visible once shelf is hung. Allow dry time and apply two coats of latex paint. Tip: Lightly sanding between coats will minimize appearance of brush strokes.

Step 8: Install the shelf

Determine placement of the cabinet. Position 1×2 board to fit on the wall under the bottom shelf and behind the base molding. Use a level to ensure the shelf will hang straight. Drill pilot holes through the board and wall. Insert screws to hold securely to the wall. Install the “L” bracket on top of the cabinet. Place the cabinet on the wall, resting on the cleat, and screw the “L” bracket into wall. Tack a few nails through the bottom shelf into the cleat to hold the shelf securely in place. Fill with baskets and toiletries. Tip: If installing in drywall, locate a stud to insert at least one screw in. If stud placement doesn’t line up with shelf placement, use wall anchors.

The original plan can be found at https://www.hgtv.com/design/rooms/bathrooms/cottage-bathroom-storage-cabinet

 
[email_link]

Simple Sink Console

Shopping List:

Wood:

  • 4 – 1×2 @ 8 feet long
  • 1 – 1×3 @ 6 feet long
  • 1 – 1×6 @ 6 feet long
  • 1 – 1×8 @ 10 feet long (NOTE: It is very important that your 1×8 is 7 1/4″ wide.  If it is not, purchase a 1×10 and rip it down to 7 3/4″.)
  • 2 – 2×2 @ 8 feet long
  • 1 – 2×2 @ 10 feet long
  • 1 – scrap of 1/4″ plywood at least 32″ x 12″
  • 1 – 1/2 sheet of 3/4″ plywood

Hardware and Supplies:

  • 3 – Knobs or Drawer Pulls
  • 1 – set of 12″ Bottom Mount Drawer Slides
  • 1 1/4″ Pocket Hole Screws
  • 2 1/2″ Pocket Hole Screws
  • 1 1/4″ Regular Wood Screws
  • 1 1/4″ Finishing Nails
  • Wood Glue
  • Wood Filler
  • Medium Grit Sandpaper
  • Primer or Wood Conditioner
  • Paint or Stain

Cut List:

Boards:

  • 6 – 1×2 @ 4 1/2″ – Drawer Trim (short)
  • 1 – 1×2 @ 7 1/2″ – False Drawer Trim (center)
  • 4 – 1×2 @ 15 3/4″ – False Drawer Trim (long)
  • 2 – 1×2 @ 32 3/4″ – Drawer Trim (long)
  • 1 – 1×2 @ 33″ – Front Trim
  • 4 – 1×2 @ 21 1/2″ – Side Trim
  • 2 – 1×3 @ 33″ – Vanity Top Trim
  • 1 – 1×6 @ 32″ – Drawer Back
  • 2 – 1×6 @ 11 1/4″ – Drawer Sides
  • 1 – 1×8 @ 32 3/4″ – Drawer Front
  • 1 – 1×8 @ 33″ – False Drawer Front
  • 1 – 1×8 @ 33″ – Back Support
  • 2 – 2×2 @ 33″ – Bottom Shelf Trim (long)
  • 2 – 2×2 @ 21 1/2″ – Bottom Shelf Trim (short)
  • 4 – 2×2 @ 35 3/4″ – Legs
  • 1 – 2×2 @ 33″ – Bottom Drawer Divider

Plywood:

  • 1 – 1/4″ Plywood scrap @ 32″ x 12″ – Drawer Bottom
  • 1 – 3/4″ Plywood @ 33″ x 21 1/2″ – Bottom Shelf
  • 2 – 3/4″ Plywood @ 21 1/2″ x 18 1/4″ – Sides

General Instructions:

Make sure to re-measure and check for square after every step.  Sometimes when building your measurements can be off very slightly, and it’s important that your numbers are exact.  (Especially when working with doors and drawers!)  Measure your available space before building this plan to make sure that it will fit.  Please read through the entire plan before getting started.

Plywood Cuts:

Here is a basic cutting diagram for your 3/4″ plywood.  When you purchase your plywood, have them cut the piece lengthwise at 21 1/2″.  That way, when you get it home, you only have to make one cut per piece.  (Plus, if you’re like me with our Matrix hatchback, this way it will actually fit in your car!)

Step 1:

Assemble the side of the vanity as shown above.  Make sure that there is a 3/4″ gap between the front of your plywood and the edge of the 2×2.  Also, make sure that your pocket holes go on the inside of what will be the cabinet, I just marked them on the outside so that you could better see where they go.

Step 2:

Add trim to the top and bottom edge.  Repeat steps 1 and 2 for the second side.

Step 3:

Here’s the fun part where it starts to look like something.  Attach the shelf, back support, and one of the pieces of the vanity top trim as shown above.

Step 4:

Add 2×2 bottom shelf trim using the pocket holes that you pre-drilled in the previous step.  (It will be easier if you flip the whole piece over while completing this step.)  The top of the 2×2 should be flush with the top of your plywood.

Step 5:

Flip your sink console so that you are now working on the front side.  Make sure to drill your pocket hole screws on the INSIDE to hide them.  Leave a 3/4″ gap on the front of your false drawer front to allow for trim in the later steps.

Step 6:

Add your second piece of top trim above your false drawer front.  The front of the 1×3 should be flush with the edges of your 2×2 legs.

Step 7:

When adding the bottom drawer divider, it is important that your measurements are exact.  Before adding this piece, double check the width of your 1×8 drawer front to once again confirm it is 7 1/2″ wide.  Some of them come as 7 1/4″, which is why I notated in the shopping list to make sure your board is wide enough.

A trick to making sure your board is exactly 7 3/4″ from the bottom of your 1×2 is to cut a scrap piece of wood to 7 3/4″ and use it as a “spacer” while screwing in your bottom drawer divider.

Step 8:

Build your drawer interior as shown above.

Step 9:

Install your drawer slides and insert your drawer.  When installing your slides the interior of the drawer should sit right behind your 2×2 bottom drawer divider, leaving room for your drawer front and trim. To install your drawer front, center it into the space, leaving a 1/8″ gap all the way around it, and secure it with finishing nails.  Once it’s tight enough to pull out, remove the drawer and further secure it using the pocket hole screws that you pre-drilled in the previous step.

Step 10:

Add all of your drawer trim. Once you have finished your piece, add your knobs/drawer pulls.

Finishing:

Finish your project as desired.  Make sure to sand it down with medium grit sand paper and fill in all your holes with wood filler before tackling that paint or stain.

The original plan can be found at http://www.oldpaintdesign.com/2012/05/28/simple-sink-console/

 
[email_link]
 

Bathroom Cabinets & Shelves

Gridview


Hanging Bathroom Shelf

Supply List:

  • 1 – 2x4x8 whitewood or pine board
  • 1 – 2x6x8 whitewood or pine board
  • Rope

Cut List:

  • (2) – 2 x 4 @ 40” long
  • (3) – 2×6 @ 21” long

I used my Kreg Jig to attach my shelf.  This is super easy to do. If you don’t own a Kreg Jig (yet) you can also attach the boards by using 2.5″ wood screws through the outside boards and into the 2×6 shelf boards.  If you do this, make sure to pre-drill first, and cover the head of the wood screw with wood putty before staining.

You can see here I have set my measurements to 1.5″ pocket holes because I am joining 2×4 wood and the thickness of the wood is 1 1/2″. I put my pocket holes in my 2×6 boards.  This is what they looked like all finished and ready to attach.

Next I used 2.5″ pocket hole screws to attach the pieces all together.  Here are the shelves attached. One is at the base, one is 13″ from the bottom and the other is placed at 27″ from the bottom.

I have found a great way to fill pocket holes and other holes is using 3M Wood Filler! Just squeeze some out into each hole.

Use a scraper to even it out.

Next I used my drill to place a 3/8″ hole in the top of each side piece.

To finish this shelf, I used one of my very favorite stains. Rust-Oleum Ultimate Wood Stain in Dark Walnut. You just brush it on with a foam brush and use an old rag to wipe it off… Easy!  You can find this stain at Lowe’s or Walmart.

Finally, I used a piece of sisal rope which I also found at Lowe’s to hang it on the wall.  I just ran the ends of the rope through the holes at the top of the shelf and tied knots on each end.  I used good anchors in my wall since I wasn’t attaching this to a stud.  I found my hook at Lowe’s

The original plan can be found at https://www.shanty-2-chic.com/2013/08/bathroom-shelf.html

 
[email_link]
 

1 2 3 4 5 6 9