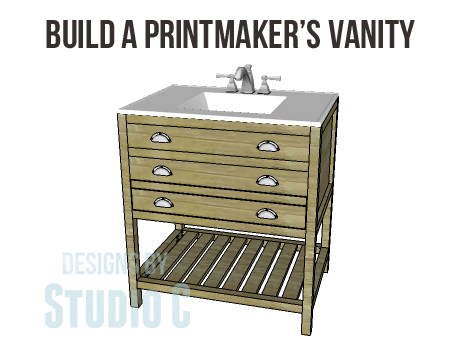
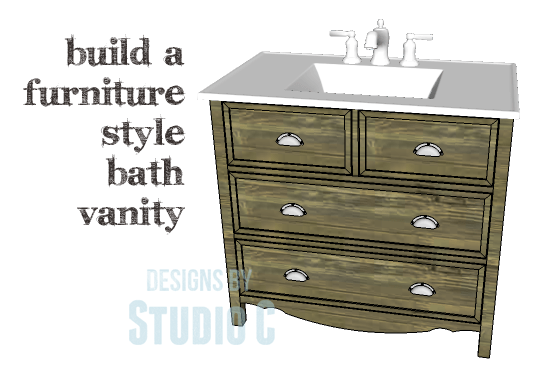
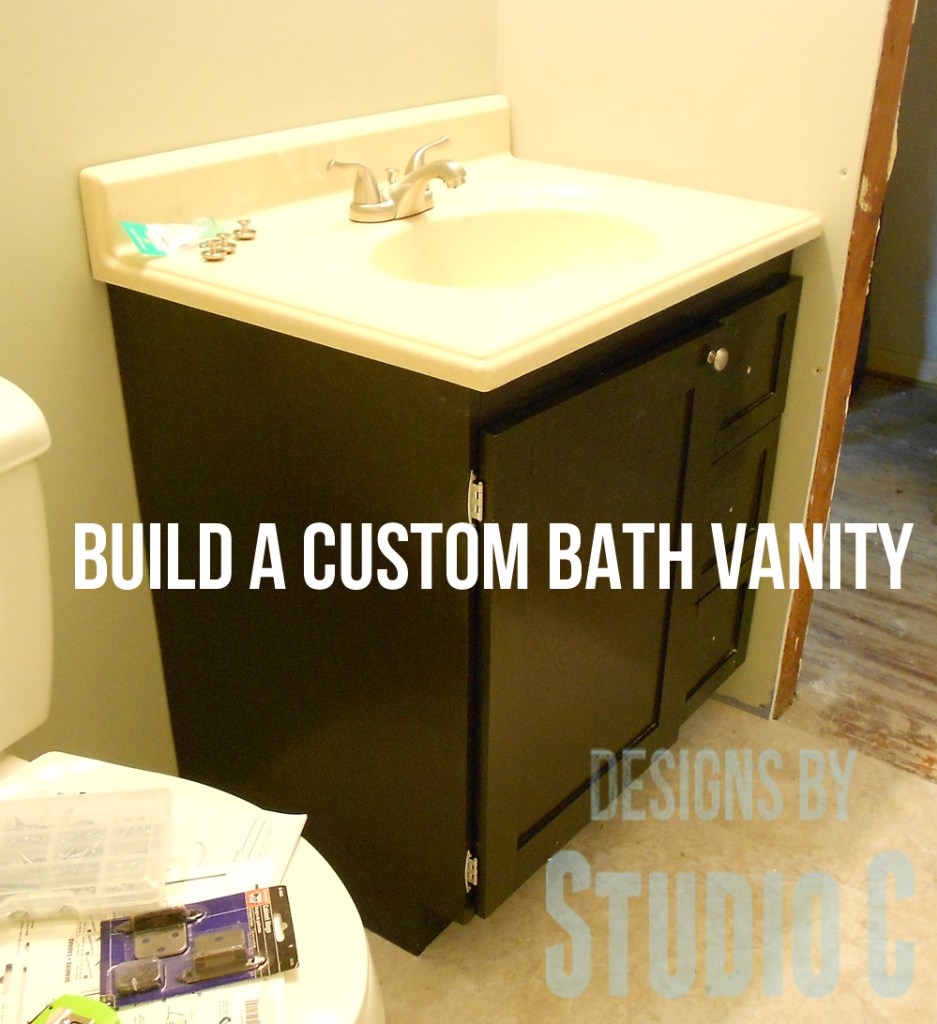
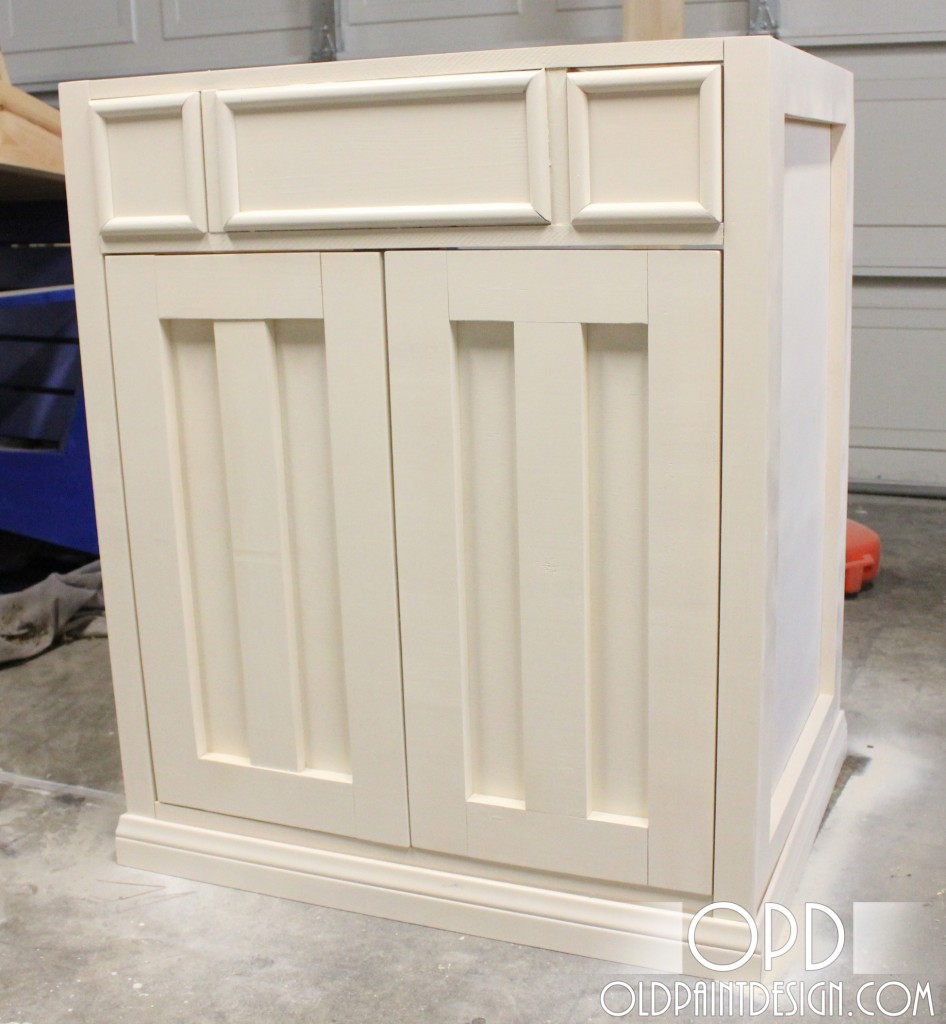
Bathroom Vanity
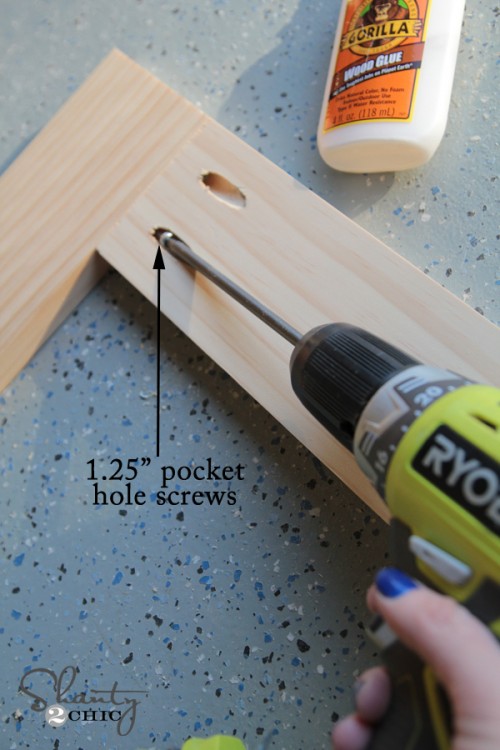
- 1-1/4″ pocket hole screws
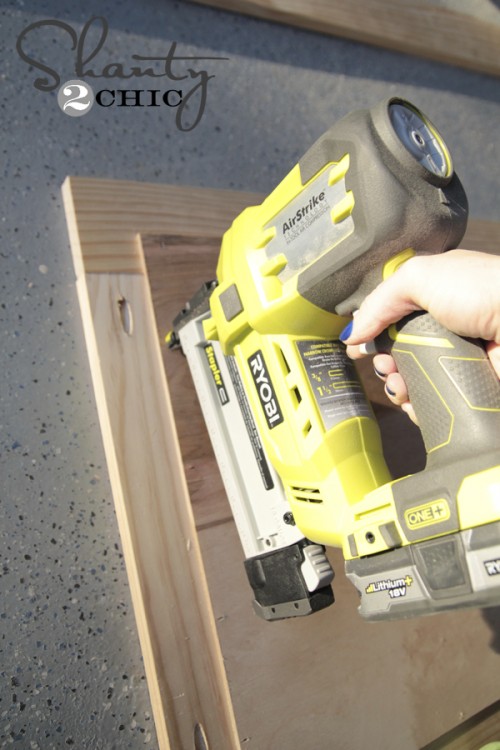
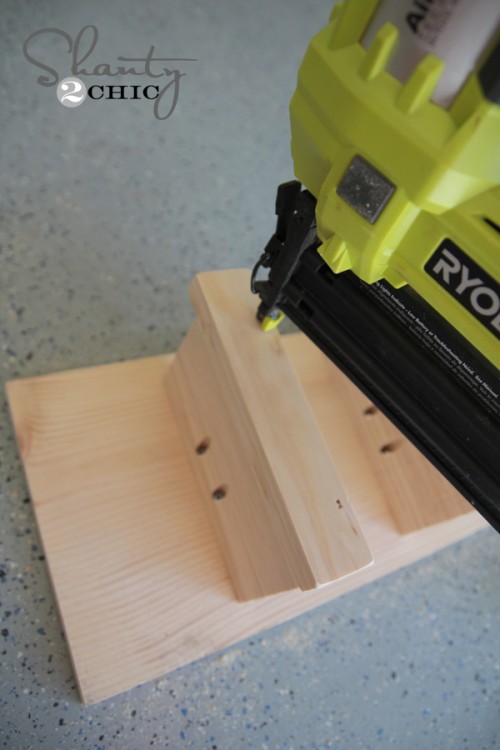
- 1-1/4″ brad nails
- Edge banding, optional
- 2 sets of 16″ Drawer slides
- Cabinet pulls
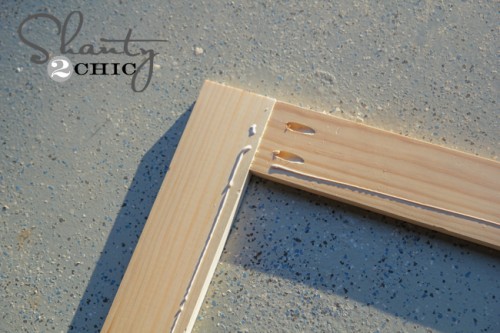
- Wood glue
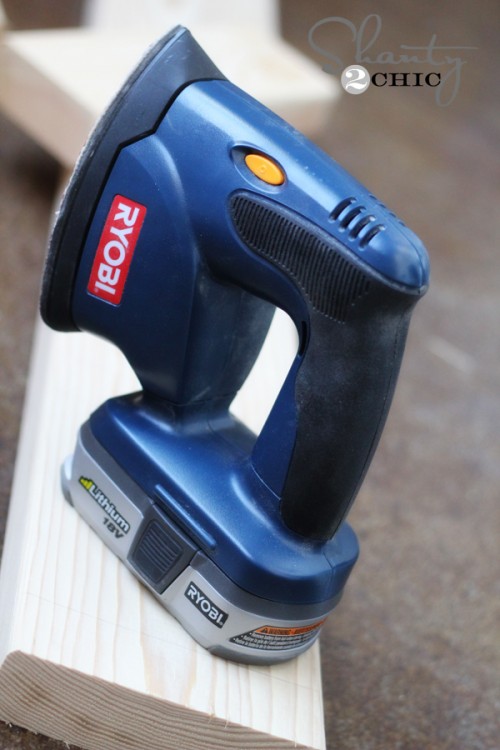
- Sandpaper (100, 150, 220 grits)
- Finishing supplies (primer & paint, or stain, sealer)
Lumber:
- 2 – 1×2 at 6′
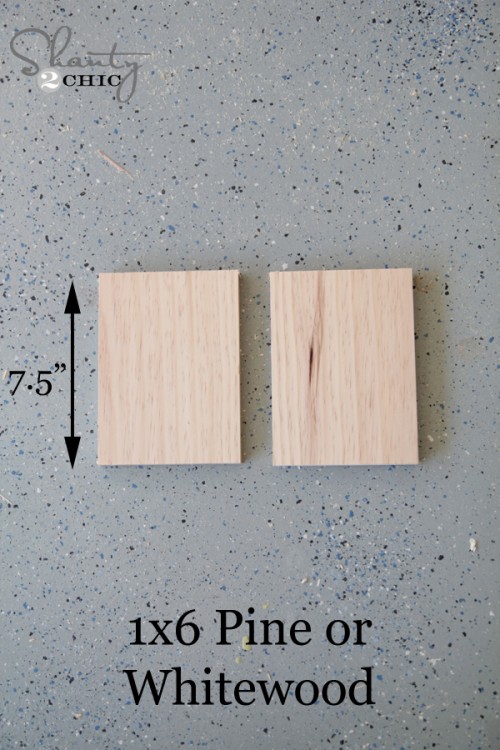
- 1 – 1×4 at 4′
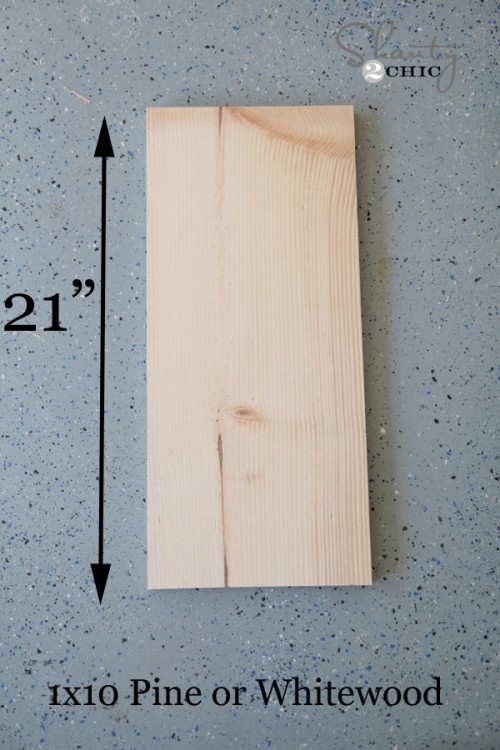
- 2 – 1×8 at 8′
- 2 – 2×2 at 8′
- 1 – 2′ x 4′ sheet of 1/2″ plywood
- 1 – 4′ x 8′ sheet of 3/4″ plywood
- 1 – 3/4″ square dowel at 3′
- 3 – 1/4″ x 3/4″ decorative moulding at 8′
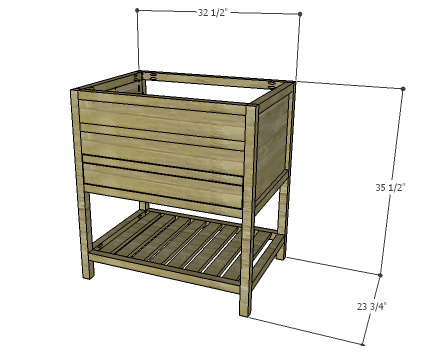
- 4 – 2×2 at 34″ – Legs
- 2 – 3/4″ plywood at 17″ x 30″ – Side Panels
- 1 – 3/4″ plywood at 30″ x 33″ – Back
- 1 – 1×3 at 33″ – Curved Lower Stretcher
- 3 – 1×2 at 33″ – Front Stretchers
- 1 – 1×2 at 8-1/2″ – Drawer Divider
- 2 – 3/4″ plywood at 14-1/2″ x 30-1/2″ – Drawer Box Bottom
- 4 – 1×8 at 14-1/2″ – Drawer Box Sides
- 4 – 1×8 at 32″ – Drawer Box Front & Back
- 2 – 1/2″ plywood at 8-3/4″ x 32-3/4″ – Drawer Front Base
- 4 – 1/4″ x 3/4″ moulding at 8-3/4″ – Drawer Front Side Trim
- 4 – 1/4″ x 3/4″ moulding at 32-3/4″ – Drawer Front Top & Bottom Trim
- 4 – 3/4″ square dowels at 8-1/2″ – False Drawer Spacers
- 2 – 1/2″ plywood at 8-1/4″ x 15-7/8″ – False Drawer Front Base
- 4 – 1/4″ x 3/4″ moulding at 8-1/4″ – False Drawer Front Side Trim
- 4 – 1/4″ x 3/4″ moulding at 15-7/8″ – False Drawer Front Top & Bottom Trim
Step 1:
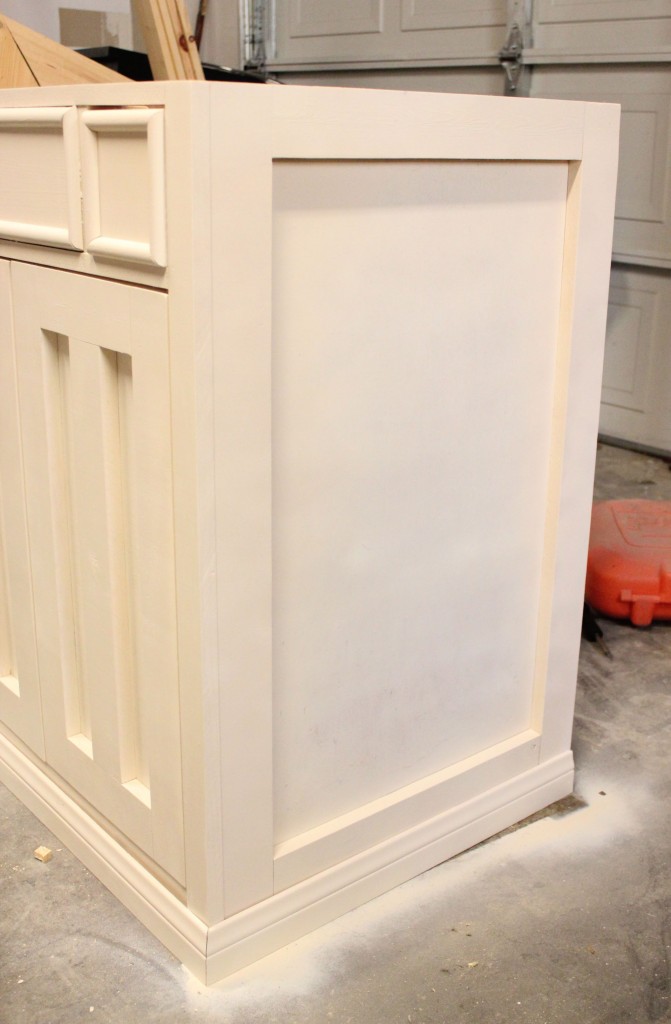
Edge banding will be applied to the exposed edges of the plywood prior to assembly.
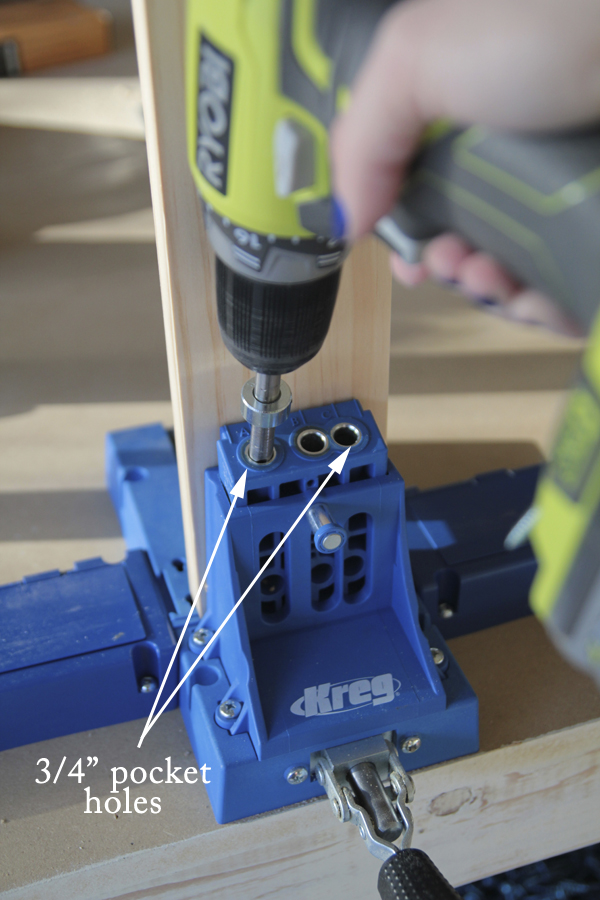
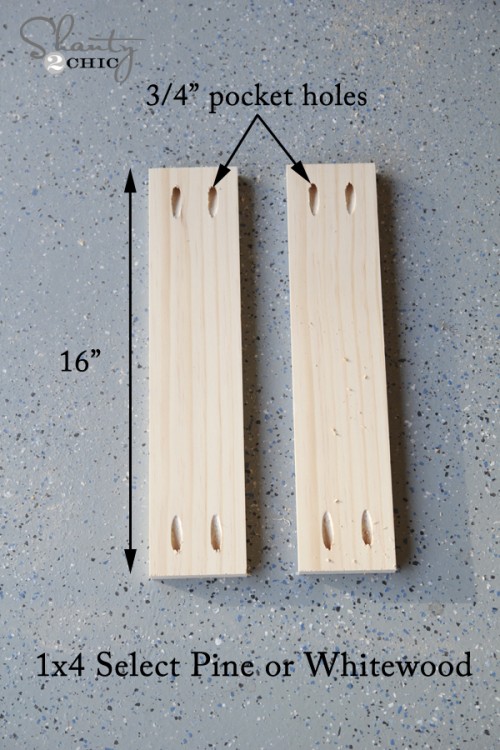
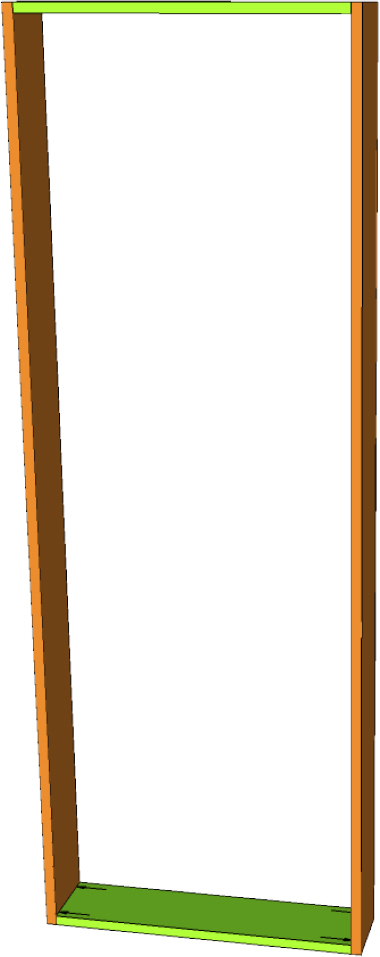
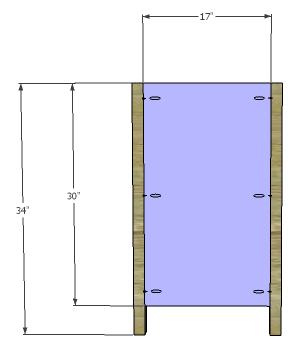
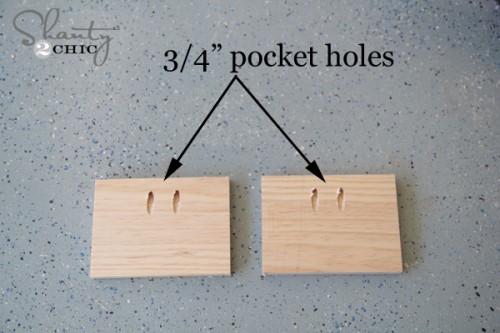
Cut the pieces for the legs and the side panels. With the pocket hole jig set for 3/4″ material, drill pocket holes in the long edges of the side panels. Secure the side panels to the legs using glue and 1-1/4″ pocket hole screws. The back face of the panels will be flush with the inside faces of the legs.
Step 2:
Cut the piece for the back panel and drill pocket holes along the side edges. Secure the panel to the legs using glue and 1-1/4″ pocket hole screws. The back face of the panel will be flush with the inside faces of the legs.

Step 3:
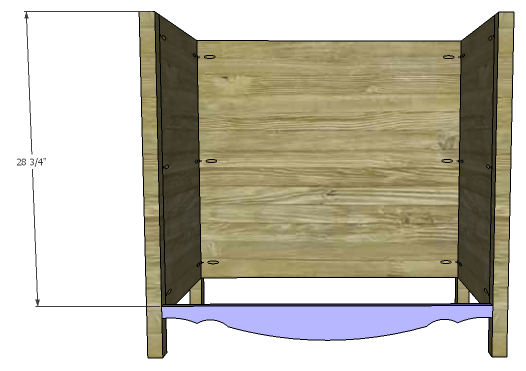
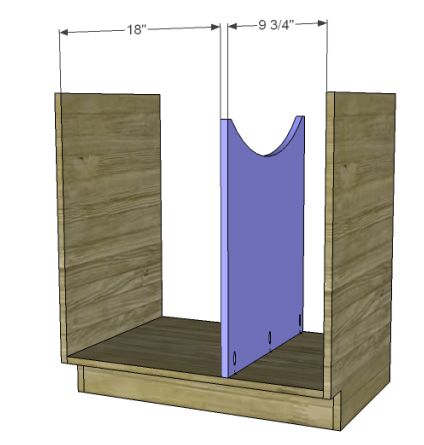
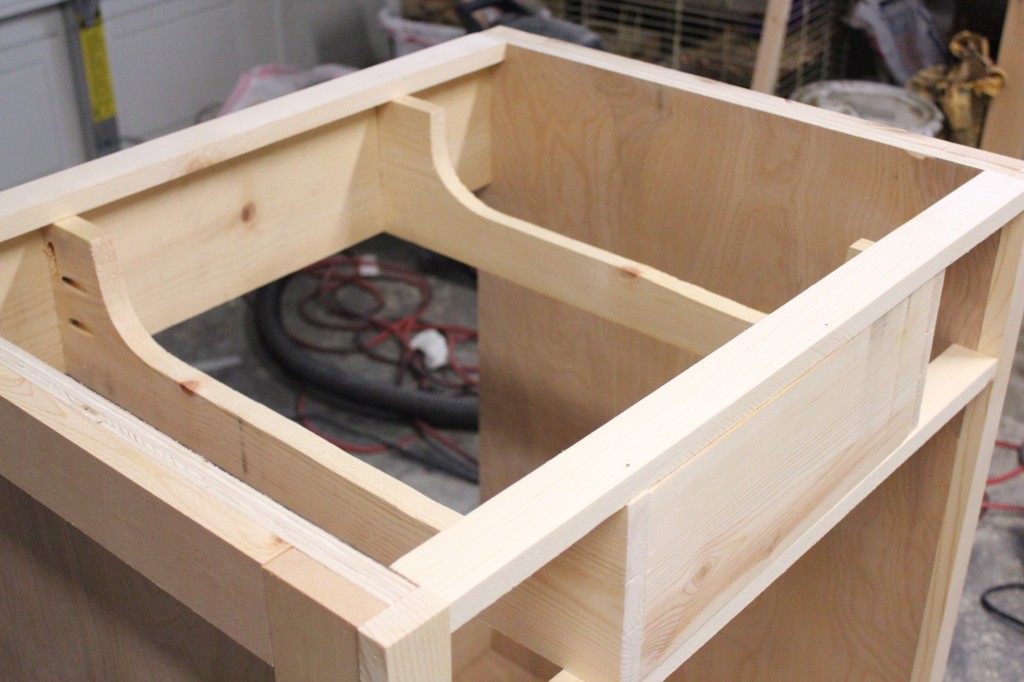
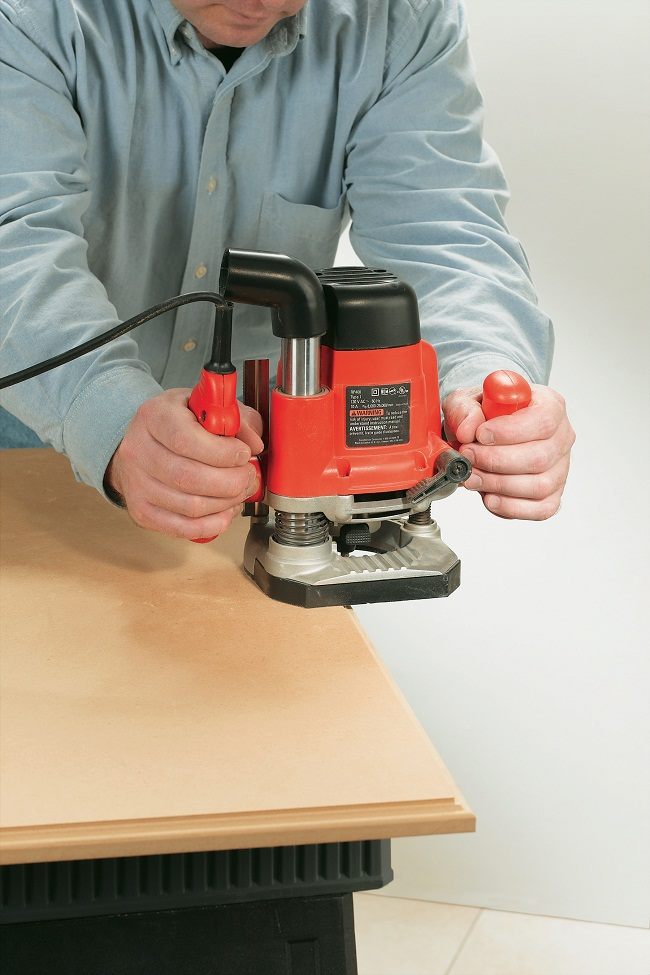
Cut the piece for the lower curved stretcher. Maintaining the side dimension (1-1/4″) and the center dimension (3-1/2″), draw a decorative curve in the board. The top edge will remain straight. Cut the curve using a jigsaw or a bandsaw.
Drill pocket holes in the side edges, and secure the stretcher to the legs using glue and 1-1/4″ pocket hole screws. The front face of the stretcher will be flush with the front face of the legs.

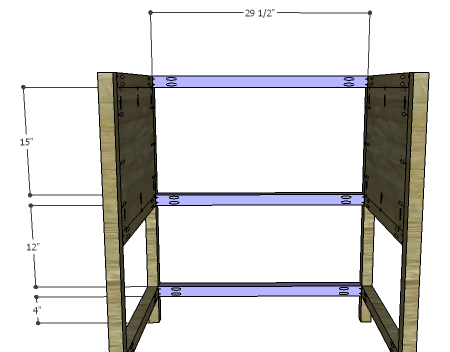
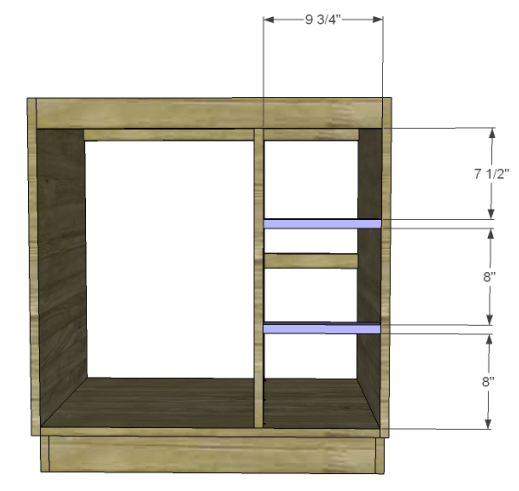
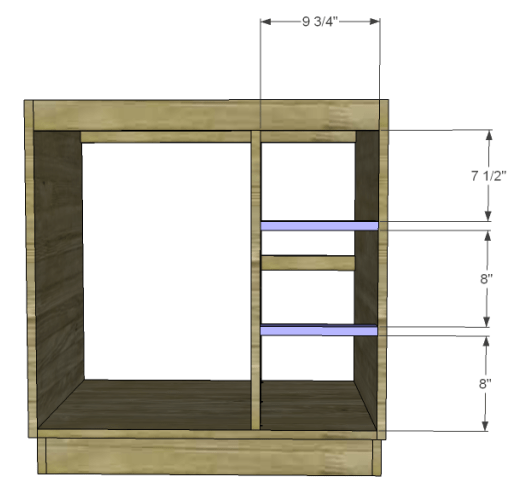
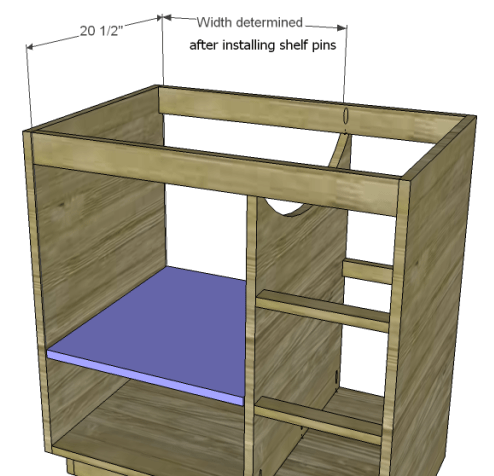
Step 4:
Cut the pieces for the stretchers and drill pocket holes in each end. Secure the stretchers to the legs as shown using glue and 1-1/4″ pocket hole screws. On the middle stretcher and the lower stretcher, orient the pocket holes so they face down. The pocket holes on the upper stretcher will face up and will be covered by the countertop.
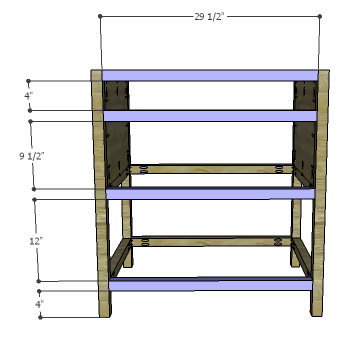
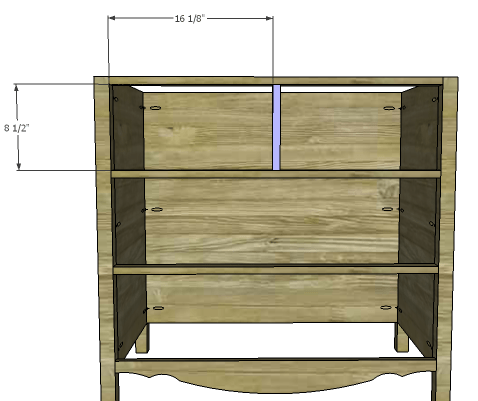
Cut the piece for the drawer divider. Secure in place using glue and 1-1/4″ brad nails through the stretchers above and below it.

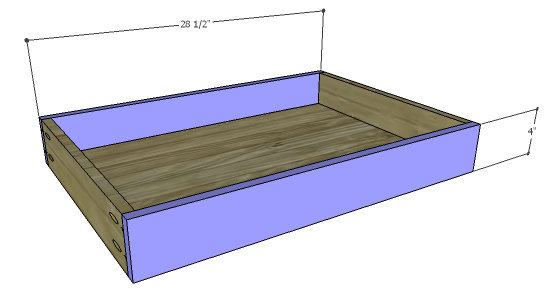
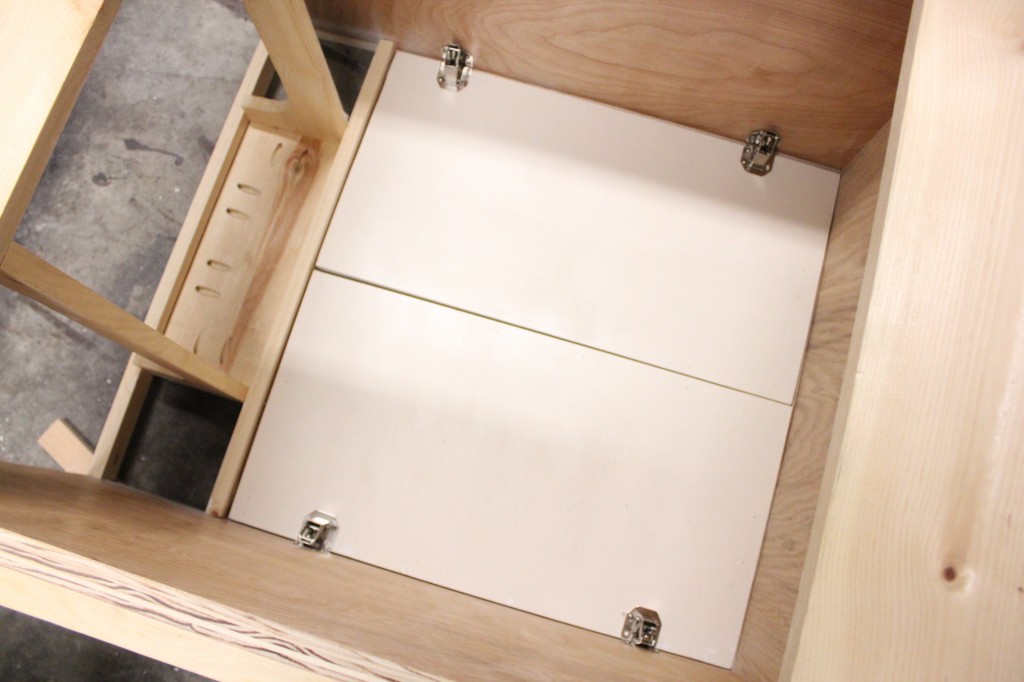
Step 5:
Before cutting the drawer boxes, make sure the p-trap or any other plumbing will not interfere with the upper drawer. The drawer can be shortened, or a notch cut in the back of the drawer box to accommodate the plumbing.
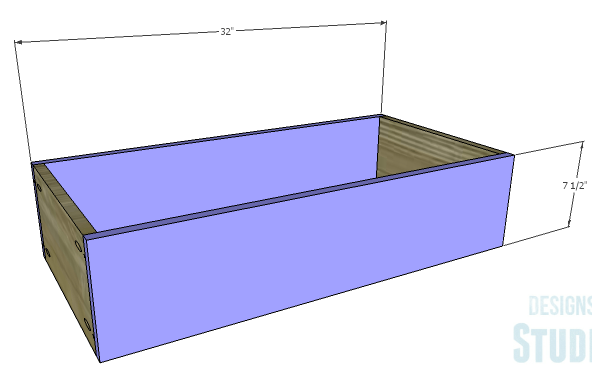
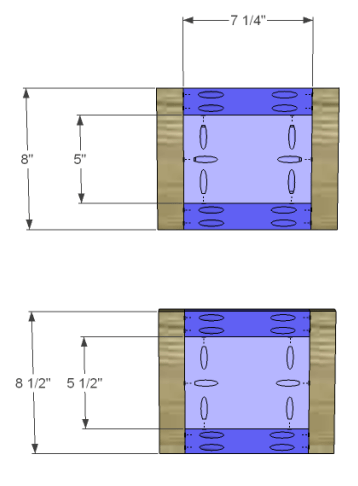
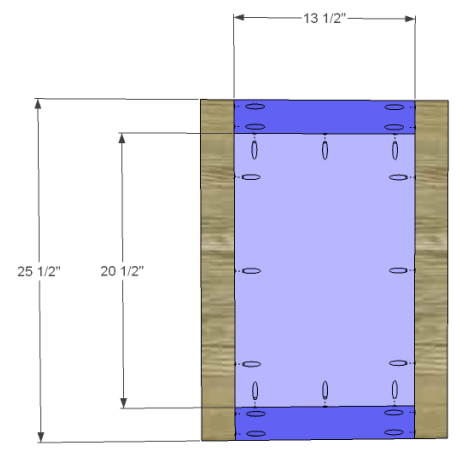
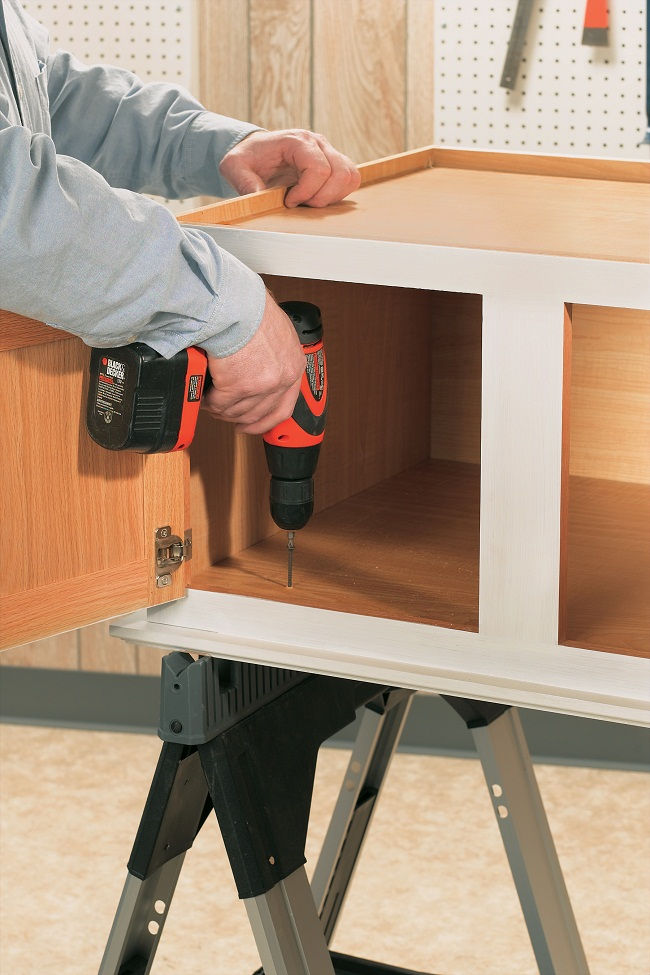
Cut the pieces for the drawer boxes. Drill pocket holes in all four edges of the bottom as well as each end of the sides. Assemble the drawer boxes as shown using glue and 1-1/4” pocket hole screws. Install the drawer slides according to the manufacturer’s installation instructions, locating them ¾” back from the front edge of the sides. Make any necessary adjustments.

Step 6:
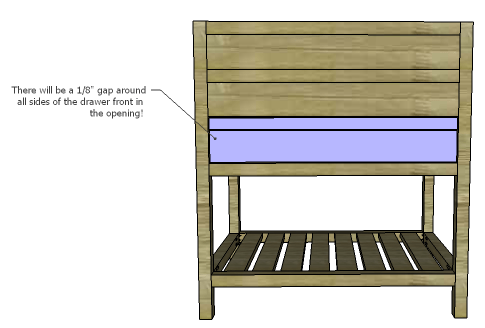
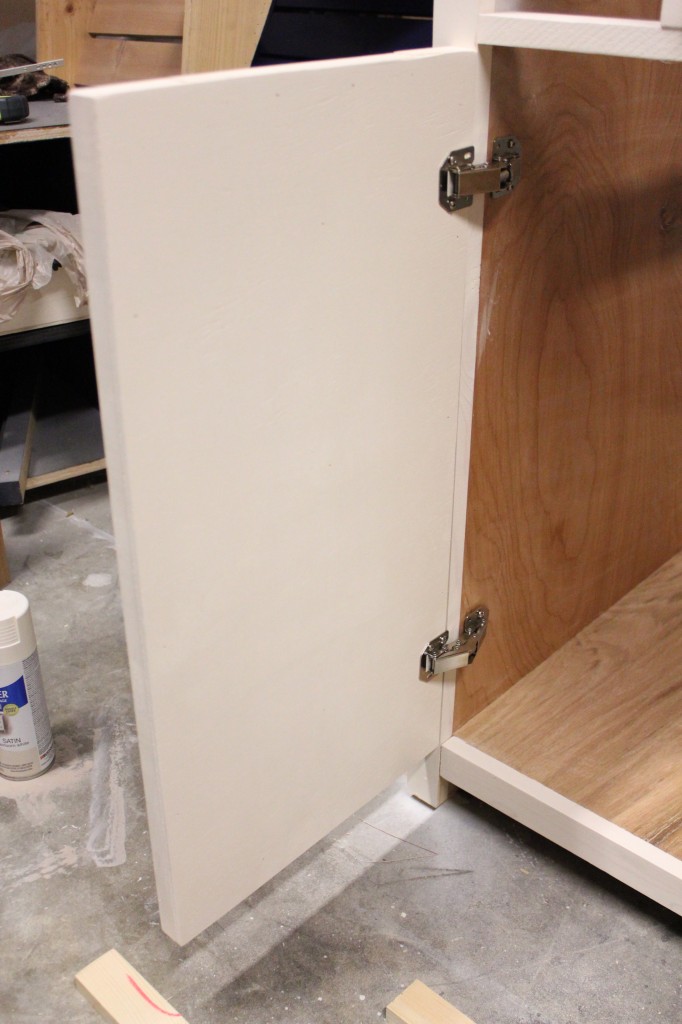
Cut the pieces for the drawer fronts as well as the moulding for the trim. Position the moulding on the front face of the drawer fronts and secure in place using glue. Clamp until dry.
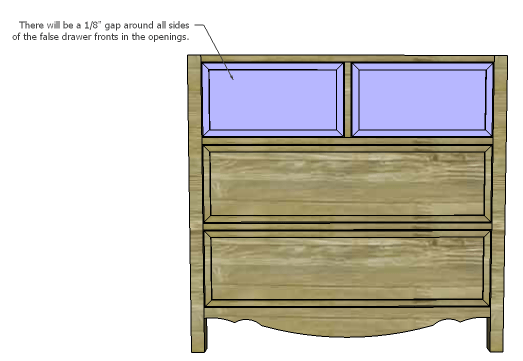
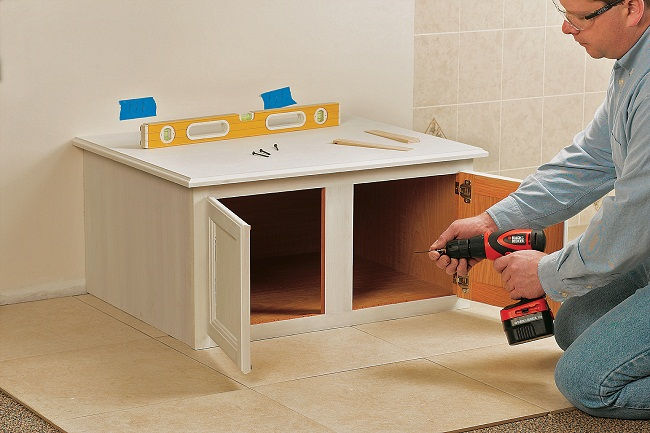
Mark the position for the drawer pulls and drill the holes. Shim the drawer front in the opening – there will be a 1/8” gap around all sides – then drive screws through the holes for the drawer pulls into the drawer box. Open the drawer, and secure the drawer front using countersunk 1-1/4” screws from the inside. Remove the screws from the holes for the drawer pull then finish drilling the holes. Install the drawer pull.


Step 7:
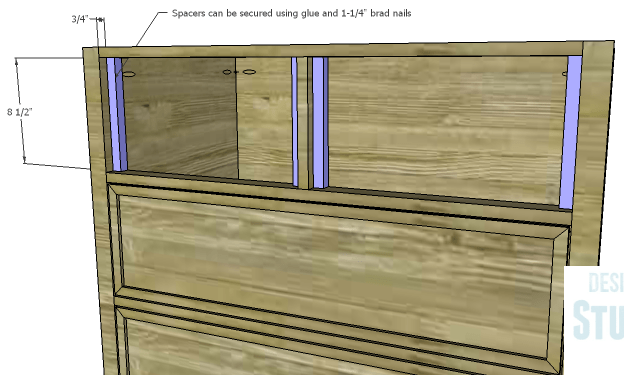
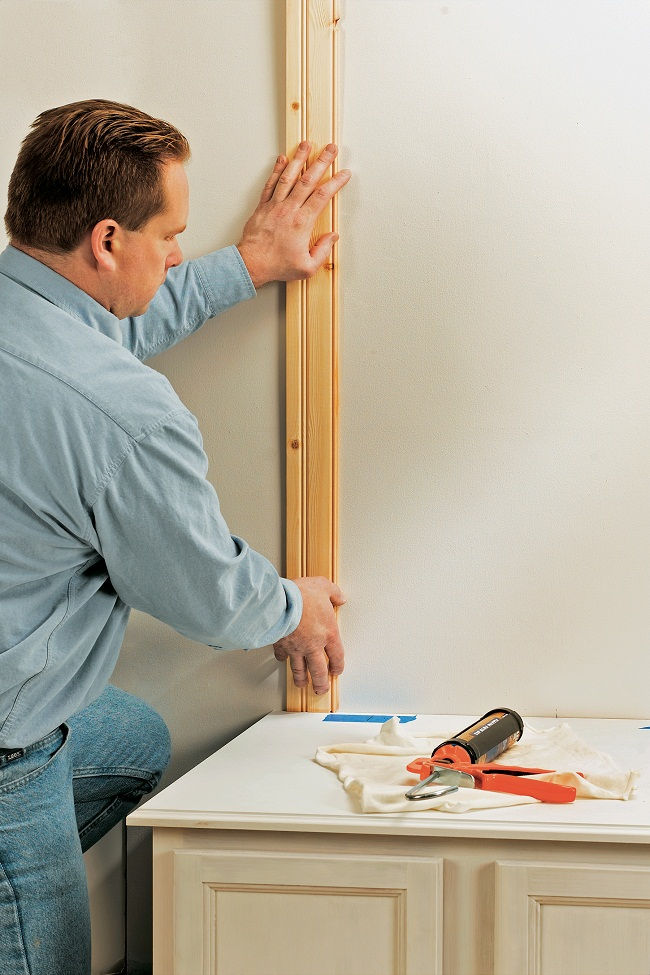
Cut the pieces for the false drawer front spacers. Secure the spacers in place using glue and 1-1/4″ brad nails through the spacers into the legs and drawer divider. The spacers will be positioned 3/4″ back from the front edge of the stretchers making them flush with the back edge.
Step 8:
Cut the pieces for the false drawer fronts. Apply the moulding in the same manner as the drawer fronts. There will be a 1/8″ gap around each of the false fronts in the openings. Shim the false fronts in place, then secure them to the spacers using glue and 1-1/4″ brad nails.

Finish as desired
The original plan can be found at http://designsbystudioc.com
![]() [email_link]
[email_link]


 Step 4:


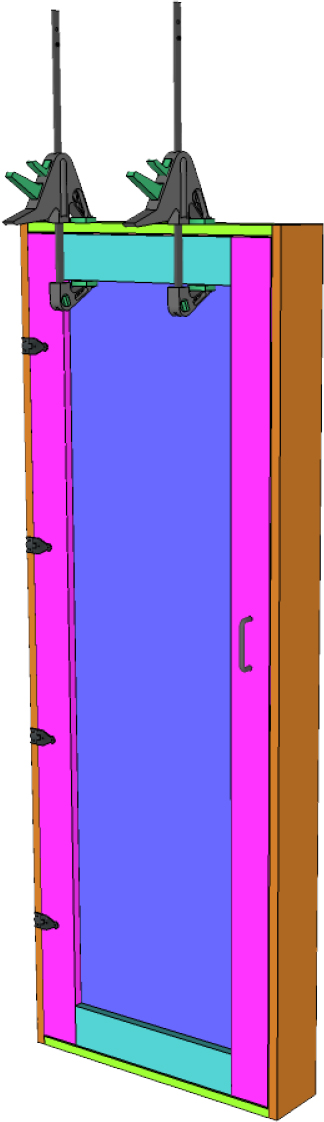
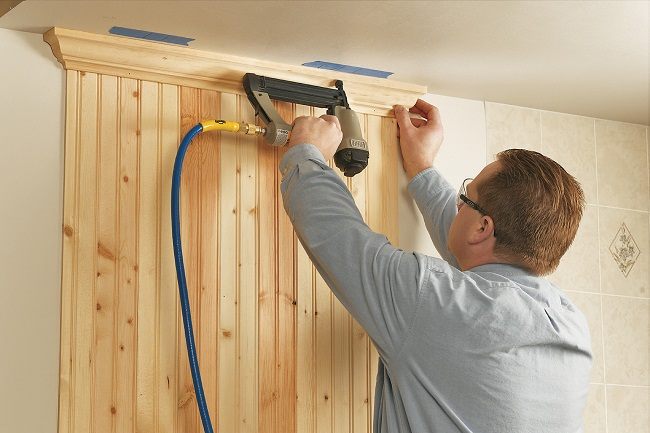
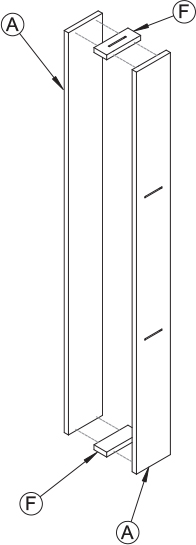 Assemble each of the four horizontal modules by gluing and nailing two spacers F between two horizontal sides C, one spacer at each end. All surfaces with slots should be facing outwards.
 Fasten two horizontal modules between a side A and the vertical module, then do the same on the other side. Insert more spacers into the vertical module as needed, to prevent its sides from bending inwards. Hold in place with clamps and go straight on to the next step.
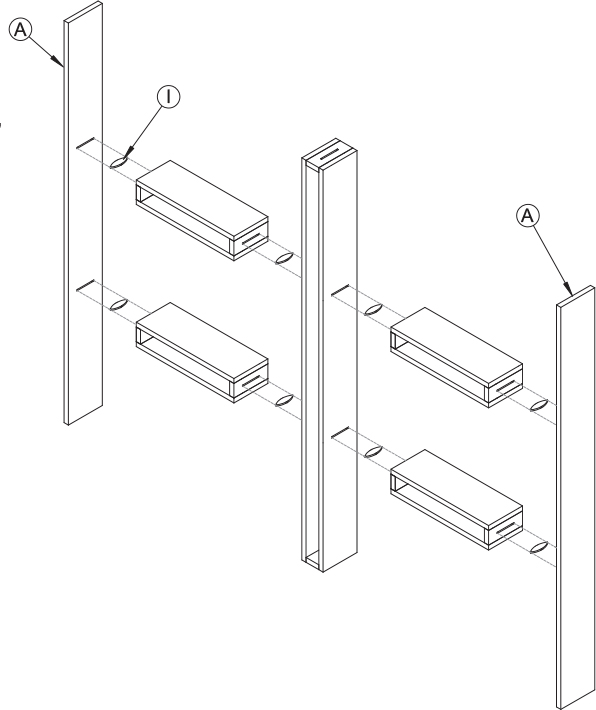 Apply glue to the slots in top / bottom G and to the ends of sides A. Insert the biscuits into the slots, then nail top / bottom G to sides A.
 Glue and nail panel E to the back of the shelves.
 Glue and nail one vertical facade B to the front of the vertical module and fasten short horizontal facades D to the horizontal modules in the same way.
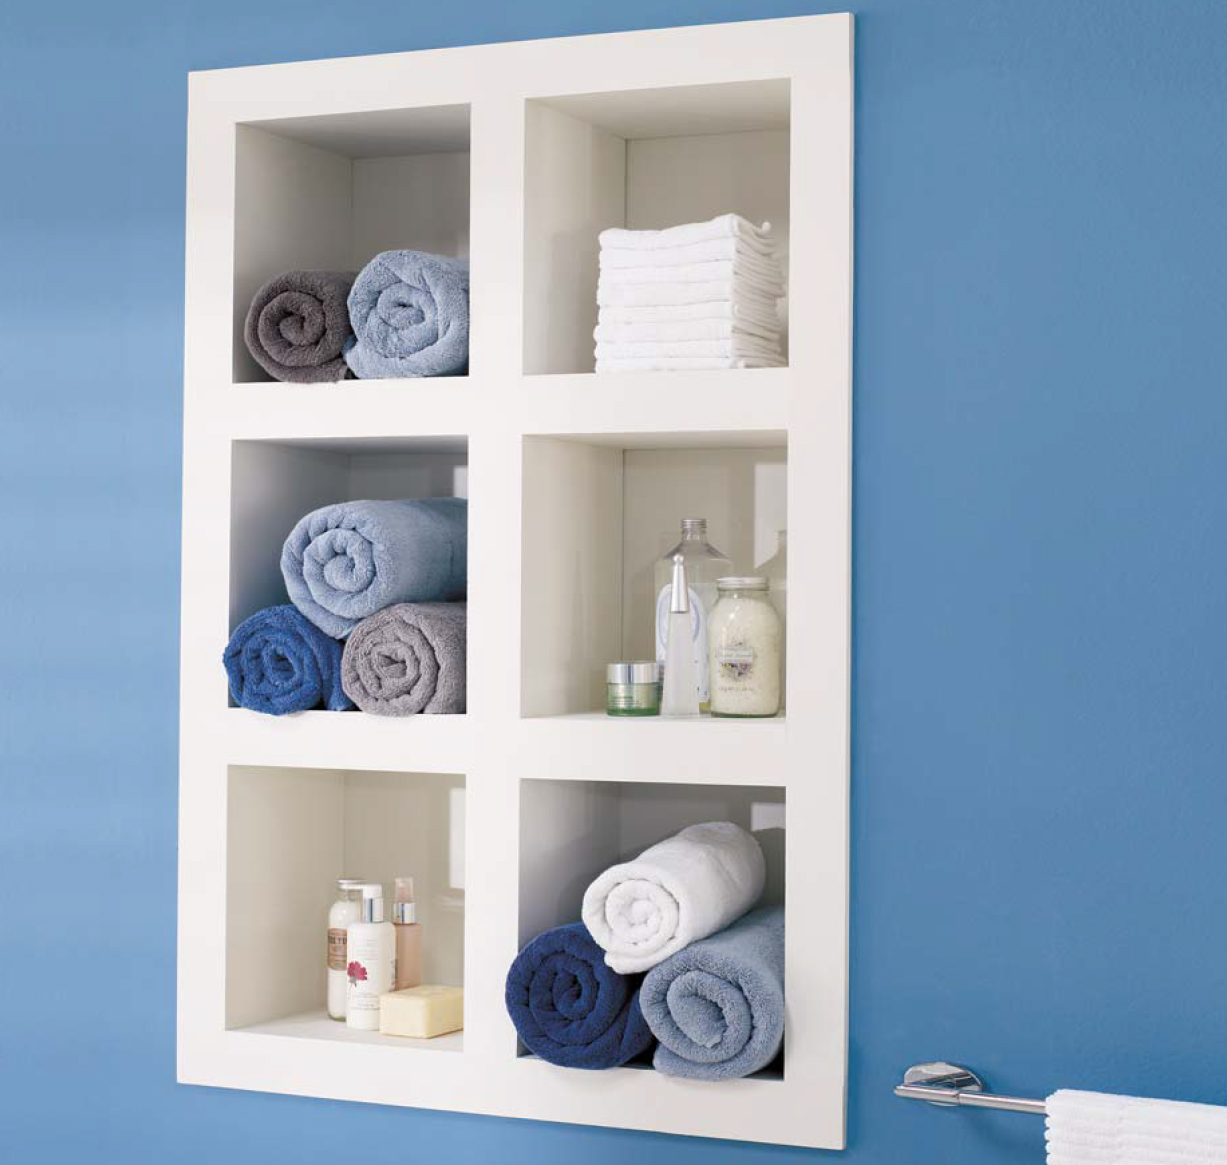
 Insert the shelf unit into the wall opening, resting it on the bottom girt. Check for level, then screw into the studs.
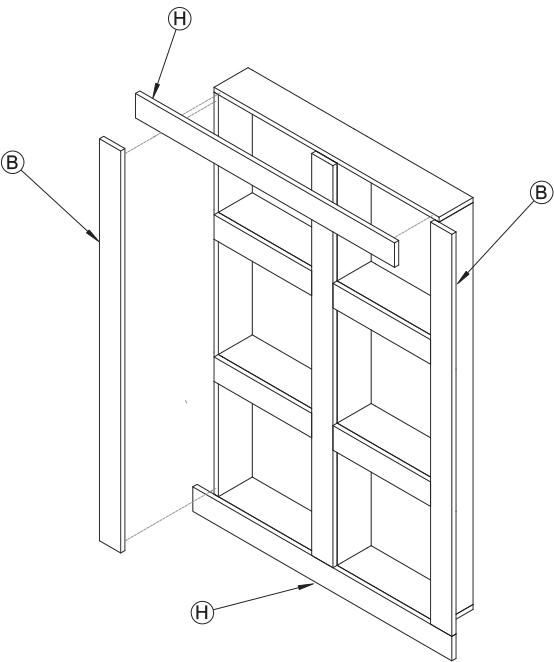 Glue and nail the two remaining vertical facades B and the two long horizontal facades H to the edges of the shelf unit in order to form a frame to conceal the cuts in the drywall. Fill the holes and apply a coat of primer. Paint.