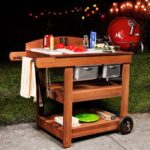
BBQ & Grill Carts

Gridview


Pub Table


Materials:

  • Qty 6  –  2 x 2 x 8′ Pine
  • Qty 2  –  2 x 4 x 96″ Premium Studs
  • Qty 2  –  4 x 4 x8′ Pine (preferably untreated)
  • Qty 3  –  1 x 2 x 8′ Common Boards; Pine
  • Qty 4  –  1 x 4 x 8′ Common Boards; Pine
  • Qty 3  –  1 x 6 x 8′ Common Boards; Pine
  • Qty 2  –  1 x 10 x 8′ Common Boards; Pine
  • 3/4″ x 48″ x 96″ Plywood
  • 2-1/2″ Kreg Pocket Hole Screws (Coarse)
  • 1-1/4″ Brad Nails
  • 1-1/4″ Wood Screws
  • 2-1/2″ Wood Screws

The original plan can be found at https://rogueengineer.com/modern-reclaimed-pub-table/

 
[email_link]

Outdoor Bar

Materials:

  • (2) Sheets 1/2”Plywood
  • (2) 4 x 4 x 96” Boards
  • (6) 2 x 4 x 96” Boards
  • (5) 1 x 6 x 96” Boards
  • Carpenter’s Wood Glue
  • 1” & 1 ¼” Brad Nails
  • 1” & 2 ½” Pocket Hole Screws
  • 2 ½” Wood Screws

Cut List:

Plywood:

  • (1) Top @ 21 x 50”
  • (1) Front Panel @ 41 x 42

4×4’s:

  • (4) Legs @ 41”

2×4’s:

  • (4) Long Frames @ 42
  • (4) Short Side Frames @ 13”
  • (8) Supports @ 15 ¼”
  • (2) Long Middle Supports @ 34”
  • (4) Shelf Braces @ 19 ¼”
  • (2) Side Panels @ 13 x 34”
  • (2) Shelves @ 15 ¼ x 42”

1×6’s, Cut one 1×6 into ½” trim:

  • (2) ½ x ¾ “ top trim @ 21”
  • (2) ½ x ¾ “ top trim @ 51”
  • (2) ½ x ¾ “ front trim @ 40 ½”
  • (2) ½ x ¾ “ front trim @ 41”

Step 1:

Build frames by first attaching your short side frames to the legs of the bar with 2 ½” pocket hole screws and wood glue. Next, attach your long frame pieces using the same method of joinery.

IMPORTANT: make sure to include pocket holes in all top frame pieces that are facing up for attaching the top panel later!

Step 2:

Add the side panels with pocket hole screws and wood glue.

Step 3:

Attach the long supports/large frame pieces with 2 ½” pocket hole screws and wood glue.

Step 4:

Attach your shelving braces with 2 ½” pocket hole screws and wood glue.

Step 5:

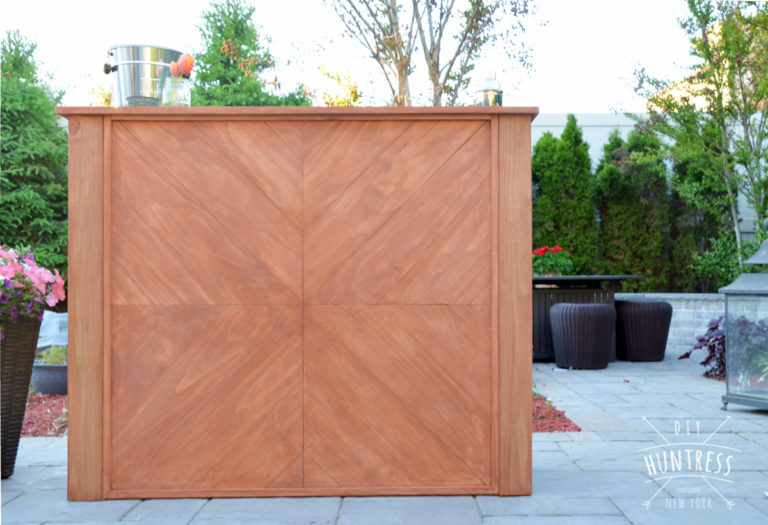
Prep your front panel for artwork! Use a pencil and a straight edge to split your front panel into four equal sections. This will help with lining up your pieces in the next step.


Step 6:

Begin attaching 1×6 pieces. This is done by cutting one end of a 1×6 board at a 45 degree angle and lining it up with the middle intersection you made with your pencil. You can either mark the cut that overhangs at the end here (and trim your pieces as you go), or you can cut your pieces a little long and trim the entire panel down later. Work in one section at a time to avoid mistakes! Use a nail gun and glue to hold your boards down.

Step 7:

Once your panel is complete and the sides are flush, attach it to the front of the bar by screwing and gluing it onto the frames from the inside. This will hide the wood screws on the inside of the bar.

Step 8:

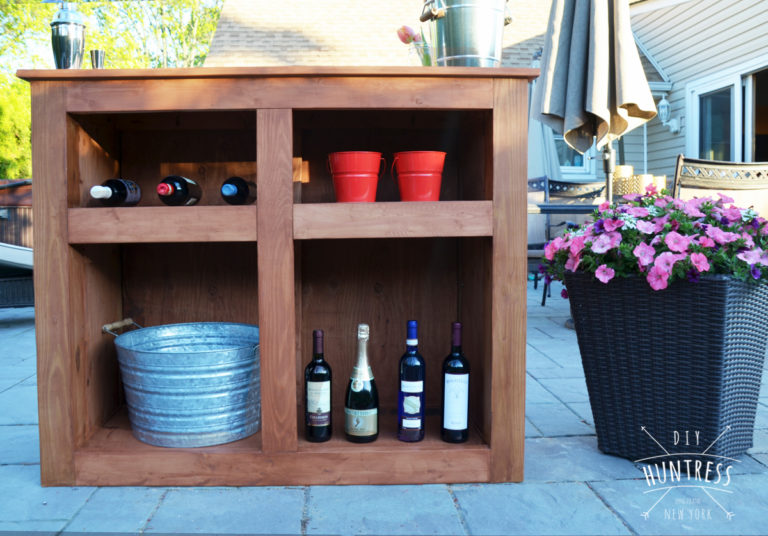
Begin adding your supports to help hold the weight of the shelves and the top (top supports not shown in image below). Attach these to the frames with 2 ½” pocket hole screws and wood glue.

IMPORTANT: In order to make your shelving panels lay flush with the shelving frames, you will have to install your shelf supports ½” (or the equivalent width of your plywood) below the top of your frame pieces. In other words, leave a ½” gap at the top of your supports for the shelf to drop in later.

Step 9:

Drop your shelving panels into place and secure them to the supports with 1” brad nails and wood glue.

Step 10:

Install your top panel with 1 ½” pocket hole screws and wood glue from the bottom frame.

Step 11:

Attach ½ x ¾” trim pieces cut from your 1×6’s to the front panel (@ 41”and 42” — to hide any imperfect gaps – this is optional!) and the top (@ 23” and 51” — to hide the plywood edging).

Step 12:

Sand and then stain and seal your bar with outdoor/waterproofing sealer or stain!

The original plan can be found at http://diyhuntress.com

 
[email_link]

Cocktail Garden Bar

Materials:

  • (6) – 2 x 10 x 8′ Pressure Treated
  • (1) 2 x 4 x 8′ Pressure Treated
  • 2 1/2″ HD Pocket Screws
  • #20 Biscuits
  • Wood Glue

The original plan can be found at https://rogueengineer.com

 
[email_link]
 

Murphy bar


Step 1: Cut the Wood to Size

In the illustrations below, you will see the five different phases of what you will be building as well as the cut list for the various wood pieces. You will need to cut:

  • 2 pieces from the one-by-eight at 38 inches
  • 2 pieces from the one-by-eight at 22 inches
  • 1 piece from the one-by-six at 34 1/4 inches
  • 4 pieces from the one-by-six at 34 inches
  • 2 pieces from the one-by-six at 10 5/8 inches
  • 2 pieces from the one-by-four at 34 inches
  • 2 pieces from the one-by-four at 11 3/8 inches
  • 2 pieces from the one-by-two at 31 inches
  • 2 pieces from the one-by-two at 14 1/2 inches


Step 2: Build the Box Frame

Use the four one-by-eight pieces to create the box frame. Using the pocket hole joinery system, drill three 3/4-inch pocket holes on either end of the short one-by-eight pieces (top and bottom), about 2 inches apart. Make sure to drill the pocket holes on the rough side of the board. Attach the bottom piece first, flush with the side pieces, using 1 1/4-inch pocket hole screws and wood glue. Then attach the top piece, 3 inches down from the top of the sides, using the same method as the bottom piece. Be sure to wipe up any excess wood glue with a damp rag. The opening between the top and bottom piece should be 34 1/4 inches.


Step 3: Attach the Divider Shelves

Drill two evenly spaced 3/4-inch pocket holes on either end of the long divider one-by-six board. Measure the center mark at 11 inches on the top and bottom of the box frame and make a line all the way down using a speed square. Line the one-by-six board up so the top and bottom marks are at the center of the one-by-six, and then attach it to the box frame using 1 1/4-inch pocket hole screws and wood glue. For the shelves, place the short one-by-six pieces to your desired heights and attach them on either side of the divider with an electric nail gun and 1 1 /4-inch nails. In this project, the lower shelf was attached 1 foot from the bottom and the upper shelf 11 inches from the top.


Step 4: Build the Planked Tabletop

The top of the fold-out bar will be built with four one-by-sixes. To attach them together, drill five 3/4-inch pocket holes evenly spaced on the rough side of three of the boards. Assemble them flush together so the rough side is facing up, with one of the boards in the middle not having any pocket holes drilled. If needed, step on the top of the boards as you screw them together using 1 1/4-inch pocket hole screws and wood glue, so as to keep the top flat. Work slowly and don’t over-screw into the wood, as you don’t want the screws to poke out of the other side. This is where you can choose to use the optional 1-inch pocket hole screws instead, so as to not risk the screws coming out of the other side.


Step 5: Build the Support Frame for the Tabletop

Drill two 3/4-inch pocket hole screws on either end of the 14 1/2-inch one-by-twos. Assemble the one-by-twos and the 34-inch one-by-fours on top of the tabletop planks you just screwed together so that the one-by-fours are flush with the long edge and the one-by-twos are flush with the short edge. This is so you make sure the sizes are exactly the same. Use clamps and wood glue to attach the one-by-twos flush on either end of the one-by-fours, making sure the rough sides are facing up. Note: you are not actually attaching the support frame pieces to the tabletop in this step.


Step 6: Attach the Support Frame to the Tabletop

Flip the support frame over so the rough side with the pocket holes is facing down toward the rough side of the tabletop. Put wood glue between them and then attach the frame to the tabletop using a nail gun and 1 1/4-inch nails.


Step 7: Assemble the Fold-Out Leg Frame

Drill two 3/4-inch pocket holes on either end of the shortest one-by-fours. Place the 31-inch one-by-twos inside the support frame along both long sides and the short one-by-fours on either side of the short sides, with the rough sides facing up. On one end, allow a small gap between the one-by-four of the leg frame and the one-by-two of the tabletop support frame so the 2-inch hinges will fit. Keep the hinges there while you attach the leg frame pieces together using 1 1/4-inch pocket hole screws, making sure to put wood glue between the joints first. Note: you are not actually attaching the leg frame pieces to the tabletop in this step.


Step 8: Attach Hinges to the Leg & Support Frames

Flip the leg frame over so the rough side is facing the rough side of the tabletop. Measure and mark with a pencil or pen where the position of the hinges will be to join the leg frame and support frame. In this project, the hinges were positioned 1 inch from the edge of the one-by-four of the leg. Pre-drill holes where you made the marks and attach the hinges with the provided screws.


Step 9: Attach Hinges to the Box Frame

Place the tabletop with legs attached on top of the box frame. Orient the tabletop so the planks are facing inward and the bottom of the legs are closest to the bottom of the box frame. Push the bar up, allowing a small gap to form at the bottom where the hinges will be placed. Slide the 4-inch hinges in between the one-by-four of the support frame and the edge of the box frame. Mark the location of the holes with a pencil or pen. Pre-drill the holes and then attach the hinges with the screws provided.


Step 10: Attach a Half-Turn Button for the Leg

Once the hinges are attached, you might notice the bottom of the leg pops out a little bit and doesn’t fit flush (see photo in Step 9). To keep the leg flush, you will need to install a half-turn button on the one-by-two of the support frame that it touches. Measure the middle mark on the one-by-two, pre-drill a hole, and screw in the galvanized half-turn button. Don’t tighten it all the way, so the button can move over the bottom of the leg and keep it flush with the rest of the unit.

Step 11: Attach a Sash Lock to the Box Frame

Using the pre-marked 11-inch center on the box frame, mark where the screw holes will be on the box frame for the sash lock. Align the other side of the sash lock on the one-by-two of the support frame and mark where the screw holes are. Pre-drill holes and attach with the screws provided.


Step 12: Attach the L-brackets

On the the inside of the box frame, at the top, center on either side of the opening where the 4-inch L-brackets will be attached, and mark with a pencil or pen. Drill the four holes (two on each bracket) with a 1/4-inch drill bit. Attach the 4-inch L-brackets with the 1/4-20 bolts and corresponding size wing nuts, so the wing nuts attach on the inside. Repeat the process on the bottom of the box frame using the smaller 2-inch L-brackets, attaching the wing nuts on the underside. This keeps the inside surface usable. You can also countersink the bolt, so it doesn’t stick up at all. The top L-brackets hold the weight of the bar and the bottom ones just keep it sturdy.


Step 13: Mount the Bar on an Exterior Wall

Have a helper position the Murphy bar so the base of the unit is 32 inches off the ground. Mount the murphy bar in your desired location, using 3-inch exterior wood screws if you have wood or vinyl siding, or 1 1/2-inch stainless steel brick screws with lead anchors, pre-drilling the holes first.

This outdoor Murphy bar is the perfect size to prepare cocktails and drinks for an evening get-together…

…or you can stock it with seasonings, sauces and grilling utensils as the perfect prep and serving station for an outdoor grill.

The original plan can be found at https://www.hunker.com

 
[email_link]
 

Cedar Bar

One of the most useful items for a deck or patio is a large flat area where you can prepare and serve food, pour hot or cold drinks, and have adequate storage for these tasks close at hand. This cedar bar is designed to provide you with the convenience of both storage and a work surface at a convenient height. The top of the bar can be separated from the shelving unit for storage if necessary, by removing two screws. We designed the storage area to accommodate a medium-sized cooler, but the cleats for the shelving can easily be altered to adapt to your particular needs.

Material:

  • (48 ft.) 1 x 6 Cedar
  • (42 ft.) 5/4” Cedar
  • (32 ft.) 2 x 4 Cedar
  • 3” deck screws
  • 1 ½” deck screws
  • Finishing/cup washers
  • 5/16” Hardwood buttons

Parts:

  • (4) 5/4” x 3 ½” x 41” – A – frame legs – front/back
  • (4) 5/4” x 3 ¼” x 41” – B – frame legs – sides
  • (4) 2 x 4 x 48” – C – frame front & back
  • (4) 2 x 4 x 15” – D – frame sides
  • (2) 2 x 4 x 31” – E – top frame
  • (2) 2 x 4 x 53 ½” – F – top frame
  • (2) 1 x 4 ½” x 39” – G – front cladding – end pieces
  • (10) 1 x 6 x 39” – H – front & side cladding
  • (8) 1 x 6 x 18 ¼” – I – floor boards
  • (1) 2 x 4 x 15” – J – brace
  • (1) 5/4” x 1 ¾” x 18 ¼” – K – cleat – floor
  • (2) 5/4” x 6” x 33” – L – vertical shelf supports
  • (3) 5/4” x 1 ¾” x 16 ½” – M – mid shelf cleats
  • (3) 5/4” x 1 ¾” x 18” – N – outer shelf cleats
  • (6) 1 x 6 x 22” – O – shelves
  • (3) 1 x 6 x 24 ¾” – P – shelves
  • (5) 1 x 6 x 50 ½” – Q – top boards

Steps:

Cut all the pieces referring to the diagrams. At all screw locations, use a #8 screw setter bit to countersink the deck screws, and use 1 1⁄2″ galvanized nails to avoid weather staining of the wood surface. Use exterior wood glue when nailing or screwing components together.

Build the two end frames. Begin with the corners, using 3″ deck screws and glue. Join the sets of corners/legs with the upper and lower frame pieces to complete the end frames. Use a carpenter’s square to ensure square corners.

Complete the bar frame by fastening the front and back frame pieces to the end frames as shown, using 3″ deck screws and glue. Clamps may be useful here, as well as a carpenter’s square to again check for square corners. Set the bar frame aside to allow the glue to set.

Build the top outer frame, mitre the corners, and fasten with 3″ deck screws and glue. Be sure the frame is square.

Fasten the cedar cladding to the front and two end sections of the bar frame using 1 1⁄2″ nails and glue. Plane or cut the rounded edge off the two outer front boards. This will allow for some spacing between the eight front boards, and tight flush corners. Space the two boards for the side sections as shown.

Fasten the floor boards to the frame using nails and glue. Install the 2″ x 4″ piece in the upper frame, and the cleat on the floor as shown, then fasten the two vertical shelf support boards to them.

Install the six additional shelf support cleats using 1 1⁄2″ deck screws and glue.

Set the shelf pieces on the cleats. You may wish to alter or add shelves to serve your particular needs or choice of storage.

Place the five boards into the top frame, and secure with 3″ deck screws and glue. Trim or plane the two outer boards on one edge to provide a tight edge with the top frame.

Sand all surfaces and apply a sealer or wood stain as directed on the container.

When the sealer is dry, set the bar top on the lower section, and secure with two 3″ screws in cup washers as shown.


The original plan can be found at http://www.homeathome.homehardware.ca

 
[email_link]
 

BBQ Grill and Cooler Table

Today I’m going to show you How to Build a Patio Cooler and Grill Cart Combo.  The grilling season is upon us!  The cool weather is making an exit and the heat, BBQ, and outdoor parties are here.  Two things I’ve been thinking of building are a patio cooler and a grill cart.  Since my back deck is not huge I decided to kill two birds with one stone and show you guys how to make a DIY patio cooler box and BBQ cart in one.

The project is made from cedar to withstand the elements and give it a nice classy look.  The heart of the cooler box side is 48 qt cooler with plenty of capacity for your parties.  The grilling side has a storage compartment and hooks to hold all your BBQ accessories.  The lid for the storage box is flush with no hinges or handles giving you a 22″ x 20″ landing space for food and other barbecue fixings.  The assembly is easy and straight forward so read ahead and get ready to get your summer outdoor entertaining game on point!

Materials:

  • (13) 12′ 1×4 cedar boards
  • 1-1/4″ Pocket Hole Screws
  • 1-1/4″ Exterior Screws
  • 48qt Cooler
  • 3″ utility hinges
  • Front handle
  • Bottle Opener
  • Single Hooks
  • Hose Bib
  • (2) 1/2″ Male PVC Adapter
  • 1/2″ PVC Pipe
  • 1/2″ PVC Nut

I built the cooler box and grilling station entirely out of 1×4 cedar.  My local lumber supplier had 12′ boards that were rough on one side and I was able to get them for half the price of what you would pay at the big box store for the cedar 1x4s.  If this is an option for you then you can save some significant money going this route.

Building the Patio Cooler Base

You’ll start by building the top frame based on the size of your cooler.  The top of my cooler was 23-3/4″ x 13-1/2″.  If your cooler is a different size then you’ll need to adjust the top frame accordingly and see if you need to adjust the base as well.

Cut 2 boards to 50″ for the long top frame pieces and 3 boards to 13-1/2″ for the short top frame pieces.  Drill pocket holes in the ends of the short pieces and assembly with 1-1/4″ pocket screws.  This will give a 15-3/4″ opening for the grilling storage box.

Cut 8 boards down to 38-1/4″ long for the legs.  Rip down 4 of these boards to narrow leg pieces at 2-3/4″ wide.  Use a pocket hole jig to drill pocket holes in the 2-3/4″ pieces in the top 13″ of the leg and another hole 2″ up from the bottom.

Join the narrow leg pieces to the wide pieces glue and 1-1/4″ pocket hole screws on the top and bottom.  In the gap where there are no pocket holes, use clamps to hold the joints tight.  Make two legs with the narrow pieces on the right side and two with the narrow pieces on the left side.  This lets you have the wide face of the legs showing on the front and back of the cooler.

Cut 8 pieces of side cladding to 16-1/2″ long.  Use a trim router to route a 1/16″ 45 degree chamfer on the outer edges of each board.  This will give the boards a nice beadboard look when butted together.

Lay two legs down and starting from the top, attach 4 side cladding pieces to the legs with two 1-1/4″ screws on each side of each board. Repeat this process with the other 2 legs to form 2 side assemblies.

Cut 4 pieces of front cladding and 4 pieces of back cladding to 44-1/2″ long, and route a chamfer on the long edges just like the side cladding.  Side the side assemblies on edge and starting at the top, attach the front cladding to the sides with 1-1/4″ screws.

Flip the assembly over and now attach the 4 back cladding pieces to the sides.  Now you have the base of your patio cooler and grill cart combo!

Cut two 3/4″ x 3/4″ top front cleats 14″ long and one top side cleat 11″ long.  Predrill holes on the bottom for attaching the top frame later.  Secure the 11″ cleat to the middle of the right side flush with the top and secure the 14″ cleats to the front and the back 1-1/2″ away from the right side.

Make the Grill Cart Storage Bay and Bottom Shelf

Attach two 1″ wide 14″ long cleats to the inside of the front and back walls, 18″ from the right side.  Cut four 15″ wide storage divider boards and glue and screw them to the cleats to create the storage bay.


Cut and install two 17-1/4″ cleats to the front and back of the storage bay.  Put them 3/4″ up from the bottom of the bay then attach five 15″ storage bay bottom pieces to the cleats with screws from underneath.  The middle board will need to be trimmed to fit.


Attach the top frame to the base with pocket hole screws on the cooler side and with 1-1/4″ screws through the cleats in the storage bay.  Use glue on all the top surfaces for a good hold.

Cut two 46″ long 1″ wide shelf stretchers and eleven 16-1/2″ shelf slats.  Attach the slats to the stretchers with glue and a brad nailer.  For consistent spacing start with the outer slats and then secure the middle slat.  From there fill in the gaps spacing the slats 3/4″ apart.

Test fit your cooler in the opening and remove the cooler drain plug.  Reach a marker through the cooler drain and mark a spot on the left side of the patio cooler.  Drill a 1-1/4″ hole in the side for the plumbing fittings.

Flip the grill cart combo over and put the cooler in place.  Secure the cooler by installing three 15″ cooler supports into the front and back with 1-1/4″ pocket screws.

Making the Cooler Box and Grill Bay Lids

Flip the cooler back over and cut four 15-3/4″ long storage bay lid pieces.  Put a chamfer on the boards with the trim router like the body cladding.  Drill a 1″ hole in the middle of one board and chamfer the top edge of the hole.

Cut two 13-1/2″ by 1″ wide lid battens.  Line the lid boards up together with the board with the hole at one end and fasten the boards together using the battens, glue and 1-1/4″ screws.

Make 4 small 1-1/2″ x 2″ storage lid tabs.  Round one corner of the tabs and install them in the top corners of the storage bay with glue and brad nails into the top corners of the storage bay.

Build the frame around the lid by based on your own cooler measurements.  The sides should be 3/4″ taller than your lid.  I cut two lid front/back pieces to 25-1/4″ by 2″ and two side piece 13-1/2″ by 2″.  Join the lid frame with 1-1/4″ pocket hole screws.


Cut 3 lid support cleats to 13-1/2″ by 1″ and attach them to the front and back with pocket holes. Place the outer cleats so they are directly over the side ridges on your lid that mate with the cooler body. You’ll be screwing into the lid later and don’t want the screws to pop through the underside of the lid.

Make 5 lid top pieces out of 25-1/4″ boards.  Route the 45 degree chamfers on these boards just as the others.  Layout the boards on the top and cut the center piece to width to fit.  Use super glue and temporarily affix the full size boards to the edges of the frame.

Flip the lid over and permanently attach the lid boards to the cleats with 1-1/4″ screws.

Flip the lid over again on top of the cooler.  Now secure the top to the cooler lid with 1-1/4″ screws through the outer cleats into the lid.  Attach the center board with wood glue on the center cleats and super glue on the outer edges.  The super glue will bond quickly and the wood glue will give a long lasting hold.  Assembling the lid this way give you a super clean look with no nail or screw holes…SCORE!

Installing the Cooler Drain & Lower Shelf

Remove the drain from your cooler and keep the washer on the inside.  Get two 1/2″ PVC male threaded adapters, a length of 1/2″ PVC, a 1/2″ nut and a hose bib for the outside of the cooler.

The length of the PVC pipe will vary per installation.  Cut a hose bib mounting block to 3-1/2″ by 3-1/2″ and drill a 1″ hole through it for the male adapter.  You may need to drill a larger hole with the collar if the fitting won’t go through.  Glue up the final PVC parts and install them on the hose bib and mounting block.  Put wood glue around the mounting block and insert the assembly into the cooler and lock in place using the nut in the cooler.

Sand everything down to 150 grit and apply your finish at this point.  I used a Spar Urethane made for outdoors.

After the finish is dry, install the lower shelf so the bottom is 2-1/2″ up from the floor.  I would recommend turning the patio cooler on it’s top to do this vs. laying it on its back like I did

Hardware for the Patio Cool / Grill Cart Combo

The cooler lid gets 3″ utility hinges and a handle on the front.

I added a bottle opener on the front and 2 hooks on the grilling side of the cart as well.

I put my inserts for my STOK Quattro grill into the storage side and it worked great to hold them all.  I just put some little dividers in there to keep them separated.

Alright, you’re all finished up!  Put the patio cooler and grill cart combo out on your deck and let the good times roll this summer.

The original plan can be found at http://fixthisbuildthat.com

 
[email_link]
 

BBQ Grill Cart

Materials:

  • (5) 2 x 8 x 8-ft. boards
  • (6) 2 x 4 x 8-ft. boards
  • (4) 3-in. steel swivel casters
  • (4) 2 x 2 x 36″ Angle irons
  • 3″ Deck screws
  • 1 Can of spray paint
  • Mineral oil to season the butcher block surface
  • Butcher block conditioner
  • Cutting oil to use as a lubricant for drilling through the metal

Step 1: Cut the lumber

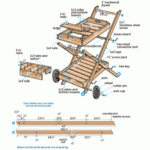
Cut the wood into the lengths shown in the diagram above.

Step 2: Build the Shelves

Screw together the 2x4s into rectangular frames and then screw the longer pieces of 2x8s and 2x4s on top of them.

Step 3: Drill through the angle irons

Drill through the angle irons with the 3/16 in. bit. Check to make sure that the screws fit through the holes. Then use the larger drill bit to create a hole over the 3/16th hole to countersink the screws.

Step 4: Paint the angle irons

Clean the cutting oil off the angle irons and then paint them with spray paint.

Step 5: Attach the angle irons

Screw through the holes drilled in the angle irons and into the wood shelves.

Step 6: Attach the top

Screw through the top boards and into the frame.

Step 7: Seal or stain wood

Finish the wood with a butcher-block conditioner.

Step 8: Add wheels and accessories

Screw on the wheels and other accessories.


The original plan can be found at http://blog.homedepot.com


[email_link]
BBQ Grill Cart

You’ve perfected your grilling technique. You’ve mastered the marinade. Now take your outdoor culinary skills to the next level by building our red cedar cookout cart. It’s the perfect mobile staging area for storing and preparing food. Chop vegetables or slice meat on its lift-off polyethylene cutting board, then dump scraps through its hole and into a sliding stainless-steel pan below. Another larger pan on the left slides out to give you access to stored meat, fish, vegetables or ice. Lean cookbooks against the backsplash and keep condiments in the lift-out tray on the left. After the feast, the slide-out pans, the cutting board and the condiment tray come inside for cleaning while the cart stays outside with your grill.

Materials:

  • A – (2) 5/4” x 4” x 44” (handle)
  • B – (2) 1” x 4” x 34 ½” (front leg)
  • C – (2) 1” x 4” x 32” (rear leg)
  • D – (6) 1” x 4” x 22” (frame end)
  • E – (6) 1” x 4” x 30 ½” (frame side)
  • F – (2) 1” x 4” x 20 ½” (frame, stretcher)
  • G – (1) ¾” dia. x 24 ¼” (steel handle)
  • H – (2) 8” dia. (cart wheel)
  • I – (1) 1” x 4” x 17 7/8” (top, center) (actual width is 4”; rip from 1×6)
  • J – (1) 1” x 4 ½” x 17 7/8” (top, end) (rip from 1×6)
  • K – (1) 1” x 3” x 37 ¼” (top, back)(rip from 1×4)
  • L – (1) 1” x 4” x 23 ½” (top, stretcher)
  • M – (1) 1” x 4 ¼” x 37 ¼” (top, front) (rip from 1×6)
  • N – (2) 1” x 1 ¾” x 20 ½” (top, cleat)(rip from scrap or 1×4)
  • O – (2) 1” x 1 ¾” x 22 ¼” (top, cleat)(rip from scrap or 1×4)
  • P – (1) 1” x 6 ¼” x 37 ¼” (backsplash)(cut from 1×8)
  • Q – (3) 5/4” x 1 ¾” x 22” (pan runners)
  • R – (6) 3/8” x 2 ½” (dowels)
  • S – (4) 1” x 2 ¼” x 2 ¼” (corner block)
  • T – (2) 1/8” x 8” x 14” (knife shield)
  • U – (1) ¾” x 17 ¾” x 23 ¾” (cutting board)
  • V – (22) 3/8” x 1 ½” x 31 7/8” (shelf slats)
  • W – (1) 6” x 12 ¾” x 21” (large pan)
  • X – (1) 6” x 10 ½” x 12” (small pan)
  • Y – (1) 3” x 5” x 18 ¾” (condiment tray)

Step 1: Clamp, then screw

Crosscut the parts for the three frames. Clamp the parts together and bore countersunk pilot holes. Apply waterproof glue to the joint to add a little strength and to seal the end grain. Next, drive 1¼-inch galvanized or stainless-steel screws into each joint.

Step 2: Install the legs

Crosscut the two rear legs, apply waterproof glue to the joint and fasten the legs using 1¼-inch screws driven into pilot holes.

Step 3: Add safety

Make a knife shield from two pieces of acrylic plastic cut to shape with a jigsaw. Drill and countersink three screw holes into each piece. Then screw one to the outer surface of the upper frame. Attach the other to the inner surface of the wood handle.

Step 4: Hide the screws

Fasten the cart’s wood handle to the upper frame with glue and deck screws. Drive the screws from the back so they’ll be hidden. Make sure that the square end of each handle is flush with the rear legs.

Step 5: Dowels make knife slots

To create five partitions to hang knives, start by drilling six holes through the upper frame and both acrylic panels, and into (but not through) the wood handle. Insert a dowel into each hole, then trim it flush.

Step 6: Rip the slats

Rip the slats from a cedar 2 x 4 and sand or plane them smooth. Shape their top edges with a router and a rounding-over bit. Using a pneumatic finish nailer, fasten the slats to the frame, spaced 5/8 inch apart.

Step 7: Build the top

Rip and crosscut the top parts and test fit the cutting board in it. Next, use glue and biscuits to assemble the top and clamp the assembly. Screw the cleats to the bottom of the assembly.

Step 8: Add Runners

With the cart upside down, screw on the runners, which will support the two stainless-steel pans.

Step 9: Fasten the backsplash

Rip and crosscut the back-splash from a cedar 1 x 8, then cut the gentle top curve using a jigsaw. Finally, fasten it by driving deck screws through pilot holes into the back of the top assembly.


The original plan can be found at https://www.popularmechanics.com

 
[email_link]
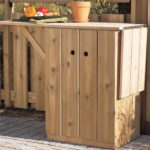
BBQ Tool Cabinet

PARTS

  • A side frame pieces – (2) 5/4 X 6 X 28″
  • B bottom frame piece – (1) 5/4 X 4 3/4″ X 19″
  • C top frame piece – (1) 5/4 X 6 X 23″
  • D front strip – (1) 1″ X 23″ (cut from 5/4 X 6 cedar)
  • E back pieces – (4) (cut to fit from 1 x 6 T & G cedar)
  • F feet – (2) (see drawing) (cut from 5/4 X 6 cedar)
  • G door pieces – (2) 1 X 4 3/4″ X 23 7/8″
  • H door pieces – (2) 1 X 4 1/2″ X 23 7/8″
  • I door cleats – (4) 1 X 2″ X 8″
  • J door strip – (1) 1/4″ X 1″ X 23 7/8″

Pre-drill all screw locations with a #8 countersink bit and  sand the pieces before assembly.

  1. Referring to the diagram, cut the two side pieces,  the top and bottom pieces, and the feet to size. Glue and nail the front strip  to the top piece.
  2. Using a bench saw or router, cut a 1/2″ x 1/2″  rabbet along the back edges of the side, top and bottom pieces of the frame.  (Note that the rabbet on the side pieces only extends to the base of the bottom  frame piece.)
  3. Assemble the frame using 2-1/2″ deck screws and  exterior wood glue. Make all the pieces flush at the back and centre the top  piece on the sides of the frame. Using clamps will help in the assembly  process. Check to ensure that the frame is square. A temporary wood strap  fastened diagonally to the front of the frame will keep the unit square until  the back is installed.
  4. Cut and assemble 1 x 6 cedar boards for the back,  using 2″ galvanized finishing nails and glue. The temporary wood strap (step 3)  may now be removed.


Build the Doors

  1. Referring to the schematic diagram, cut the four  door pieces to size from 1 x 6 tongue and groove cedar.  Cut off the  tongue and groove from the inner and outer edges of each door.
  2. Fasten the two cleats to the back of each door,  using glue and 1″ #8 brass screws.
  3. With the cabinet on its back, install the two  doors, using two hinges per door.  Install  the cedar strip to the right side door, using  1″ finishing nails and glue.
  4. Install the barrel bolt, drilling a 1/4″ diameter  hole half an inch into the top frame piece to line up with the bolt.
  5. Attach the two wooden feet, using glue and 2″ deck  screws.  Initially insert one screw into each foot, set the cabinet on a  level surface, and using a level or carpenter’s square check to make sure the  unit is vertical.  Then secure with three more screws in each foot.
  6. Install the hooks and handle as shown.
  7. Finish with a natural UV resistant wood finish.

The original plan can be found at  http://www.homeathome.homehardware.ca

 
[email_link]
 

1 2