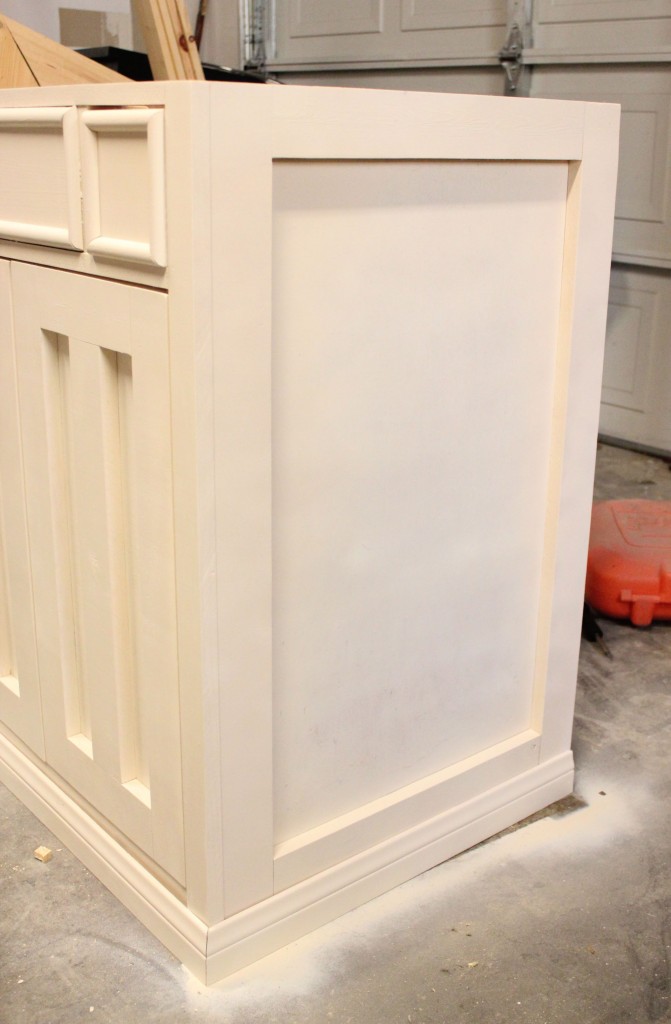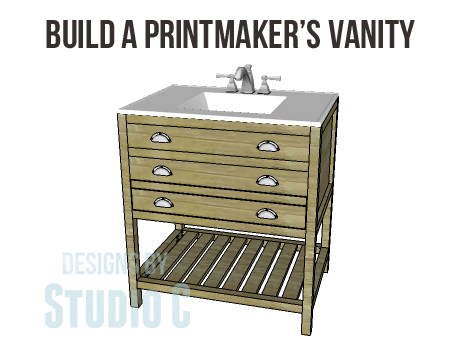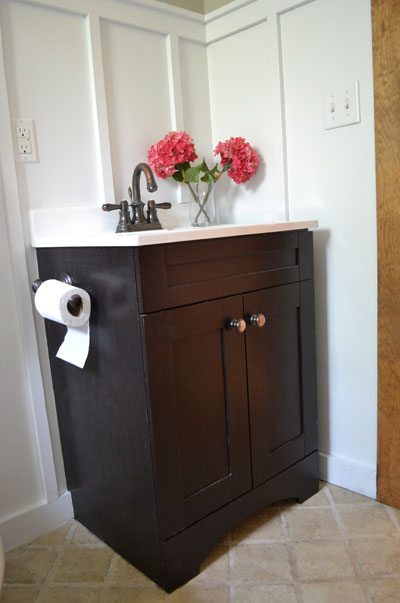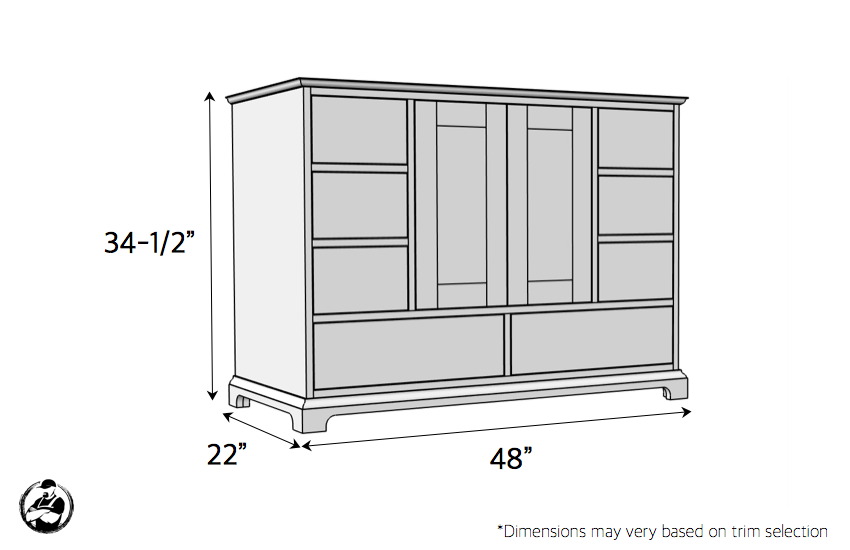
Bathroom Vanity

Materials:

  • 1-1/4″ pocket hole screws
  • 1-1/4″ brad nails
  • Edge banding, optional
  • 2 sets of 16″ Drawer slides
  • Cabinet pulls
  • Wood glue
  • Sandpaper (100, 150, 220 grits)
  • Finishing supplies (primer & paint, or stain, sealer)

Lumber:

  • 2 – 1×2 at 6′
  • 1 – 1×4 at 4′
  • 2 – 1×8 at 8′
  • 2 – 2×2 at 8′
  • 1 – 2′ x 4′ sheet of 1/2″ plywood
  • 1 – 4′ x 8′ sheet of 3/4″ plywood
  • 1 – 3/4″ square dowel at 3′
  • 3 – 1/4″ x 3/4″ decorative moulding at 8′

Cut List:

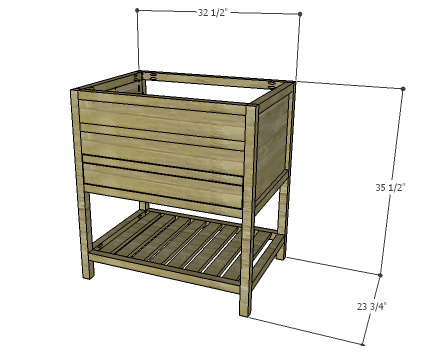
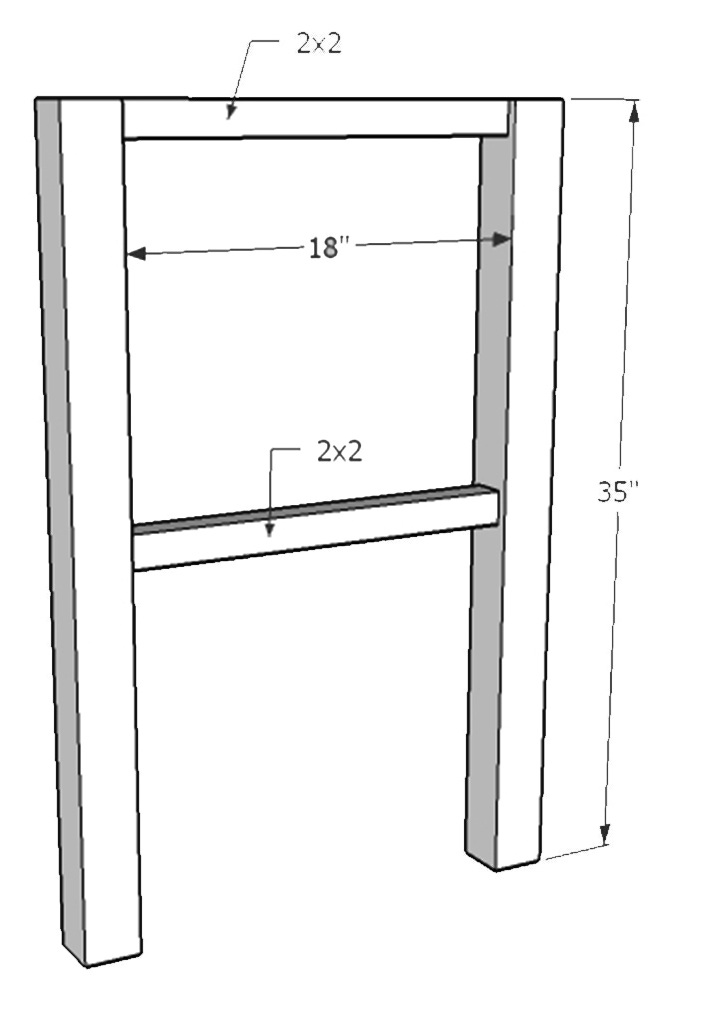
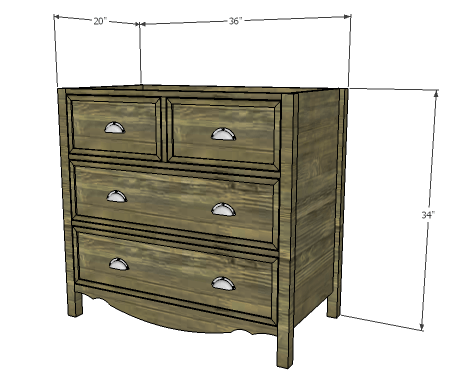
  • 4 – 2×2 at 34″ – Legs
  • 2 – 3/4″ plywood at 17″ x 30″ – Side Panels
  • 1 – 3/4″ plywood at 30″ x 33″ – Back
  • 1  – 1×3 at 33″ – Curved Lower Stretcher
  • 3 – 1×2 at 33″ – Front Stretchers
  • 1 – 1×2 at 8-1/2″ – Drawer Divider
  • 2 – 3/4″ plywood at 14-1/2″ x 30-1/2″ – Drawer Box Bottom
  • 4 – 1×8 at 14-1/2″ – Drawer Box Sides
  • 4 – 1×8 at 32″ – Drawer Box Front & Back
  • 2 – 1/2″ plywood at 8-3/4″ x 32-3/4″ – Drawer Front Base
  • 4 – 1/4″ x 3/4″ moulding at 8-3/4″ – Drawer Front Side Trim
  • 4 – 1/4″ x 3/4″ moulding at 32-3/4″ – Drawer Front Top & Bottom Trim
  • 4 – 3/4″ square dowels at 8-1/2″ – False Drawer Spacers
  • 2 – 1/2″ plywood at 8-1/4″ x 15-7/8″ – False Drawer Front Base
  • 4 – 1/4″ x 3/4″ moulding at 8-1/4″ – False Drawer Front Side Trim
  • 4 – 1/4″ x 3/4″ moulding at 15-7/8″ – False Drawer Front Top & Bottom Trim
Directions:

Step 1:

Edge banding will be applied to the exposed edges of the plywood prior to assembly.

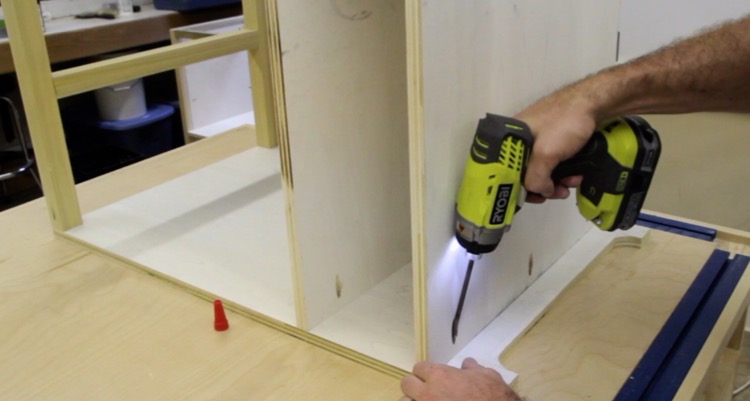
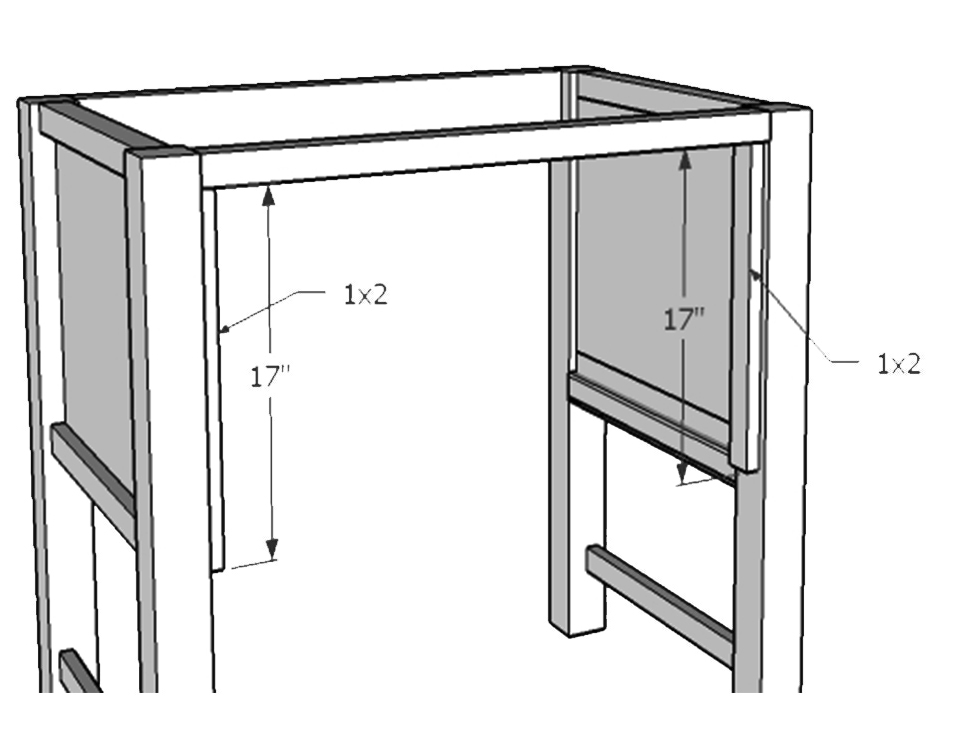
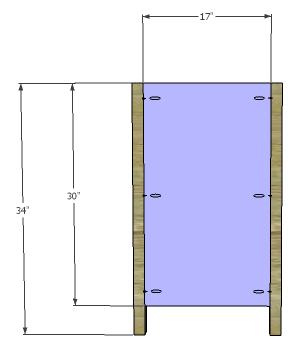
Cut the pieces for the legs and the side panels. With the pocket hole jig set for 3/4″ material, drill pocket holes in the long edges of the side panels. Secure the side panels to the legs using glue and 1-1/4″ pocket hole screws. The back face of the panels will be flush with the inside faces of the legs.
Step 2:

Cut the piece for the back panel and drill pocket holes along the side edges. Secure the panel to the legs using glue and 1-1/4″ pocket hole screws. The back face of the panel will be flush with the inside faces of the legs.

Step 3:

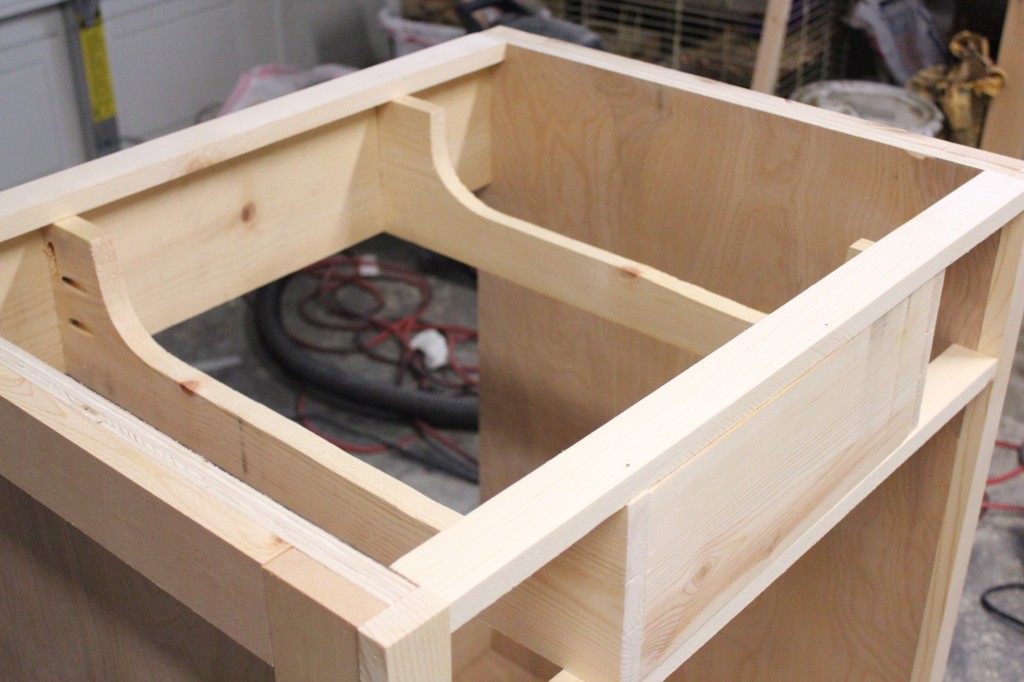
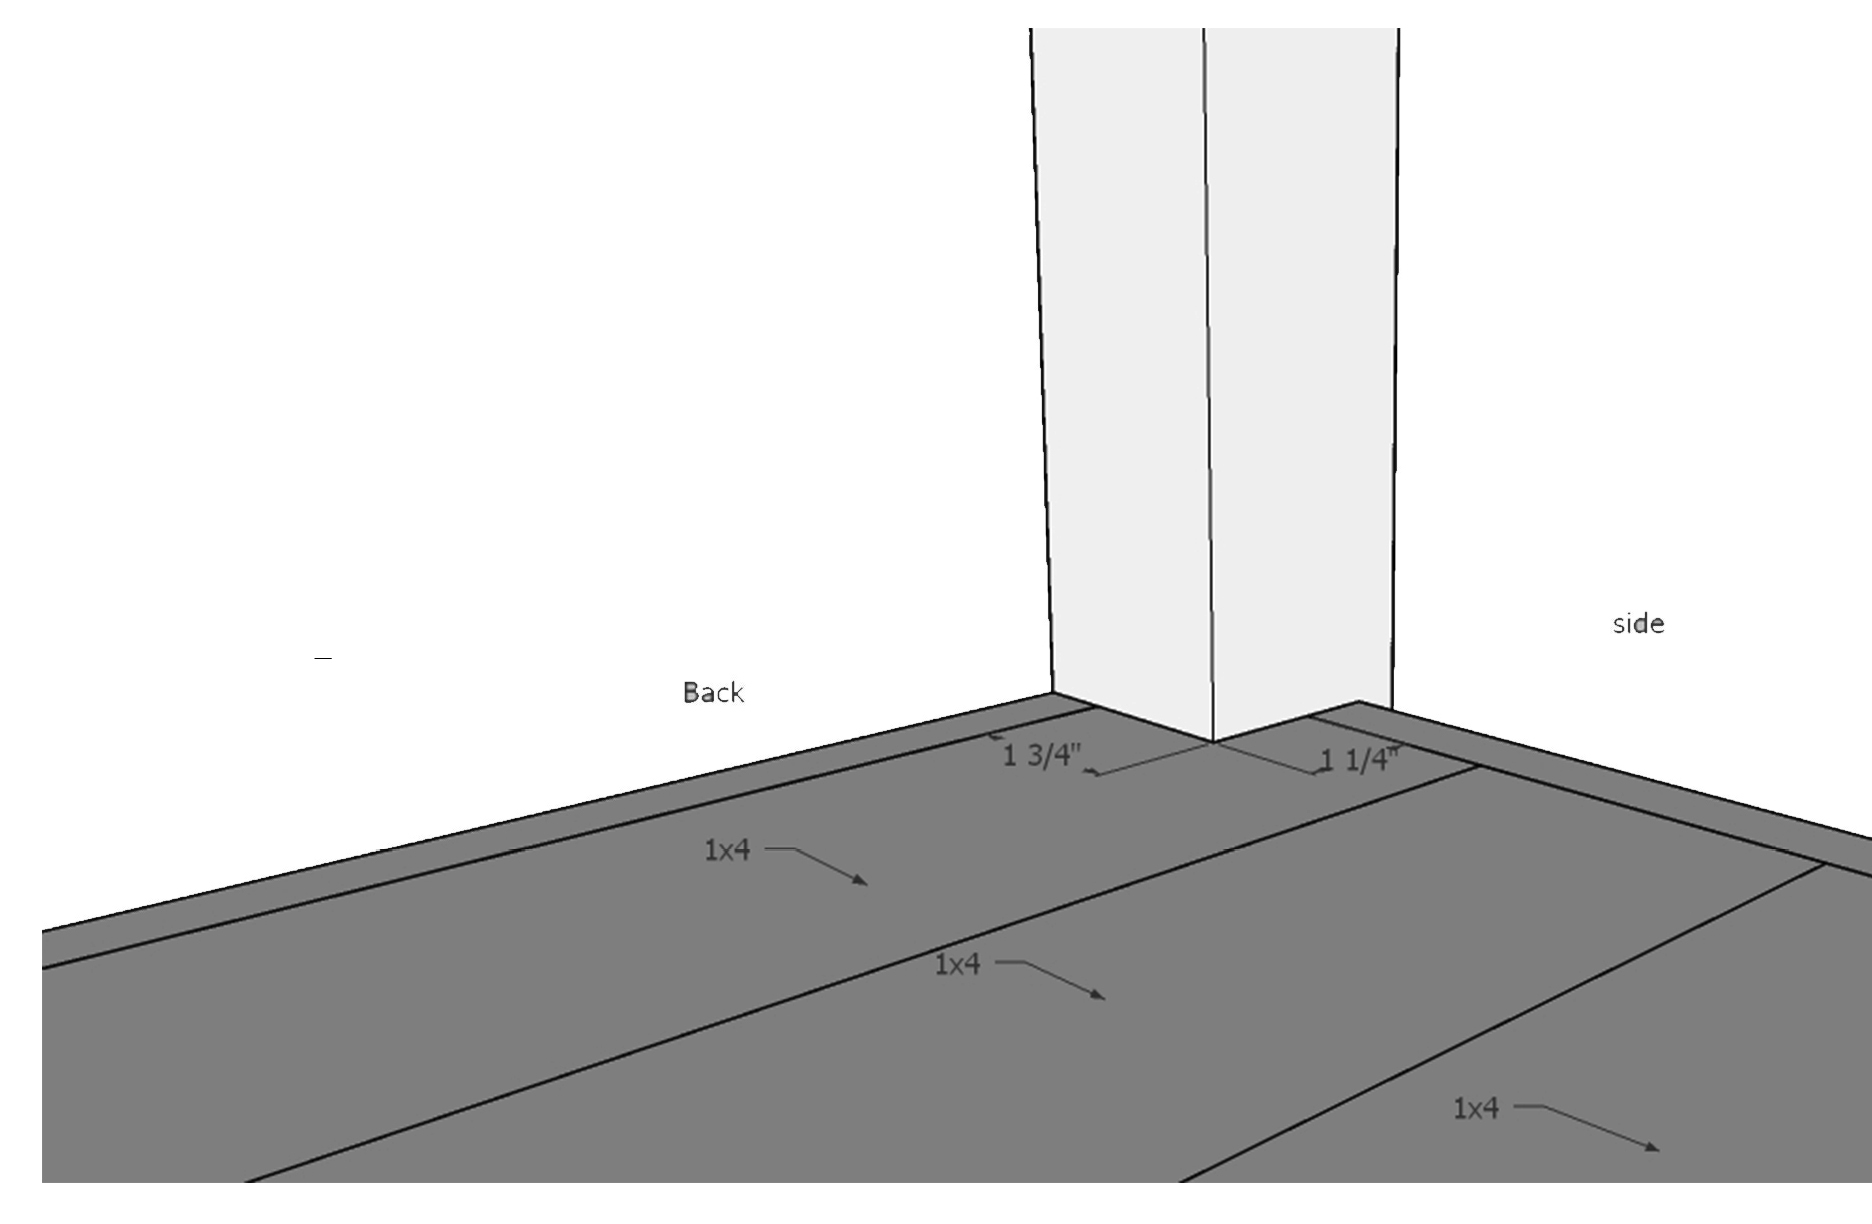
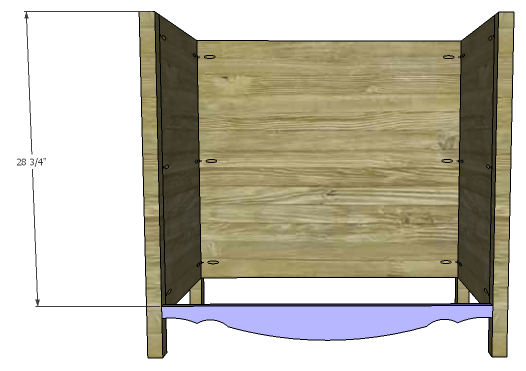
Cut the piece for the lower curved stretcher. Maintaining the side dimension (1-1/4″) and the center dimension (3-1/2″), draw a decorative curve in the board. The top edge will remain straight. Cut the curve using a jigsaw or a bandsaw.

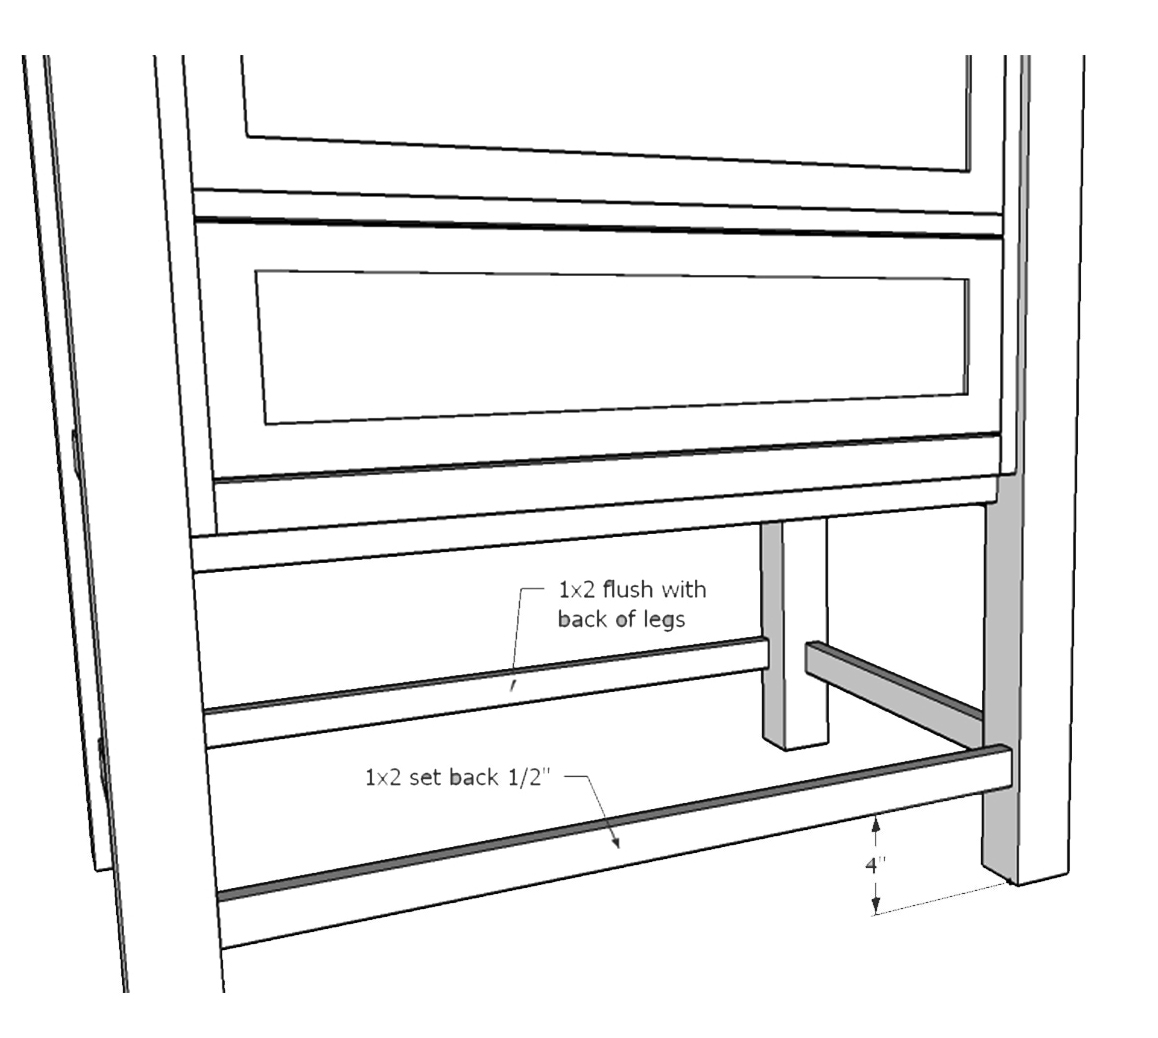
Drill pocket holes in the side edges, and secure the stretcher to the legs using glue and 1-1/4″ pocket hole screws. The front face of the stretcher will be flush with the front face of the legs.

Step 4:

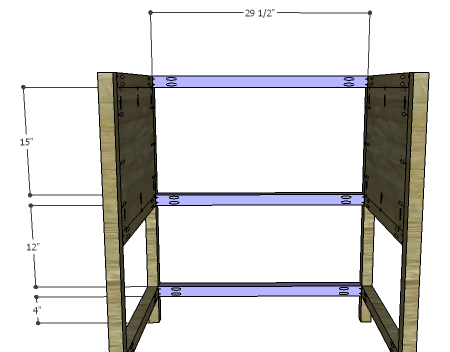
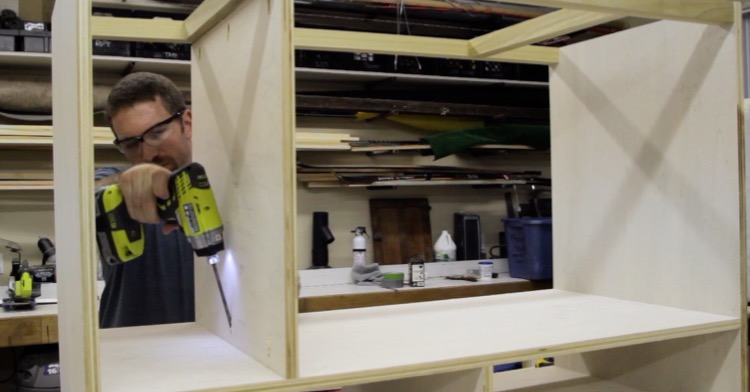
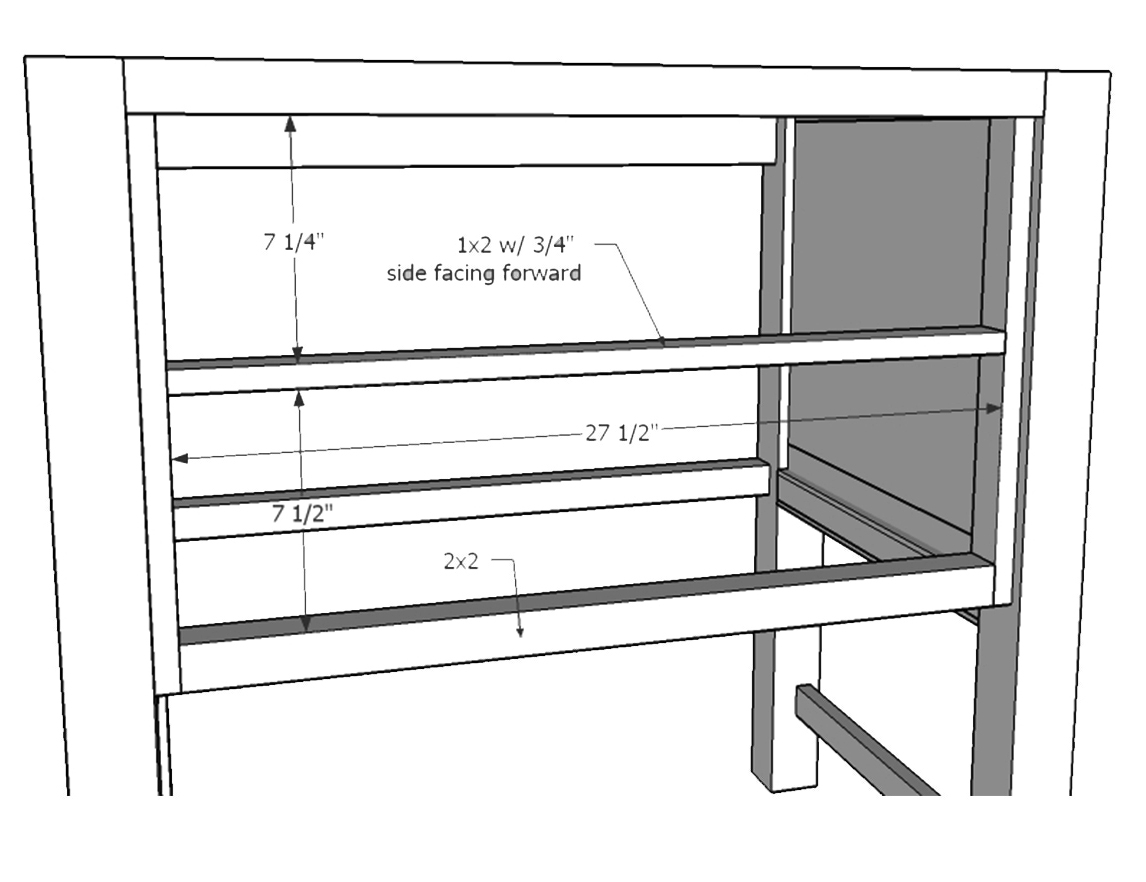
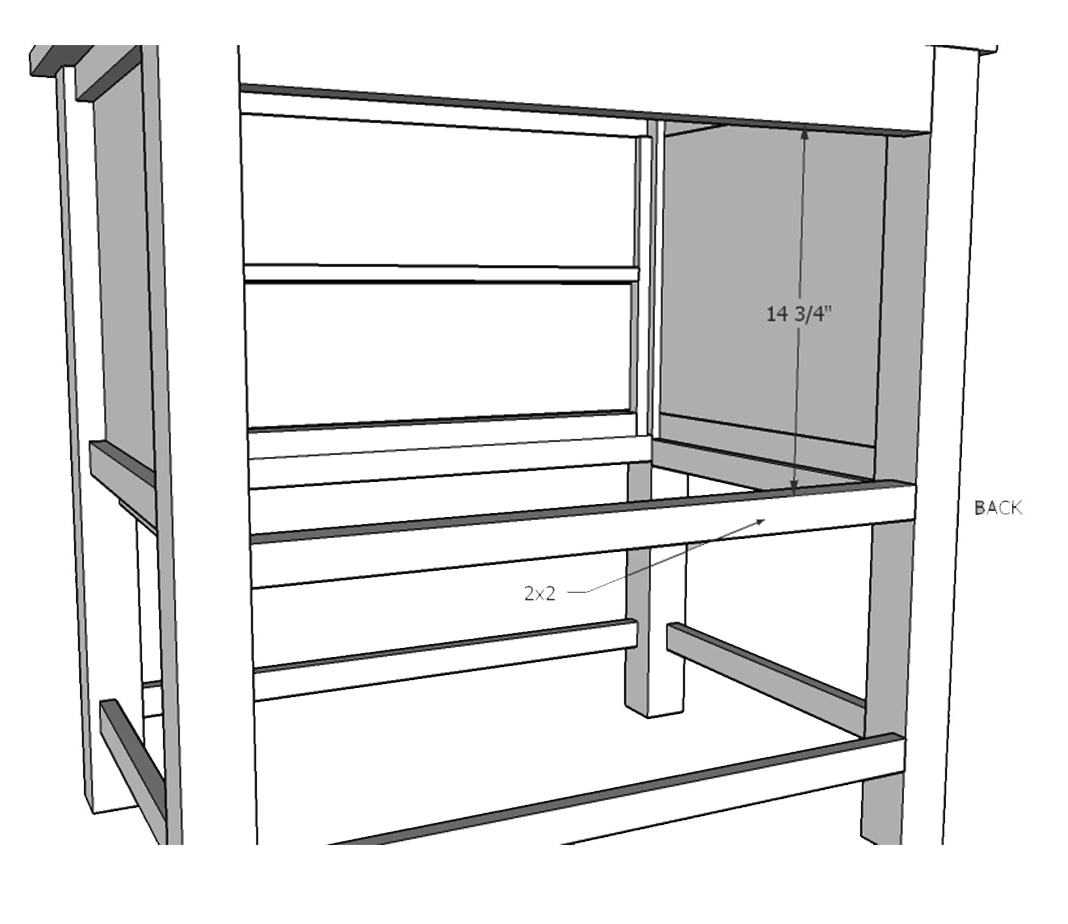
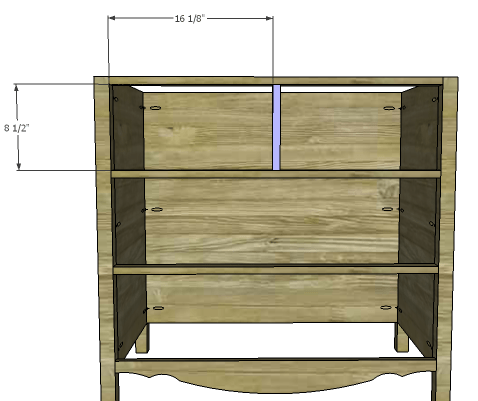
Cut the pieces for the stretchers and drill pocket holes in each end. Secure the stretchers to the legs as shown using glue and 1-1/4″ pocket hole screws. On the middle stretcher and the lower stretcher, orient the pocket holes so they face down. The pocket holes on the upper stretcher will face up and will be covered by the countertop.

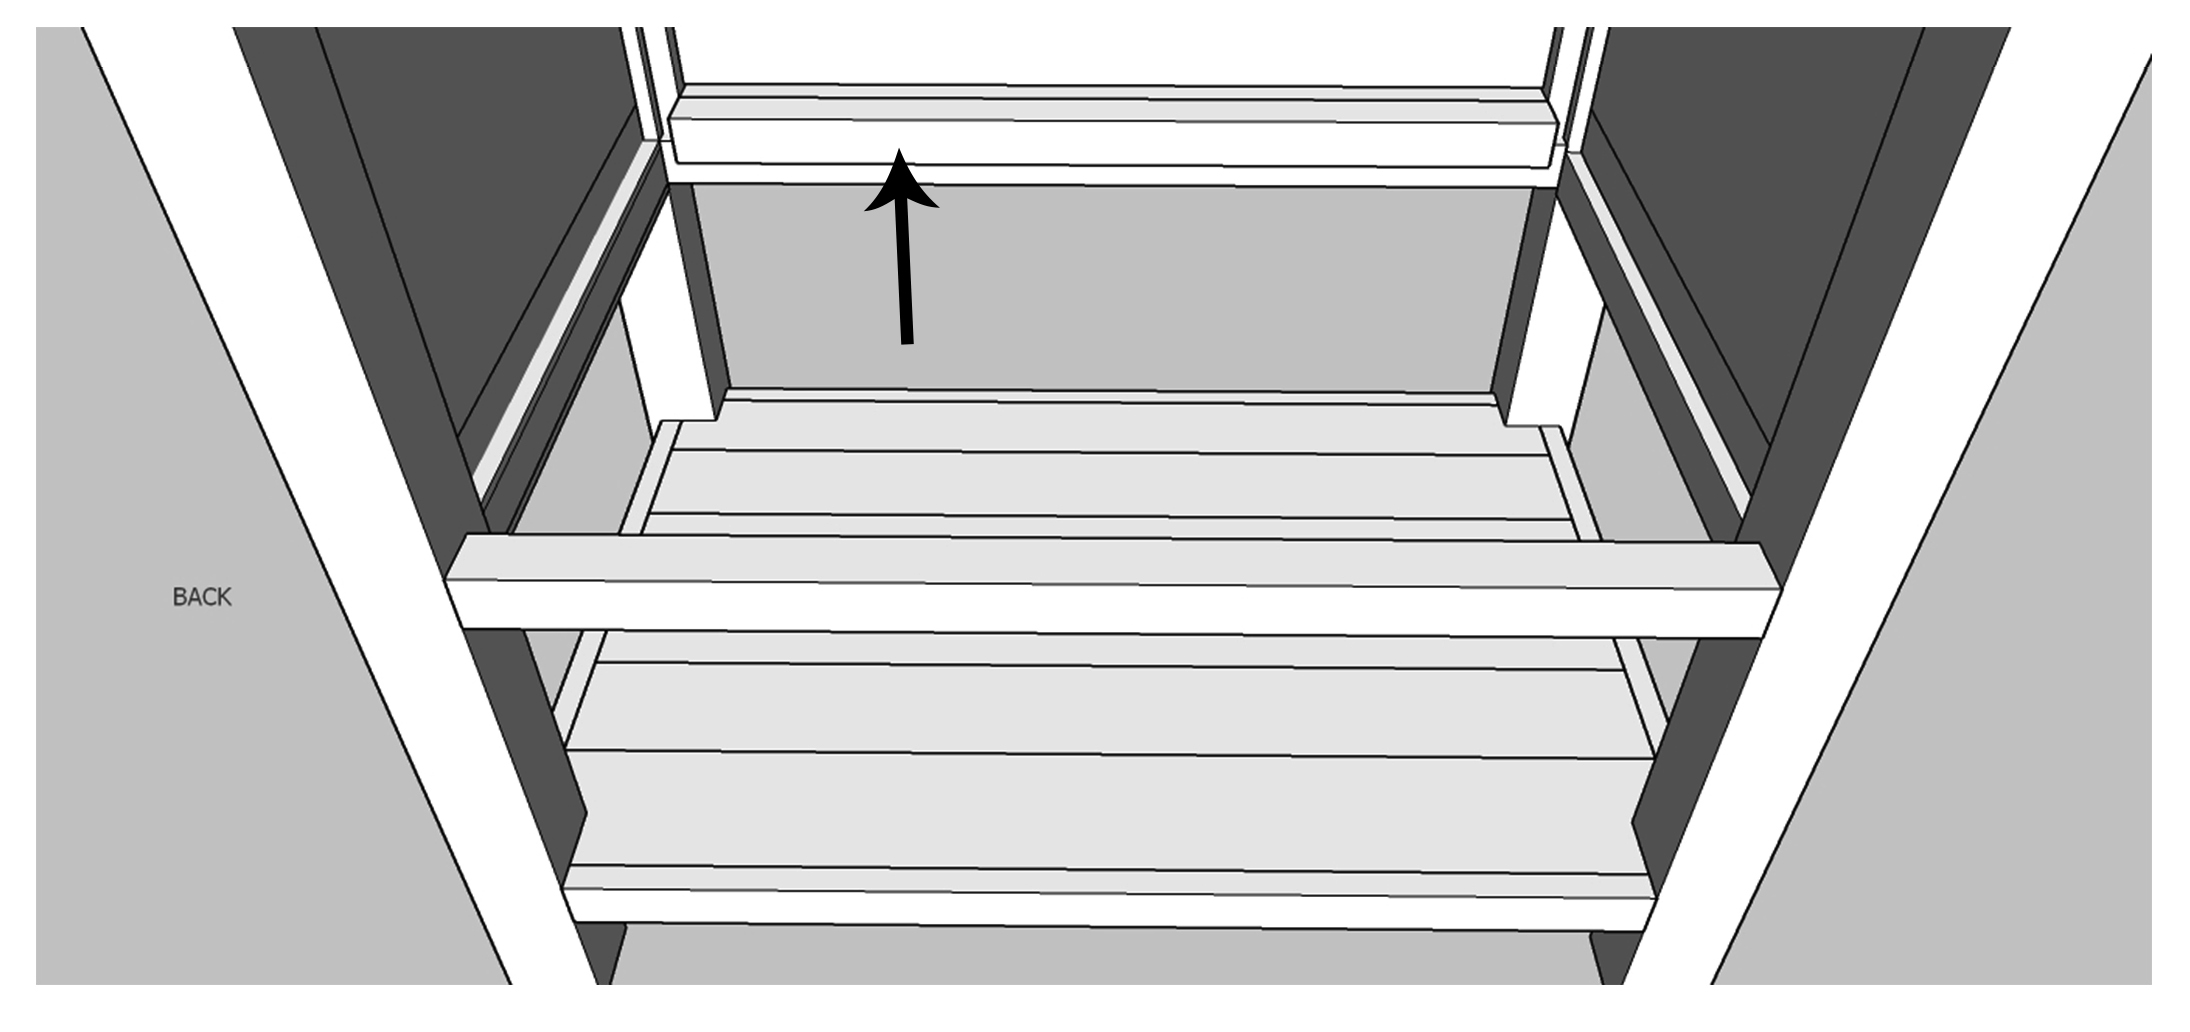
Cut the piece for the drawer divider. Secure in place using glue and 1-1/4″ brad nails through the stretchers above and below it.

Step 5:

Before cutting the drawer boxes, make sure the p-trap or any other plumbing will not interfere with the upper drawer. The drawer can be shortened, or a notch cut in the back of the drawer box to accommodate the plumbing.

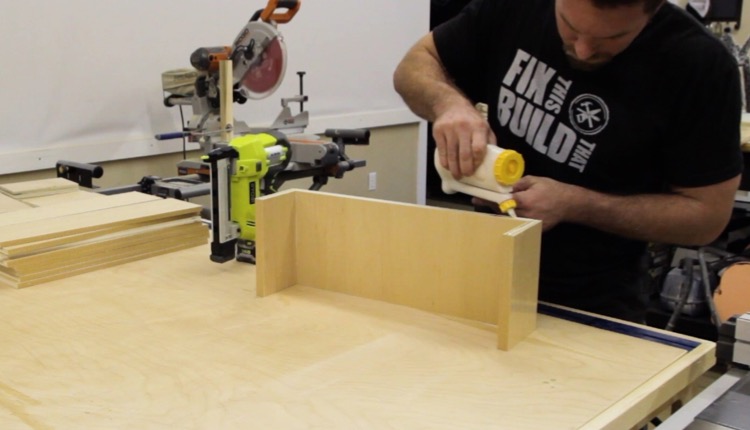
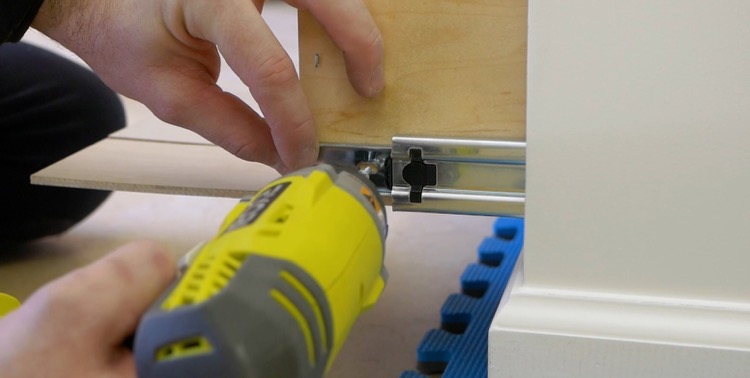
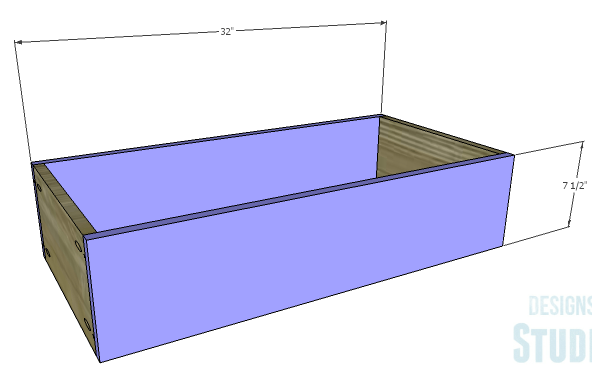
Cut the pieces for the drawer boxes. Drill pocket holes in all four edges of the bottom as well as each end of the sides. Assemble the drawer boxes as shown using glue and 1-1/4” pocket hole screws. Install the drawer slides according to the manufacturer’s installation instructions, locating them ¾” back from the front edge of the sides. Make any necessary adjustments.

Step 6:

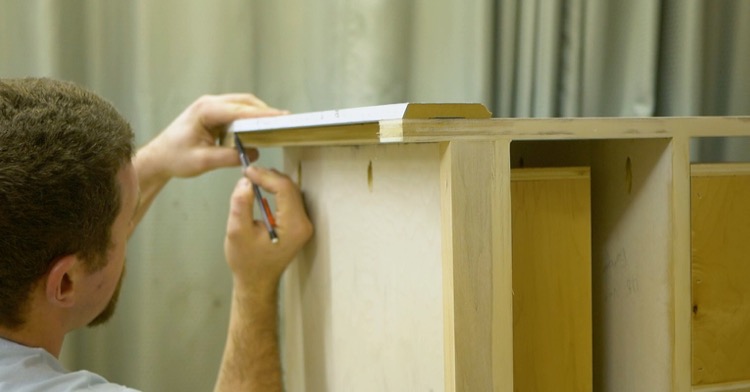
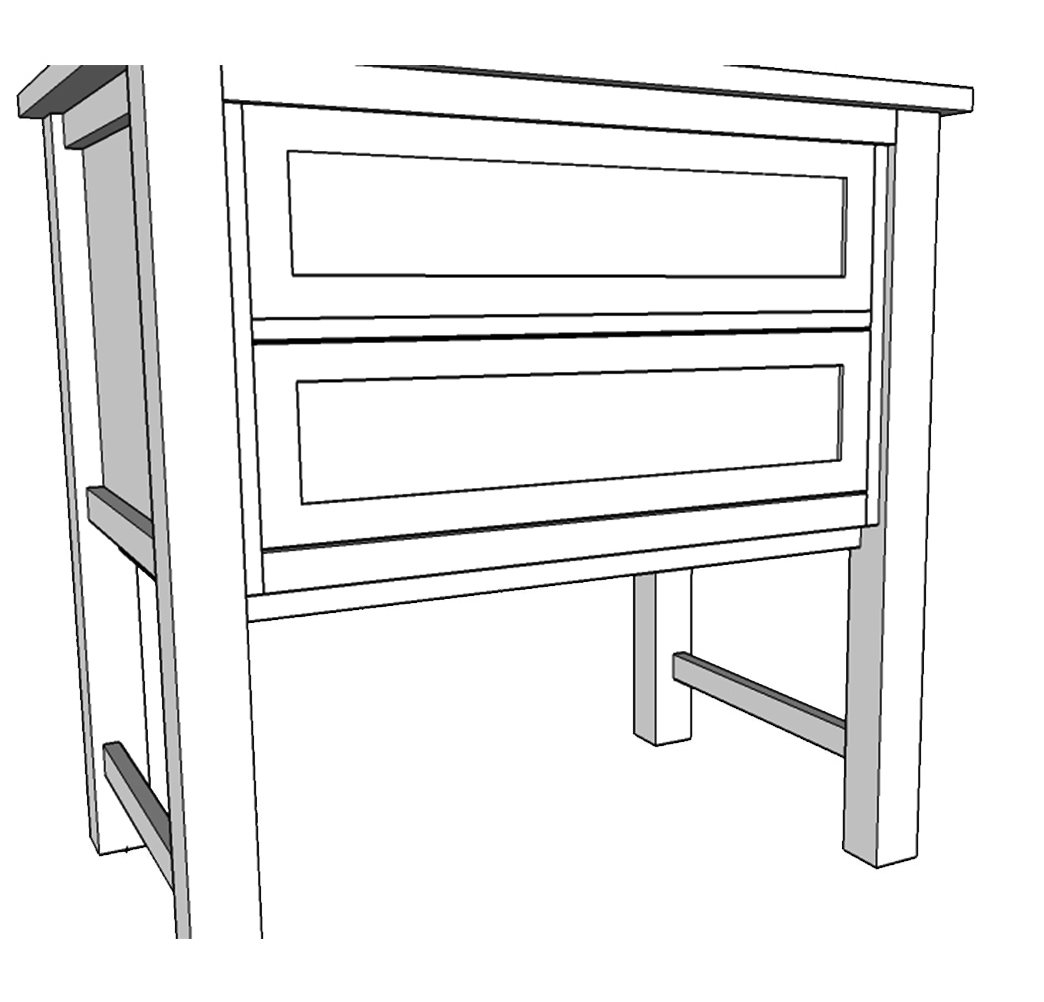
Cut the pieces for the drawer fronts as well as the moulding for the trim. Position the moulding on the front face of the drawer fronts and secure in place using glue. Clamp until dry.

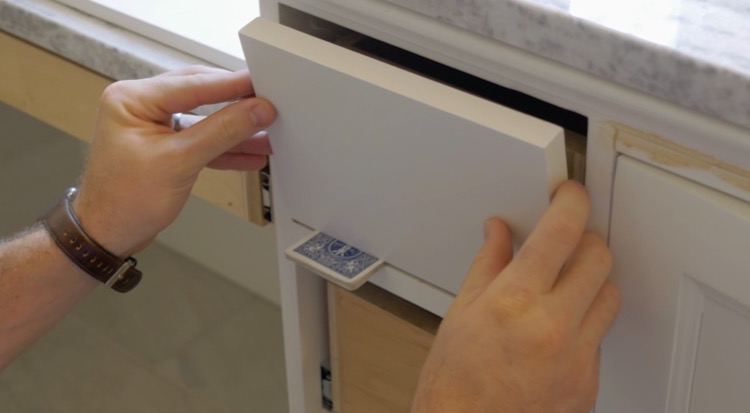
Mark the position for the drawer pulls and drill the holes. Shim the drawer front in the opening – there will be a 1/8” gap around all sides – then drive screws through the holes for the drawer pulls into the drawer box. Open the drawer, and secure the drawer front using countersunk 1-1/4” screws from the inside. Remove the screws from the holes for the drawer pull then finish drilling the holes. Install the drawer pull.

Step 7:

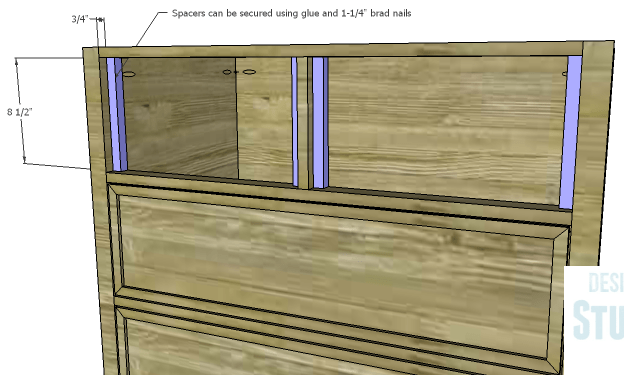
Cut the pieces for the false drawer front spacers. Secure the spacers in place using glue and 1-1/4″ brad nails through the spacers into the legs and drawer divider. The spacers will be positioned 3/4″ back from the front edge of the stretchers making them flush with the back edge.
Step 8:

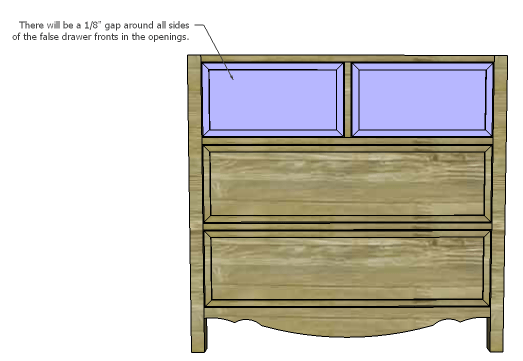
Cut the pieces for the false drawer fronts. Apply the moulding in the same manner as the drawer fronts. There will be a 1/8″ gap around each of the false fronts in the openings. Shim the false fronts in place, then secure them to the spacers using glue and 1-1/4″ brad nails.

Finish as desired

The original plan can be found at http://designsbystudioc.com

 
[email_link]
 

Bathroom Vanity

The vanity is constructed almost entirely out of plywood with edge banding applied. This was to keep the cost down as we were using oak plywood.

Materials:

  • 1″ pocket hole screws
  • 1-1/4″ pocket hole screws
  • 3 sets of 18″ drawer slides
  • 3 sets of shelf pins
  • Edge banding, if desired
  • 4 cabinet pulls
  • 1 set of hinges
  • Finishing supplies

Lumber:

  • 1 sheet of 3/4″ plywood
  • Half sheet of 3/4″ plywood – cabinet grade
  • Quarter sheet of 1/2″ plywood
  • Scrap piece of 1×2

Cut List:

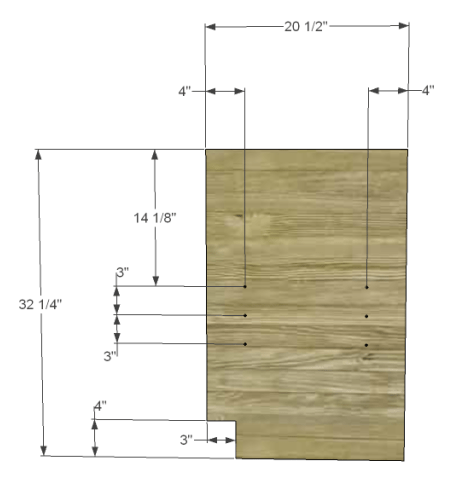
  • 2 – 3/4″ plywood at 20-1/2″ x 32-1/4″ – Sides
  • 1 – 3/4″ plywood at 20-1/2″ x 28-1/2″ – Bottom
  • 1 – 3/4″ plywood at 4″ x 28-1/2″ – Kickplate
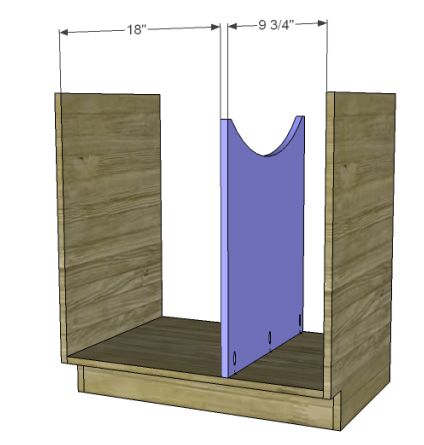
  • 1 – 3/4″ plywood at 20-1/2″ x 25″ – Divider
  • 1 – 1×2 at 9-3/4″ – Divider Support
  • 2 – 3/4″ plywood at 2-1/2″ x 28-1/2″ – Upper Stretchers
  • 2 – 3/4″ plywood at 1-1/2″ x 9-3/4″ – Drawer Dividers
  • 2 – 3/4″ plywood at 2-1/2″ x 13-1/2″ – Door Rails
  • 2 – 3/4″ plywood at 2-1/2″ x 25-1/2″ – Door Stiles
  • 1 – 1/2″ plywood at 13-1/2″ x 20-1/2″ – Door Panel
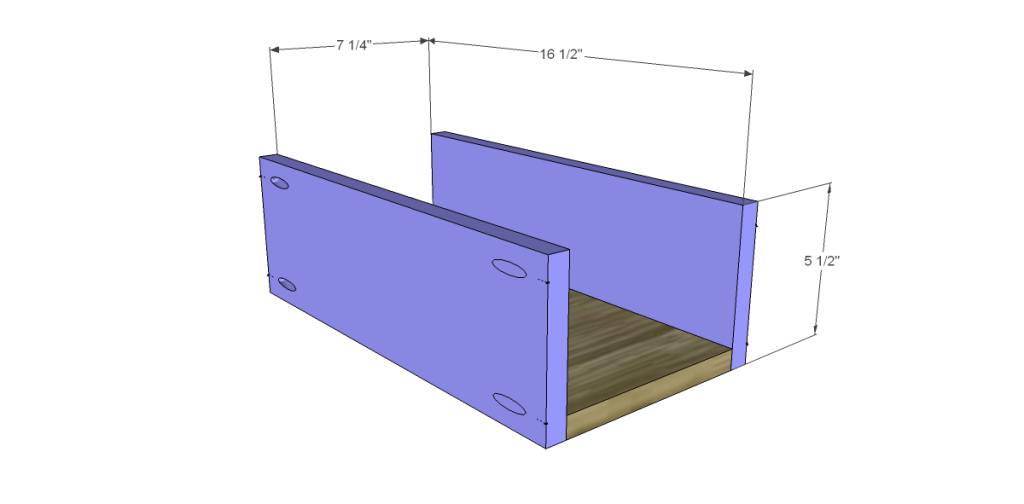
  • 3 – 3/4″ plywood at 7-1/4″ x 16-1/2″ – Drawer Bottoms
  • 6 – 3/4″ plywood at 5-1/2″ x 16-1/2″ – Drawer Sides
  • 6 – 3/4″ plywood at 5-1/2″ x 8-3/4″ – Drawer Front & Back
  • 6 – 3/4″ plywood at 1-1/2″ x 7-1/4″ – Drawer Front Rails
  • 2 – 3/4″ plywood at 1-1/2″ x 8″ – Upper Drawer Front Stiles
  • 4 – 3/4″ plywood at 1-1/2″ x 8-1/2″ – Drawer Front Stiles
  • 1 – 1/2″ plywood at 5″ x 7-1/4″ – Upper Drawer Front Panel
  • 2 – 1/2″ plywood at 5-1/2″ x 7-1/4″ – Drawer Front Panels
  • 1 – 3/4″ plywood at width (after shelf pins are installed) x 20-1/2″ – Shelf

Directions:

Step 1:

Edge banding will be applied before assembly! Cut the pieces for the sides. Cut the notch for the kickplate using a jigsaw. Drill the holes for the shelf pins (only on the side piece that will be on the left!) but only go about halfway through the plywood!

Step 2:

Cut the piece for the bottom and drill pocket holes at each end. Attach to the sides just above the horizontal line for the kickplate using glue and 1-1/4″ pocket hole screws.

Step 3:

Cut the piece for the kickplate and drill pocket holes at each end. Secure as shown using glue and 1-1/4″ pocket hole screws.

Step 4:

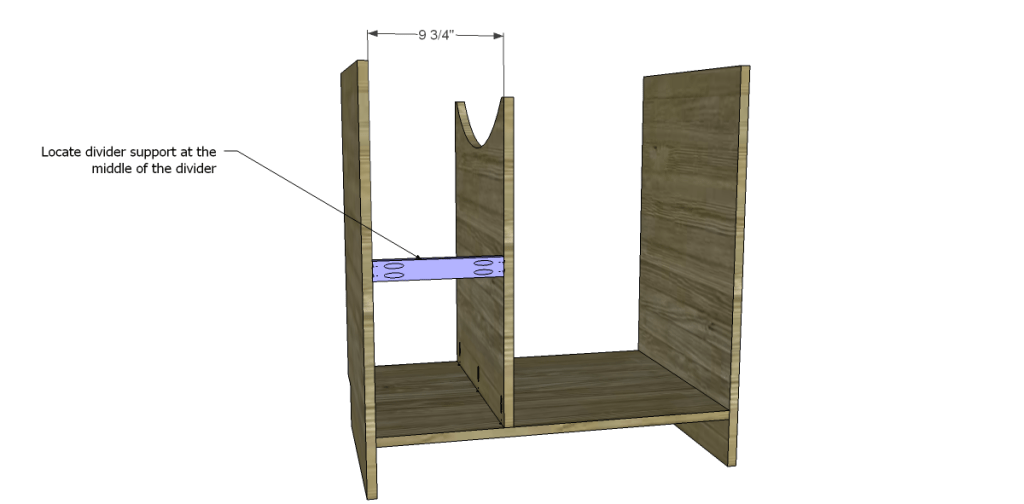
Cut the piece for the divider. Cut the arc as shown using a jigsaw and leaving 3/4″ square at each end of this edge. Drill pocket holes in the lower edge (opposite the side that is shown in the drawing). On the opposite side, drill holes for the shelf pins as shown. Secure the divider to the bottom as shown using glue and 1-1/4″ pocket hole screws.

Step 5:

Cut the piece for the divider support and drill pocket holes in each end. Position at the center of the divider and attach using glue and 1-1/4″ pocket hole screws.

Step 6:

Cut the pieces for the upper stretchers. Drill pocket holes in each end as well as one pocket hole as shown to secure the divider. (Drill the pocket hole on the piece as shown in the drawing, then reverse the dimensions to drill the pocket hole in the other piece.) Position as shown, then secure to the sides and the divider using glue and 1-1/4″ pocket hole screws.

Step 7:

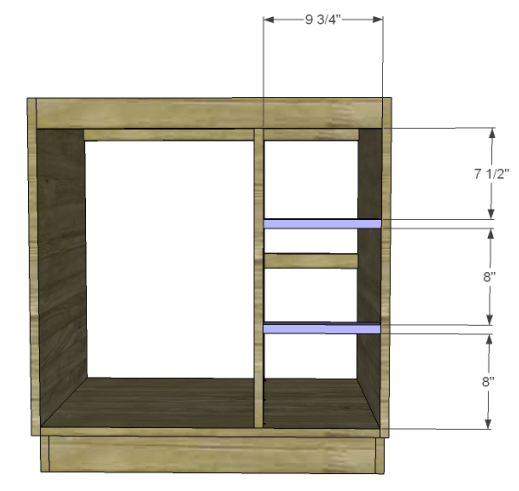
Cut the pieces for the drawer stretchers and drill holes in each end. Position as shown then secure using glue and 1-1/4″ pocket hole screws.

Step 8:

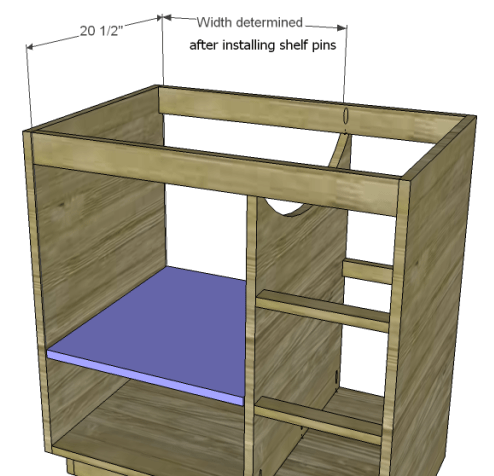
Install the shelf pins to determine the width of the shelf, then cut the piece for the shelf and position it inside.. In our case, the shelf would measure 17-3/4″ wide.

Step 9:

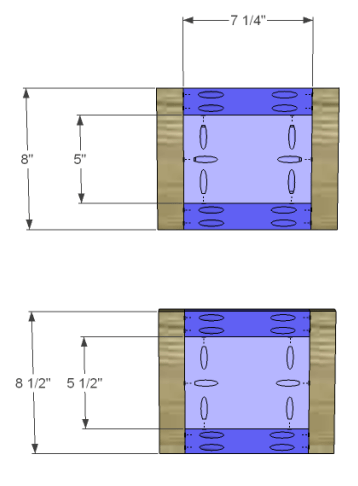
Cut the pieces for the drawers. Drill pocket holes in each end of the side pieces as well as all four edges of the bottom. Assemble as shown using glue and 1-1/4″ pocket hole screws. Install the drawer slides according to the manufacturer’s instructions. Make any necessary adjustments, then install the drawer boxes.

Step 10:

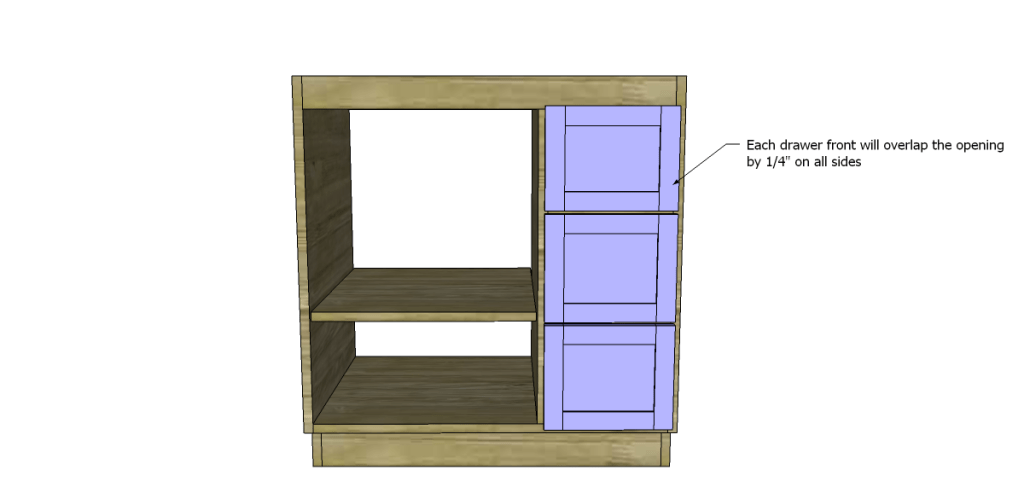
Cut the pieces for the drawer fronts. Drill pocket holes as shown. Attach the rails to the center panels using glue and 1″ pocket hole screws. The back face of the panel will be flush with the back face of the rails. Attach the stiles to the assembly using glue and 1-1/4″ pocket hole screws through the rails and 1″ pocket hole screws through the panel. Locate and drill holes for the cabinet pull. The drawer fronts will overlap the opening by 1/4″ on all sides. Drive screws through the holes drilled for the cabinet pull into the drawer box. Open the drawer, then secure the front from the inside of the box.

Step 11:

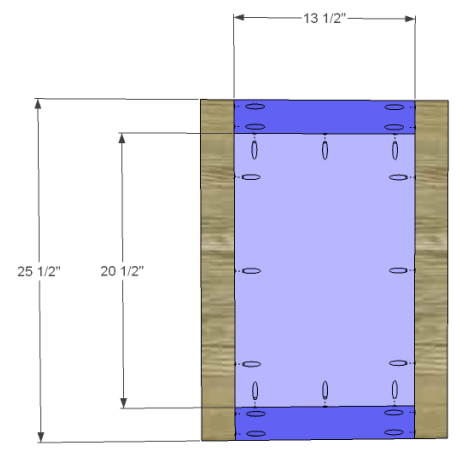
Cut the pieces for the door and assemble in the same manner as the drawer fronts. Attach the hinges according to the manufacturer’s instructions.

Finish as desired.

The original plan can be found at http://designsbystudioc.com/

 
[email_link]
 

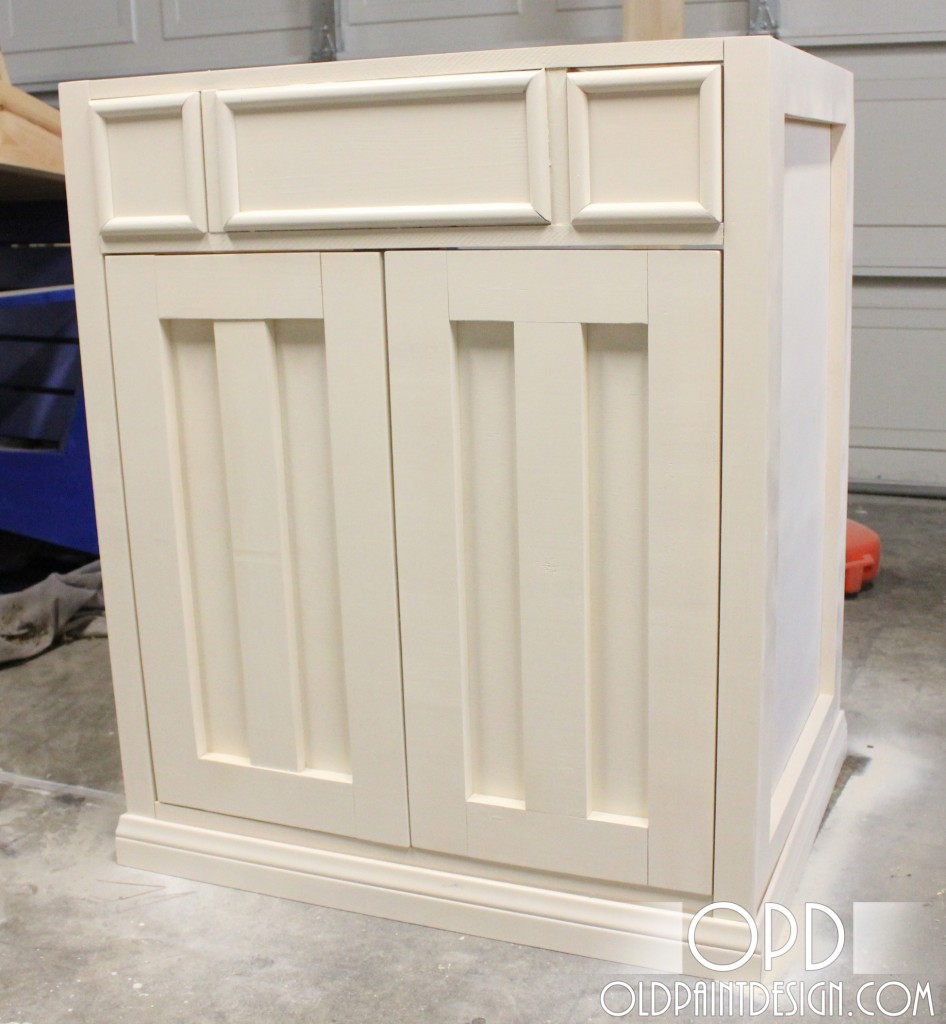
Napoleon Bathroom Vanity

Shopping List:

Wood:

  • 2 – 1×2 @ 9 ft long
  • 4 – 1×3 @ 8 ft long
  • 1 – 1×4 @ 9 ft long
  • 1 – 1×6 @ 9 ft long
  • 1 – piece of half round molding @ 9 ft long
  • 1 – piece of 2 1/2″ base molding @ 9 ft long
  • 1 – Sheet of 3/4″ plywood (you will have quite a bit of scrap for your next project)*
  • 1/4 – Sheet of 1/4″ plywood

Hardware and Supplies:

  • 2 – sets of cheap-o bottom mount 20″ or 22″ drawer slides
  • 2 – sets of Euro Inset Hinges
  • 1 1/4″ Screws
  • 1 1/4″ Pocket Hole Screws
  • 5/8″ Finishing Nails
  • 1 1/4″ Finishing Nails
  • 2″ Finishing Nails
  • Wood Glue
  • Wood Filler
  • Medium Grit Sandpaper
  • Primer or Wood Conditioner
  • Paint or Stain


Cut List:

  • 2 – 1/4″ PLY @ 24 1/2″ x 16 1/4″ – Door Back
  • 2 – 1/4″ PLY @ 22 3/4 x 4 1/2″ – Drawer Bottom
  • 2 – 3/4″ PLY @ 35″ x 23 1/2″ – Side
  • 1 – 3/4″ PLY @ 33″ x 23 1/2″ – Bottom Shelf
  • 1 – 1×2 @ 33″ – Base Support
  • 2 – 1×2 @ 35″ – Side Trim (front)
  • 3 – 1×2 @ 33″ Front Trim
  • 2 – 1×3 @ 19 1/2″ – Door Trim (center)
  • 4 – 1×3 @ 24 1/2″ – Door Trim (sides)
  • 4 – 1×3 @ 11 1/4″ – Door Trim (top/bottom)
  • 4 – 1×3 @ 35″ – Side Trim (sides)
  • 4 – 1×3 @ 18 1/2″ – Side Trim (top/bottom)
  • 4 – 1×4 @ 3 1/2″ – Drawer Back/Inside Front
  • 4 – 1×4 @ 22 3/4″ – Drawer Side
  • 2 – 1×6 @ 33″ – Back Support
  • 2 – 1×6 @ 5 1/4″ – Drawer Front
  • 2 – 1×6 @ 23 1/2″ – Drawer Side Support
  • 1 – 1×6 @ 20 1/2″ – Fake Drawer Front Base molding and half round cut to fit

General Instructions:

Make sure to re-measure and check for square after every step.  Sometimes when building your measurements can be off very slightly, and it’s important for this plan that your numbers are exact.  (Especially when working with doors and drawers!)  Measure your available space and purchase your sink before building this plan to make sure that it will fit.

Step 1:

Cut plywood as shown above.  My mock-up is based on a full 4′x8′ sheet, but this project is much more ideal if you are able to use up some plywood scrap for the 1/4″ piece.

Step 2:

Attach 1×3 trim along the outside edge of of your plywood with 1 1/4″ finishing nails and glue, leaving a 1 3/4″ gap between the base and the bottom of your lowest piece of horizontal trim.

Step 3:

Attach your side trim (front) to the side of your base with 1 1/4″ finishing nails and glue. Repeat steps 2-3 to create the other side, remembering to put the side trim (front) on the opposite side of the other panel.  (The side with the trim will be the front of your vanity.)

Step 4:

Attach 1×6 and 1×2 back and top supports with your Kreg Jig using 1 1/4″ screws and wood glue.  For the top of the back section, add the 1×2 first to get the positioning of your 1×6 right underneath it.  Attach these two pieces together with 1 1/4″ screws, remembering to countersink your holes.  In addition to the kreg screws, I also attached the 1x2s from the outside with 2″ finishing nails to prevent the board from rotating.

Step 5:

Attach the bottom shelf with your Kreg Jig and 1 1/4″ pocket hole screws, making sure that it’s level.  The back of the plywood should fit underneath your base support 1×6.

Step 6:

Join the fake drawer front to your drawer side supports using your Kreg Jig before attaching it to the inside of the console.  There should be a 5 1/2″ gap on either side of the side supports when placed inside the vanity.  Kreg Jig the drawer side supports to the 1×6 back support of the vanity using 1 1/4″ pocket hole screws.  Attach the top of the fake drawer front to the 1×2 top support using your Kreg Jig. Depending on the size of your sink, you may have to notch out your 1x6s to make room for it.  Since my vanity had to be smaller to fit the space, I had to do this.  I used my jigsaw to cut out large, rounded rectangles to make room for the sink, making sure to keep the bottom at least 2″ high at all times to allow for future drawer slides.  If you need this step, make sure to do it first, before attaching them to your fake drawer front. Since this step is a bit complicated, here are a few additional pictures to help.

Side view of the notched out 1×6 drawer supports to make room for the sink.

Front-ish view of the vanity, showing the notched boards and kreg screws into the back 1×6 support

View from behind the vanity showing the kreg screws on fake drawer front to the 1×2 top.

Step 7:

Attach 1×2 front trim underneath your fake drawer to the sides of your vanity using your Kreg Jig.  Use 2″ finishing nails to give it some extra support on either side and 1 1/4″ finishing nails to attach it to your fake drawer. Attach base trim to the bottom shelf using 1 1/4″ finishing nails and wood glue.

Step 8:

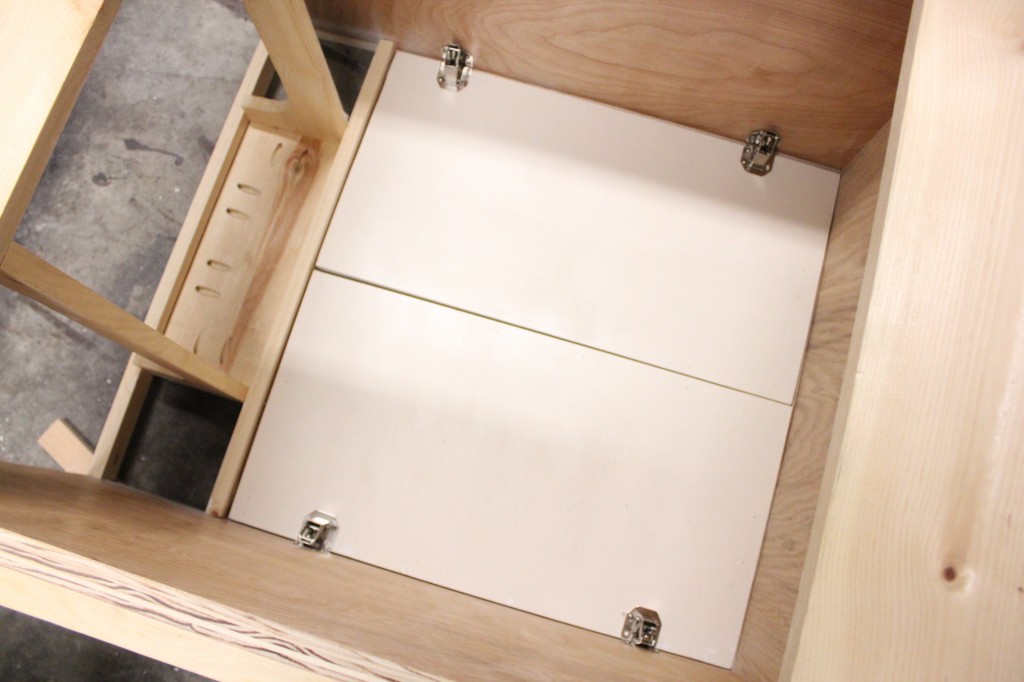
Build your drawer as shown above using your Kreg Jig and 1 1/4″ finishing nails.  (My drill wasn’t big enough to get into the small spaces, so I Kreg Jig-ed one drawer front/back piece to each side and then used 1 1/4″ finishing nails to attach the two pieces like a puzzle.  Attach the 1/4″ plywood base to the bottom of each drawer using 1 1/4″ finishing nails and glue.

Step 9:

Attach your drawer slides as shown above to both the drawer and the inside of both the right and left sides of the vanity.

Step 10:

Center the fronts of your drawers into the opening, leaving 1/8″ around all sides.  When it’s in place, attach with 1 1/4″ finishing nails.

Step 11:

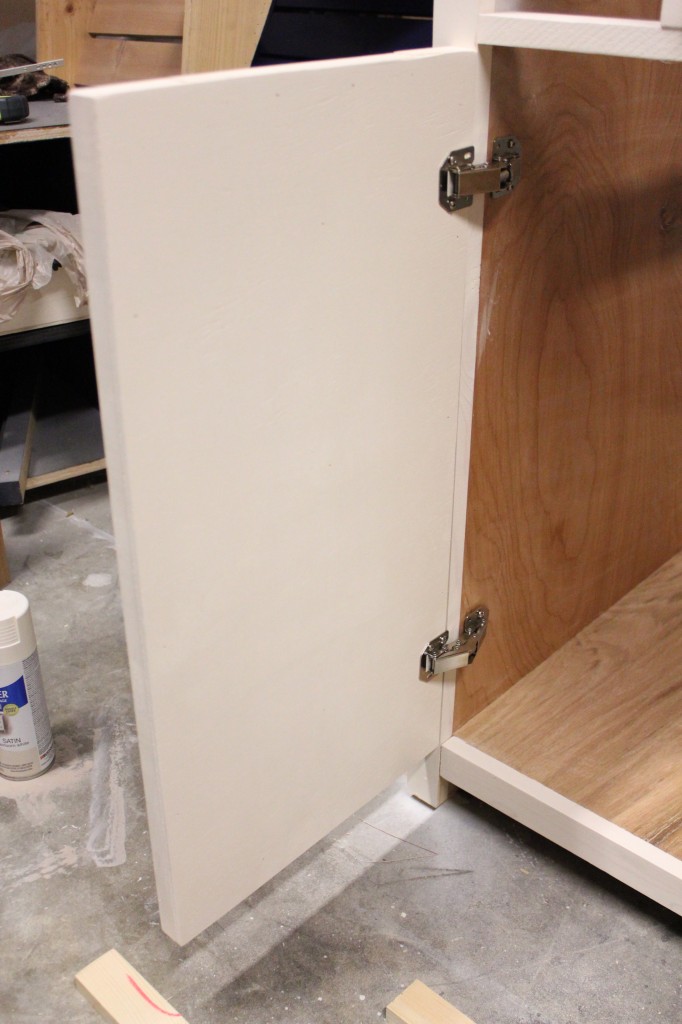
Attach 1×3 door trim to the your plywood from the back with 5/8″ finishing nails and glue.  There should be a 4 3/8″ space on either side of your center door trim between that and the insides of your side trim.  (For a stronger hold, you could kreg jig your 1x3s together from the back prior to attaching them to the plywood.) Attach each door to the inside of the vanity using your inset hinges, making sure to leave a 1/8″ gap on all sides.

Step 12:

Attach doors to the vanity using your inset hinges. Put your vanity face down and place your doors where you would like them to go, leaving 1/8″ along all sides.

Align hinges along the edges and screw in a few of the screws.  (I do two screws per hinge on the door side and two on the frame.)

Stand your console back up and test how the hinges work.  If they’re lining up where you want them to, screw in the other half of the screws.

Close your doors and enjoy your new hinges!

Step 13:

Attach base molding as shown, mitering your corners.  I’ve attached rough measurements, but make sure to measure your base prior to cutting – every handmade project is just a little different, and those 1/8″s count!

The original plan can be found at http://www.oldpaintdesign.com

 
[email_link]
 

Bathroom Vanity

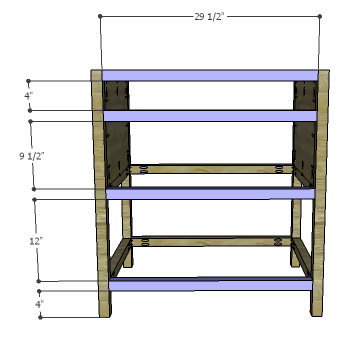
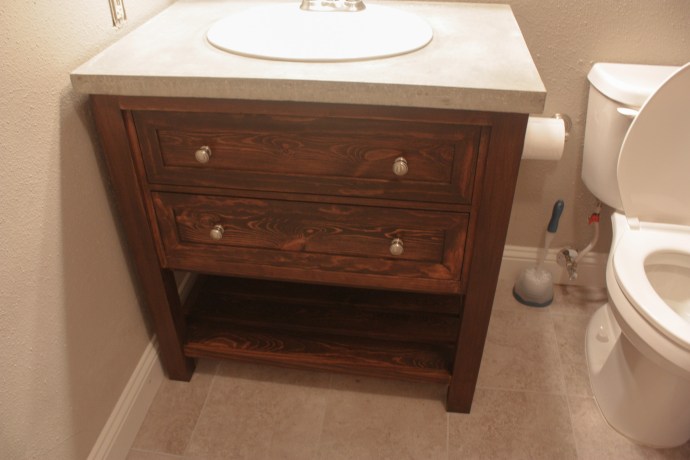
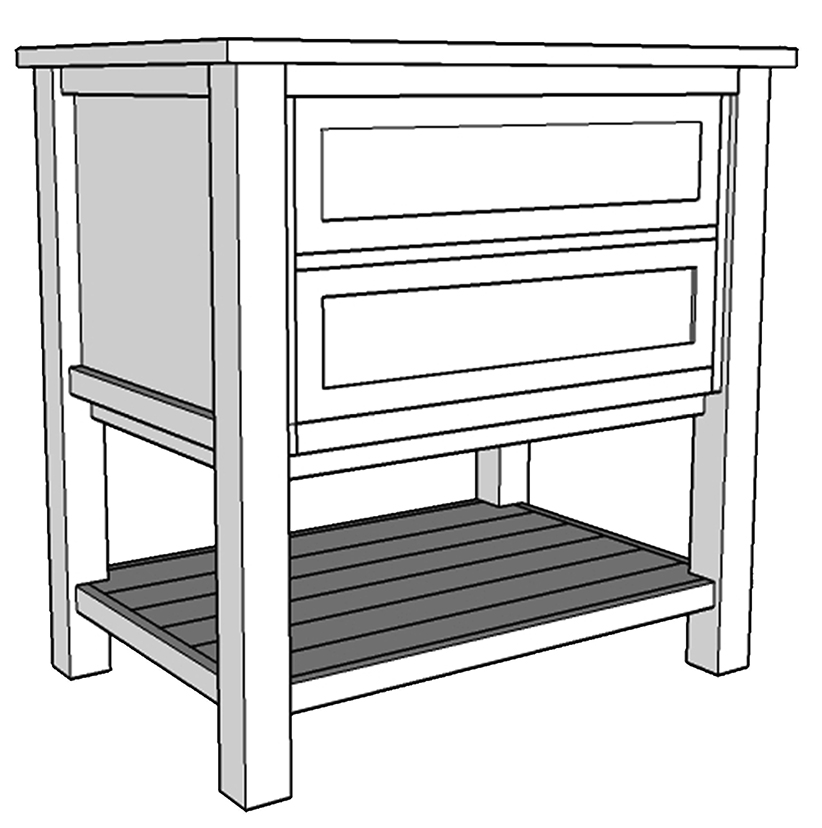
This vanity style will accommodate a 36″ wide x 24″ deep x 1″ thick top. The vanity has an open back to allow room for the plumbing. The upper drawers are “false” and non-working but the lower drawer is a functional drawer.

Materials:

  • 1-1/4″ pocket hole screws
  • 2-1/2″ pocket hole screws
  • 1 set of 20″ drawer slides
  • Cabinet pulls
  • Wood glue
  • Sandpaper (100, 150, 220 grits)
  • Finishing supplies (primer & paint, or stain, sealer)

Lumber:

  • 2 – 1×3 at 8′
  • 2 – 1×6 at 4′
  • 5 – 2×2 at 8′
  • 1 – 2′ x 4′ sheet of 1/4″ plywood
  • 1 – 2′ x 4′  sheet of 1/2″ plywood
  • 1 – 4′ x 4′ sheet of 3/4″ plywood

Cut List:

  • 4 – 2×2 at 35-1/2″ – Legs
  • 6 – 2×2 at 20-3/4″ – Side Framing
  • 2 – 3/4″ plywood at 15″ x 20-3/4″ – Side Panels
  • 7 – 2×2 at 29-1/2″ – Back & Front Stretchers
  • 8 – 1×3 at 20-3/4″ – Lower Slats
  • 2 – 3/4″ plywood at 4″ x 29-1/2″ – False Drawer Fronts
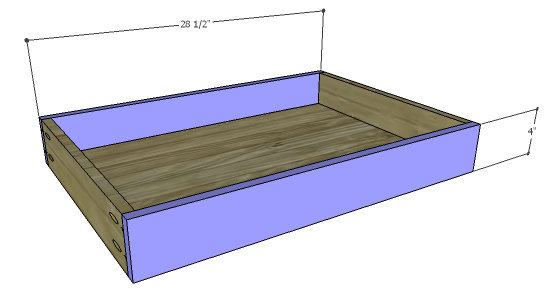
  • 1 – 3/4″ plywood at 18-1/2″ x 27″ – Drawer Box Bottom
  • 2 – 1×6 (ripped to 4″ wide) at 18-1/2″ – Drawer Box Sides
  • 2 – 1×6 (ripped to 4″ wide) at 28-1/2″ – Drawer Box Front & Back
  • 1 – 1/2″ plywood at 5-1/4″ x 29-1/4″ – Drawer Front Base
  • 1 – 1/4″ plywood at 1-3/8″ x 29-1/4 – Drawer Front
  • 1- 1/4″ plywood at 3-3/4″ – x 29-1/4″ Drawer Front

Step 1:

Cut the pieces for the legs, side framing, and the side panels. With the pocket hole jig set for 1-1/2″ material, drill pocket holes in each end of the framing pieces. Secure the framing pieces to the legs as shown using glue and 2-1/2″ pocket hole screws.

Set the pocket hole jig for 3/4″ material and drill pocket holes in all four edges of the side panels. Secure to the legs and framing using glue and 1-1/4″ pocket hole screws. The back face of the panels will be flush with the inside face of the legs.

Step 2:

Cut the pieces for the back and front stretchers. Set the pocket hole jig for 1-1/2″ material and drill pocket holes in each end of each piece. Secure the stretchers to the legs as shown using glue and 2-1/2″ pocket hole screws.

Step 3:

Cut the pieces for the slats. Set the pocket hole jig for 3/4″ material and drill pocket holes in each end of the slat pieces. Space the slats as shown securing them to the lower front and back stretchers using glue and 1-1/4″ pocket hole screws.

Step 4:

Cut the pieces for the false drawer fronts. Drill pocket holes in all four edges of one pieces, and the sides and upper edge of the other piece. Secure the pieces to the front stretchers using glue and 1-1/4″ pocket hole screws. The front face will be flush with the front face of the stretchers.

Step 5:

Cut the pieces for the drawer boxes. Drill pocket holes in all four edges of the bottom as well as each end of the sides. Assemble the drawer box as shown using glue and 1-1/4” pocket hole screws. Install the drawer slides according to the manufacturer’s installation instructions, locating them ¾” back from the front edge of the sides. Make any necessary adjustments.

Step 6:

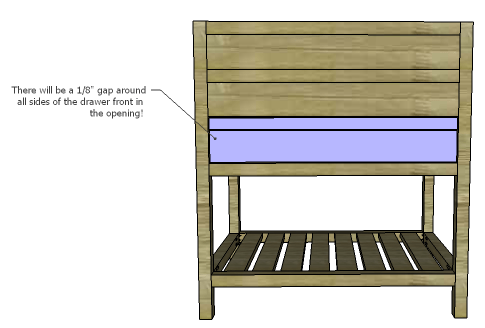
Cut the pieces for the drawer front. The base is cut from 1/2″ material, and the “fronts” are cut from 1/4″ material that is glued and clamped into place until dry. There is 1/8″ gap between the 1/4″ pieces on the base.

Mark the position for the drawer pulls and drill the holes. Shim the drawer front in the opening – there will be a 1/8” gap around all sides – then drive screws through the holes for the drawer pulls into the drawer box. Open the drawer, and secure the drawer front using countersunk 1-1/4” screws from the inside. Remove the screws from the holes for the drawer pull then finish drilling the holes. Install the drawer pull. Drill holes in the false drawer fronts for the cabinet pulls, and install the pulls.

Finish as desired.


The original plan can be found at http://designsbystudioc.com

 
[email_link]
 

Hairpin Make-up Vanity

Materials List:

  • (2) 1 x 18 x 48″
  • (2) 1 x 4 x 96″
  • (6) *full overlay cup hinges
  • (4) 26″ steel hairpin legs  OR (2) 10′ pieces of 3/8″ steel rod and (4) 3/16 thick steel plates

Cut List:

  • (2) 1 x 18 @ 46″
  • (2) 1 x 4 @ 44″
  • (4) 1 x 4 @ 13 3/4″

Instructions:

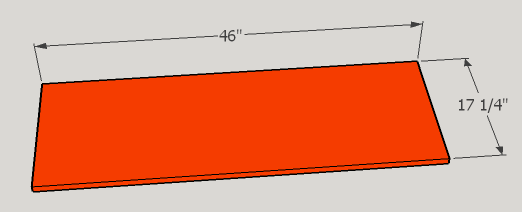
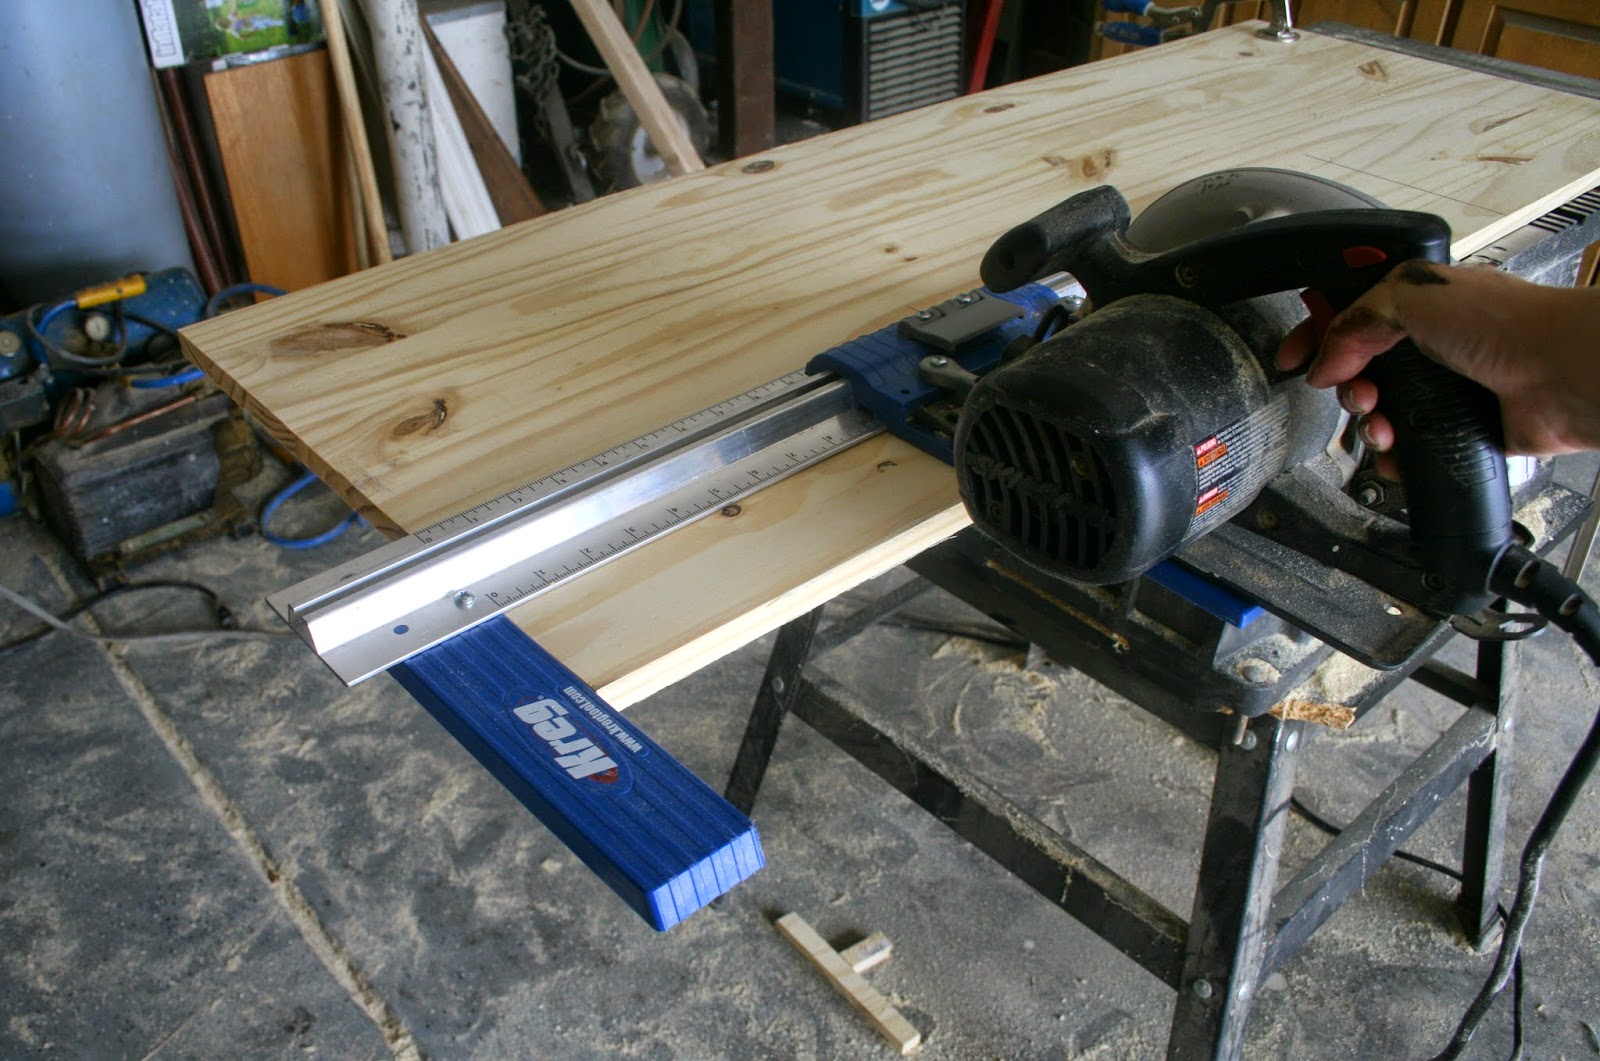
Start with your 1 x 18 boards. Of course 18″ is the “nominal” width; they should actually measure 17 1/4″ wide. Cut both boards down to 46″ in length using a either a table saw or a circular saw attached to a cutting guide, like the Kreg Rip-Cut™.

Next, cut the 1 x 4’s to length. On each 13 3/4″ piece, drill 3, evenly spaced pocket holes on the same side on each end.

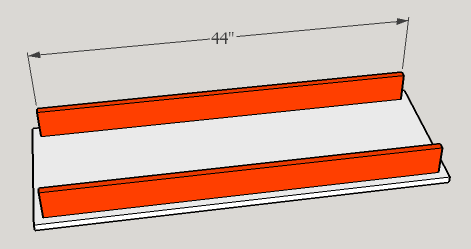
Take your first 1 x 18, and draw a line 1″ from all 4 sides. Line up the 44″ 1 x 4’s along the line and attach them via 2 1/2″ wood screws from the bottom, making sure to pre-drill and countersink.

Now, attach one of the shorter 1 x 4’s, parallel and flush with the ends of the longer boards, using 1 1/4″ pocket hole screws.

Measure 11 7/8″ from the inside of each end board and make a mark. Line up the outer edge of another 13 3/4″ 1 x 4, check for square, and connect with 1 1/4″ pocket hole screws. Repeat the process, measuring from the inside of the other end board. When you are done, you should have two, 11 1/8″ wide sections and one, 17 1/4″ section.

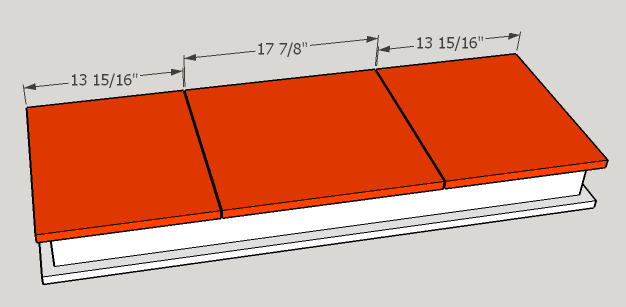
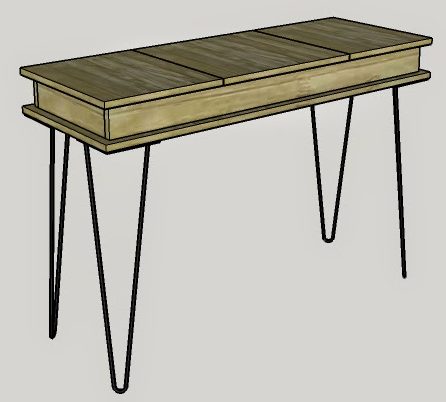
Now, you need to cut the doors. Take the second 1 x 18 board, and measure 14″ from either end and draw a line.  Those lines are where you need to make your cuts. You can do it with a table saw.

The saw blade will remove 1/8″ of material, so when you have made both cuts, you will be left with two 13 15/16″ sections of board and one 17 7/8″ section of board. Don’t panic if your doors aren’t the exact same measurement as mine. As long as you’re close and the two outside doors are the same, you’ll be fine.

At this point, I recommend applying the finish to the vanity box, and both sides of the doors. It will much harder to paint or stain with the doors attached. I gave my wood a cool, medium stain with a couple coats of a dark toner, and sealed everything with 3 coats of lacquer.

To attach the doors, you will need a pair of full overlay cup hinges for each door. I know they sound scary, but they really aren’t too bad! I’m always scared to drill two huge holes into the underside of my door, but the little guide that comes with the drill bit kit makes it easy to line everything up.

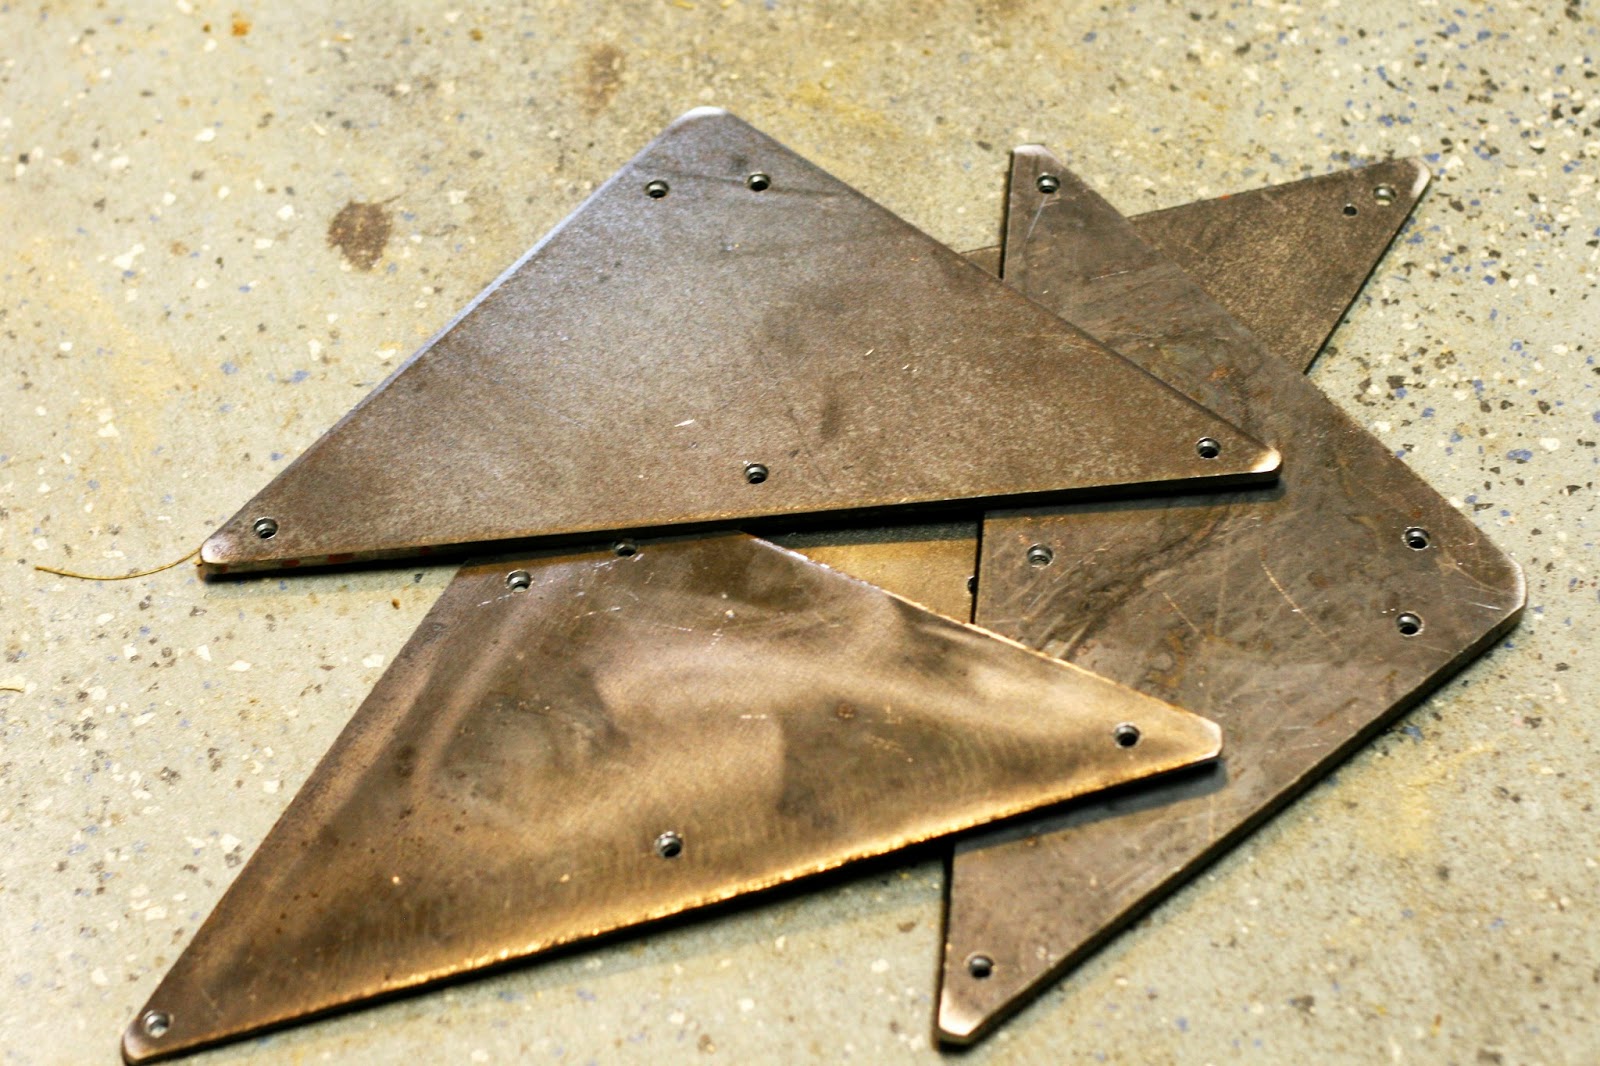
Time to address the legs. I made four, 26″ DIY hairpin legs out of pre-cut 3/16″, 8″ steel triangles. I picked up the steel from a local metal supplier and the materials for all four legs only cost me around $24. Google “metal supply” in your area and I guarantee you’ll find a local distributor who is open to the public.

If you’re not feeling like creating DIY hairpin legs, you can definitely buy them. I found a website that sells 26″ height legs with pretty quick turnaround (here).

To attach the legs, flip the vanity over. Line up each leg, 1/8″ from the edge of the wood, and attach with 5/8″ #8 wood screws.

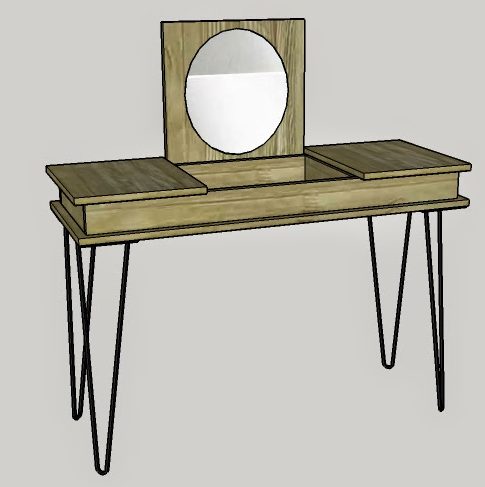
Now you can flip it right side up. Open the middle door and attach a mirror to the underside. I actually used an inexpensive, dollar store mirror left over from another project.

And, you’re done!

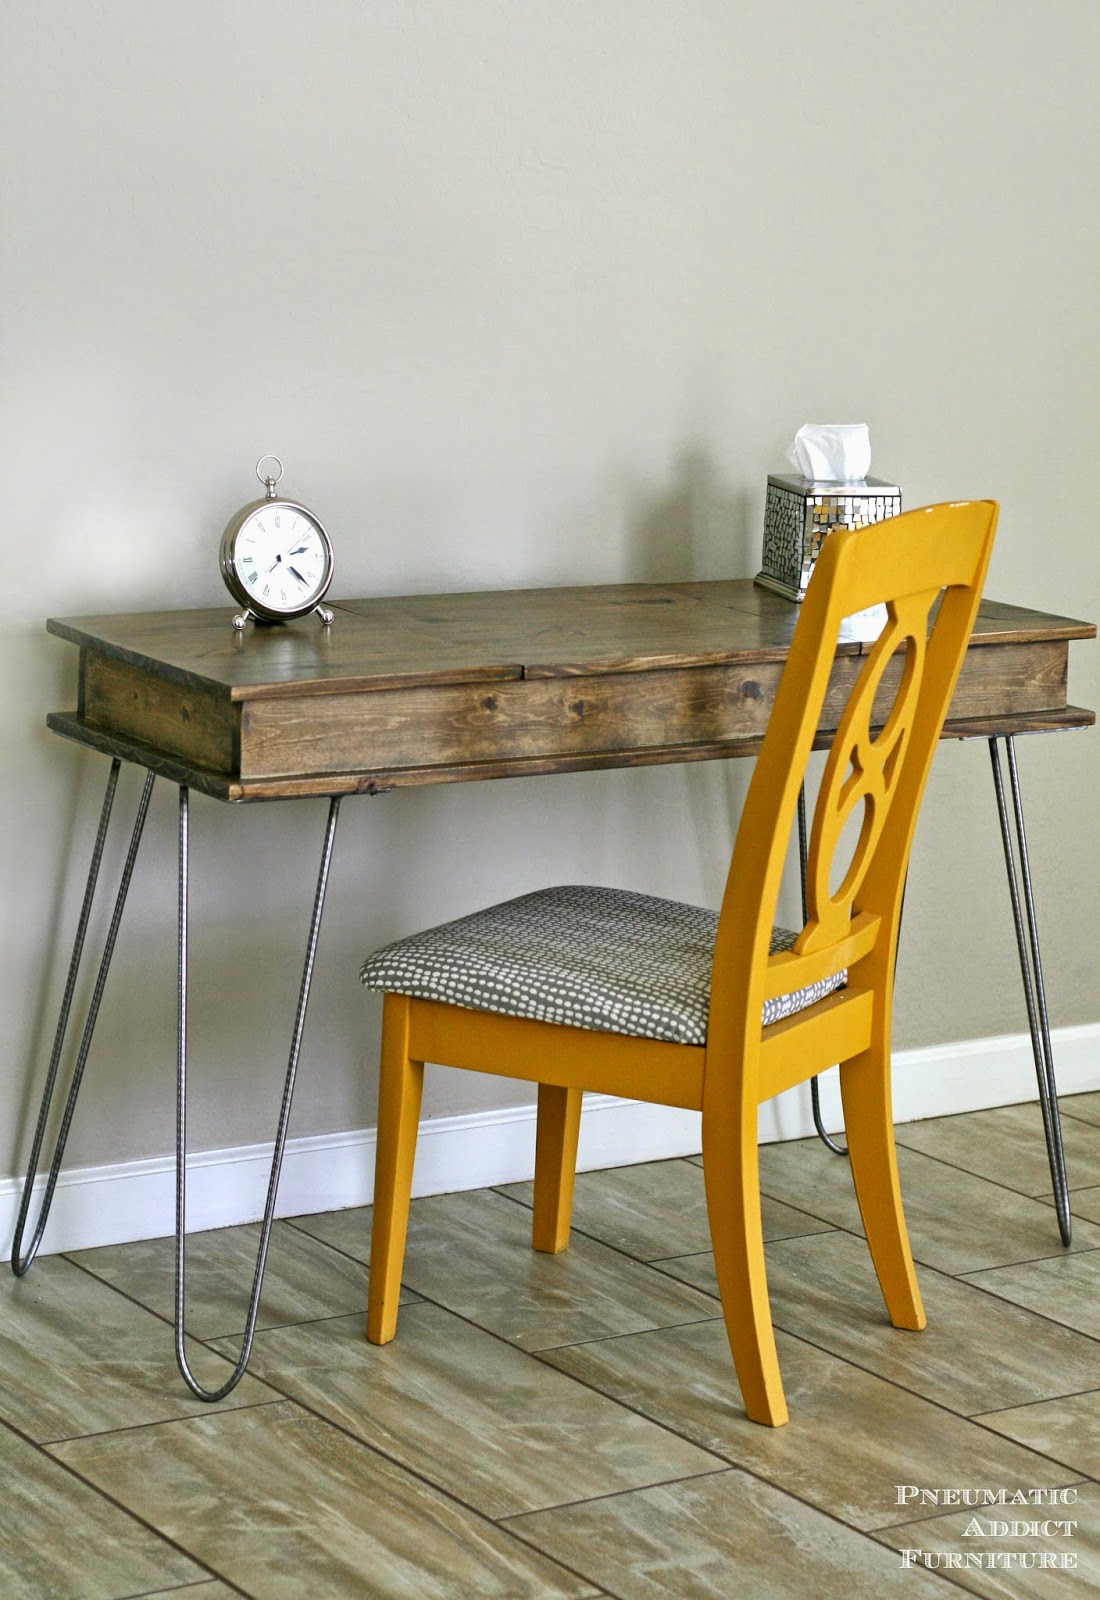
I’m really happy with how it turned out!

The original plan can be found at http://www.pneumaticaddict.com

 
[email_link]

Bathroom Vanity

Materials:

  • 2 -sheets of 3/4″ Cabinet grade plywood cut as shown below.
  • 5 -8′ 1×2 poplar for face frame
  • 1- sheet of 1/2″ plywood for drawers
  • 1- sheet of 1/4″ plywood or backer board (smooth)
  • door and drawer front material (3/4″ solid wood with applied moulding is the easiest door to make)
  • 1 3/4″ wood screws
  • 1 1/4″ Kreg pocket hole screws
  • wood glue

Step 1:

Secure dividers and sides to bottom with 1 3/4″ wood screws.

Step 2:

Attach long cleats to top.  Drive two screws into each divider.

Step 3:

Attach back cleats using pocket hole screws.

Step 4:

Secure bottom.  This second bottom is going to make this big vanity heavy but will add stability and help distribute the weight of the entire piece onto the bun feet.

Step 5:

Square up by checking the diagonal measurement from top left to bottom right and visa versa.  The measurement should be exactly the same.  Doesn’t matter what the number is – just make sure it’s the same. Secure the back with 3/4″ – 1 1/4″ staples or screws.

Step 6:

Build side face frames our of 1×2 poplar (which is really 3/4″ x 1 1/2″) with 1 1/4″ pocket hole screws.  Make sure to adjust size to fit the side of your vanity specifically.  It should be flush with the front and back (covering the exposed side of back you just attached).

Step 7:

Attach side face frames with glue and small brad nails.

Step 8:

Build front face frame, making sure the placement of the styles (vertical pieces) are in the correct place for YOUR DIY vanity.  Things don’t always turn out exactly like you planned them, even with the best planning so double check your specific dimensions before building your face frame.

Step 9:

Add countertop and feet.  Build your own countertop or buy granite or tile or do concrete, the possibilities are endless.

Step 10: Build Drawers

There are many ways to build a drawer box depending on the tools you have and your level of experience.  Build your drawers paying attention to the outside dimensions.  This will leave 1/2″ clearance for 22″ drawer glides.


Center Top Drawer Dimensions


Center Bottom 2 Drawers

Step 11: 

Build doors and drawer fronts for your double vanity. 3/4″ solid wood with applied moulding is the easiest door to make


Dimensions for false fronts and doors for sides.

Dimensions for center drawer fronts

It should be all ready to paint up, add hardware and use!

The original plan can be found at https://sawdustgirl.com

 
[email_link]


Bathroom Vanity

Build a small bath vanity with storage. These simple, step by step woodworking plans are designed for the beginner and can be built from a single sheet of plywood.

Shopping List: 

  • 1 Sheet of 3/4″ Plywood
  • 1 – 1×3 @ 8 feet long
  • 1 – 1×6 @ 4 feet long (optional)
  • 1 – 1×2 – 1/4″ thick stock @ 8 feet long (optional decorative door trim)
  • 1 – 25 foot long roll edge banding for stained finishes
  • 3/4″ finish nails or brad nails if you are applying decorative trim
  • Either pocket hole screws or countersunk screws/finish nails
  • 2 inch screws
  • 1 1/4 inch finish nails
  • 1-1/4″ Pocket Hole Screws
  • Elmer’s Wood Glue
  • Elmer’s Wood Filler
  • 120 grit sandpaper
  • Primer
  • wood conditioner
  • paint
  • paint brush

Cut List:

  • 1 – 3/4″ Plywood @ 22 1/2″ x 18″
  • 2 – 3/4″ Plywood @ 32″ x 18″
  • 2 – 3/4″ Plywood @ 30 3/4″ x 12″
  • 2 – 1×6 OR 3/4″ Plywood @ 24″
  • 4 – 1×3 @ 24″
  • Cut trim pieces to fit door faces

Step 1: 

Cut plywood as shown above, with the grain, cutting long cuts first. So you would cut an 18″ wide strip off of your plywood, and then from that 18″ strip, cut the sides and shelf. You can ask the lumber store to make the cuts for you, and your plywood will be easier to transport and store.

Step 2: 

Place the bottom shelf as shown above between the sides, either using the Kreg Jig or countersunk screws or 2″ finish nails and wood glue.

Step 3: 

Attach the 1x3s as shown above. The front 1×3 needs to be placed with a 4″ space above it. The back 1x3s need to be placed at the top, bottom of the bottom shelf, and centered.

Step 4: 

Now the toe kick. Cut out and attach with 2″ finish nails and wood glue.

Step 5: 

Now the front apron. Same thing.

Step 6: 

For the front apron, you can glue and attach the 1/4″ trim pieces as shown above.

Step 7 Instructions: 

And the doors. You can attach trim pieces as well. The best hinges I’ve found for doors like these (full overlay) are these ones from the Home Depot

Preparation Instructions: 

Fill all holes with wood filler and let dry. Apply additional coats of wood filler as needed. When wood filler is completely dry, sand the project in the direction of the wood grain with 120 grit sandpaper. Vacuum sanded project to remove sanding residue. Remove all sanding residue on work surfaces as well. Wipe project clean with damp cloth. It is always recommended to apply a test coat on a hidden area or scrap piece to ensure color evenness and adhesion. Use primer or wood conditioner as needed.

The original plan can be found at http://www.ana-white.com

 
[email_link]

Bathroom Vanity

Materials:

  • Pre-Primed PureBond Plywood
    • Qty 2 – 3/4” x 2’ x 8’
    • Qty 1 – 3/4” x 2’ x 4’
    • Qty 1 – 1/4” x 2’ x 2’
  • Pre-Finished PureBond Plywood
    • Qty 1 – 1/2” x 2’ x 8’
    • Qty 1 – 3/4” x 2’ x 8’
    • Qty 1 – 3/4” x 2’ x 4’
  • Qty 2 – 2 x 2 x 8’ Poplar
  • Qty 1 – 1 x 2 x 8’ Poplar
  • Qty 2 – 1 x 3 x 6’ Poplar
  • Qty 2 – 1 x 8 x 6’ Poplar
  • 8’ – 3-1/4” Baseboard Trim
  • 8’ – 1” Base Cap Molding
  • Qty 8 – Liberty 20 in. Soft Close Full Extension Drawer Slide (1-Pair)
  • Qty 2 – Liberty 90-Degree Surface Mount Hidden Spring Hinge (1-Pair)
  • Qty 10 – Liberty 3” Glass Pulls
  • Qty 2 – Liberty Glass Knob
  • 2-1/2″ Kreg Pocket Screws (Coarse)
  • 1-1/4″ Kreg Pocket Screws (Coarse)
  • 1-1/4″ Brad Nails
  • 1-1/4″ Wood Screws
  • Wood Glue

Make sure to note where your plumbing is located. If it comes out of the floor like mine did you will have to modify the depth of you bottom drawers so the plumbing can be run behind one or both.

When it comes to installing your vanity every situation will be different but the vanity should be leveled from front to back and side to side. Shim as required and then secure the back of the vanity into the wall studs with appropriately sized screws. Once that is done the top and sink can be installed. Then the plumbing and faucet can be finished.


The original plan can be found at https://rogueengineer.com

[email_link]

Bathroom Vanity
Supplies:

  • (1) 1x2x6
  • (1) 1x3x8
  • (1) 5/4x2x6
  • (2) 5/4x3x8
  • Molding 8′
  • 1/2” pin nails
  • 1/4” plywood 24”x24”
  • 1/2” plywood 24”x24” (optional)
  • 3/4” plywood 24”x48”
  • 1-1/4” wood screws
  • 1-1/4″ pocket screws
  • 1-1/2″ pocket screws
  • (2) Cabinet hinges
  • Elmer’s Wood Glue Max
  • Rust-Oleum Ultimate Wood Stain – Dark Walnut
  • Semi-Gloss Polyurethane

Step 1:

Cut the Legs. Cut 4 pieces of 5/4×3 to 27-1/4″. On one end, measure up 2″ and in 2″. Connect the marks with a line. Cut the angle using a circular saw and crosscut jig. Repeat for the other legs.

Step 2:

Cut the Side Rails. Cut 4 pieces of 5/4×3 to 10-3/4″ and drill pocket holes in each end.

Step 3:

Cut the Bottom Side Rails. Cut 2 pieces of 5/4×2 to 10-3/4″ and drill a pocket hole in each end.

Step 4:

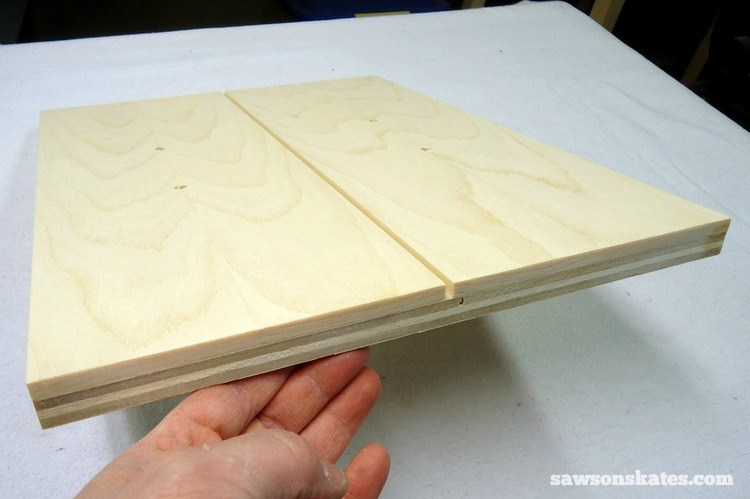
Cut the Side Panels. Cut 2 pieces of 3/4″ plywood to 10-3/4″ x 9″ and drill pocket holes around the edges.

Note: I made my panels a little differently. I made 1/4″ book-matched panels and glued those panels to a pieces of 1/2″ plywood for a total of 3/4″.

Step 5:

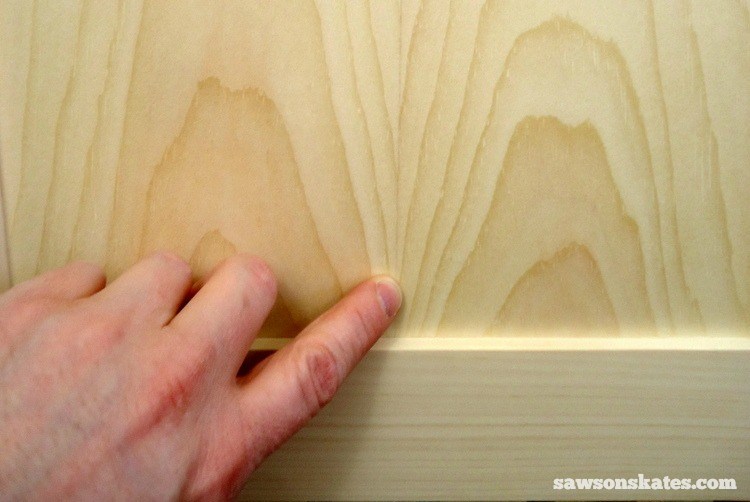
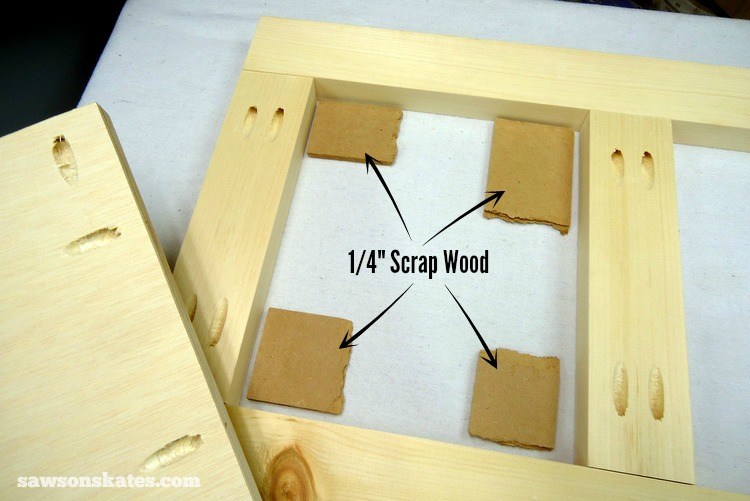
Assemble the Side. Layout 2 legs (make sure the angles face inward), the top rail, middle rail and bottom rail. The side panel sets in 1/4″ from the face of the legs. To help position the panel, I placed some scrap pieces of 1/4″ MDF on my workbench, then placed the panel on top. My book-matched panels had cathedral grain and I made sure this was pointing towards the top of the vanity. (Cathedral grain refers to the grain pattern of the wood. Think of the grain pattern like a mountain. You want the point of the mountain facing towards the top of the piece and the wide part of the mountain facing towards the bottom of the piece.)

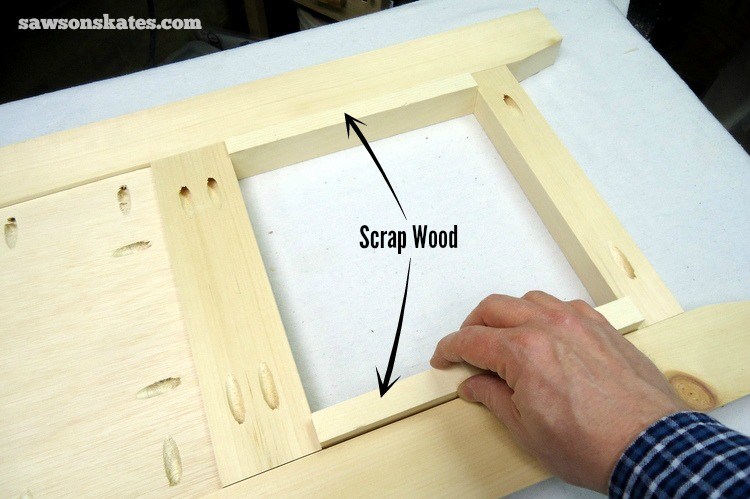
To keep the proper spacing of the bottom rail I cut two pieces of scrap wood to 9″ and placed between the bottom and middle rail.

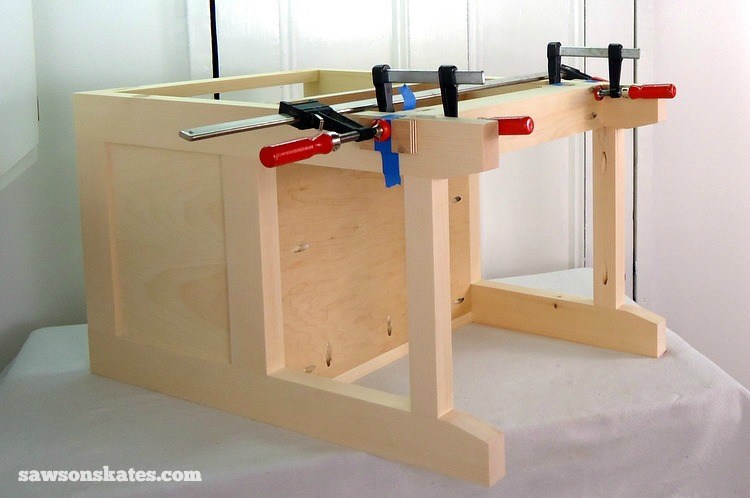
Once everything is laid out, apply glue to the ends of the rails, clamp the assembly and attach using 1-1/2″ pocket screws. Do not attach the panel at this point.

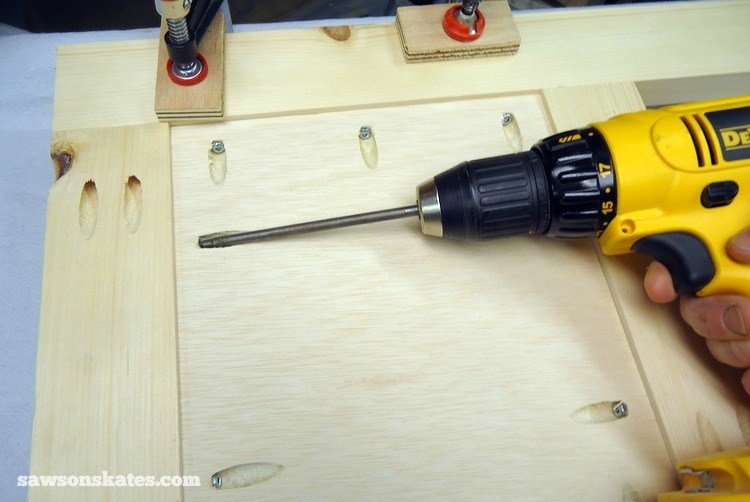
Flip the assembly over and be sure the panel sets in 1/4″ from the face of the legs. Adjust if necessary. Clamp the panel in position, flip the assembly over and attach the panel with 1″ pocket screws. Repeat for the other side.

Step 6:

Cut 5 pieces of 1×2 to 15-1/2″ and drill a pocket hole in each end.

Step 7:

Cut 5 pieces of 1×3 to 15-1/2″ and drill a pocket holes in each end.

Step 8:

Cut the Bottom. Cut 1 piece of 3/4″ plywood to 15-1/2″ x 15″ and drill pocket holes around the edges.

Step 9:

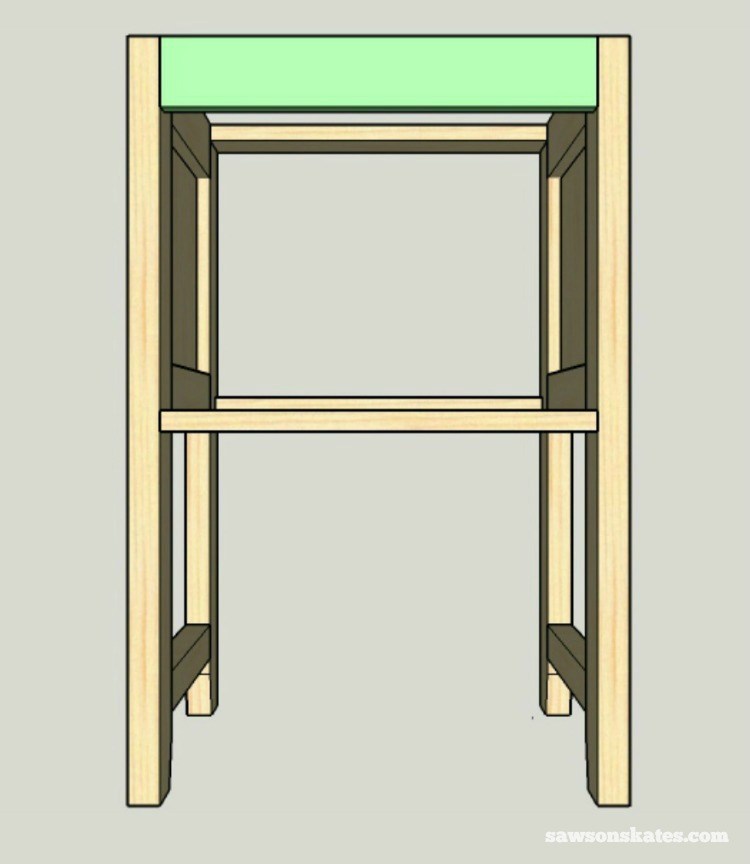
Assemble the Carcass. Apply glue to a 1×3 (from Step 7) and place at the top of the front legs. Attach using 1-1/4″ pocket screws.

Apply glue to a 1×2 (from Step 6) and place 11-3/4″ below the top brace. I cut a few pieces of scrap wood to 11-3/4″ to help position this piece. Attach using 1-1/4″ pocket screws.

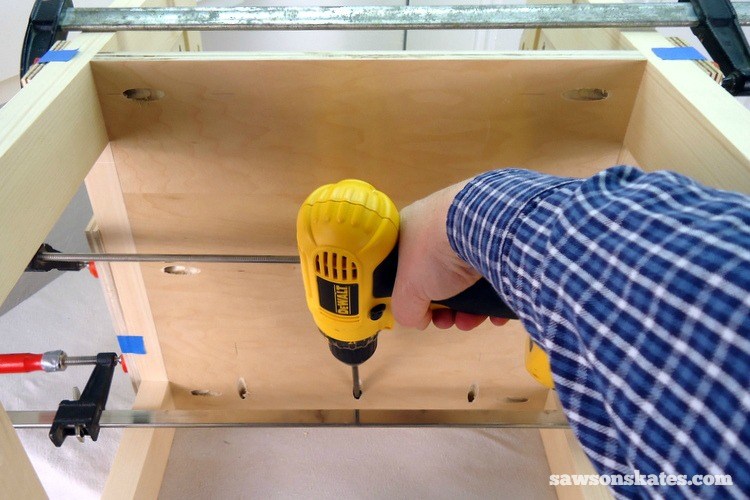
Slide the bottom in position. Make sure the bottom is flush with the bottom of the side rails and front rail. Clamp and attach using 1-1/4″ pocket screws.

Apply glue to a 1×2 (from Step 6), place at the top of the back legs and attach using 1-1/4″ pocket screws.

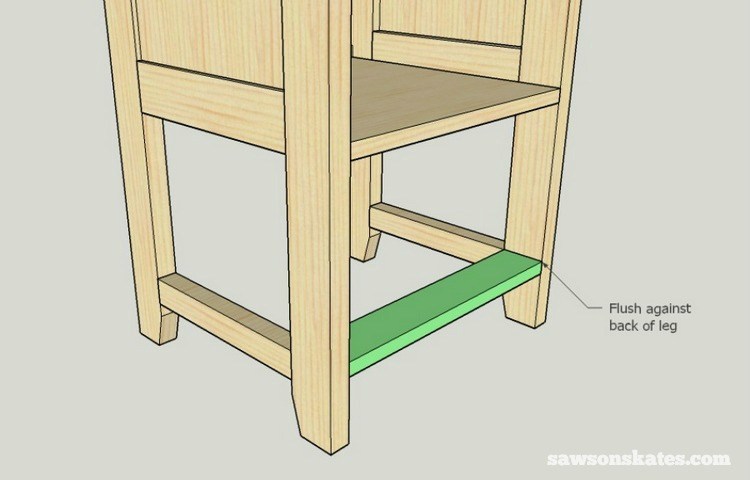
To help install the back slat, I cut a few pieces of scrap to 9″ and placed below the bottom. The back of the slat (from Step 7) is placed flush against the back legs. Attach using 1-1/4″ pocket screws.

Place a 1×2 (from Step 6) on top of the back slat. Attach using 1-1/4″ pocket screws.

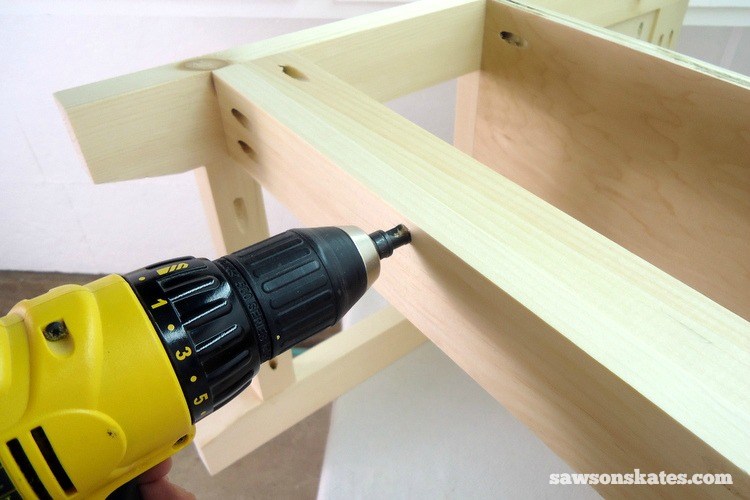
From the bottom, drill a countersink hole and attach using a 1-1/4″ wood screw.

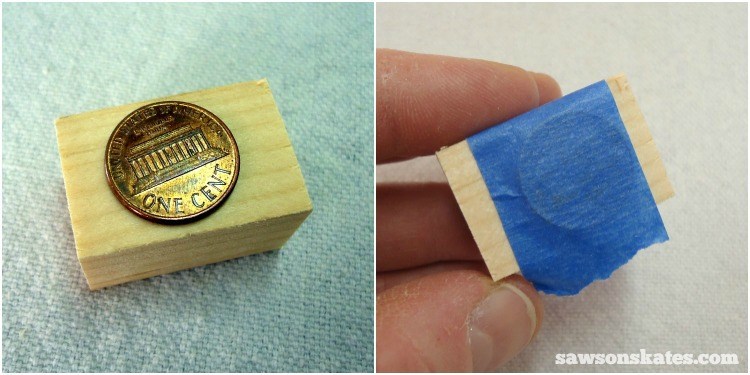
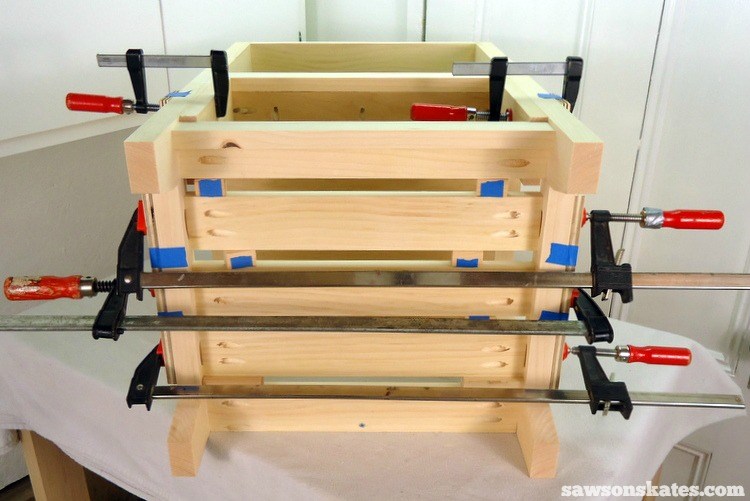
The remaining 3 slats (1×3’s from Step 7) are placed so that the tops of the slats are flush with the top of the bottom rails and spaced 13/16″ apart. To help with the spacing I cut a few pieces of 3/4″ scrap wood and attached pennies to the scrap wood with painter’s tape. The thickness of the wood plus the penny equals about 13/16″.

Attach the slats using 1-1/4″ pocket screws.

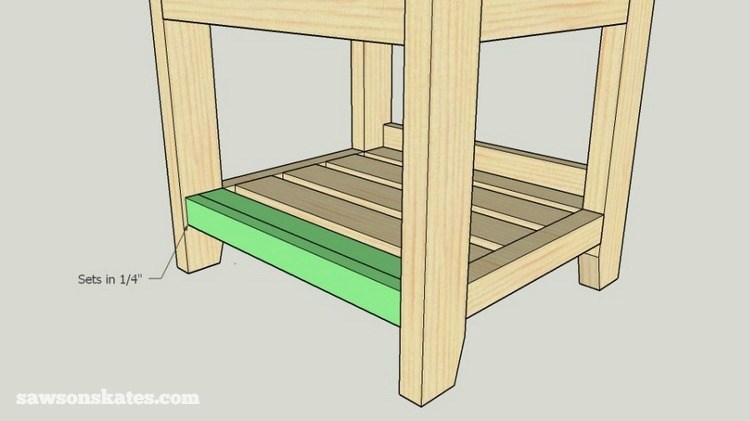
Make the Front Slat Assembly. Apply glue to the edge of a 1×2 (from Step 6) and attach to a 1×2 (from Step 6). To help position the front slat assembly, I cut a few pieces of scrap to 9″ and placed below the bottom. Place at the front slat assembly below the scrap wood and set in 1/4″. Attach using 1-1/4″ pocket screws.

Cut 2 pieces of 1/2″ plywood to 1-1/2″ x 3/4″. Apply glue and place under the front slat assembly. This piece will keep the front assembly from rocking.

Step 10:

Make the Faux Drawers. Cut a piece of 1/4″ plywood to 15-1/4″ x 11-1/2″.

Make the “drawer fronts” from 2 pieces of 1/4″ plywood to 15-1/4″ x 5-11/16″.

Note: I used leftover pieces of the book-matched side panels to make my drawer fronts. Apply glue to the drawer fronts, place on the door panel (leaving a gap between the drawer fronts) and clamp until dry.

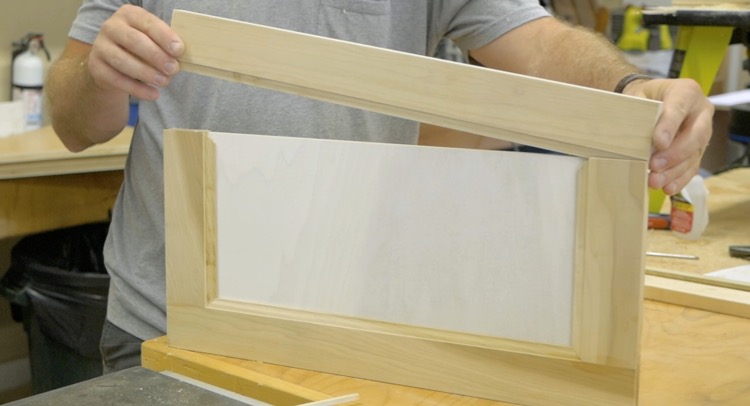
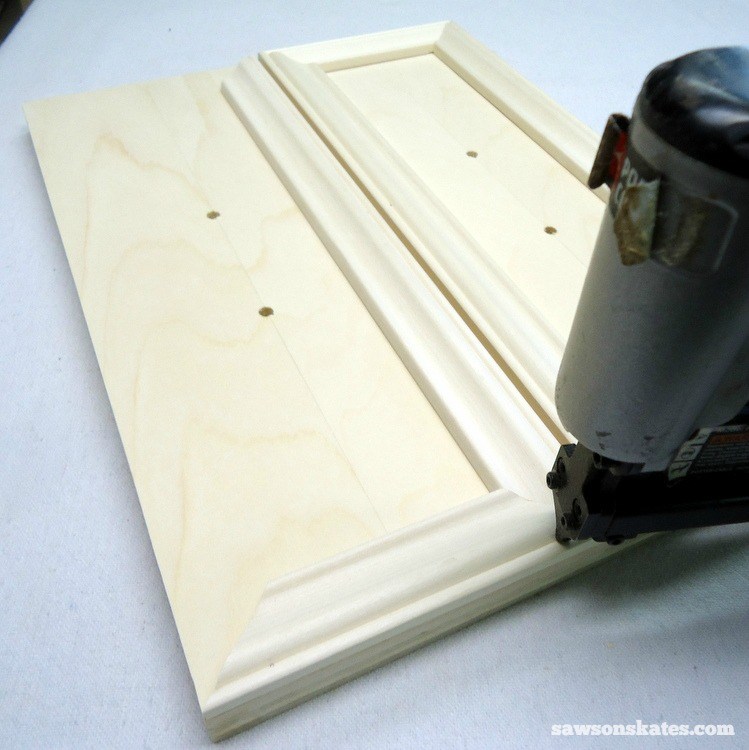
Wrap the drawer fronts with molding. Miter the molding, apply glue and tack in place with 1/2″ pin nails.

Step 11:

Install the Hinges. Follow the manufacturer instructions for installing the hinges.

Step 12:

Finish the Vanity. Sand, fill any holes or gaps with wood filler, apply a tea stain, apply a dark walnut stain and then three coats of polyurethane.


The original plan can be found at https://sawsonskates.com

 
[email_link]
 

Bathroom Vanity

Materials:

  • (4) 3×3 x 36″ poplar legs
  • (1) 3/4″ project panel 2′ x 4′
  • (2) 2×2 x 8 Lumber
  • (1) 2×6 x 8′ Lumber
  • (1) 1×8 x 8′ Lumber
  • (2) 1×4 x 8′ Lumber
  • (3) 1×2 x 8′ Lumber
  • (2) 1/4″ x 1 1/2″ x 8′ moulding
  • 2 inset hinges
  • 2 magnetic clasps
  • 4 knobs

Cut List:

  • (4) 3×3 @ 35″
  • (2) 2×2 @ 29″
  • (1) 2×2 @ 27 1/2″
  • (1) 2×6 @ 29″
  • (4) 2×2 @ 18″
  • (1) 1×8 @ 27 1/2″
  • (1) 1×8 @ 27 1/4″
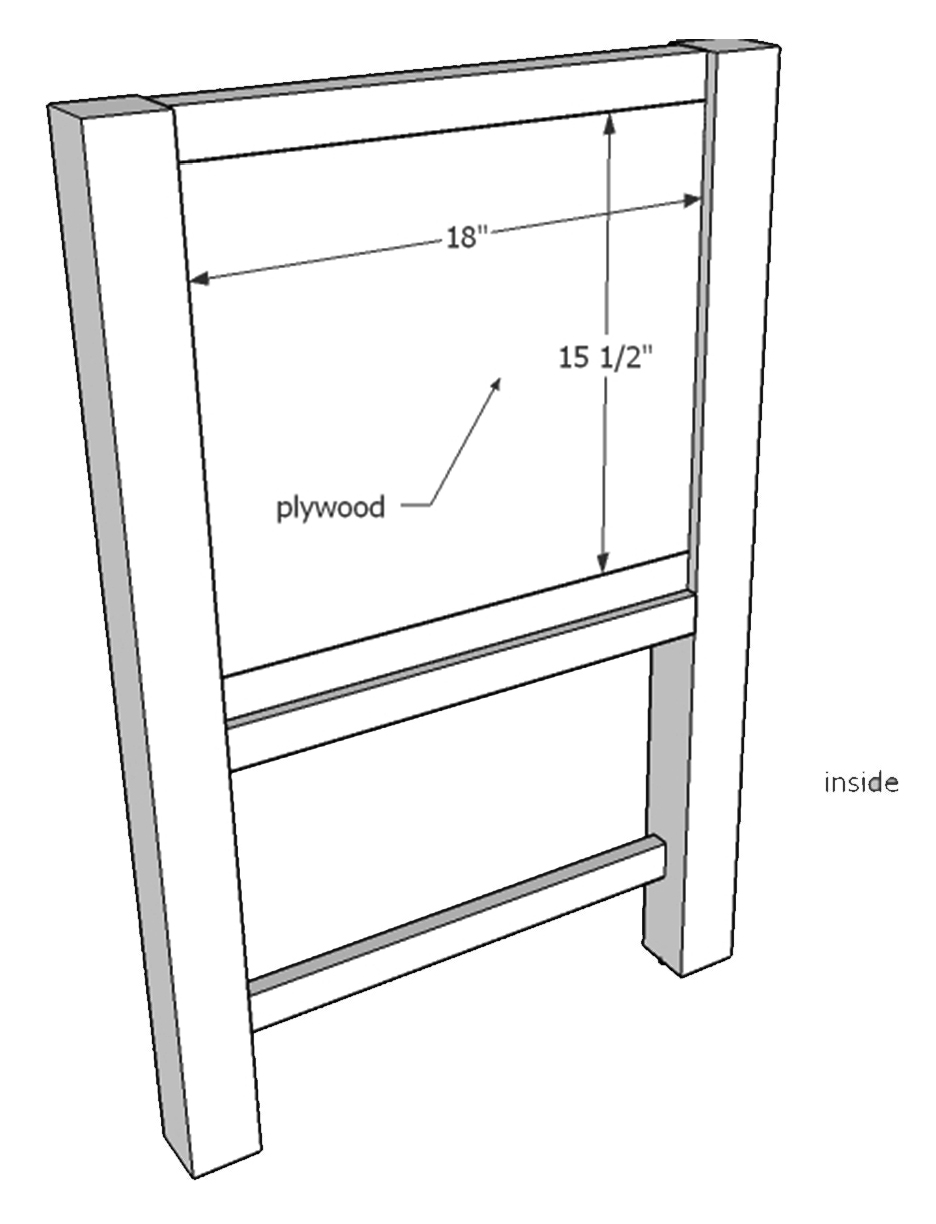
  • (2) 3/4″ x 15 1/2″ x 18″ plywood
  • (2) 1×2 @ 17″
  • (3) 1×2 @ 29″
  • (1) 1×2 @ 27 1/2″
  • (4) 1×2 @ 18″
  • (2) 1/4″ x 1 1/2″ @ 7″ mitered at 45
  • (4) 1/4″ x 1 1/2″ @ 27 1/4″ mitered at 45
  • (2) 1/4″ x 1 1/2″ @ 7 1/4″ mitered at 45

Step 1:

Build the side frame by attaching the 2×2 @ 18″ to the 3x3s with 1 1/2″ pocket holes and 2 1/2″ pocket hole screws and glue! Top 2×2 is flush with the tops of the 3x3s but set back 1/2″ and the second 2×2 is placed at 15 1/2″ from the bottom of the top 2×2 and set back 1/2″! Whichever way you place your pocket holes will determine the inside of the side!

Step 2:

Attach the 1×2 @ 18″ flush with the 3x3s to the back. Attach with 3/4″ pocket holes and 1 1/4″ screws and glue. Make sure pocket holes are facing the “inside”.

Step 3:

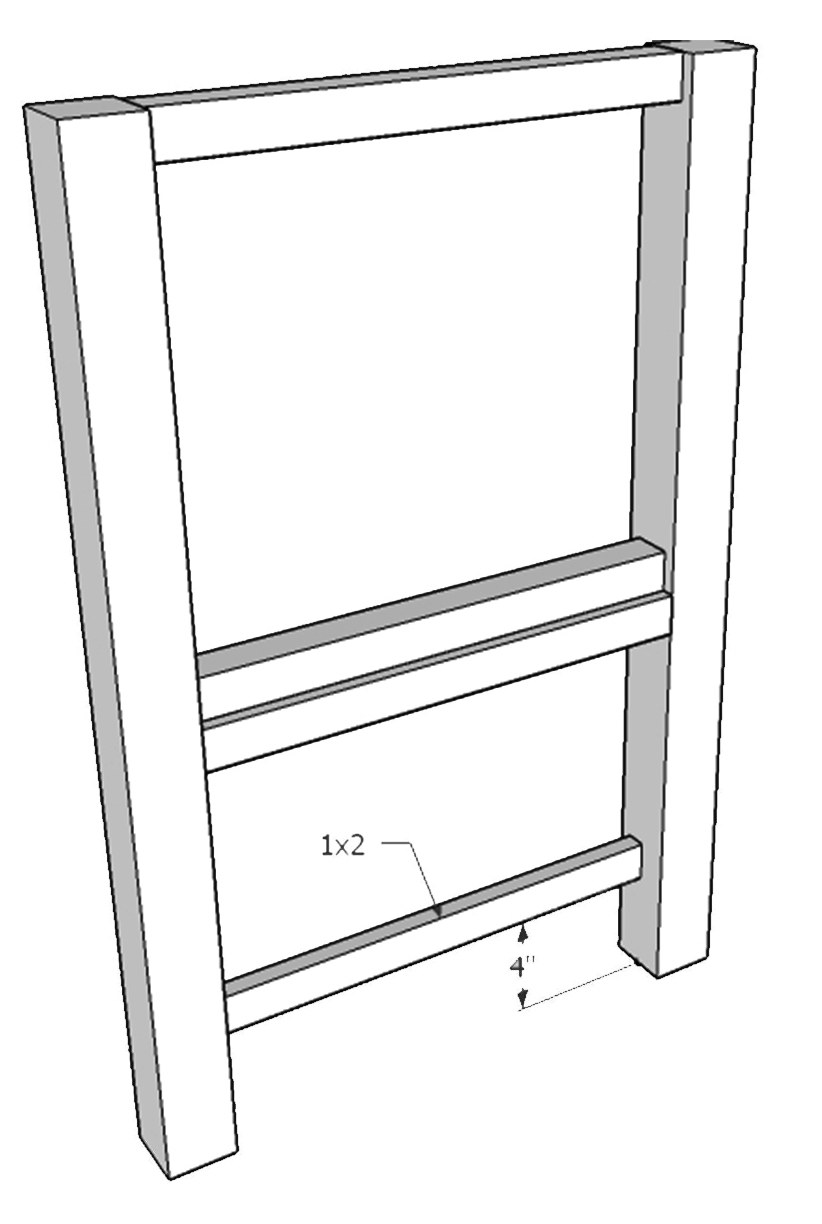
Place another 1×2 @ 18″ 4″ up from the bottom of the 3x3s and set back 1/2″ from the front. This will be attached with the same 3/4″ pocket holes and 1 1/4″ screws and glue!


Step 4:

Place your plywood piece cut at 18 x 15 1/2″ in the square space created by your frame! This is attached with 3/4″ pocket holes all around the edges and 1 1/4″ screws and glue! It should be flush with your 2x2s!

Step 5:

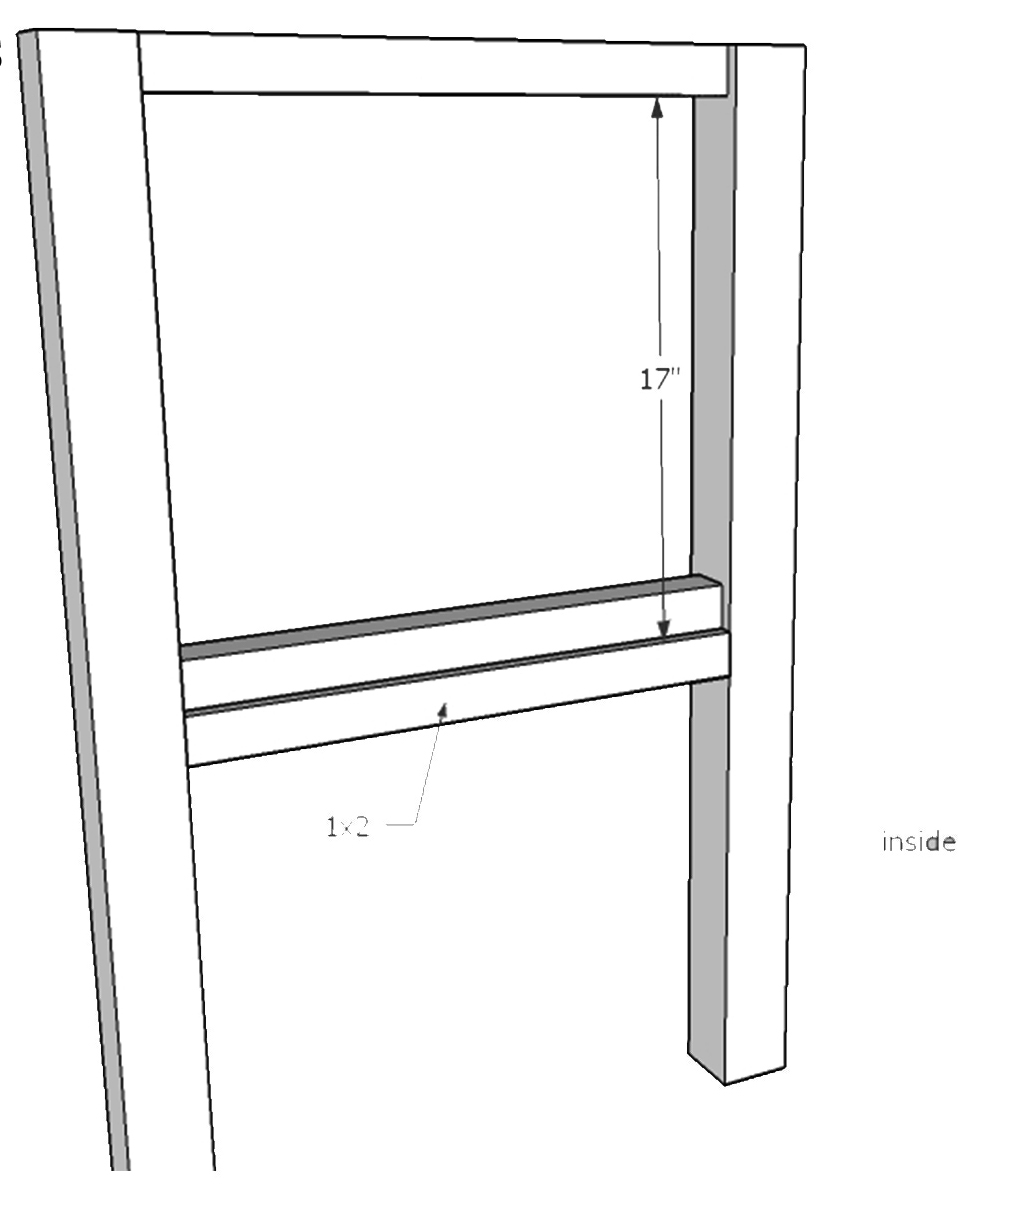
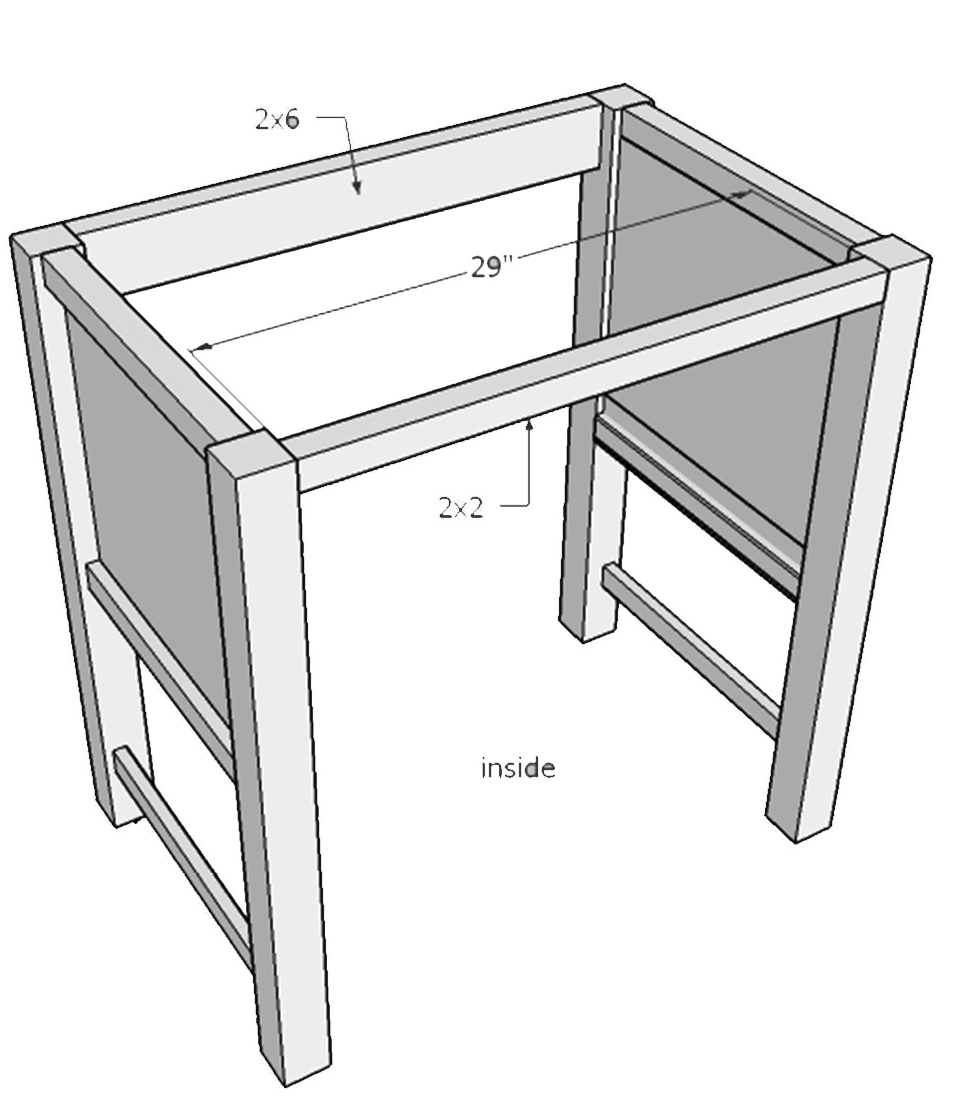
After building the sides, using the 2×6 @ 29″ and the 2×2@ 29″ attach both sides together! Using 1 1/2″ pocket holes on both and 2 1/2″ screws and glue on both! The 2×6 is going to be flush with the top and what will be the back and the 2×2 is flush with the top and what will be the front!

Step 6:

Attach the 2 – 1×2 @ 17″ to the 3x3s…they are glued and attached using countersunk screws! To do this you will need a 1/2″ countersink drill bit, drill the 1x2s in each place you would like to place a screw and then when you screw the screw in, it will sit down inside a little hole that you can then putty over and no one will ever know it was there! Three screws on each 1×2 should be fine. The 1x2s are set back 1/2″!

Step 7:

Attach the 1×2 @ 27 1/2″ using 3/4″ pocket holes and 1 1/4″ screws and glue. This should be 7 1/4″ down from the bottom of the 2×2 across the top. Attach the 2×2 @ 27 1/2″ flush with the bottom of the 1x2s that run along the 3x3s. Use 1 1/2″ pocket holes and 2 1/2″ screws and glue to attach.

Step 8:

Attach the 1×2 @ 29″ below the 2×2 flush to the back of the 3x3s though. Using 3/4″ pocket holes and 1 1/4″ screws and glue to attach.

Step 9:

Take the 1×8 @ 27 1/2″ and cut your 1/4″ molding leaving a 1/8″ gap around all sides of Mitering the corners at 45 degrees off square, make sure and measure your board here. Glue and staple this to the front of the 1×8… on the back you will drill normal 3/4″ pocket holes and attach using 1 1/4″ screws and glue… if you do not want the bottom drawer to flip down, you can make two of this same size only bring the molding all the way to the top and bottom edges since room has already been left in this bottom space for it to move… if you want the flip down door continue to step 10.

Step 10:

Take the 1×8 @ 27 1/4″ and place 1/4″ molding all the way to the edges of the board, mitered at 45 degrees off square. Make sure and measure your board. This board will be attached with hinges and magnetic claps… later on in the instructions. I sanded and stained it before attaching.


Step 11:

Attach the 2 – 1×2 @ 29″ up four inches from the bottom. Using 3/4″ pocket holes and 1 1/4″ screws and glue. The front 1×2 will be set back 1/2″ and the back 1×2 will be flush with the back.

Step 12:

Attach the 2×2 @ 29″ across the back… you may want to measure your plumbing before placing this board as it can easily be moved up or down right now but not once it’s glued. It is flush with the back. Using 1 1/2″ pocket holes and 2 1/2″ screws and glue.

Step 13:

The front and back 1x4s @ 31 1/2″ along the bottom where they meet the 3x3s will need to be cut, taking a jigsaw you can quickly make these cuts. The measurements here are for the back 1x4s are all cut normal @ 31 1/2″. And the front 1x4s is cut at 1 1/4″ in and 1 1/4″ in. Attach using 3/4″ pocket holes and 1 1/4″ screws and glue.

Step 14:

Attach the 2×2 @ 27 1/2″ to the other 2×2 that is along the bottom of the ‘drawers’… just using 1 1/2″ pocket holes drilled toward the other 2×2 (not on the ends but along the whole 2×2 as if you were planking them together) and connecting it to the other 2×2 with 2 1/2″ screws and glue. Now using the hinges and magnetic clasps you can finish the vanity. After sanding and staining you’re done.

The original plan can be found at http://builditcraftitloveit.com

 
[email_link]

1 2