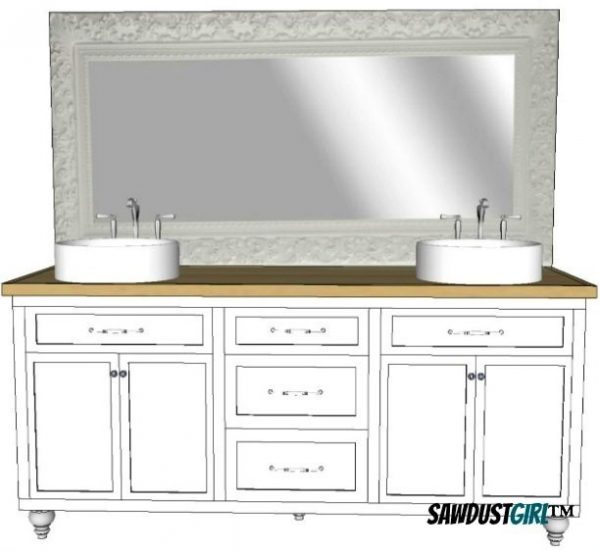
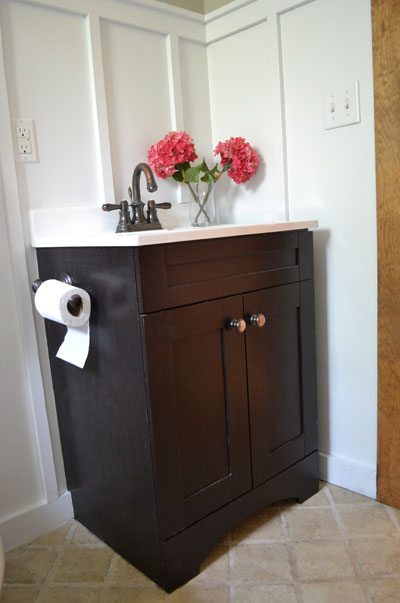
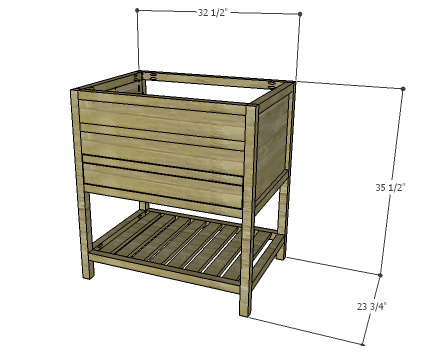
Bathroom Vanity
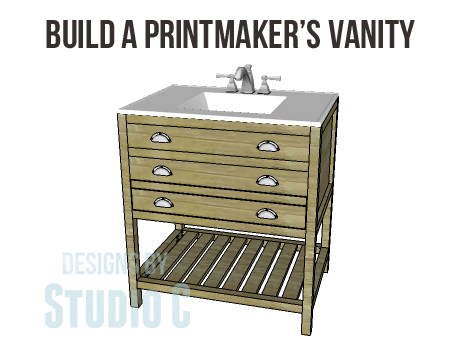
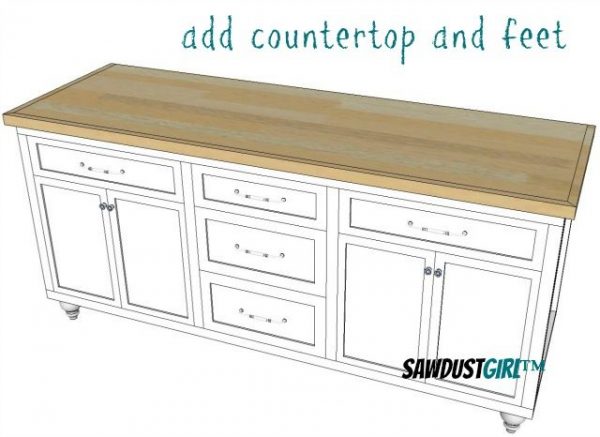
This vanity style will accommodate a 36″ wide x 24″ deep x 1″ thick top. The vanity has an open back to allow room for the plumbing. The upper drawers are “false” and non-working but the lower drawer is a functional drawer.
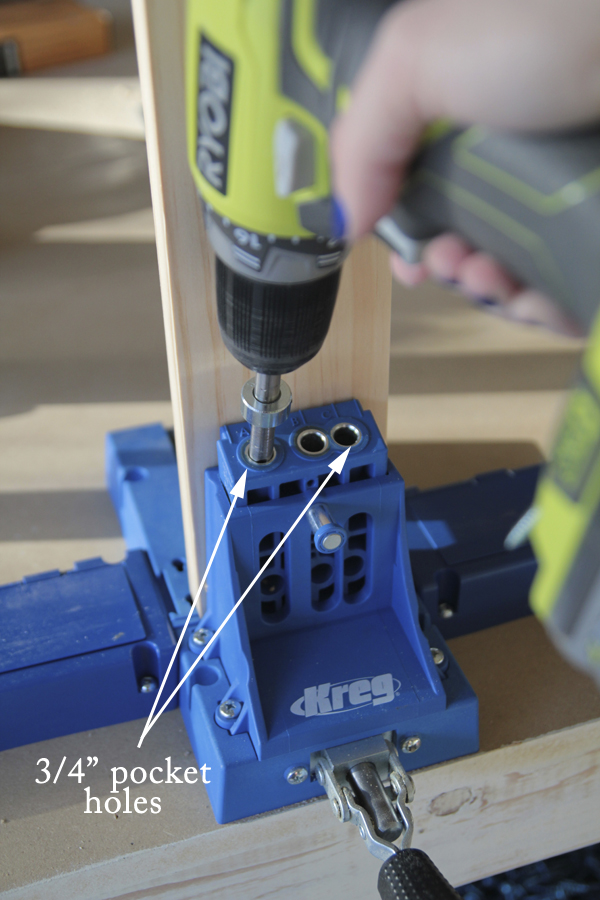
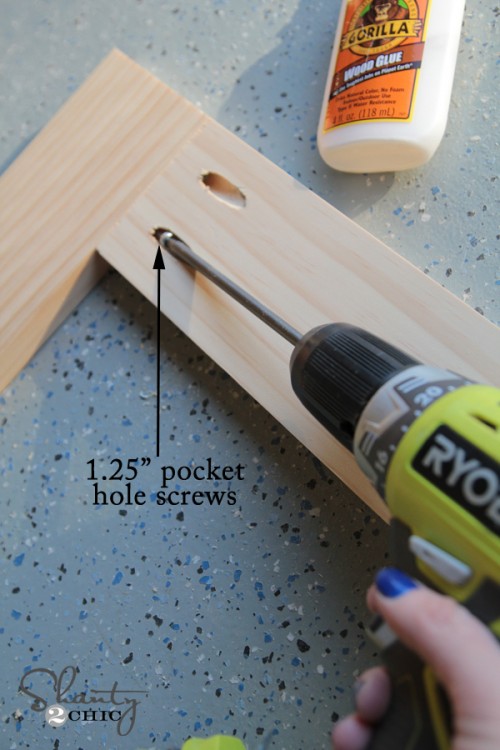
- 1-1/4″ pocket hole screws
- 2-1/2″ pocket hole screws
- 1 set of 20″ drawer slides
- Cabinet pulls
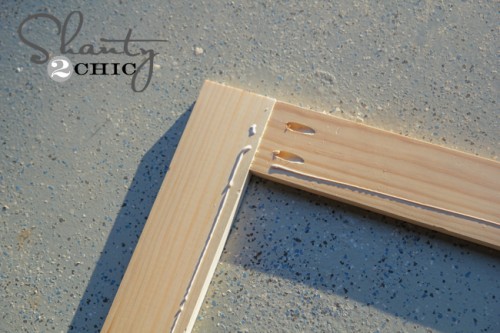
- Wood glue
- Sandpaper (100, 150, 220 grits)
- Finishing supplies (primer & paint, or stain, sealer)
- 2 – 1×3 at 8′
- 2 – 1×6 at 4′
- 5 – 2×2 at 8′
- 1 – 2′ x 4′ sheet of 1/4″ plywood
- 1 – 2′ x 4′ sheet of 1/2″ plywood
- 1 – 4′ x 4′ sheet of 3/4″ plywood
- 4 – 2×2 at 35-1/2″ – Legs
- 6 – 2×2 at 20-3/4″ – Side Framing
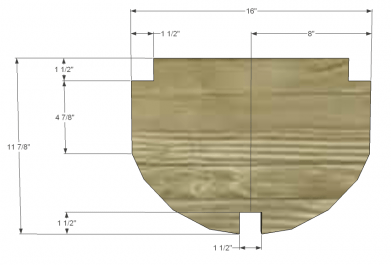
- 2 – 3/4″ plywood at 15″ x 20-3/4″ – Side Panels
- 7 – 2×2 at 29-1/2″ – Back & Front Stretchers
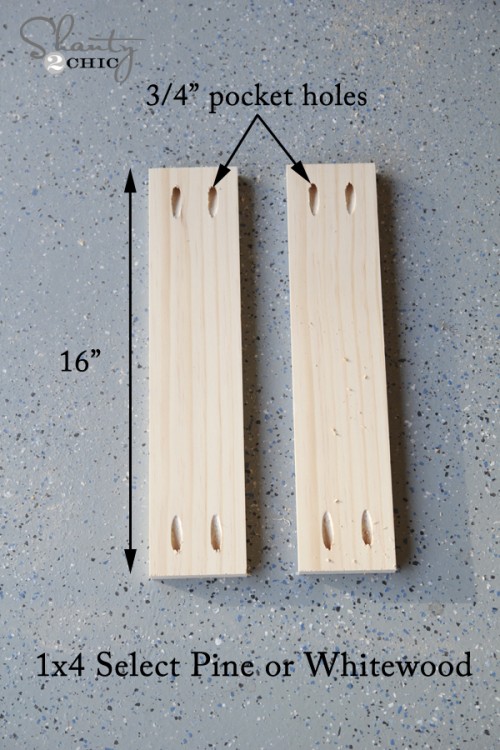
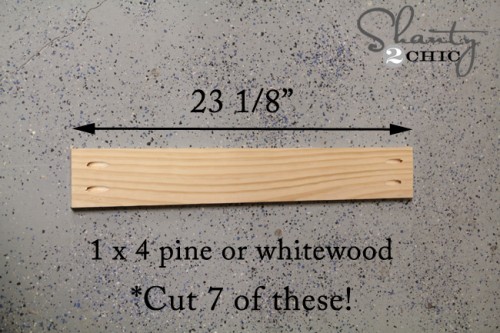
- 8 – 1×3 at 20-3/4″ – Lower Slats
- 2 – 3/4″ plywood at 4″ x 29-1/2″ – False Drawer Fronts
- 1 – 3/4″ plywood at 18-1/2″ x 27″ – Drawer Box Bottom
- 2 – 1×6 (ripped to 4″ wide) at 18-1/2″ – Drawer Box Sides
- 2 – 1×6 (ripped to 4″ wide) at 28-1/2″ – Drawer Box Front & Back
- 1 – 1/2″ plywood at 5-1/4″ x 29-1/4″ – Drawer Front Base
- 1 – 1/4″ plywood at 1-3/8″ x 29-1/4 – Drawer Front
- 1- 1/4″ plywood at 3-3/4″ – x 29-1/4″ Drawer Front
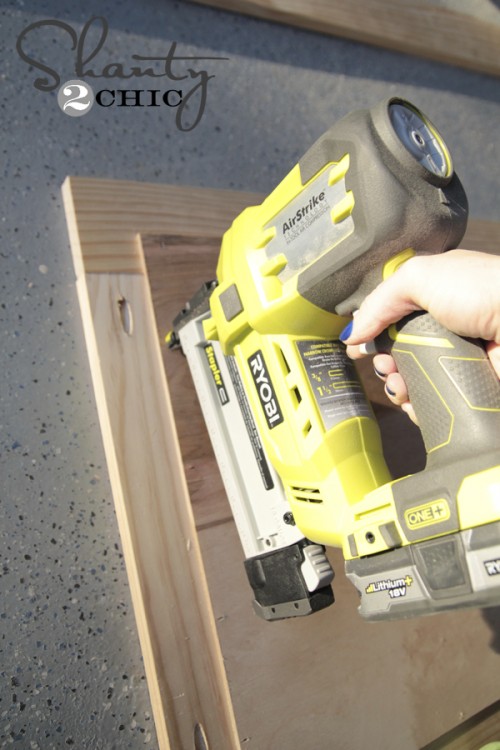
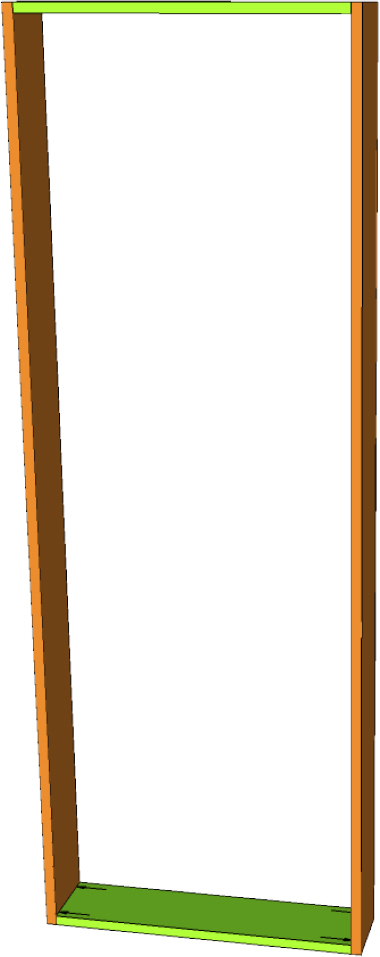
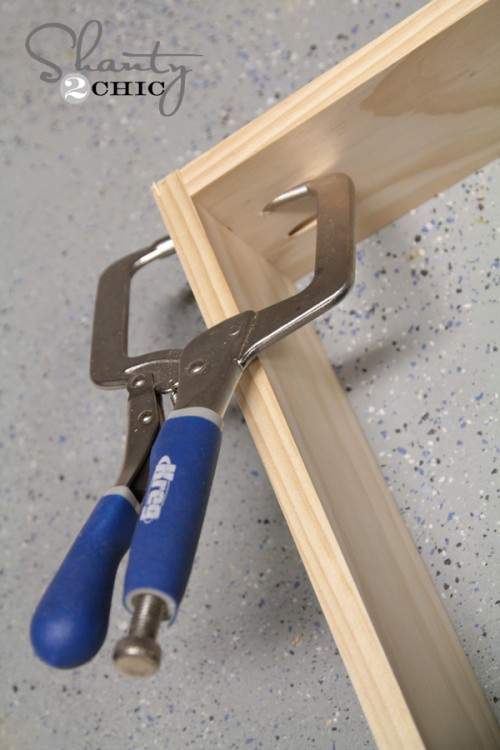
Cut the pieces for the legs, side framing, and the side panels. With the pocket hole jig set for 1-1/2″ material, drill pocket holes in each end of the framing pieces. Secure the framing pieces to the legs as shown using glue and 2-1/2″ pocket hole screws.
Set the pocket hole jig for 3/4″ material and drill pocket holes in all four edges of the side panels. Secure to the legs and framing using glue and 1-1/4″ pocket hole screws. The back face of the panels will be flush with the inside face of the legs.

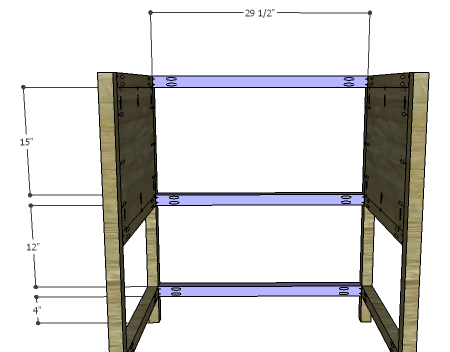
Cut the pieces for the back and front stretchers. Set the pocket hole jig for 1-1/2″ material and drill pocket holes in each end of each piece. Secure the stretchers to the legs as shown using glue and 2-1/2″ pocket hole screws.
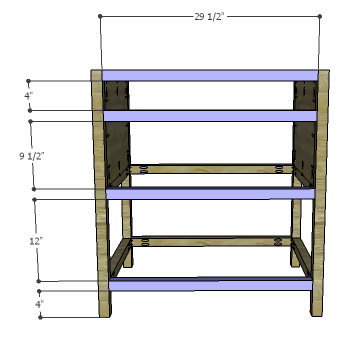
Cut the pieces for the slats. Set the pocket hole jig for 3/4″ material and drill pocket holes in each end of the slat pieces. Space the slats as shown securing them to the lower front and back stretchers using glue and 1-1/4″ pocket hole screws.

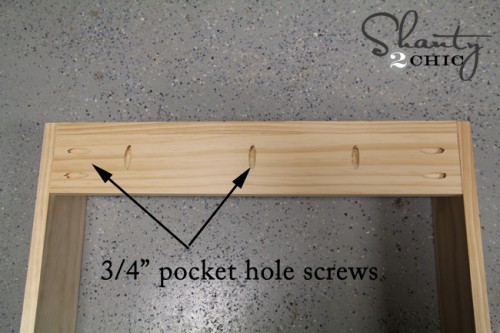
Cut the pieces for the false drawer fronts. Drill pocket holes in all four edges of one pieces, and the sides and upper edge of the other piece. Secure the pieces to the front stretchers using glue and 1-1/4″ pocket hole screws. The front face will be flush with the front face of the stretchers.

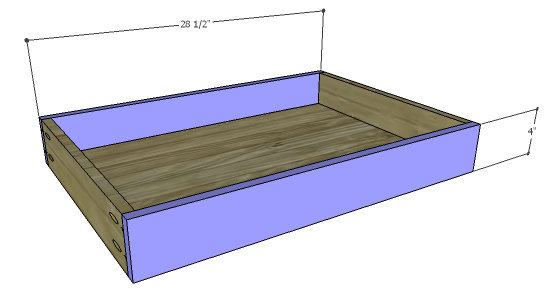
Cut the pieces for the drawer boxes. Drill pocket holes in all four edges of the bottom as well as each end of the sides. Assemble the drawer box as shown using glue and 1-1/4” pocket hole screws. Install the drawer slides according to the manufacturer’s installation instructions, locating them ¾” back from the front edge of the sides. Make any necessary adjustments.

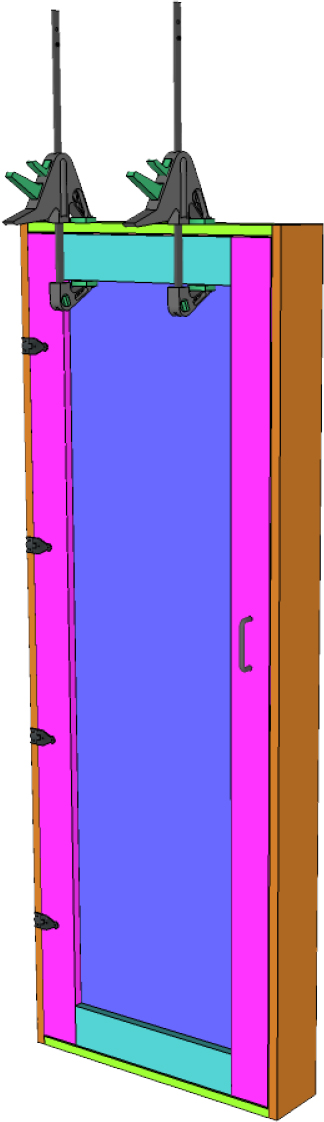
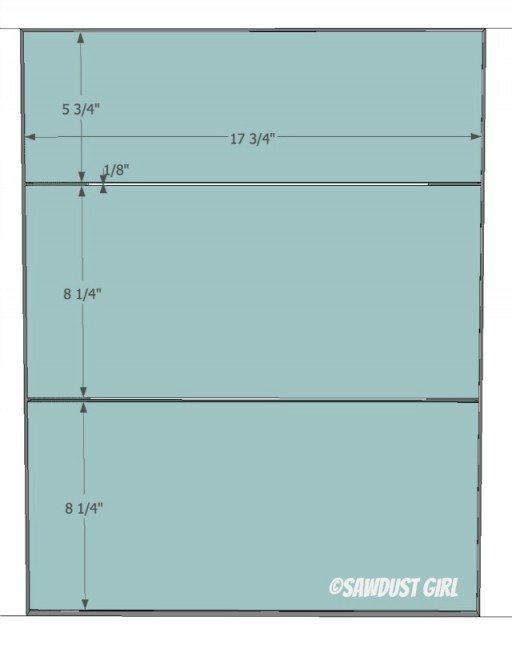
Cut the pieces for the drawer front. The base is cut from 1/2″ material, and the “fronts” are cut from 1/4″ material that is glued and clamped into place until dry. There is 1/8″ gap between the 1/4″ pieces on the base.
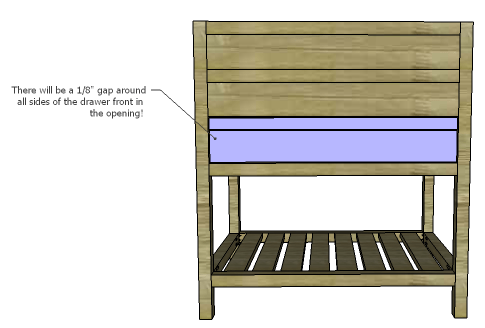
Mark the position for the drawer pulls and drill the holes. Shim the drawer front in the opening – there will be a 1/8” gap around all sides – then drive screws through the holes for the drawer pulls into the drawer box. Open the drawer, and secure the drawer front using countersunk 1-1/4” screws from the inside. Remove the screws from the holes for the drawer pull then finish drilling the holes. Install the drawer pull. Drill holes in the false drawer fronts for the cabinet pulls, and install the pulls.

Finish as desired.
The original plan can be found at http://designsbystudioc.com
![]() [email_link]
[email_link]