BBQ Grill and Cooler Table

Today I’m going to show you How to Build a Patio Cooler and Grill Cart Combo.  The grilling season is upon us!  The cool weather is making an exit and the heat, BBQ, and outdoor parties are here.  Two things I’ve been thinking of building are a patio cooler and a grill cart.  Since my back deck is not huge I decided to kill two birds with one stone and show you guys how to make a DIY patio cooler box and BBQ cart in one.

The project is made from cedar to withstand the elements and give it a nice classy look.  The heart of the cooler box side is 48 qt cooler with plenty of capacity for your parties.  The grilling side has a storage compartment and hooks to hold all your BBQ accessories.  The lid for the storage box is flush with no hinges or handles giving you a 22″ x 20″ landing space for food and other barbecue fixings.  The assembly is easy and straight forward so read ahead and get ready to get your summer outdoor entertaining game on point!

Materials:

  • (13) 12′ 1×4 cedar boards
  • 1-1/4″ Pocket Hole Screws
  • 1-1/4″ Exterior Screws
  • 48qt Cooler
  • 3″ utility hinges
  • Front handle
  • Bottle Opener
  • Single Hooks
  • Hose Bib
  • (2) 1/2″ Male PVC Adapter
  • 1/2″ PVC Pipe
  • 1/2″ PVC Nut

I built the cooler box and grilling station entirely out of 1×4 cedar.  My local lumber supplier had 12′ boards that were rough on one side and I was able to get them for half the price of what you would pay at the big box store for the cedar 1x4s.  If this is an option for you then you can save some significant money going this route.

Building the Patio Cooler Base

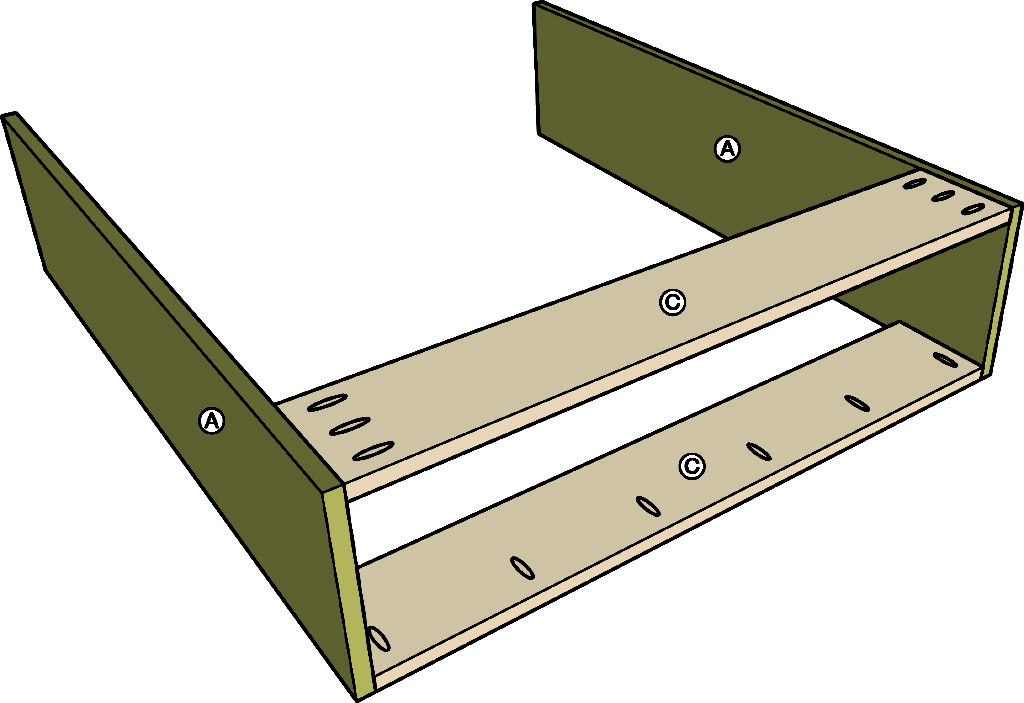
You’ll start by building the top frame based on the size of your cooler.  The top of my cooler was 23-3/4″ x 13-1/2″.  If your cooler is a different size then you’ll need to adjust the top frame accordingly and see if you need to adjust the base as well.

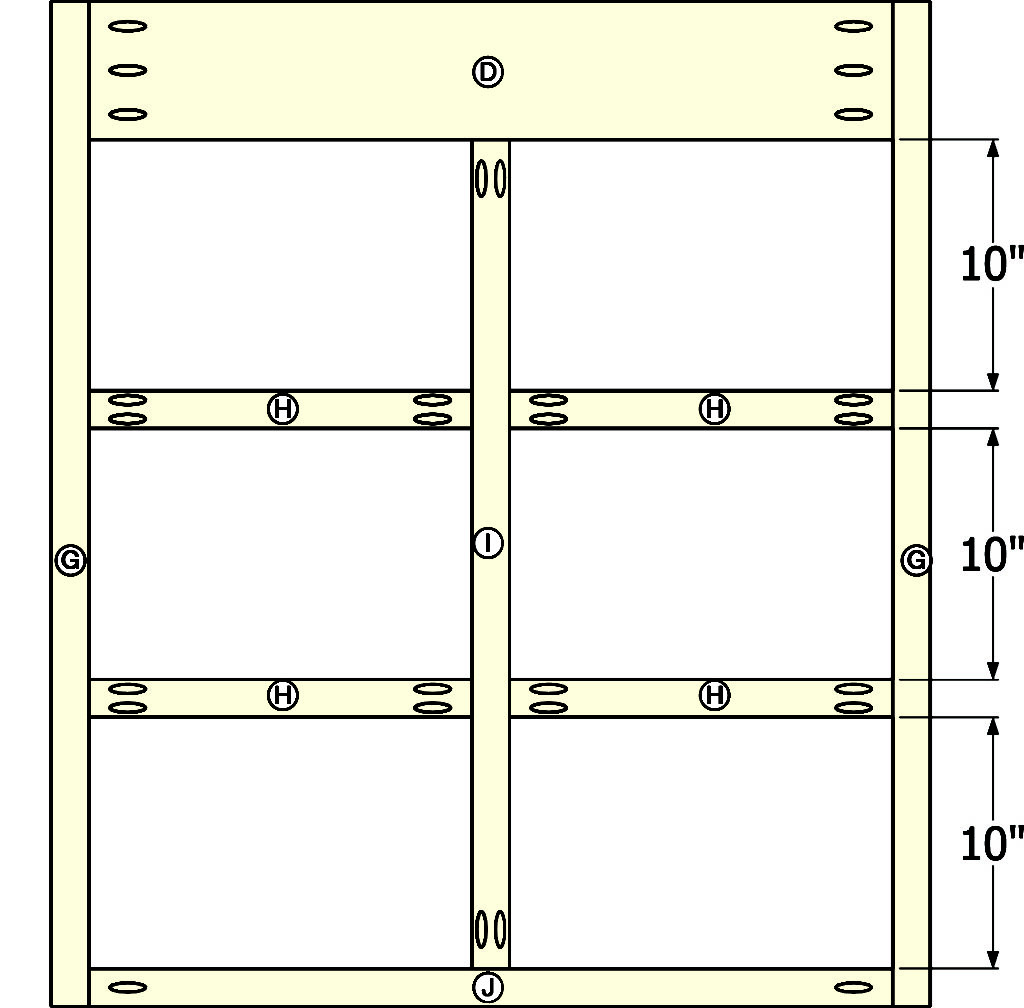
Cut 2 boards to 50″ for the long top frame pieces and 3 boards to 13-1/2″ for the short top frame pieces.  Drill pocket holes in the ends of the short pieces and assembly with 1-1/4″ pocket screws.  This will give a 15-3/4″ opening for the grilling storage box.

Cut 8 boards down to 38-1/4″ long for the legs.  Rip down 4 of these boards to narrow leg pieces at 2-3/4″ wide.  Use a pocket hole jig to drill pocket holes in the 2-3/4″ pieces in the top 13″ of the leg and another hole 2″ up from the bottom.

Join the narrow leg pieces to the wide pieces glue and 1-1/4″ pocket hole screws on the top and bottom.  In the gap where there are no pocket holes, use clamps to hold the joints tight.  Make two legs with the narrow pieces on the right side and two with the narrow pieces on the left side.  This lets you have the wide face of the legs showing on the front and back of the cooler.

Cut 8 pieces of side cladding to 16-1/2″ long.  Use a trim router to route a 1/16″ 45 degree chamfer on the outer edges of each board.  This will give the boards a nice beadboard look when butted together.

Lay two legs down and starting from the top, attach 4 side cladding pieces to the legs with two 1-1/4″ screws on each side of each board. Repeat this process with the other 2 legs to form 2 side assemblies.

Cut 4 pieces of front cladding and 4 pieces of back cladding to 44-1/2″ long, and route a chamfer on the long edges just like the side cladding.  Side the side assemblies on edge and starting at the top, attach the front cladding to the sides with 1-1/4″ screws.

Flip the assembly over and now attach the 4 back cladding pieces to the sides.  Now you have the base of your patio cooler and grill cart combo!

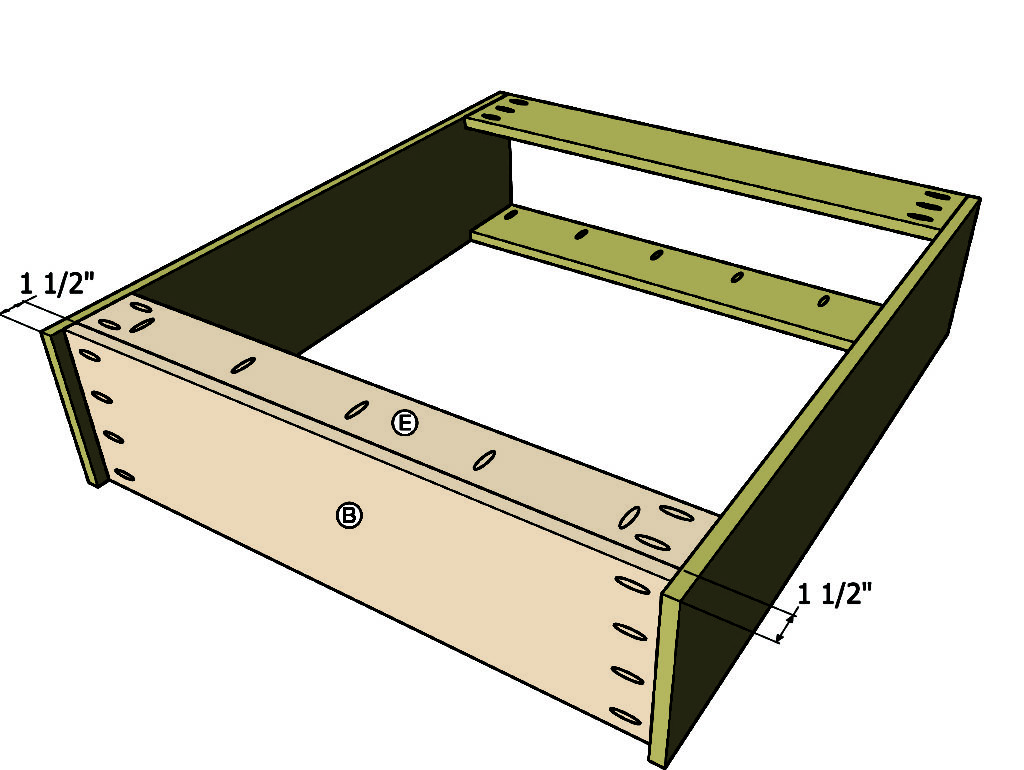
Cut two 3/4″ x 3/4″ top front cleats 14″ long and one top side cleat 11″ long.  Predrill holes on the bottom for attaching the top frame later.  Secure the 11″ cleat to the middle of the right side flush with the top and secure the 14″ cleats to the front and the back 1-1/2″ away from the right side.

Make the Grill Cart Storage Bay and Bottom Shelf

Attach two 1″ wide 14″ long cleats to the inside of the front and back walls, 18″ from the right side.  Cut four 15″ wide storage divider boards and glue and screw them to the cleats to create the storage bay.


Cut and install two 17-1/4″ cleats to the front and back of the storage bay.  Put them 3/4″ up from the bottom of the bay then attach five 15″ storage bay bottom pieces to the cleats with screws from underneath.  The middle board will need to be trimmed to fit.


Attach the top frame to the base with pocket hole screws on the cooler side and with 1-1/4″ screws through the cleats in the storage bay.  Use glue on all the top surfaces for a good hold.

Cut two 46″ long 1″ wide shelf stretchers and eleven 16-1/2″ shelf slats.  Attach the slats to the stretchers with glue and a brad nailer.  For consistent spacing start with the outer slats and then secure the middle slat.  From there fill in the gaps spacing the slats 3/4″ apart.

Test fit your cooler in the opening and remove the cooler drain plug.  Reach a marker through the cooler drain and mark a spot on the left side of the patio cooler.  Drill a 1-1/4″ hole in the side for the plumbing fittings.

Flip the grill cart combo over and put the cooler in place.  Secure the cooler by installing three 15″ cooler supports into the front and back with 1-1/4″ pocket screws.

Making the Cooler Box and Grill Bay Lids

Flip the cooler back over and cut four 15-3/4″ long storage bay lid pieces.  Put a chamfer on the boards with the trim router like the body cladding.  Drill a 1″ hole in the middle of one board and chamfer the top edge of the hole.

Cut two 13-1/2″ by 1″ wide lid battens.  Line the lid boards up together with the board with the hole at one end and fasten the boards together using the battens, glue and 1-1/4″ screws.

Make 4 small 1-1/2″ x 2″ storage lid tabs.  Round one corner of the tabs and install them in the top corners of the storage bay with glue and brad nails into the top corners of the storage bay.

Build the frame around the lid by based on your own cooler measurements.  The sides should be 3/4″ taller than your lid.  I cut two lid front/back pieces to 25-1/4″ by 2″ and two side piece 13-1/2″ by 2″.  Join the lid frame with 1-1/4″ pocket hole screws.


Cut 3 lid support cleats to 13-1/2″ by 1″ and attach them to the front and back with pocket holes. Place the outer cleats so they are directly over the side ridges on your lid that mate with the cooler body. You’ll be screwing into the lid later and don’t want the screws to pop through the underside of the lid.

Make 5 lid top pieces out of 25-1/4″ boards.  Route the 45 degree chamfers on these boards just as the others.  Layout the boards on the top and cut the center piece to width to fit.  Use super glue and temporarily affix the full size boards to the edges of the frame.

Flip the lid over and permanently attach the lid boards to the cleats with 1-1/4″ screws.

Flip the lid over again on top of the cooler.  Now secure the top to the cooler lid with 1-1/4″ screws through the outer cleats into the lid.  Attach the center board with wood glue on the center cleats and super glue on the outer edges.  The super glue will bond quickly and the wood glue will give a long lasting hold.  Assembling the lid this way give you a super clean look with no nail or screw holes…SCORE!

Installing the Cooler Drain & Lower Shelf

Remove the drain from your cooler and keep the washer on the inside.  Get two 1/2″ PVC male threaded adapters, a length of 1/2″ PVC, a 1/2″ nut and a hose bib for the outside of the cooler.

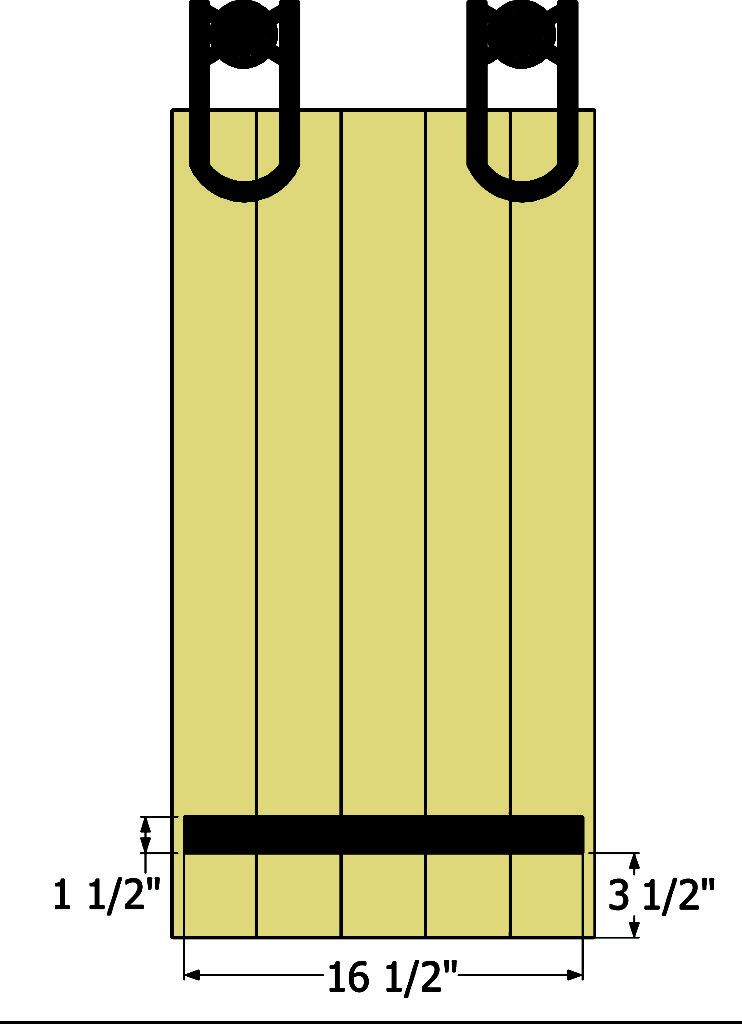
The length of the PVC pipe will vary per installation.  Cut a hose bib mounting block to 3-1/2″ by 3-1/2″ and drill a 1″ hole through it for the male adapter.  You may need to drill a larger hole with the collar if the fitting won’t go through.  Glue up the final PVC parts and install them on the hose bib and mounting block.  Put wood glue around the mounting block and insert the assembly into the cooler and lock in place using the nut in the cooler.

Sand everything down to 150 grit and apply your finish at this point.  I used a Spar Urethane made for outdoors.

After the finish is dry, install the lower shelf so the bottom is 2-1/2″ up from the floor.  I would recommend turning the patio cooler on it’s top to do this vs. laying it on its back like I did

Hardware for the Patio Cool / Grill Cart Combo

The cooler lid gets 3″ utility hinges and a handle on the front.

I added a bottle opener on the front and 2 hooks on the grilling side of the cart as well.

I put my inserts for my STOK Quattro grill into the storage side and it worked great to hold them all.  I just put some little dividers in there to keep them separated.

Alright, you’re all finished up!  Put the patio cooler and grill cart combo out on your deck and let the good times roll this summer.

The original plan can be found at http://fixthisbuildthat.com

 
[email_link]
 

BBQ Table

This plan makes a table 47 inches wide, 22 inches deep and 36 inches high with the top added. All my builds are made with pocket hole joinery. You will need a pocket hole jig tool such as a Kreg Pocket Hole Jig in order to build them.

Materials:

  • (8) 1×4 @ 8′
  • (2) 1×6 @ 8′
  • 1 1/4″ screws

Cut List:

  • (8) 1×4 @ 35 1/4″ – Legs
  • (2) 1×4 @ 38″ – Top rails for front and back
  • (2) 1×4 @ 42″ – Bottom rails for front and back
  • (2) 1×4 @ 11 1/2″ – Top rails for sides
  • (2) 1×4 @ 18 1/2″ – Bottom rails for sides
  • (11) 1×4 @ 17″ – Shelf slats
  • (4) 1×6 @ 36″ – Top
  • (2) 1×6 @ 22″ – Top

Step 1 – Make the two Sides


Use the following pieces of 1 by 4 to make each side. Two pieces measuring 35 ¼ inches long, one piece 11 ½ inches long, one piece 18.5 inches long. Put the pocket holes on the short edges of the 11 ½ inch piece. The 18 ½ inch piece will be fixed using 1 ¼ inch wood screws. Screw through the 18 ½ inch piece in to the legs to make sure the screw head is hidden once the table is assembled. Also drill pocket holes on the outside edges of the legs as shown below for fixing the sides to the front and back frames.

Step 2– Make the front and back frames


Use the following pieces of 1 by 4 to make the front and back frames. Two pieces measuring 35 ¼ inches long, one piece 38 inches long, one piece 42 inches long. Put the pocket holes on the short edges of the 38 inch piece. The 42 inch piece will be fixed using 1 ¼ inch wood screws. Screw through the 42 inch piece in to the legs to make sure the screw head is hidden once the table is assembled.

Step 3– Join the sides and front and back together


Join the sides and front and back frames together as shown below. This is why the pocket holes were put on the outer edges of the inside of the sides.

Step 4 – Add the shelf pieces


Add the 17 inch long pieces of 1 by 4 as the shelf supports. Drill pocket holes on both ends of each 17 inch piece and attach them flush with the top edge of the bottom rail. Check the exact dimensions of your boards as they may not be exactly 3.5 inches wide. For mine I worked out the spacing between each board had to be 11/32 inches. It helps to cut a spacer from scrap wood to use.

Step 5 – Make the top


Make the top from the 1 by 6 pieces as shown below.

Tip : If using Cedar then I have found the 1 by 6 boards are actually smaller than the actual width of 5.5 inches advertised. Attach the four 36 inch long pieces together first and then cut the two end pieces exactly to the size required.

Step 6 – Fit the top


Drill pocket holes facing upwards all the way around the top of the frame.
Place the top with the good side down and then place the upturned frame on top. Make sure you have equal gap all around and then fix the sides and back with 1 ¼ inch pocket hole screws.

The original plan can be found at https://andrewharriswoodwork.com

 
[email_link]

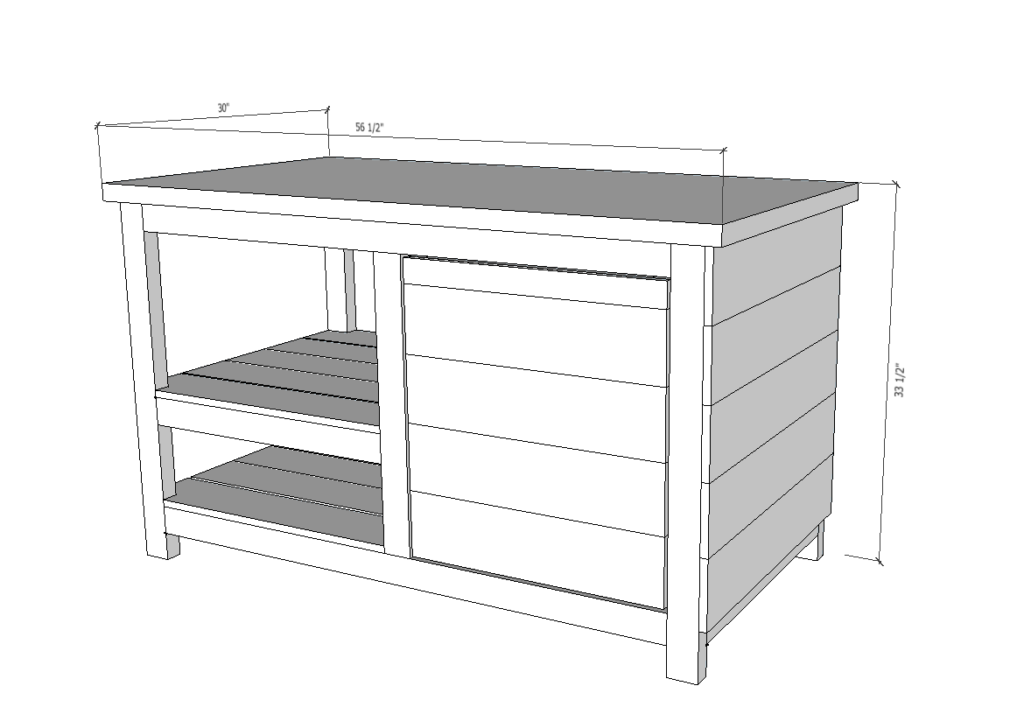
BBQ Grilling Station

Please note that these plans do not include instructions/materials for the top of the table. I planned to do a concrete top to inset the grill, but Mr. Goats broke his toe and I am physically unable to handle an 80lbs bag of concrete. The top photographed is made from cedar fence pickets and i would be perfectly content with it if I hadn’t had my heart set on a concrete top. It’s weather-resistant and beautiful! If you love it, add 5 fence pickets to your shopping list.

Shopping List:


  • 8 – 2×3@8′
  • 12 – 5 1/2″ x 72″ (1×6) Cedar Fence Pickets (we only have dog-eared, so that’s what I used)
  • 3 – 1×2@8′
  • 1 – set of outdoor hinges + pull
  • 1 1/4″ outdoor pocket hole screws
  • 2 1/2″ outdoor pocket hole screws
  • Outdoor Glue (I use Titebond III)


Cut List:

2×3

  • 4 @ 49″ (stretchers)
  • 4 @ 32″ (legs)
  • 2 @ 24″ (shelf stretcher)
  • 2 @ 24 1/2″ (front/back divider)
  • 8 @ 25″ (deep stretchers)


1×6 Cedar Fence Pickets

  • 15 @ 28″ (shelf boards and side slats)
  • 7 @ 22″ (front and back of “drawer”)
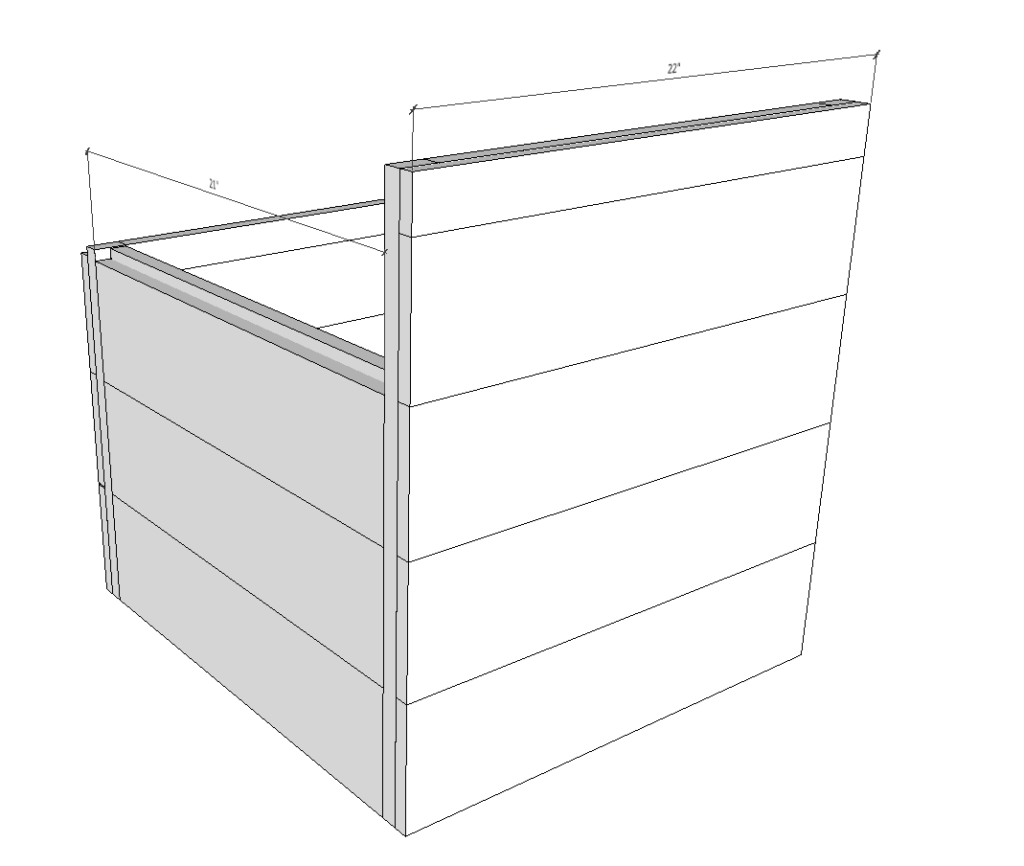
  • 6 @ 21″ (sides of “drawer”)
  • 3 @ 22″ (bottom of “drawer”)

1×2

  • 2 @ 24″ (drawer frame front stiles)
  • 2 @ 17″ (drawer frame back stiles)
  • 4 @ 19″ (drawer frame rails)
  • 4 @ 21″ (drawer stretchers)

56 1/2″ W x 30″ D x 33 1/2″ H (dimensions are given based on suggested tabletop size, accounting for a 1 1/2″ top)

Step 1:

You get two pictures in one step because I didn’t capture all of the dimensions in a single shot.

Begin by building the main frame using wood glue and 2 1/2″ pocket hole screws. The top “shelf” can be placed at your desired height, but make sure to match the front and back frames. Make two.

Step 2:

With your front and back frames built, you can add the 25″ stretchers as pictured. I found it easiest to start from the outsides, in. The only thing to pay special attention to is the bottom, middle stretcher. It should be flush with the top of the adjoining boards.

Step 3:

Finish adding the stretchers to create the top shelf.

Step 4:


Make the front frame for your “drawer” using glue and 1 1/4″ pocket hole screws.

Step 5:


Make the back frame for your “drawer”.

Step 6:

With your 21″ dividers, create your drawer “box” as shown above.

Step 7:

Finish your box by first gluing/screwing the side boards in from the front and back of the frames (countersinking your screws) and then gluing/screwing the front and backs. I screwed from the inside of the drawer frames into the outer boards. Set aside.

You have the option of leaving gaps between the boards to fill up all the space or ripping a board to the remaining gap, but I just left the space at the top.

Step 8:

Notch out four of the shelf boards to the dimensions above. These will be the front and back boards of your shelves.

Screw your shelf boards in place, starting with the bottom shelf, first. Use glue and 1 1/4″ outdoor screws (I used pocket hole screws w/o pocket holes, because it was what I had).

Step 9:

Insert the pull out “drawer”, using a 1/4″ spacer on the bottom. Attach hinges and drawer pull. If necessary, add a stop block (created with a wood scrap) to the inside of the frame using glue and screws.

Step 10:

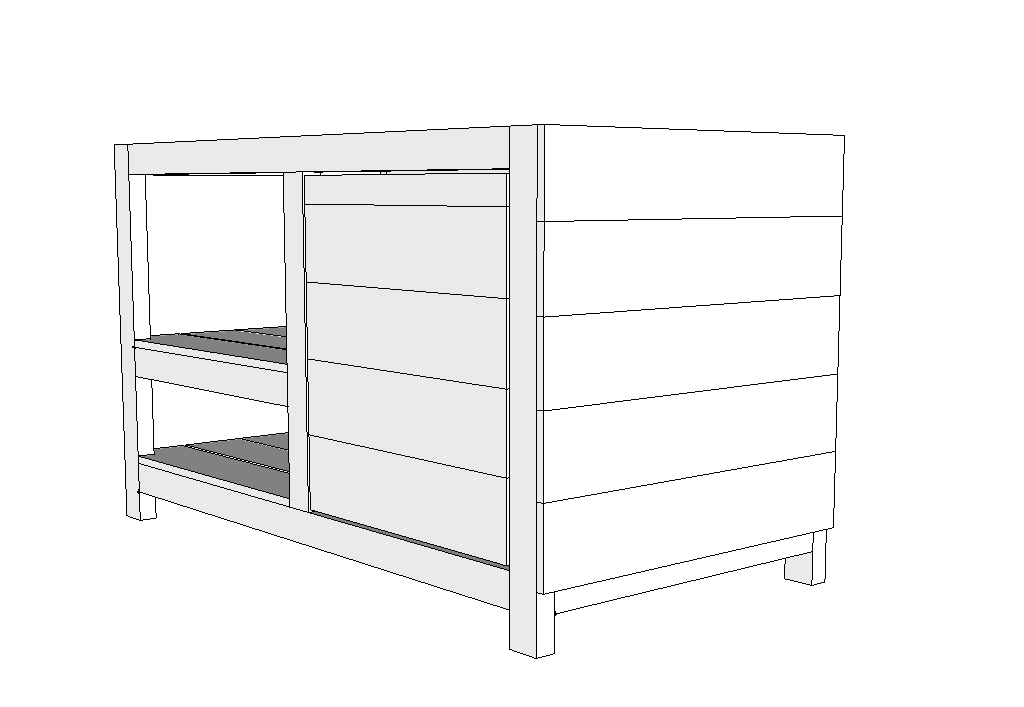
Screw on the side slats using glue and 1 1/4″ screws.

There! Your table is built!! The choices on tops are endless, from tile to wood to concrete! Suggested dimensions for the top are 30″ x 56 1/2″.


The original plan can be found at http://www.ladygoats.com

 
[email_link]

BBQ Grill Cart

Materials:

  • (5) 2 x 8 x 8-ft. boards
  • (6) 2 x 4 x 8-ft. boards
  • (4) 3-in. steel swivel casters
  • (4) 2 x 2 x 36″ Angle irons
  • 3″ Deck screws
  • 1 Can of spray paint
  • Mineral oil to season the butcher block surface
  • Butcher block conditioner
  • Cutting oil to use as a lubricant for drilling through the metal

Step 1: Cut the lumber

Cut the wood into the lengths shown in the diagram above.

Step 2: Build the Shelves

Screw together the 2x4s into rectangular frames and then screw the longer pieces of 2x8s and 2x4s on top of them.

Step 3: Drill through the angle irons

Drill through the angle irons with the 3/16 in. bit. Check to make sure that the screws fit through the holes. Then use the larger drill bit to create a hole over the 3/16th hole to countersink the screws.

Step 4: Paint the angle irons

Clean the cutting oil off the angle irons and then paint them with spray paint.

Step 5: Attach the angle irons

Screw through the holes drilled in the angle irons and into the wood shelves.

Step 6: Attach the top

Screw through the top boards and into the frame.

Step 7: Seal or stain wood

Finish the wood with a butcher-block conditioner.

Step 8: Add wheels and accessories

Screw on the wheels and other accessories.


The original plan can be found at http://blog.homedepot.com


[email_link]

BBQ Grill Cart

You’ve perfected your grilling technique. You’ve mastered the marinade. Now take your outdoor culinary skills to the next level by building our red cedar cookout cart. It’s the perfect mobile staging area for storing and preparing food. Chop vegetables or slice meat on its lift-off polyethylene cutting board, then dump scraps through its hole and into a sliding stainless-steel pan below. Another larger pan on the left slides out to give you access to stored meat, fish, vegetables or ice. Lean cookbooks against the backsplash and keep condiments in the lift-out tray on the left. After the feast, the slide-out pans, the cutting board and the condiment tray come inside for cleaning while the cart stays outside with your grill.

Materials:

  • A – (2) 5/4” x 4” x 44” (handle)
  • B – (2) 1” x 4” x 34 ½” (front leg)
  • C – (2) 1” x 4” x 32” (rear leg)
  • D – (6) 1” x 4” x 22” (frame end)
  • E – (6) 1” x 4” x 30 ½” (frame side)
  • F – (2) 1” x 4” x 20 ½” (frame, stretcher)
  • G – (1) ¾” dia. x 24 ¼” (steel handle)
  • H – (2) 8” dia. (cart wheel)
  • I – (1) 1” x 4” x 17 7/8” (top, center) (actual width is 4”; rip from 1×6)
  • J – (1) 1” x 4 ½” x 17 7/8” (top, end) (rip from 1×6)
  • K – (1) 1” x 3” x 37 ¼” (top, back)(rip from 1×4)
  • L – (1) 1” x 4” x 23 ½” (top, stretcher)
  • M – (1) 1” x 4 ¼” x 37 ¼” (top, front) (rip from 1×6)
  • N – (2) 1” x 1 ¾” x 20 ½” (top, cleat)(rip from scrap or 1×4)
  • O – (2) 1” x 1 ¾” x 22 ¼” (top, cleat)(rip from scrap or 1×4)
  • P – (1) 1” x 6 ¼” x 37 ¼” (backsplash)(cut from 1×8)
  • Q – (3) 5/4” x 1 ¾” x 22” (pan runners)
  • R – (6) 3/8” x 2 ½” (dowels)
  • S – (4) 1” x 2 ¼” x 2 ¼” (corner block)
  • T – (2) 1/8” x 8” x 14” (knife shield)
  • U – (1) ¾” x 17 ¾” x 23 ¾” (cutting board)
  • V – (22) 3/8” x 1 ½” x 31 7/8” (shelf slats)
  • W – (1) 6” x 12 ¾” x 21” (large pan)
  • X – (1) 6” x 10 ½” x 12” (small pan)
  • Y – (1) 3” x 5” x 18 ¾” (condiment tray)

Step 1: Clamp, then screw

Crosscut the parts for the three frames. Clamp the parts together and bore countersunk pilot holes. Apply waterproof glue to the joint to add a little strength and to seal the end grain. Next, drive 1¼-inch galvanized or stainless-steel screws into each joint.

Step 2: Install the legs

Crosscut the two rear legs, apply waterproof glue to the joint and fasten the legs using 1¼-inch screws driven into pilot holes.

Step 3: Add safety

Make a knife shield from two pieces of acrylic plastic cut to shape with a jigsaw. Drill and countersink three screw holes into each piece. Then screw one to the outer surface of the upper frame. Attach the other to the inner surface of the wood handle.

Step 4: Hide the screws

Fasten the cart’s wood handle to the upper frame with glue and deck screws. Drive the screws from the back so they’ll be hidden. Make sure that the square end of each handle is flush with the rear legs.

Step 5: Dowels make knife slots

To create five partitions to hang knives, start by drilling six holes through the upper frame and both acrylic panels, and into (but not through) the wood handle. Insert a dowel into each hole, then trim it flush.

Step 6: Rip the slats

Rip the slats from a cedar 2 x 4 and sand or plane them smooth. Shape their top edges with a router and a rounding-over bit. Using a pneumatic finish nailer, fasten the slats to the frame, spaced 5/8 inch apart.

Step 7: Build the top

Rip and crosscut the top parts and test fit the cutting board in it. Next, use glue and biscuits to assemble the top and clamp the assembly. Screw the cleats to the bottom of the assembly.

Step 8: Add Runners

With the cart upside down, screw on the runners, which will support the two stainless-steel pans.

Step 9: Fasten the backsplash

Rip and crosscut the back-splash from a cedar 1 x 8, then cut the gentle top curve using a jigsaw. Finally, fasten it by driving deck screws through pilot holes into the back of the top assembly.


The original plan can be found at https://www.popularmechanics.com

 
[email_link]

BBQ Tool Cabinet

PARTS

  • A side frame pieces – (2) 5/4 X 6 X 28″
  • B bottom frame piece – (1) 5/4 X 4 3/4″ X 19″
  • C top frame piece – (1) 5/4 X 6 X 23″
  • D front strip – (1) 1″ X 23″ (cut from 5/4 X 6 cedar)
  • E back pieces – (4) (cut to fit from 1 x 6 T & G cedar)
  • F feet – (2) (see drawing) (cut from 5/4 X 6 cedar)
  • G door pieces – (2) 1 X 4 3/4″ X 23 7/8″
  • H door pieces – (2) 1 X 4 1/2″ X 23 7/8″
  • I door cleats – (4) 1 X 2″ X 8″
  • J door strip – (1) 1/4″ X 1″ X 23 7/8″

Pre-drill all screw locations with a #8 countersink bit and  sand the pieces before assembly.

  1. Referring to the diagram, cut the two side pieces,  the top and bottom pieces, and the feet to size. Glue and nail the front strip  to the top piece.
  2. Using a bench saw or router, cut a 1/2″ x 1/2″  rabbet along the back edges of the side, top and bottom pieces of the frame.  (Note that the rabbet on the side pieces only extends to the base of the bottom  frame piece.)
  3. Assemble the frame using 2-1/2″ deck screws and  exterior wood glue. Make all the pieces flush at the back and centre the top  piece on the sides of the frame. Using clamps will help in the assembly  process. Check to ensure that the frame is square. A temporary wood strap  fastened diagonally to the front of the frame will keep the unit square until  the back is installed.
  4. Cut and assemble 1 x 6 cedar boards for the back,  using 2″ galvanized finishing nails and glue. The temporary wood strap (step 3)  may now be removed.


Build the Doors

  1. Referring to the schematic diagram, cut the four  door pieces to size from 1 x 6 tongue and groove cedar.  Cut off the  tongue and groove from the inner and outer edges of each door.
  2. Fasten the two cleats to the back of each door,  using glue and 1″ #8 brass screws.
  3. With the cabinet on its back, install the two  doors, using two hinges per door.  Install  the cedar strip to the right side door, using  1″ finishing nails and glue.
  4. Install the barrel bolt, drilling a 1/4″ diameter  hole half an inch into the top frame piece to line up with the bolt.
  5. Attach the two wooden feet, using glue and 2″ deck  screws.  Initially insert one screw into each foot, set the cabinet on a  level surface, and using a level or carpenter’s square check to make sure the  unit is vertical.  Then secure with three more screws in each foot.
  6. Install the hooks and handle as shown.
  7. Finish with a natural UV resistant wood finish.

The original plan can be found at  http://www.homeathome.homehardware.ca

 
[email_link]
 

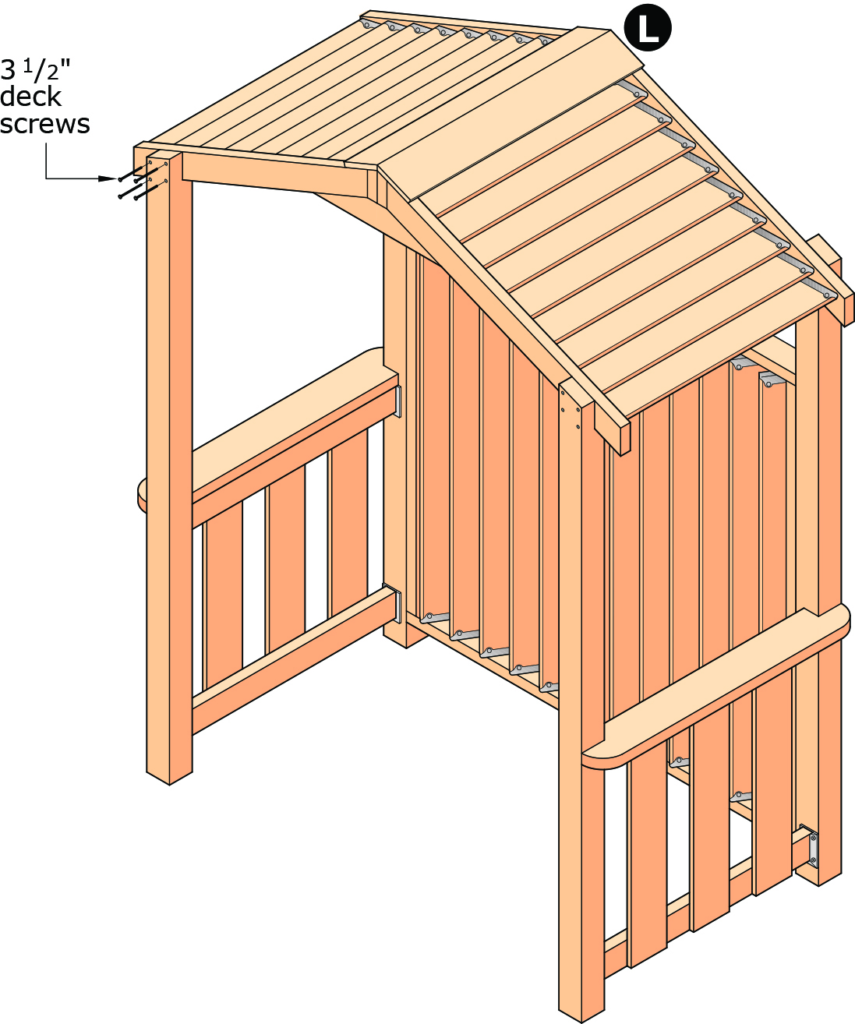
BBQ Shelter


PARTS:

  • A side panels – posts – (4) 4 X 4 X 6′ 11 1/2″ (see dwg)
  • B side panels – rails – (4) 2 X 4 X 33″ (cut shorter if using rail connectors)
  • C side panels – fence boards – (6) 1 X 6 X 2′ 7″ (cut from 6′ fence boards)
  • D side panels – top rail & shelf – (2) 2 x 6 x 3′ 4″ (see dwg)
  • E back panel – frame – (5) 2 x 4 x 5′
  • F back panel – filler pieces – (8) two 1 x 6 x 5′ fence boards ripped to 1 1/4″ wide strips
  • G back panel – shutter boards – (12) 1 x 6 x 5′ (cut lengths to accommodate louvre brackets & rails)
  • H roof – ridge boards – (2) 2 X 6 X 3′ (see dwg)
  • I roof – rafters – (4) 2 X 4 X 3′ 4 1/2″ (see dwg)
  • J roof – shutter boards – (18) 1 X 6 X cut length to fit (6′ fence boards cut in half)
  • K roof – peak – (2) 2 x 4 x 1′ 8″ (see dwg)
  • L roof – cap – (2) 1 x 6 x 3′ (see dwg)

ROOF – ASSEMBLY
Fasten the louvre brackets and misc parts to the shutter boards and install the boards according to the manufacturer’s instructions.

Fasten the roof cap to the ridge boards and the rafters. Lift the roof structure onto the four posts. Set the rafters into the post notches. Fasten the rafters to each post with four 3 1/2″ deck screws.

ROOF – PARTS


ROOF – STRUCTURE
Fasten 2 rafters to each ridge board using 3 1/2″ deck screws. Install louvre rails on the insides of the 4 rafters.

Screw or bolt the two ridge boards together. Fasten the two roof peak pieces “K” to the bottoms of the rafters.

BACK PANEL
Install the louvre rail sections to the insides of the frame (top and bottom) according to the manufacturer’s instructions. Screw vertical filler pieces “F” to the insides of the frame to fill in the gaps at the ends of the louvre rails. Fasten the louvre brackets and misc parts to the shutter boards and install the boards according to the manufacturer’s instructions.

ASSEMBLY – BACK & SIDE PANELS
Fasten the back panel to the side panel posts with 3 1/2″ deck screws.

SIDE PANELS
Fasten the top rails “D” to the side panels with 3 1/2″ deck screws.

BACK PANEL
Assemble the back panel frame using 3″ deck screws.

POSTS
In two posts, slope the notches in one direction and in the other two posts, slope the notches in the opposite direction.

SIDE PANELS
Construct two side panel assemblies:

  • Fasten the rails to the posts using rail connectors.
  • Make certain that the post notches in
    each panel face inward.
  • Also, make certain that the post notches
    slope in the correct direction for the
    roof structure


The original plan can be found at  http://www.homeathome.homehardware.ca

 
[email_link]

Bathroom Shelf

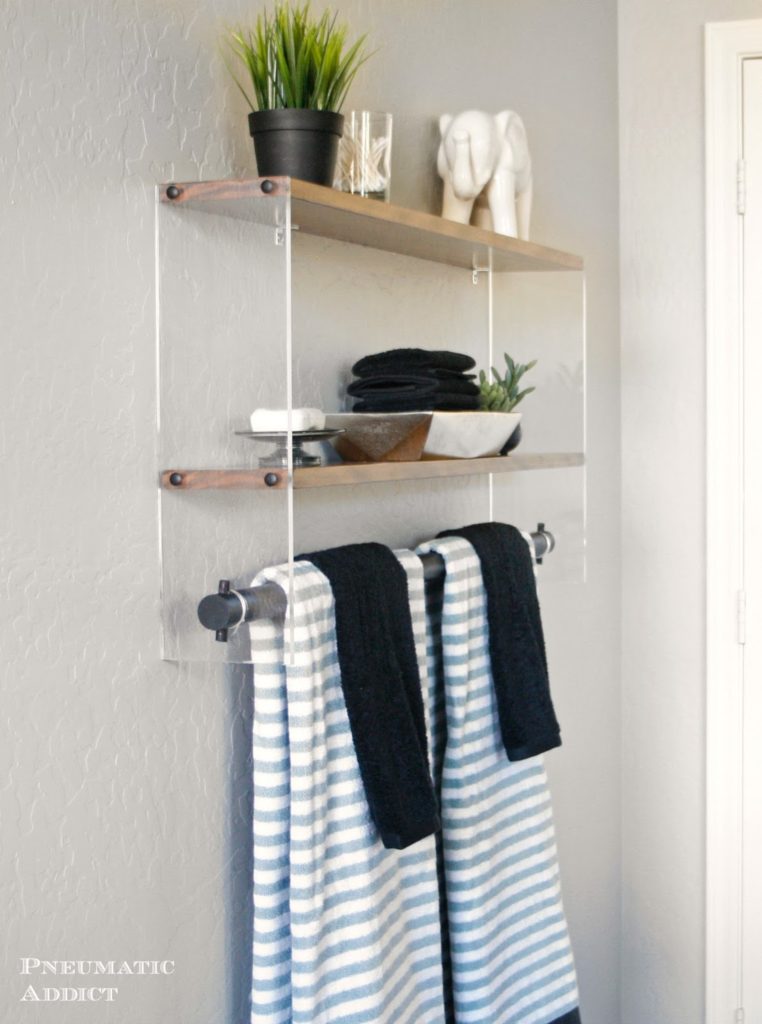
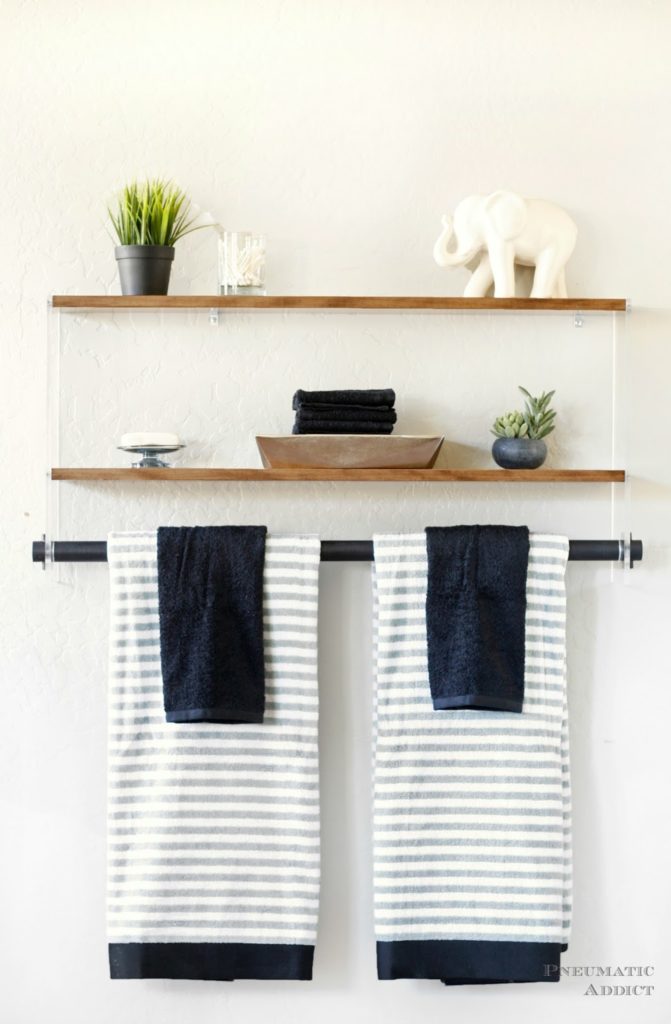
My boys’ bathroom is a disaster, so my #OrganizeBuildChallenge submission is a shelf/ towel bar hybrid, combining wood, paint, and clear acrylic sheets. Although the idea of a new material, like acrylic, may seem intimidating but I promise you, it went together so easily! The whole project took me a single afternoon.

Materials List:

  • (2) 5-1/2″ x 18″ x 3/8″ acrylic sheet
  • (1) 1 x 6 x 72″ – wood board
  • (1) 1-3/8″ x 48″ – wood closet rod
  • (1) 3/8″ x 12″ – wood dowel
  • (8) *2″ wood screws
  • (8) *screw head covers
  • (4) *3/4″ L-brackets


Cut List:

  • (2) 1 x 6 @ 36″
  • (1) 1-3/8″ closet rod @ 38-3/4″
  • (2) 3/8″ wood dowel @ 2-1/8″

Step 1:

Cut and finish your pieces and allow to fully dry. You can cut the acrylic sheets yourself, or request them to be cut from your supplier. I found a company on Ebay which was inexpensive and didn’t charge for cutting.

Step 2:

Start by drilling and prepping your acrylic side panels. Leave the protective film on the acrylic as long as you can. Measure 2″ from the bottom edge, and center between the sides and make a mark. Using a 1-3/8″ forstner drill bit, make a hole.

Step 3:

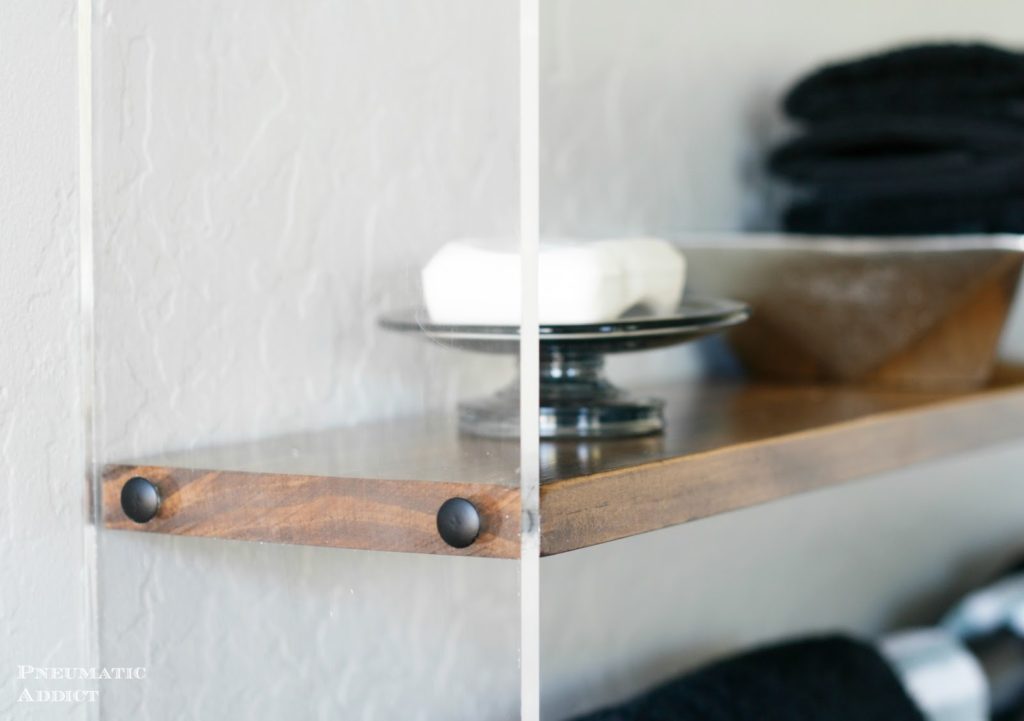
3/8″ from the top edge, pre-drill two holes though the acrylic and into the ends of the first wood board. Counter-bore the holes and attach the pieces with 2″ wood screws.  Measure 10″ down from the bottom side of the first shelf and align your second board. Pre-drill, counter-bore and attach with screws.

Step 4:

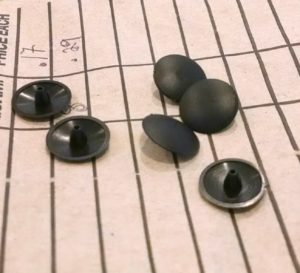
A cool and simple way to address the exposed screw heads is to cover them with screw head caps. I found a set of matte black covers for $0.29 at local True Value.

You just simply tap them into place and the screws instantly look much better.

Step 5:

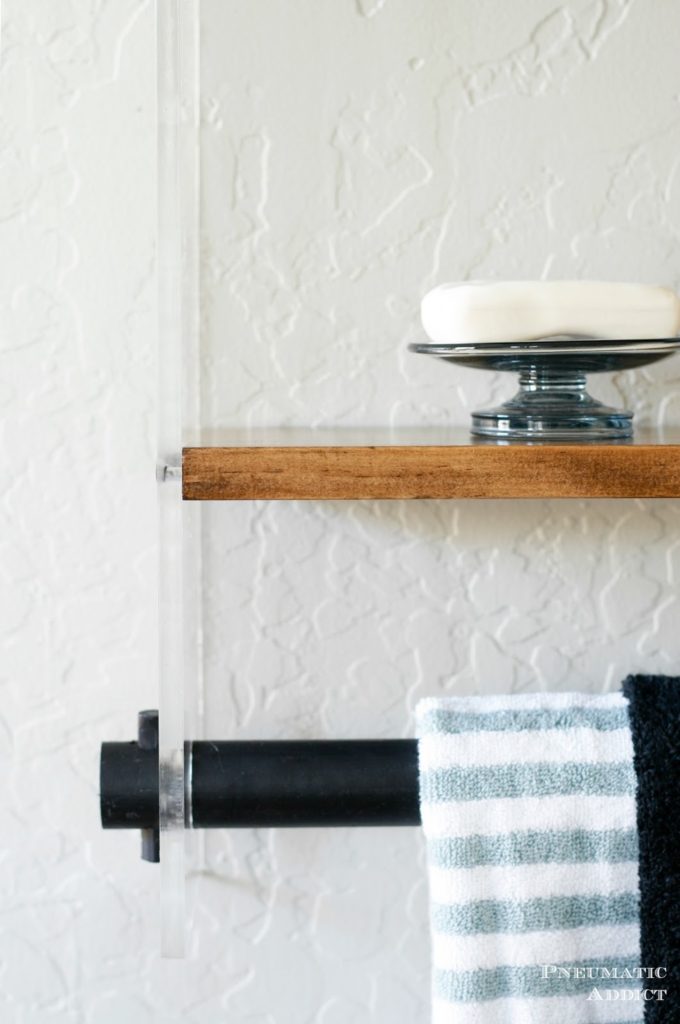
Insert the finished closet rod through the holes, leaving 1″ overhang on each end. Drill a 3/8″ hole, vertically through the rod, just outside the acrylic.

Step 6:

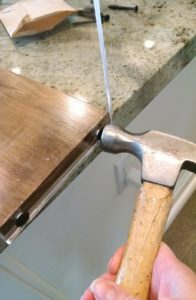
Use a mallet to tap wood dowel pins till centered through holes.

Step 7:

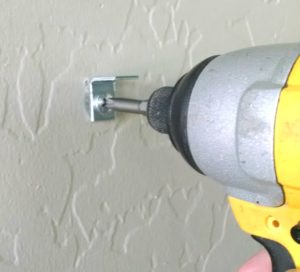
The shelf is built and ready to hang on the wall. To mount my shelf, I attached four, 3/4″ L-brackets to the wall, then placed and attached the shelf.

And here’s the final look!

The original plan can be found at http://www.pneumaticaddict.com/2016/01/wood-and-acrylic-bathroom-shelf.html

 
[email_link]

Bathroom Shelf

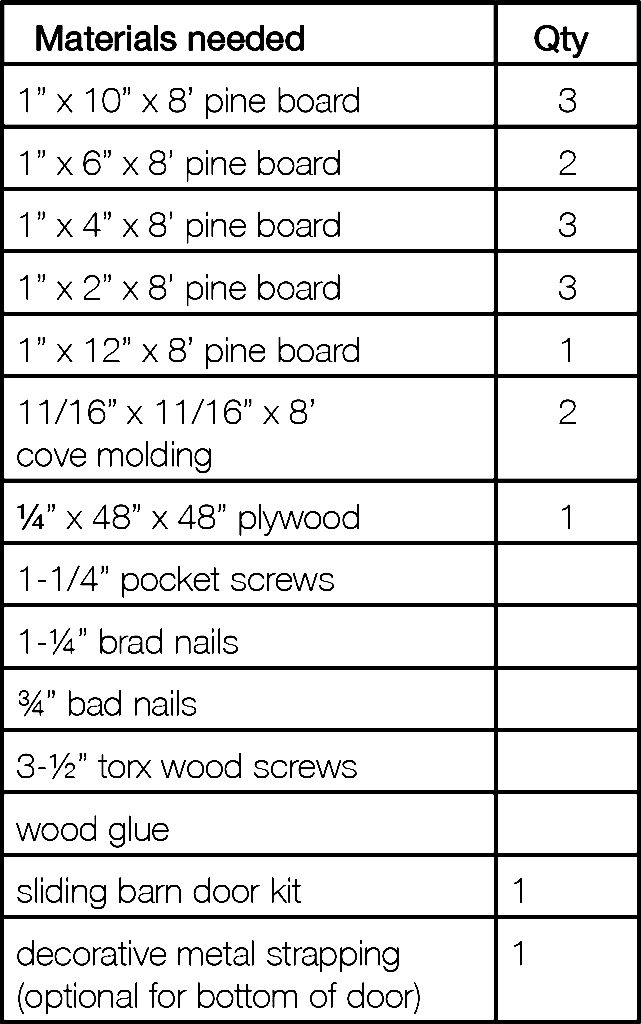
Material List:

  • 1 – 4×8 sheet of Luan
  • 2 – 2×8 @ 8’ long
  • 1 box of 3” screws
  • 6’ trim board
  • 1 – 1×2 @ 8’ long

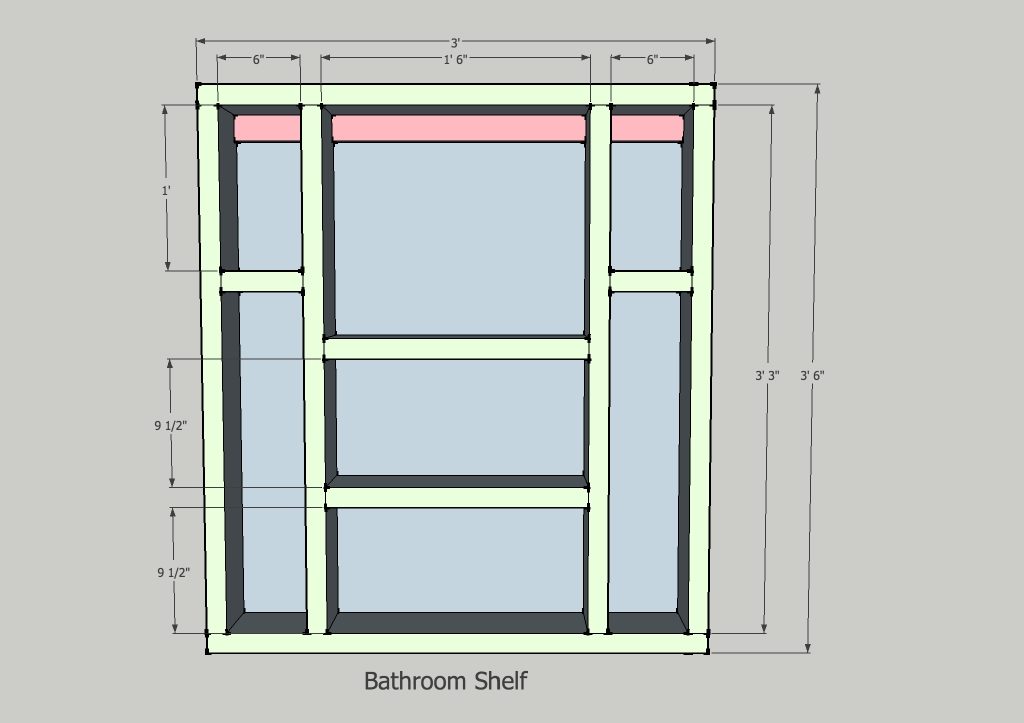
We cut the 2×6 boards according to the dimension on the plan below.  Pre-drilling the holes is essential to being able to put the whole project together without and gaps.  So line up all of the boards and mark where they should be drilled.

Tip: If you start with the center shelves first you will have plenty of room to tighten the screws.  Then add the remaining boards to complete your shelf unit.

When all of the shelves are in place cut the piece of plywood for the back.  Make sure the shelf is square, then nail the plywood to the back of the shelf.

At the very top of the shelf you will need to cut three pieces of the 1×2 material and secure it to the inside of the unit (salmon colored board in the drawing above).  This is to give us something to secure it to the wall with when we are ready to put it in place.  These 3 pieces can be secured with screws from the top down.

Finally we are ready to cut that trim board and place it around the top of the finished shelf.  Paint or stain your masterpiece and let it dry.  Locate the studs where you want to hang it and pre-drill holes in the 1×2’s at the appropriate locations.  You can use those 3 inch screws to mount it in place.


The original plan can be found at http://dadbuiltthis.blogspot.ca/2012/11/bathroom-shelf.html

 
[email_link]

Bathroom Storage Cabinet

Its a perfect mix of open shelving and hidden storage for the ugly stuff you don’t want to display, plus it’s super easy to build.

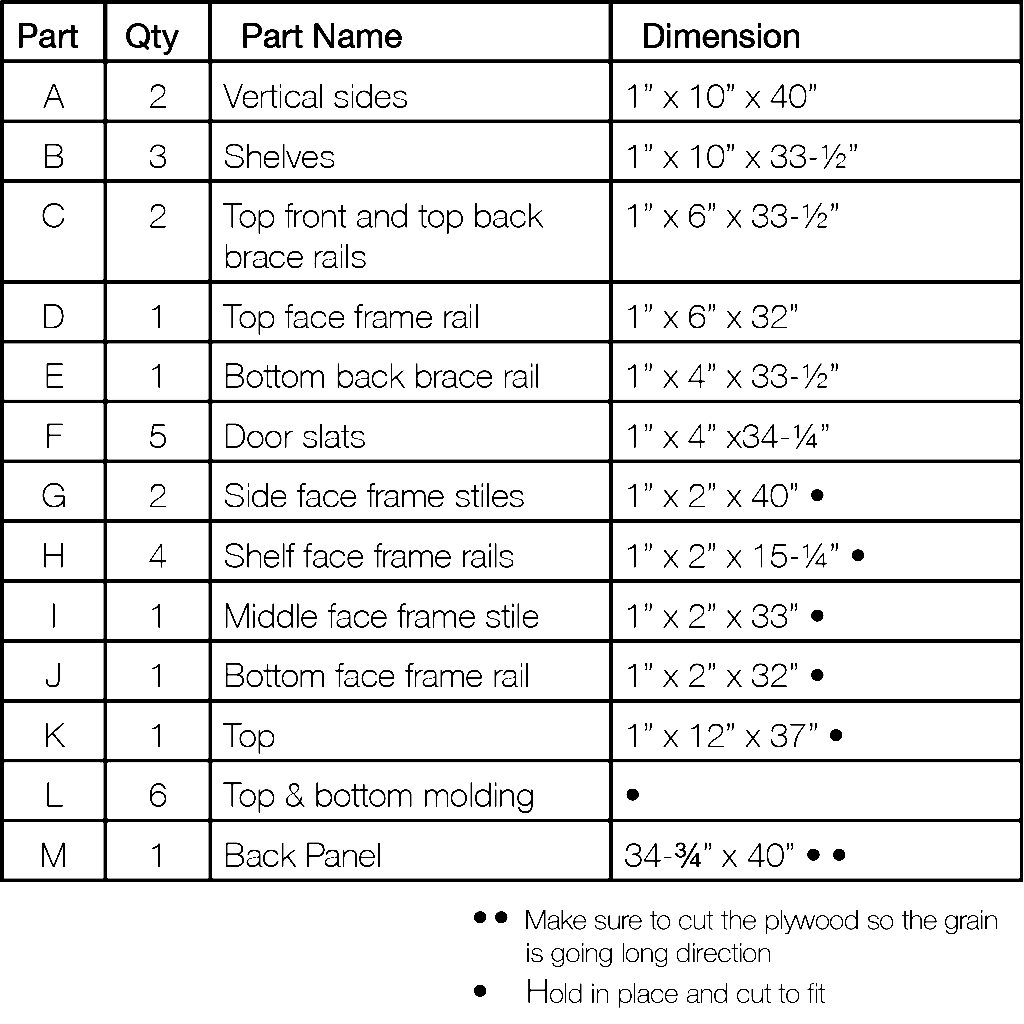
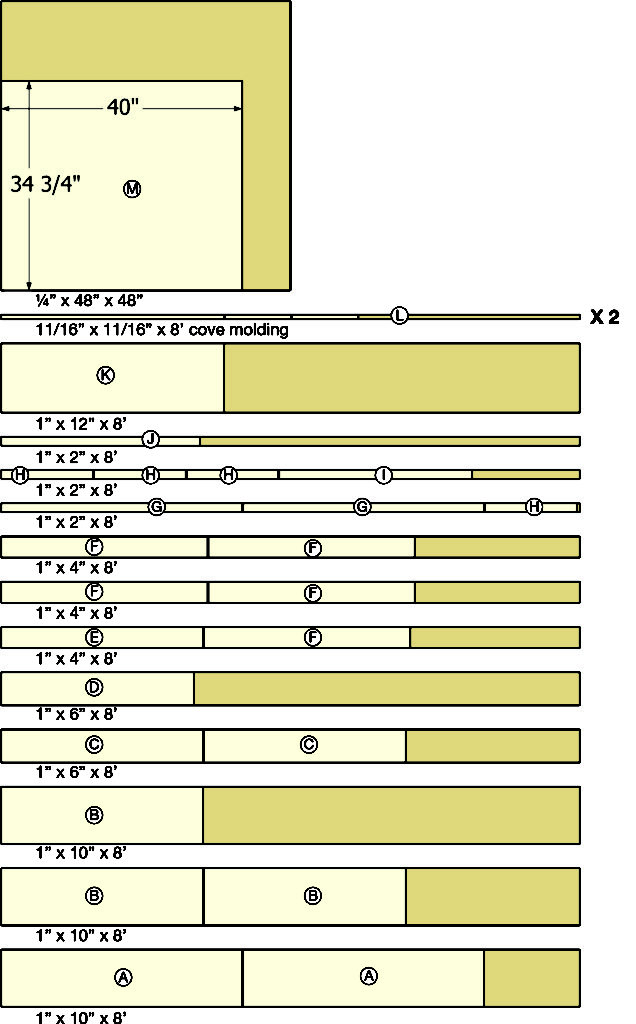
Cut List

Step 1:

Drill for 1-1/4” pocket screws along the ends and top edges of both the top front and top back rails as shown. Attach the top front and the top back brace rails to the vertical side boards with screws and wood glue. The pocket holes along the top edge will be used to
attach the top later on. Attach the rails with the pocket screws facing out. You will cover up the front pocket holes with a face frame and you want the back to have the clean face facing inwards.

Step 2:

Drill for 1-1/4” pocket screws in the bottom shelf and the bottom rail brace as shown. First attach the bottom shelf with wood glue and screws so that the top of the shelf is 1-1/2” (or the thickness of your 1” x 2” board for the bottom of the face frame) from the bottom as shown. Then attach your bottom brace rail with the pocket screws facing outward as shown.

Step 3:

Cut the side face frame pieces and the top and bottom face frame pieces to fit the box you made in steps 1 and 2. Create your face-frame as shown, drilling for 1-1/4” pocket screws and attaching with wood glue and screws. Make sure the faces and edges of the boards are all flush.

Step 4:

Attach the face frame with wood glue and 1-1/4” brad nails. Make sure the outside, top and bottom side edges are flush with the face frame.

Step 5:

Drill for 1-1/4” pocket screws along the sides and front edges on the bottom of the remaining two shelves. Attach with wood glue and screws; making sure the top of the shelves are flush with the shelf face frame rails.

Step 6:

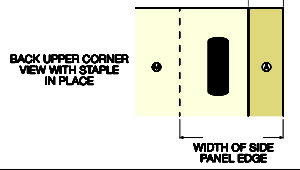
Cut your plywood back panel to fit so that it will be flush top and bottom and 1/8” shorter on both sides of the box you’ve created. Attach with staples so that the orientation of the staples run vertical. With the back panel cut narrower you should still have about 1/2” of the side panel edges to staple into. See detail.

Step 7:

Hold your 1” x 12” board on top of your cabinet, flush with the back. Measure how far forward the board hangs over the front and cut the length so that the over hang is equal on all sides. Attach with wood glue and pocket screws through the holes you drilled earlier in step 1.

Step 8:

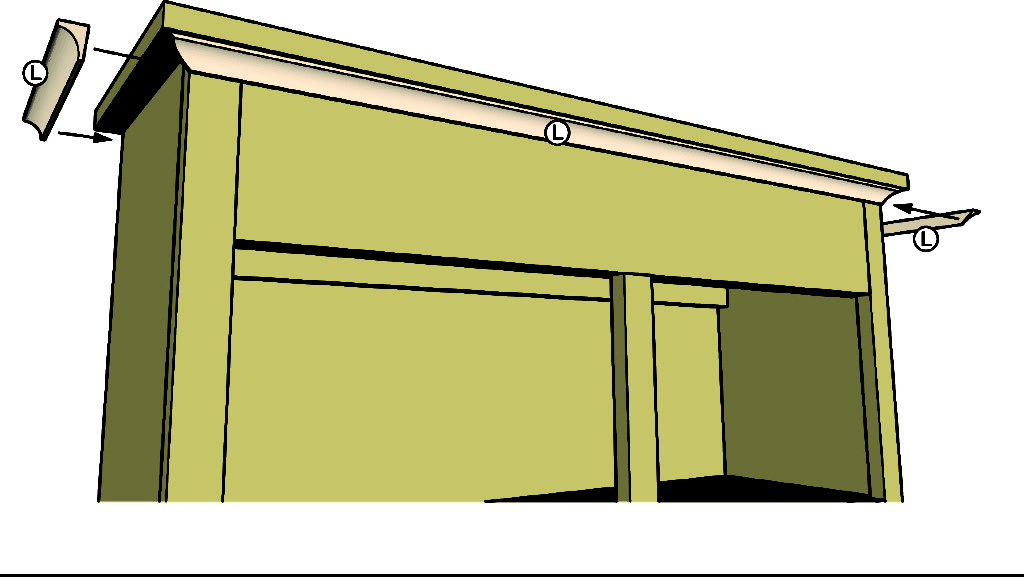
Attach your cove molding by first cutting a 45 degree miter cut at one end. Then hold the piece up to the front with the mitered end at one end. Mark the other for length and cut the opposite mitered 45 degree cut. Now cut a mitered cut into a piece slightly longer than
the side. Hold that piece and the front piece in place and mark the length of the side piece where it touches the back end of the side board, NOT THE BACK OF THE PLYWOOD PANEL. Make a straight cut on the other end of the side molding. Now repeat with the other side and dry fit the three pieces. Once you are happy with the corner mitered cuts attach with wood glue and 3/4” brad nails. Repeat adding the molding on the bottom but fl ip the molding so that the fl at end is on the bottom.

Step 9:

Attach the plate for the sliding door according to the instructions that came with the hardware. Basically, the instructions will give you measurements for screw and plate placement. The kit should have a spacer and screws and be attached similarly as shown.

Step 10:

Taking into account the length of the door sliding hardware and how it sits on the plate will determine the length of your door slats. Take some time and take careful measurements. You basically want the door to be about 3/4” shorter than your cabinet when it is hung. If for some reason it comes out a bit too long you can always run the finished door across your table saw, or use a radial hand saw, and trim it to the proper length. To attach the door slats together you will drill for 1-1/4” pocket screws as shown. When laying out the boards take notice of the circular motion of the end grain on the edge of your board. You want to alternate the end grain as shown in the detail above. This will help the door not to cup and warp over time. Attach with wood glue and screws.

Step 11:

Attach the door hanging hardware according to the instructions that came with the hardware. As an added, decorative element we attached a metal strapping across the bottom as shown. You could instead use a door pull or simply nothing at all.


The original plan can be found at https://www.shanty-2-chic.com/2016/01/diy-sliding-barn-door-bathroom-cabinet.html

 
[email_link]

1 4 5 6 7 8 9